1. Overview
In the Java ecosystem, as the new releases of JDK are introduced at least once a year, we’ll probably need to switch to a newer version at some point.
In this quick tutorial, we’ll show how to check the available JREs, add a JRE to Eclipse, and change a Java version in an Eclipse project, so we’ll be ready when that time comes.
2. Check Whether the JRE Is Available in Eclipse
After being sure that we have installed the version that we want to use, we’ll need to ensure that it’s available to use in Eclipse.
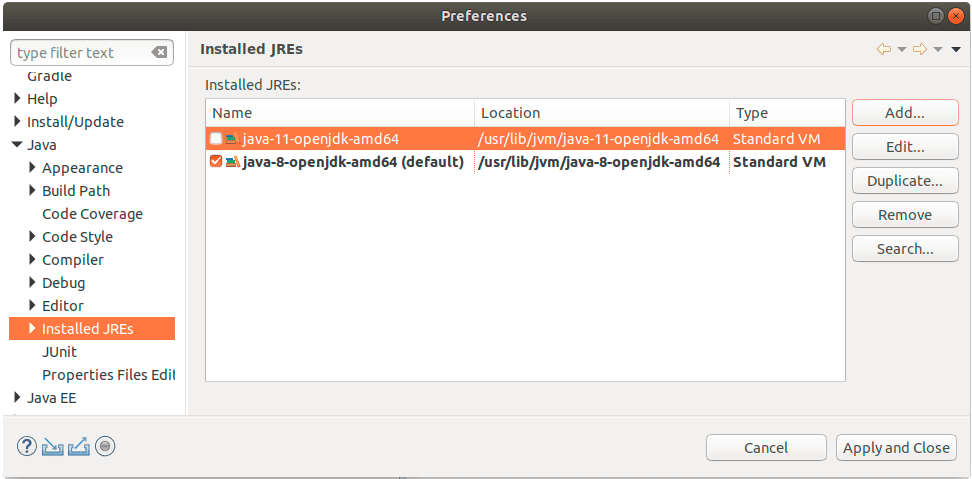
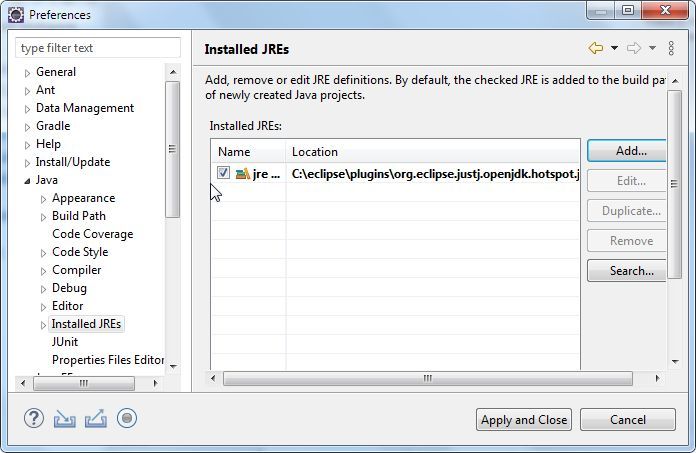
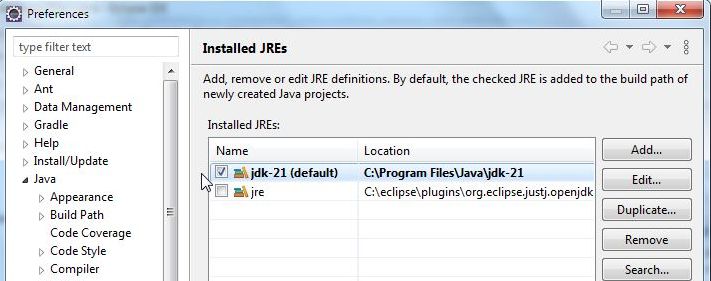
Let’s take a look at Window -> Preferences, and within that, Java -> Installed JREs:
If the JRE we want is listed, then we’re good to go.
But, suppose we need to use JRE 9, 10, or 11. Since we only have JDK 8 installed, we’ll have to add it to Eclipse.
3. Adding a JRE to Eclipse
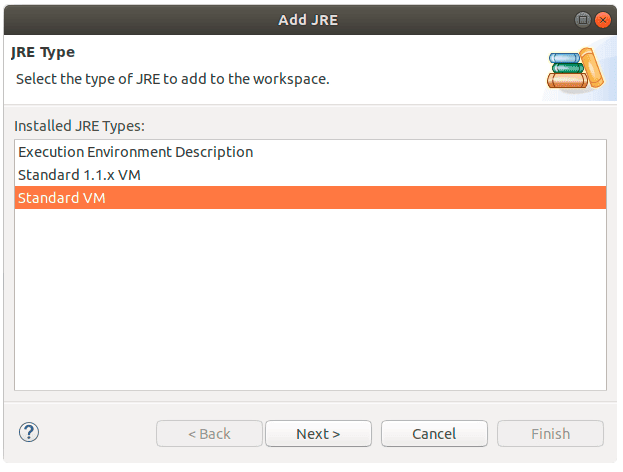
Next, from the Window -> Preferences dialog, let’s click the Add… button. From here, we need to specify the JRE type. We’ll choose Standard VM:
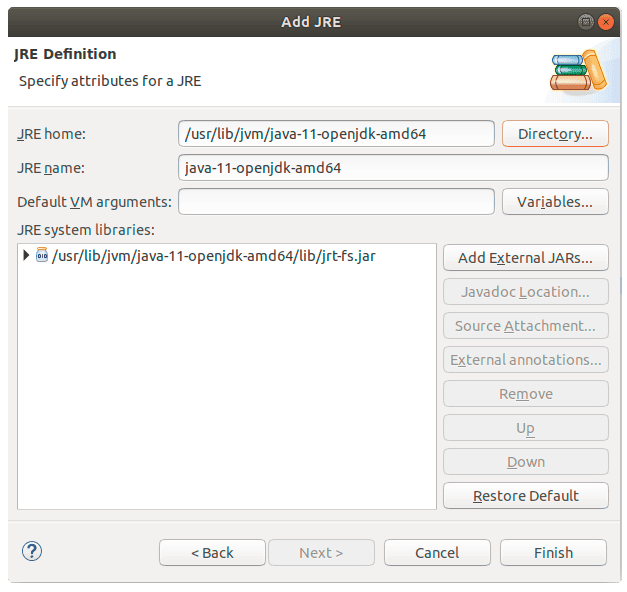
And finally, let’s specify the location of the new JRE (under the JRE home) and click Finish:
As a result, we now have two JREs configured in our IDE:
4. Change the Java Version of Our Project
Now, let’s suppose that we were using Java 8 in our project and now we want to change it to Java 10:
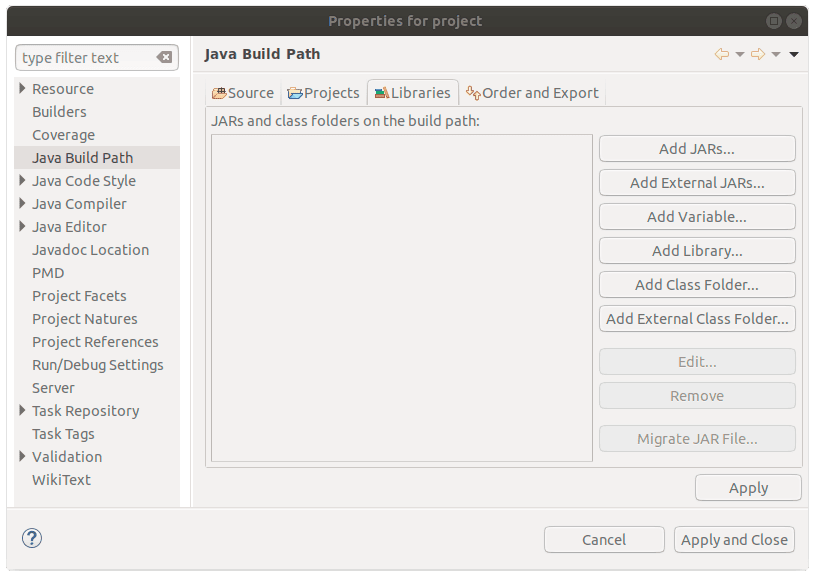
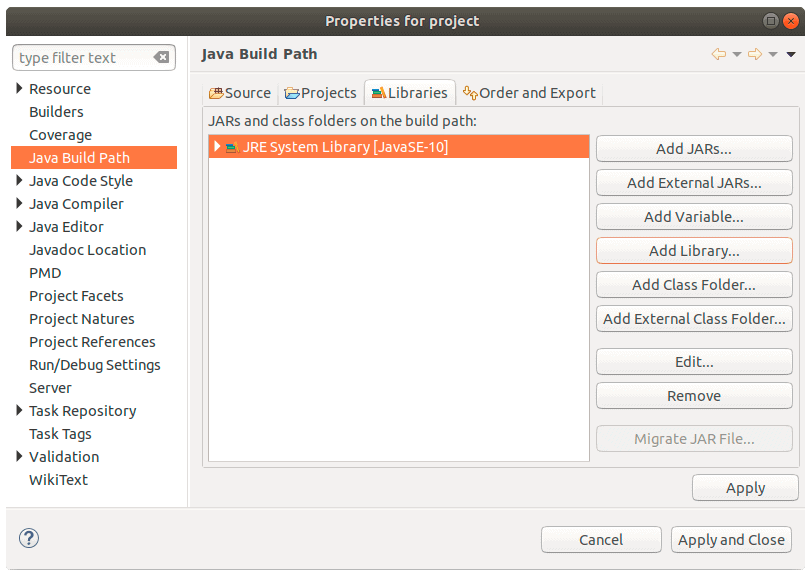
First, we’ll navigate to the Project properties and then to the Java Build Path:
and hit the Remove button on the existing JRE:
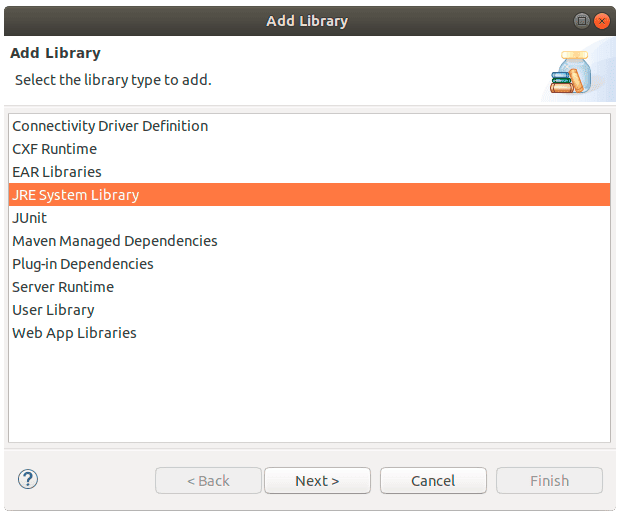
Now, we’ll use the Add Library button and choose the JRE System Library:
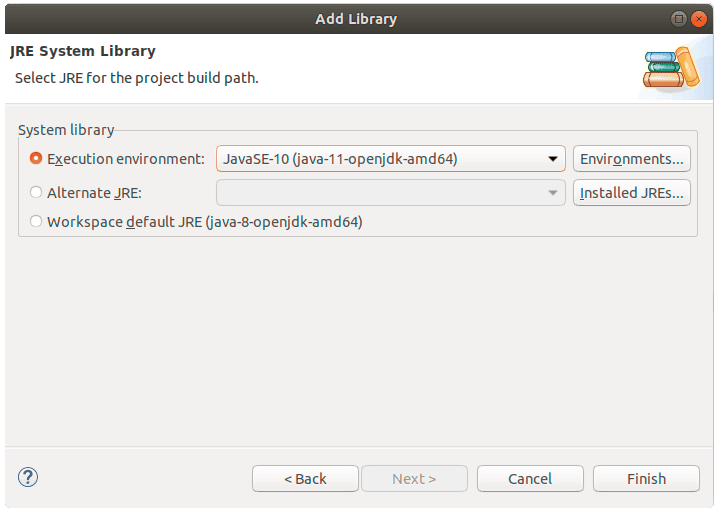
Let’s choose JavaSE-10 from the JDK that we recently installed and click the Finish button:
Now, as we can see, we’ve correctly configured our project’s Java Build Path:
We need to do one additional step — make sure we’re using the correct Compiler Compliance Level for the Java Compiler:
In our case it says Java 10, so we’re all good:
In case the Compiler Compliance Level is not the correct one, we can simply uncheck the Use compliance from execution environment option and choose the correct one.
5. Switching Java Versions
As a Java project evolves, we may need to change the Java version (JDK/JRE) associated with the project to a different one. At the outset, we don’t need to delete and create a new project to use a different Java version. Futhermore, we don’t need to remove an existing JRE System Library in the Java build path either.
Although the Eclipse IDE continues to refer to “JRE” in its graphical user interface (GUI); henceforth, we won’t make a distinction between the JDK and the JRE because JRE is included with the JDK as of Java 11. Further, to help with the setup of a JRE, Eclipse distinguishes between different JRE associations:
- Default JRE – A default JRE must be associated with an Eclipse Workspace, and only one can be the default among the Installed JREs. The default JRE is used by default to compile and run all new Java projects. The default JRE is uniquely identified with the “default” label. Any existing Java projects that use the default JRE are automatically synced if the actual JRE selected as the default JRE is changed from among the Installed JREs
- Project JRE – Each Java project is associated with a project JRE. The project JRE is used to build/compile the project. Eclipse sets the project JRE to be the same as the default JRE when we create a new Java project. However, we can change it to a different one in the build path
- Runtime JRE – The runtime JRE is used to run a Java application. Accordingly, Eclipse automatically creates a launch configuration and associates a runtime JRE with it when we run a Java application. Eclipse sets the runtime JRE to be the same as the project JRE by default. However, we can change it to a different one in the launch configuration
- Alternate JRE – All other Installed JREs that are not the default JREs are alternate JREs. We can set an alternate JRE as the project JRE or the runtime JRE
Let’s discuss with an example how to switch to a new Java version in a project.
5.1. Set a Default JRE
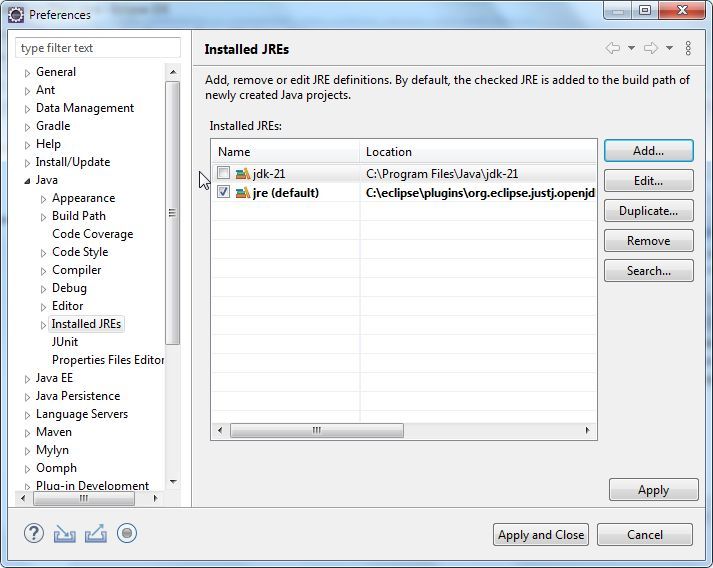
We should choose a default JRE before creating any Java project. Select Windows>Preferences, and select Java>Installed JREs in the Preferences window. Select a JRE with a checkmark as the default JRE for an Eclipse Workspace:
5.2. Select the JRE for a New Project
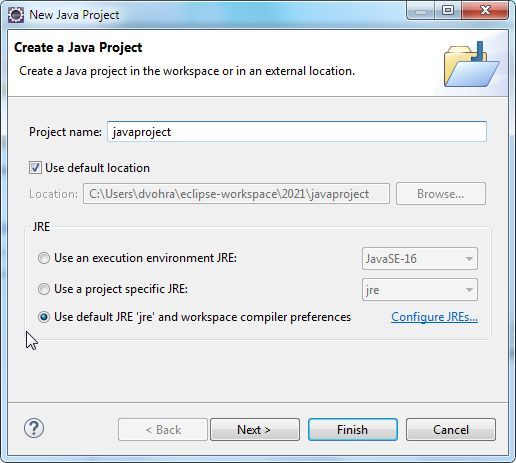
Select the default JRE as the JRE for a new Java project in the New Java Project window:
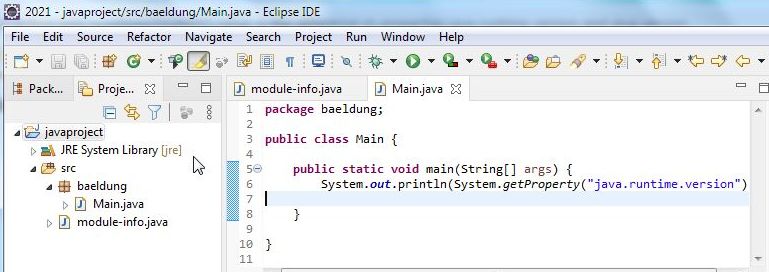
The project becomes associated with the selected JRE as the one to use to build and run the project:
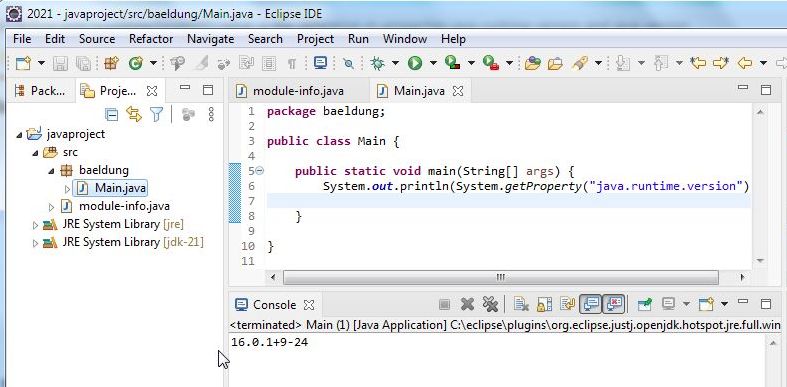
Let’s run an application that just outputs the runtime version:
public class Main {
public static void main(String[] args) {
System.out.println(System.getProperty("java.runtime.version"));
}
}
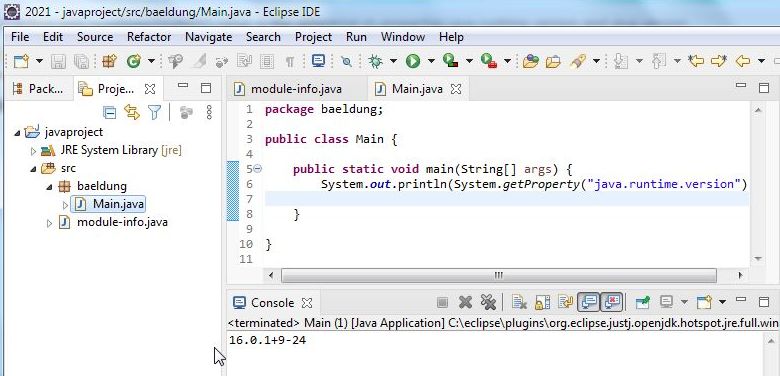
Indeed, the runtime version is the one we set as the default JRE:
5.3. Add a New Java Version JRE Definition
Let’s switch the Java version to a different one without deleting and creating a new project or changing the default JRE. We first need to install the JRE we want to use. Let’s install a Java 21 JDK in the Installed JREs. Click on Apply and Close after adding a new JRE definition:
5.4. Switch the Java Version in the Build Path
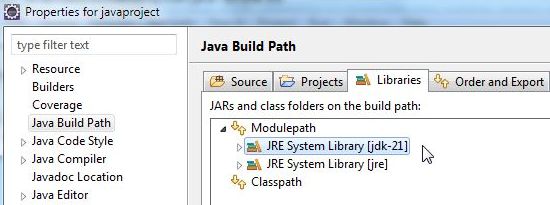
Let’s add a new JRE System Library to the Java Build Path for the new Java version 21 that we want to use:
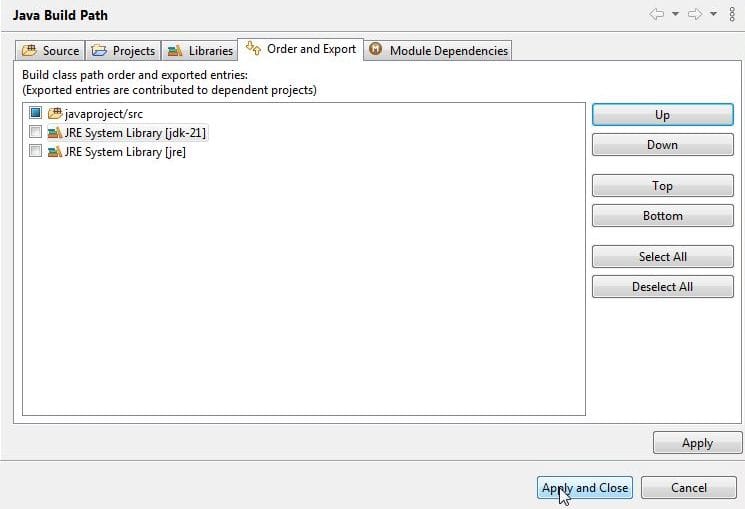
Select the Order and Export tab, and select the new library we added. Click on the Up button to move the new library up in the export order:
Click on Apply and Close:
5.5. Run the Same Application with the New Java Version
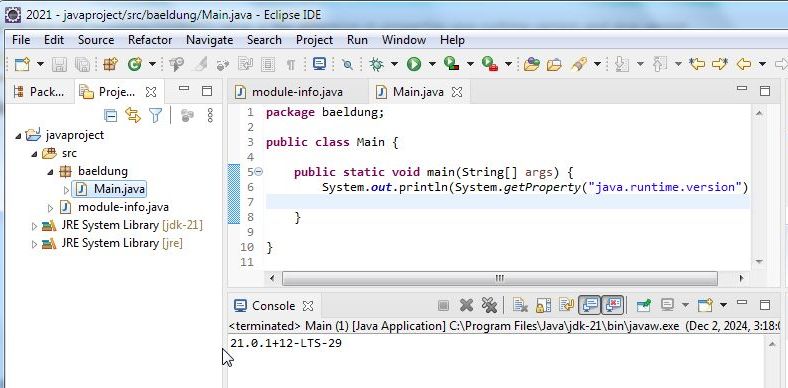
Let’s rerun the same Java application after switching the Java version in the build path:
Indeed, it runs with the new Java version as the runtime version.
5.6. Switch Back to the Old Java Version
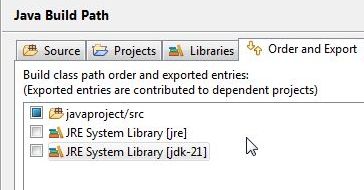
We can just as easily switch back to the old Java version by changing the order of the JRE System Libraries in the build path:
Let’s run the same Java application one more time:
Indeed, as the output indicates, we can switch back to the old version as the runtime version. Furthermore, we can configure multiple Java versions and select the one we want to use by moving the JRE System Library to the top in the Order and Export tab of the Java Build Path window.
5.7. Use the New Java Version for All New Java Projects
We can use the new Java version for all new Java projects we create without modifying individual project settings. We can do this by selecting the new Java version as the default JRE in the Instaled JREs:
6. Conclusion
In this quick article, we learned how to add a new JRE into our Eclipse workspace and how to switch to a different Java version in our current Eclipse project.