1. Introduction

IntelliJ IDEA offers extensive support for working with the Git version control system. In this tutorial, we’ll look at a selection of features that the IDE provides.

Since regular updates are made to IntelliJ, we won’t look at every feature in too much detail. Instead, we’ll get an overview of what’s available. The screenshots in this tutorial are based on IntelliJ IDEA 2023.3.6 with dark mode, and we’ll work with the Baeldung GitHub repository to illustrate the examples.

2. Git Configuration

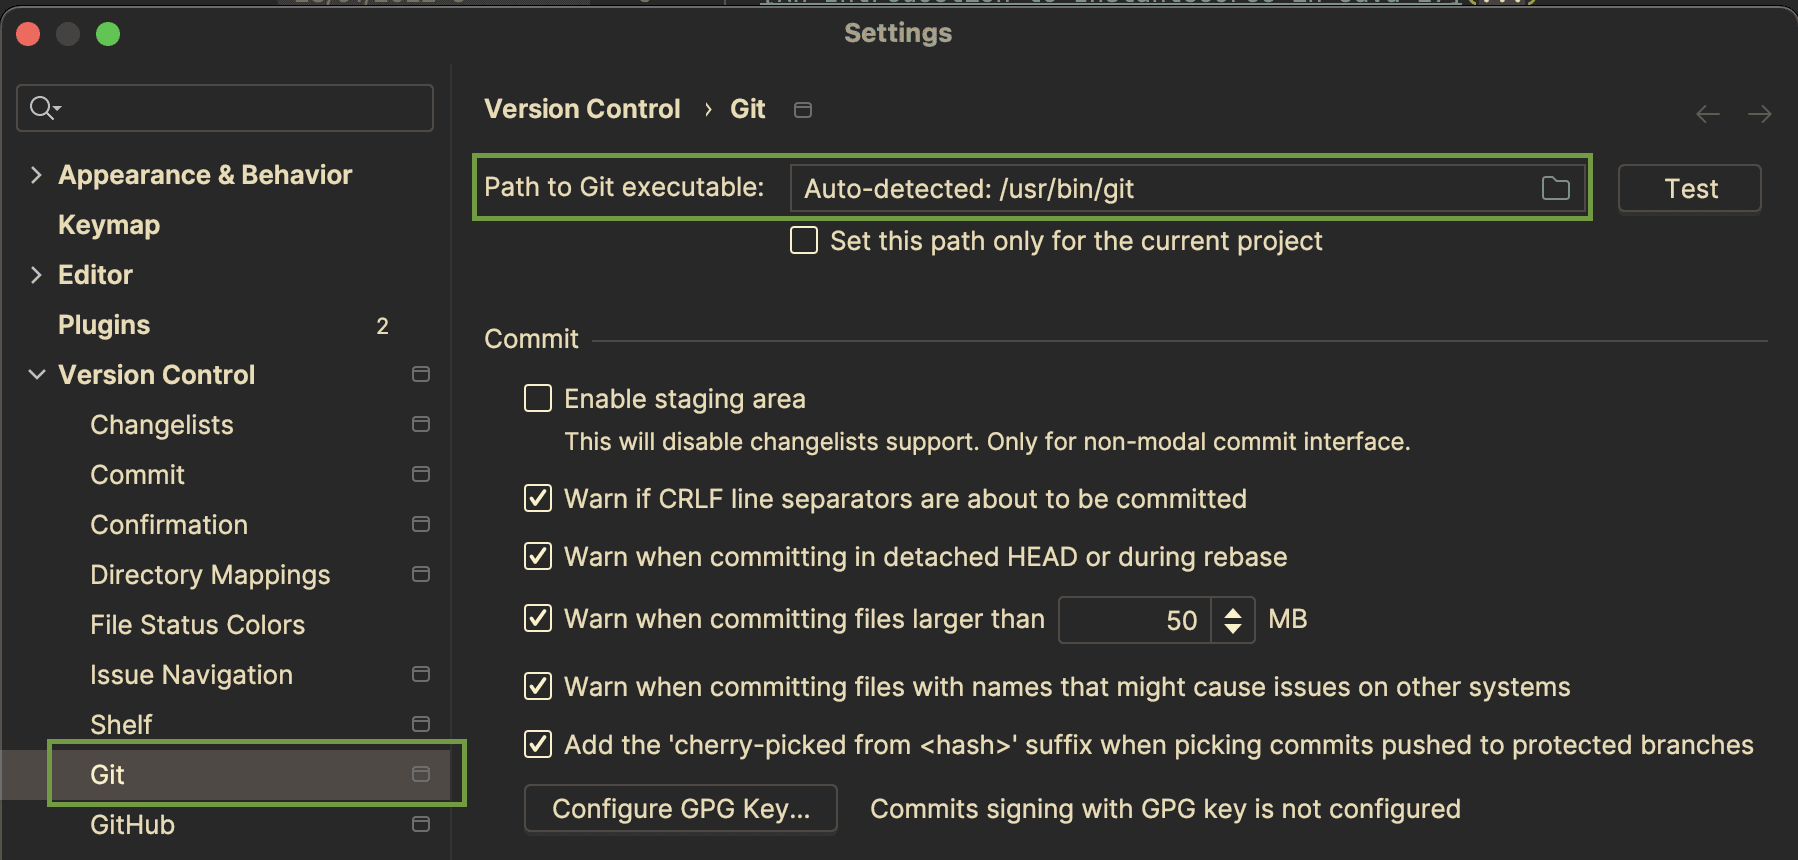
Before we can work with Git in IntelliJ, we need to install it on our system and configure the path in the IDE’s settings:

Git settings in IntelliJ

This setting tells IntelliJ to use the Git executable installed on our system.

3. Project Configuration

There are several ways of using Git with an IntelliJ project:

  1. We can create a new project from an existing remote repository.
  2. We can import a local source folder already configured as a Git repository.
  3. We can add Git support to an existing project.

Let’s have a look at these three options in more detail.

3.1. Cloning an Existing Repository

Let’s clone an existing remote repository by going to File -> New -> Project from Version Control, pasting the URL of the repository, and specifying the directory in which we want to create the local repository:

Clone a remore repository

Behind the scenes, IntelliJ will run the git clone command and open the project in the IDE.

3.2. Opening an Existing Project

Next, let’s create a new project from a local directory by opening the folder that contains the project using File -> New -> Project from Existing Sources:

project from existing sources

If there’s a .git directory present, IntelliJ will automatically make all Git functionality available to the project.

3.3. Creating a New Git Repository

Finally, let’s enable version control with Git for a project that doesn’t use Git yet. First, let’s locate the VCS menu item in the top menu bar. Then, let’s go to VCS -> Enable Version Control Integration:

enable version control integration

Here, we can select Git as the version control system to use:

enable version control integration

IntelliJ will run the git init command and create a .git folder in the main project folder.

3.4. Available Git Actions in the IDE

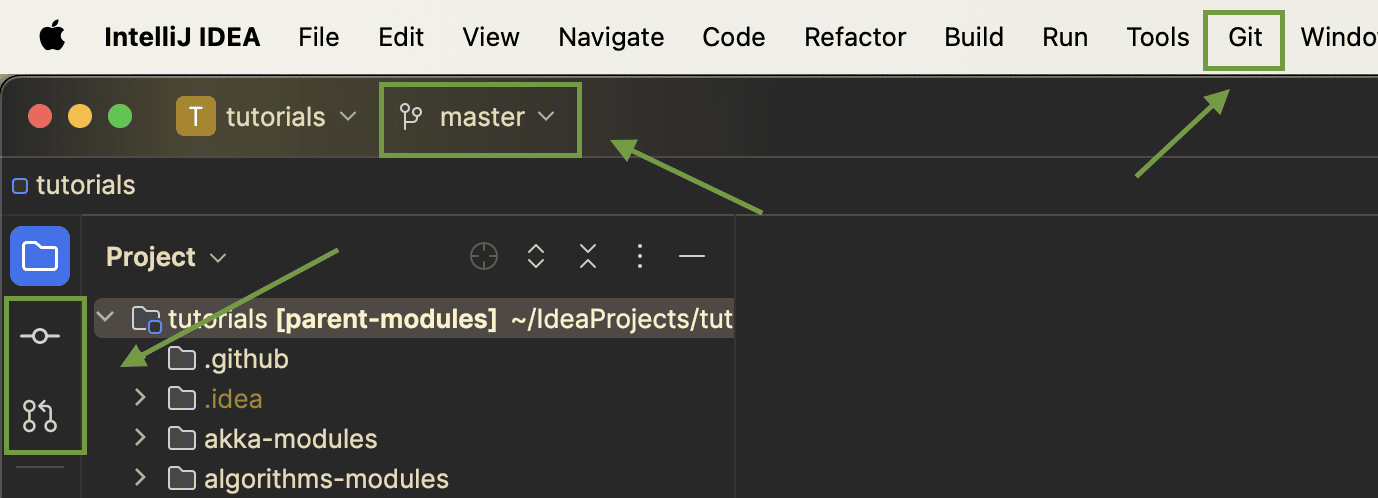
Once we’ve configured Git integration for our project, we have several actions available in the IDE:

Git menu and toolbar items in IntelliJ

We can see the Git menu item in the top menu bar, the current branch in the top toolbar, and the commit and pull request buttons in the left toolbar.

We’ll look at these actions in more detail in the following sections.

4. Creating a New Branch

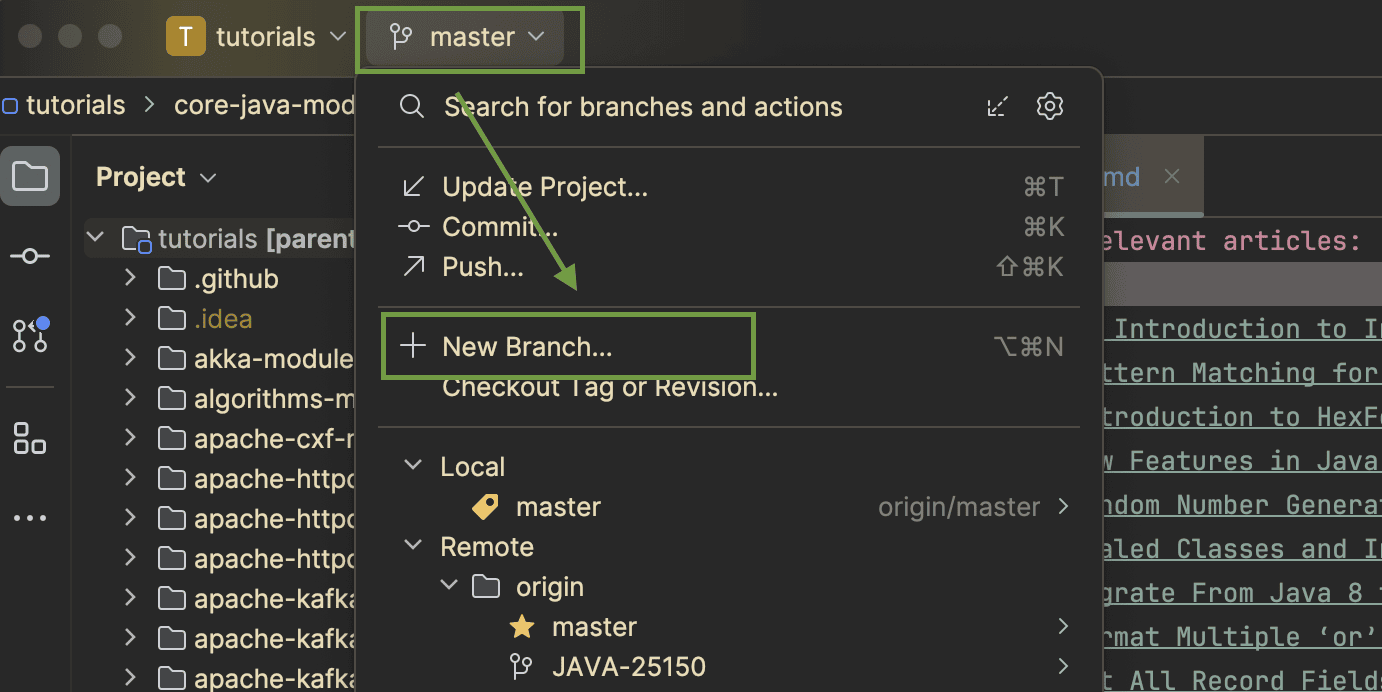
We can create a new branch using the branch drop-down button in the toolbar. The drop-down also lists the existing local and remote branches:

Create a new branch

5. Committing Changes

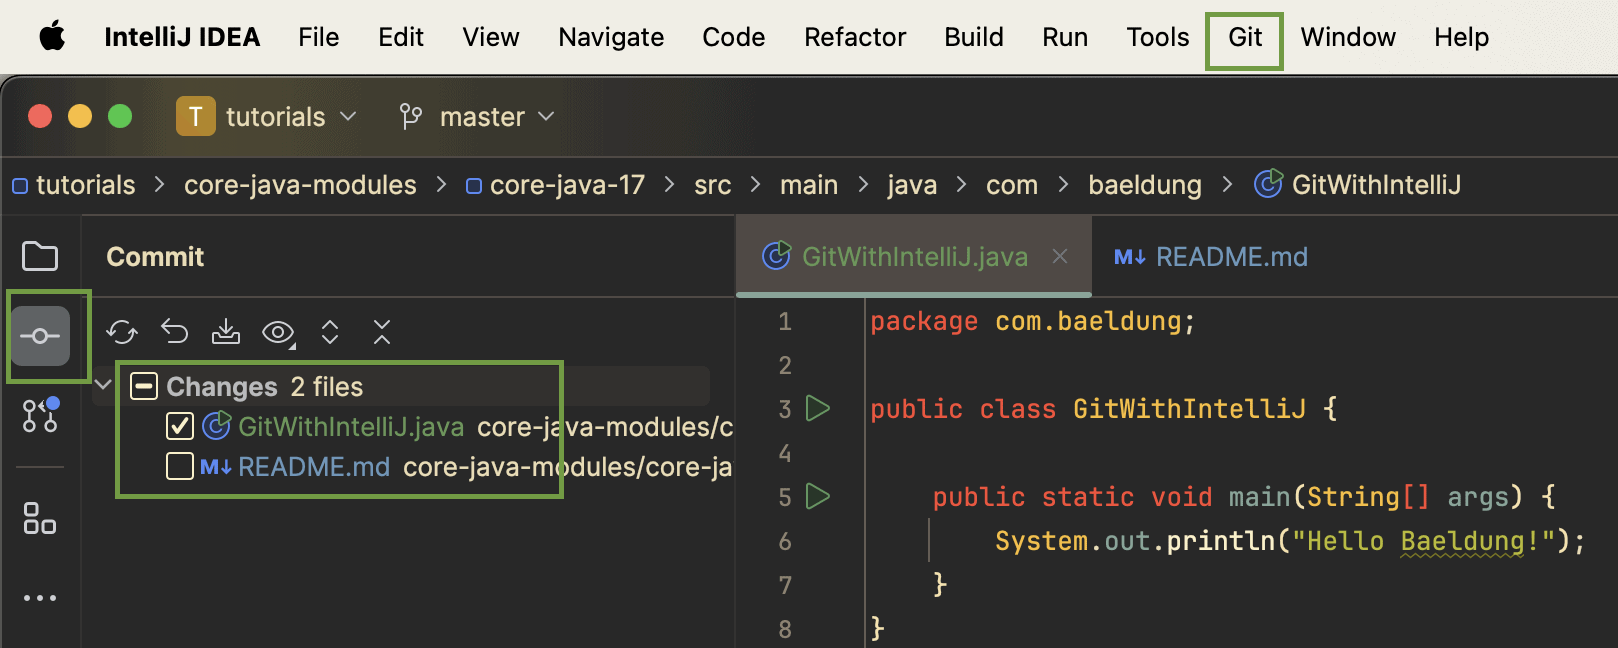
The commit tool window lists all files that contain changes in the current branch:

Comitting changes

We can click on each file that contains a change and review the update:

Show the diff between two files

When committing, we can select all files or individual ones by selecting the appropriate checkboxes.

6. Conflict Resolution

IntelliJ has great support for conflict resolution while merging or rebasing branches:

Conflict resolution

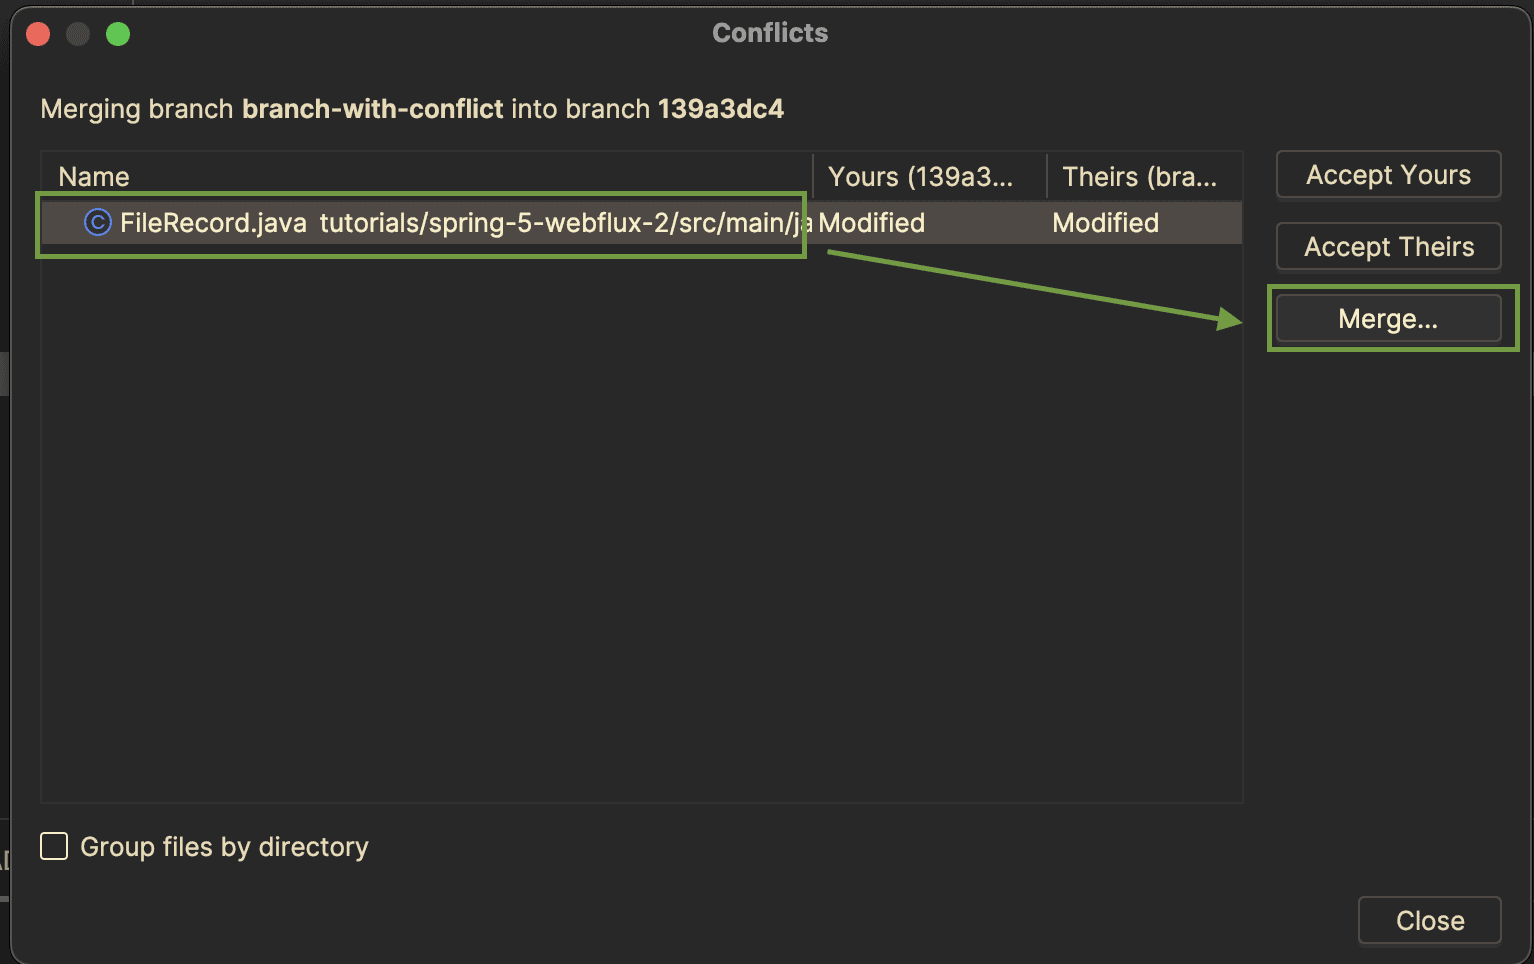
For every file that contains a conflict, we have the option to open a dialog box that allows us to perform conflict resolution. The local file is on the left, the file from the branch to be merged is on the right, and the result is in the middle.

We can choose to either accept the change on the left or the right. Moreover, the IDE provides a handy button with a magic wand icon. We can press that button and IntelliJ will resolve conflicts automatically where possible:

Conflict resolution

7. Git History

As developers, we often use Git History to see how a class, or any other file in the project, has changed over time. IntelliJ makes it easy to dive into the Git history of a project through several easy-to-use features. In this section, we’ll look at three: Git blame, the Git file history, and the Git commit history.

7.1. Git Blame

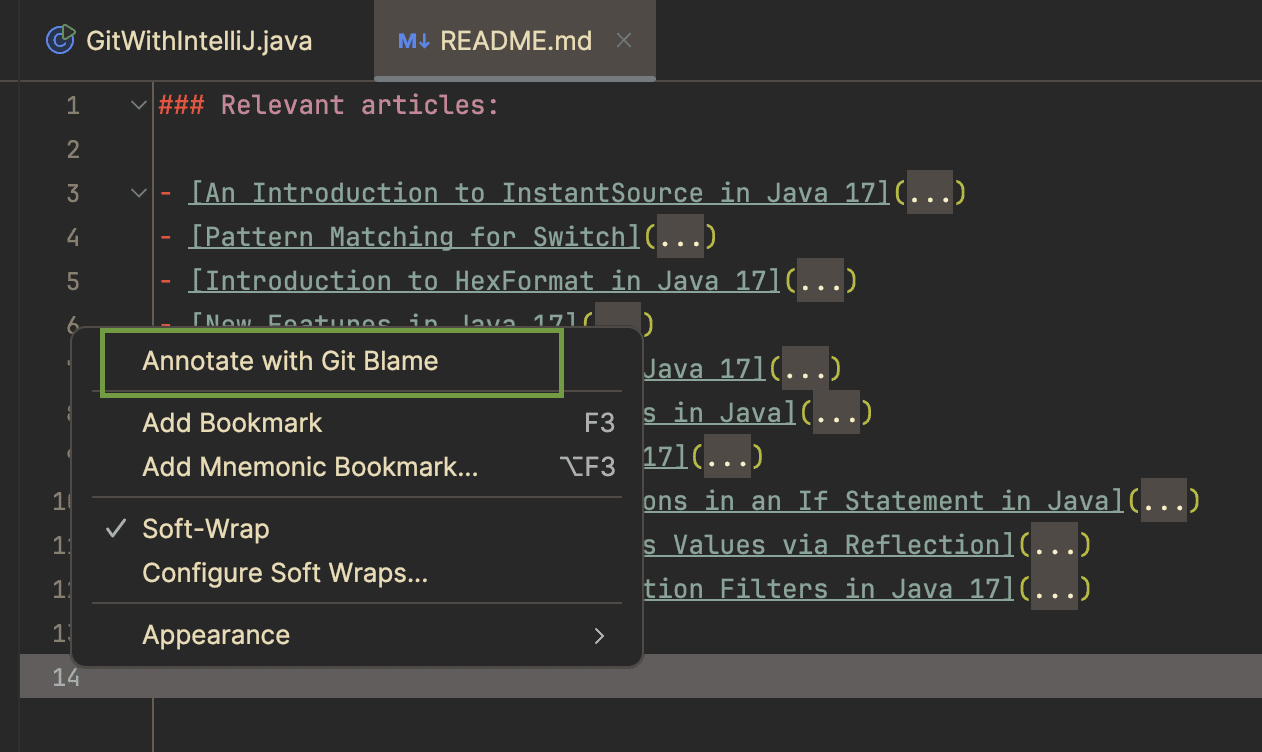
With Git Blame, we can see who did the last edit of each line. To show this information, we can either right-click anywhere in a file or on the line numbers on the left side of the editor and select Annotate with Git Blame:

Git blame

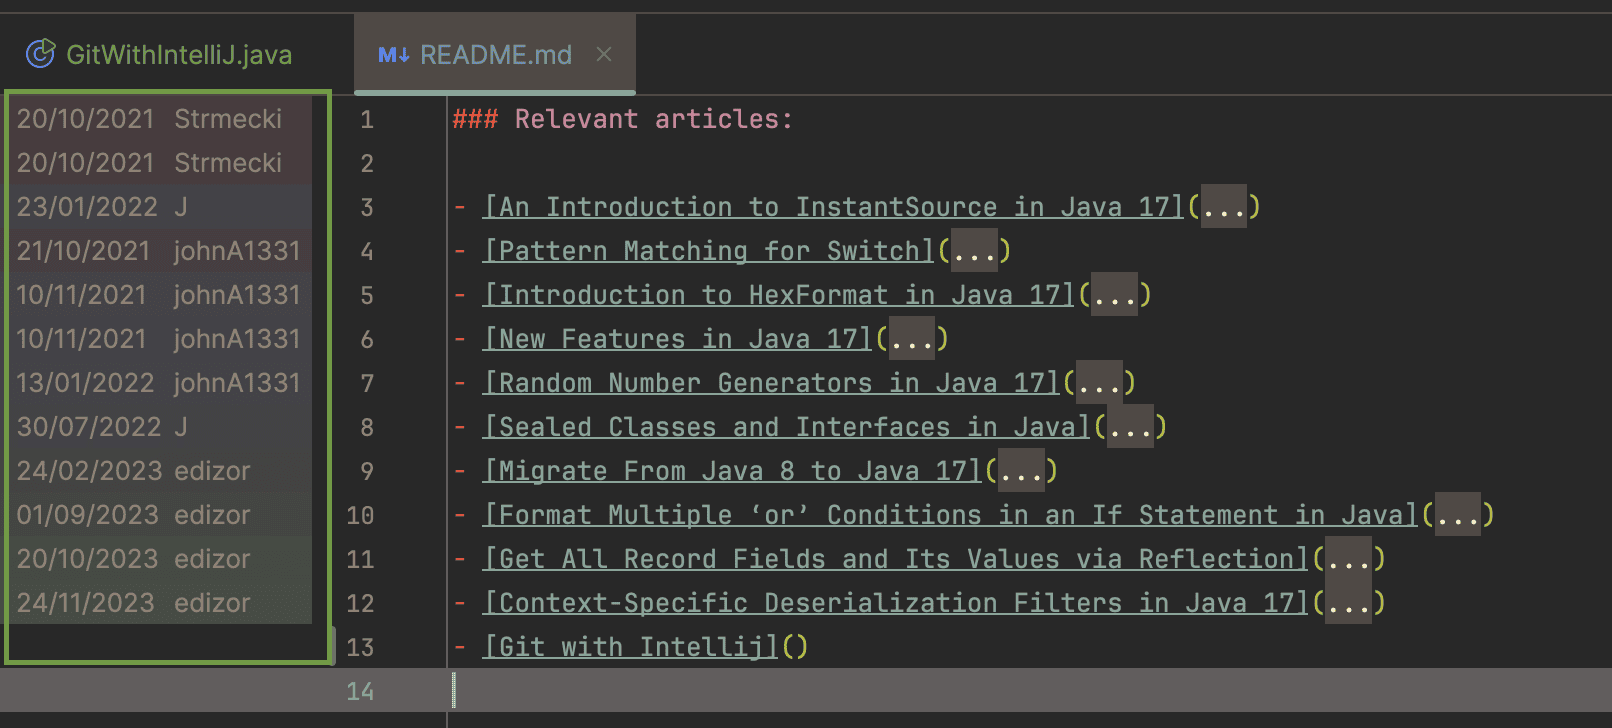
IntelliJ will show the date and username of the last edit next to every line:

Git blame

Blank lines indicate modifications that haven’t been committed yet. Thus, Git Blame is also a convenient way to show our current changes to a file.

7.2. Git File History

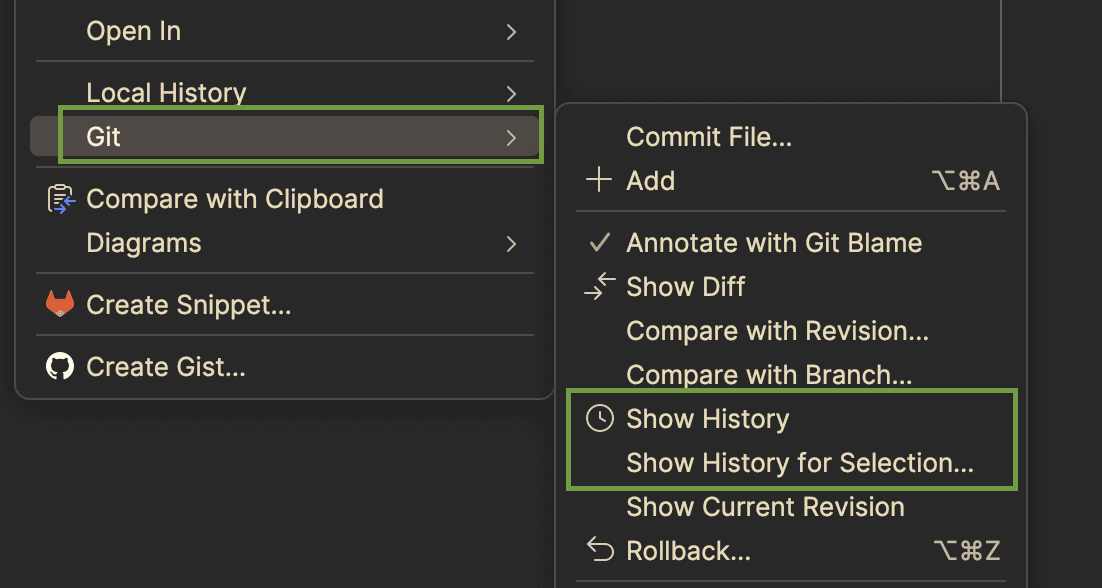
Furthermore, we can show the entire Git history of a file (if not rewritten or otherwise deleted) by right-clicking on the file in the editor or the project window:

Git file history

IntelliJ will display the list of commits that include the selected file. We can open each version of a file, see the diff to any other version, and even check out a specific version.

7.3. Git Commit History

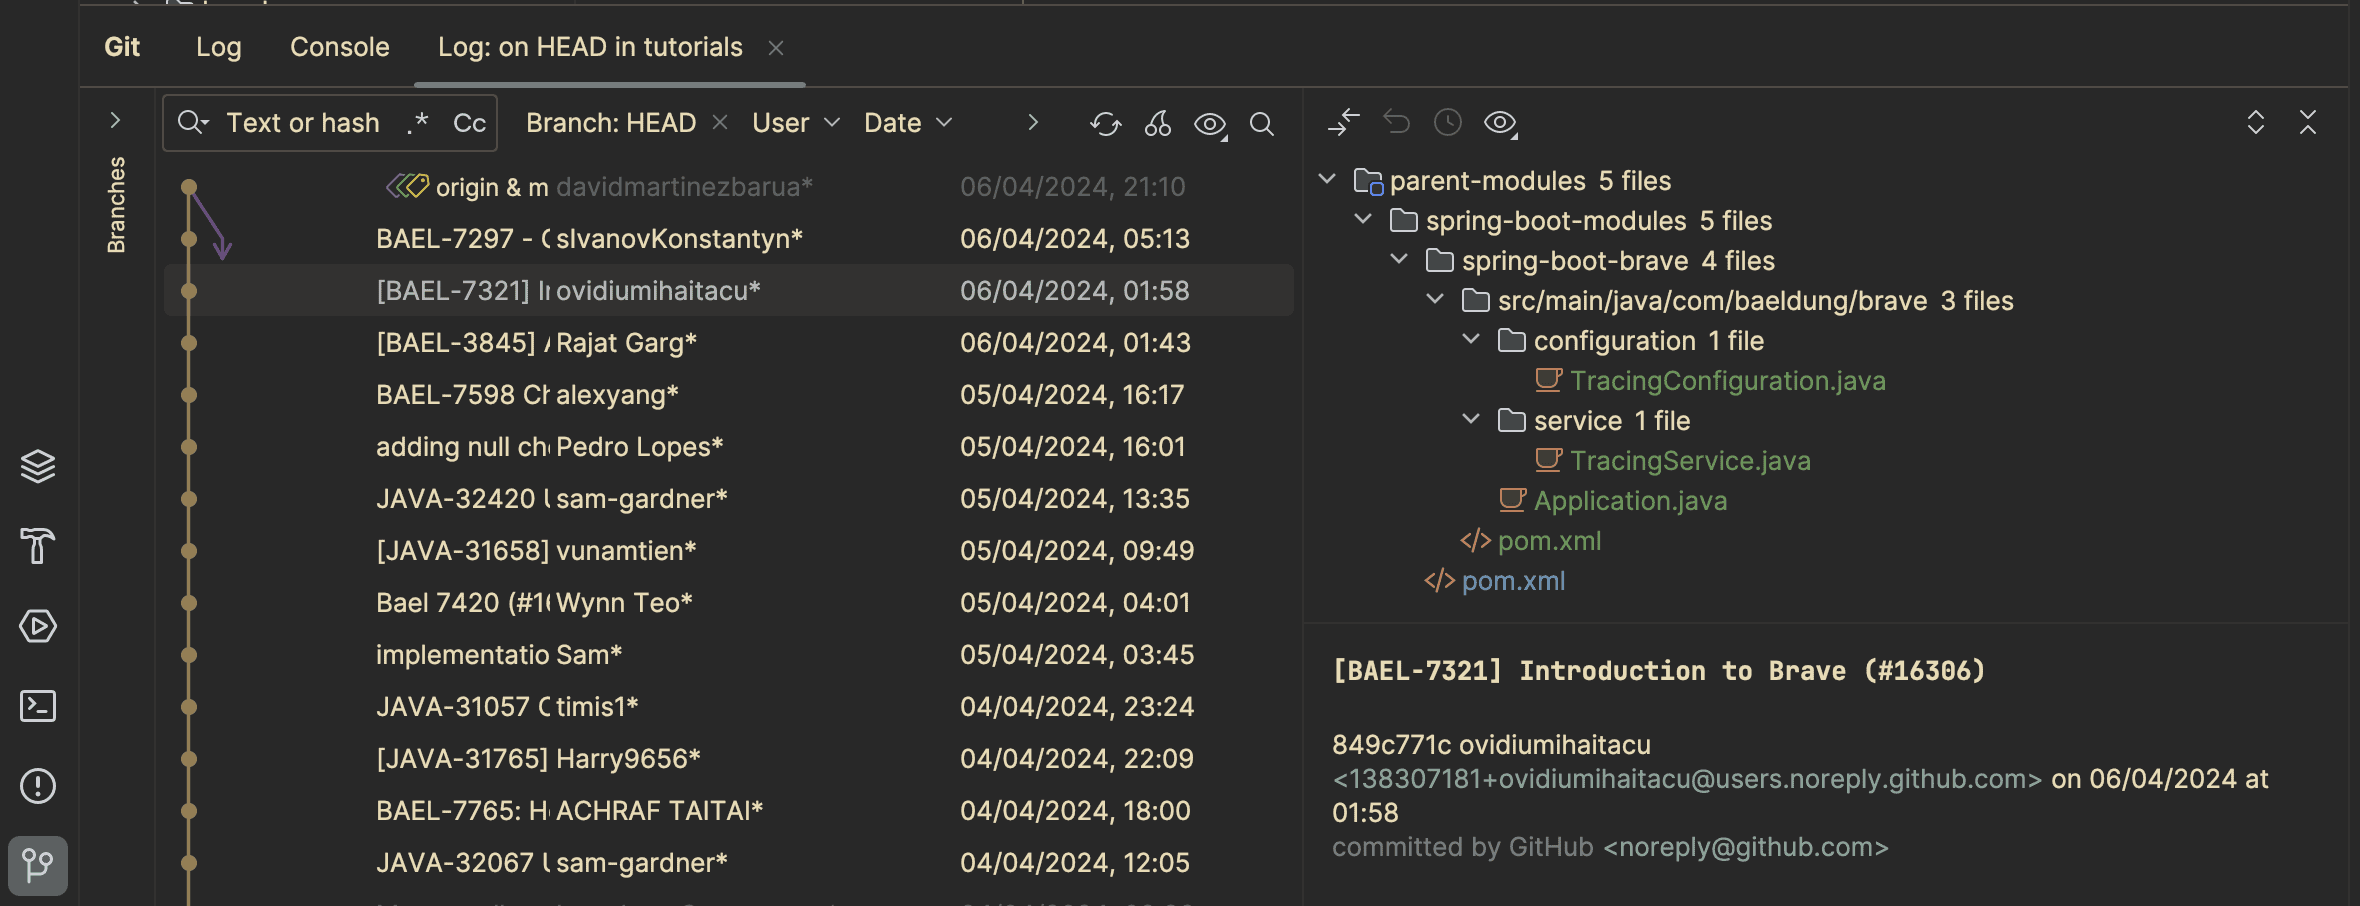
In addition, we can see the commit history of the entire project. When we right-click on the project’s root folder in the project window and select Show History, we can see all commits and the changes included in each of them:

Git commit history

8. Multi-Module Setup

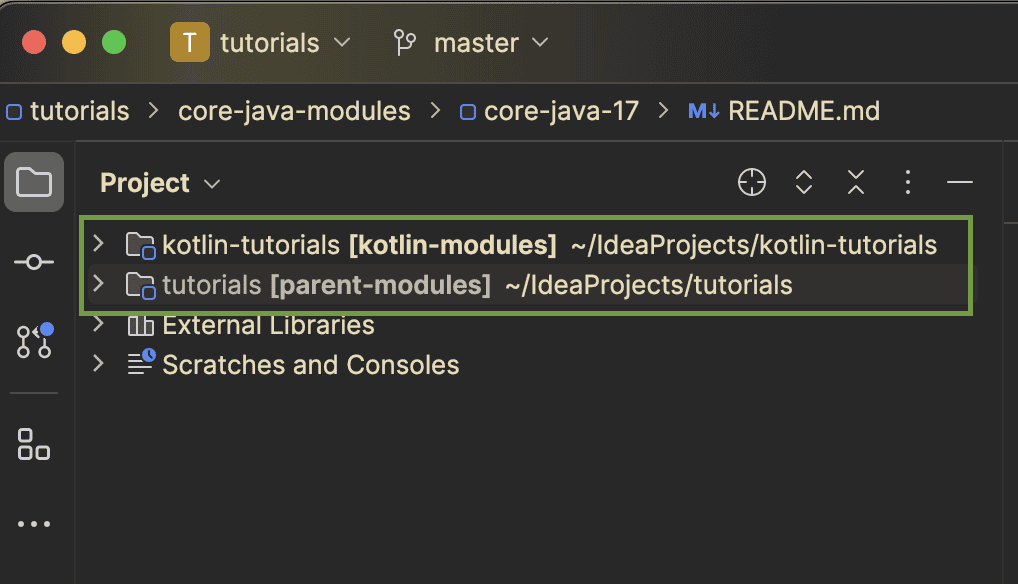
IntelliJ also offers great support for multi-module projects. We can create a multi-module project by importing several projects into a single IntelliJ window:

Multi module setup

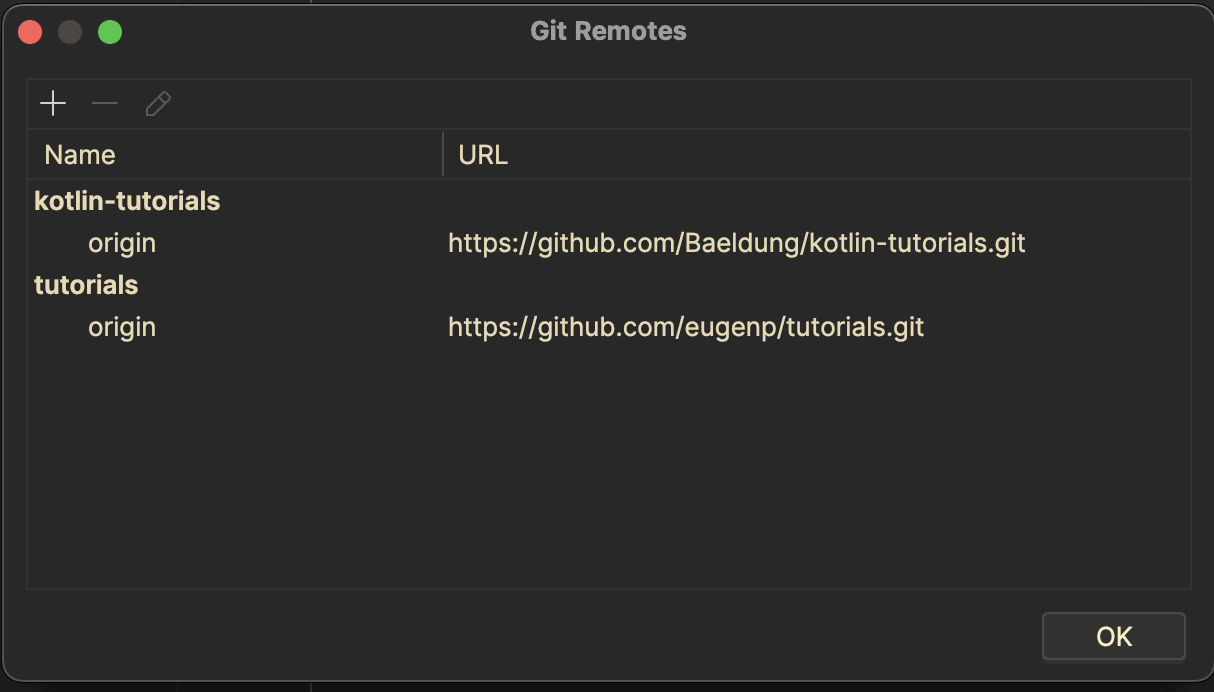
Every module can be associated with a different Git repository. We can see the remotes by going to Git -> Manage Remotes in the main menu:

Multi module remote repositories

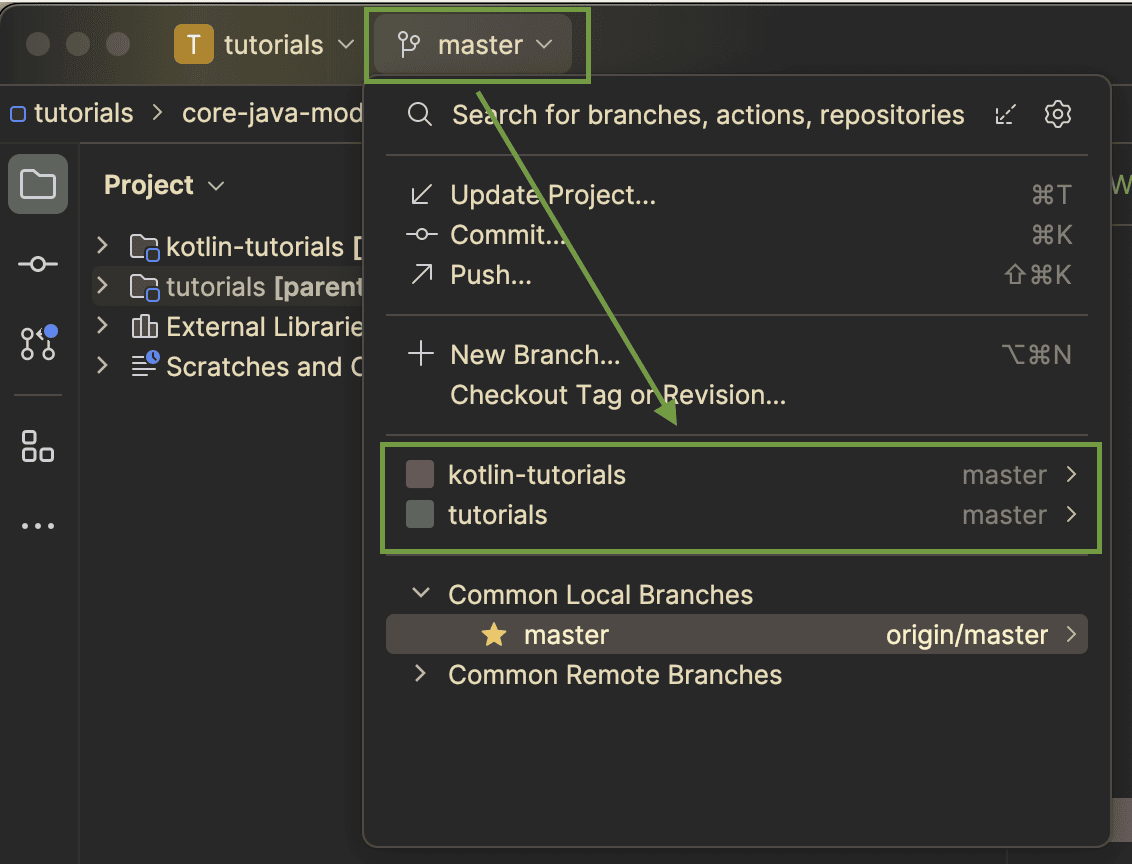
Moreover, we can work on different branches per module:

Multi module branches

In the above example, we have two modules, the Baeldung tutorials project and the Balding Kotlin tutorials. Both have different remote repositories and we’re currently working in the master branch of both projects.

9. Pull Requests

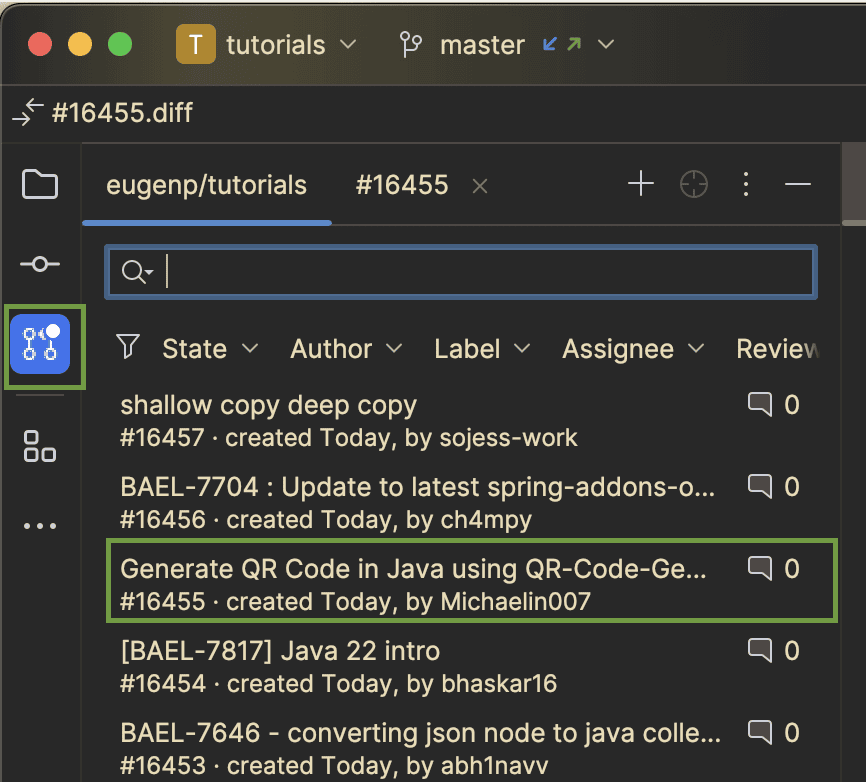
Another handy feature that IntelliJ offers is the possibility to check out and review pull requests. We can click on the PR icon in the left toolbar and see a list of all pull requests for the repository:

Display pull requests

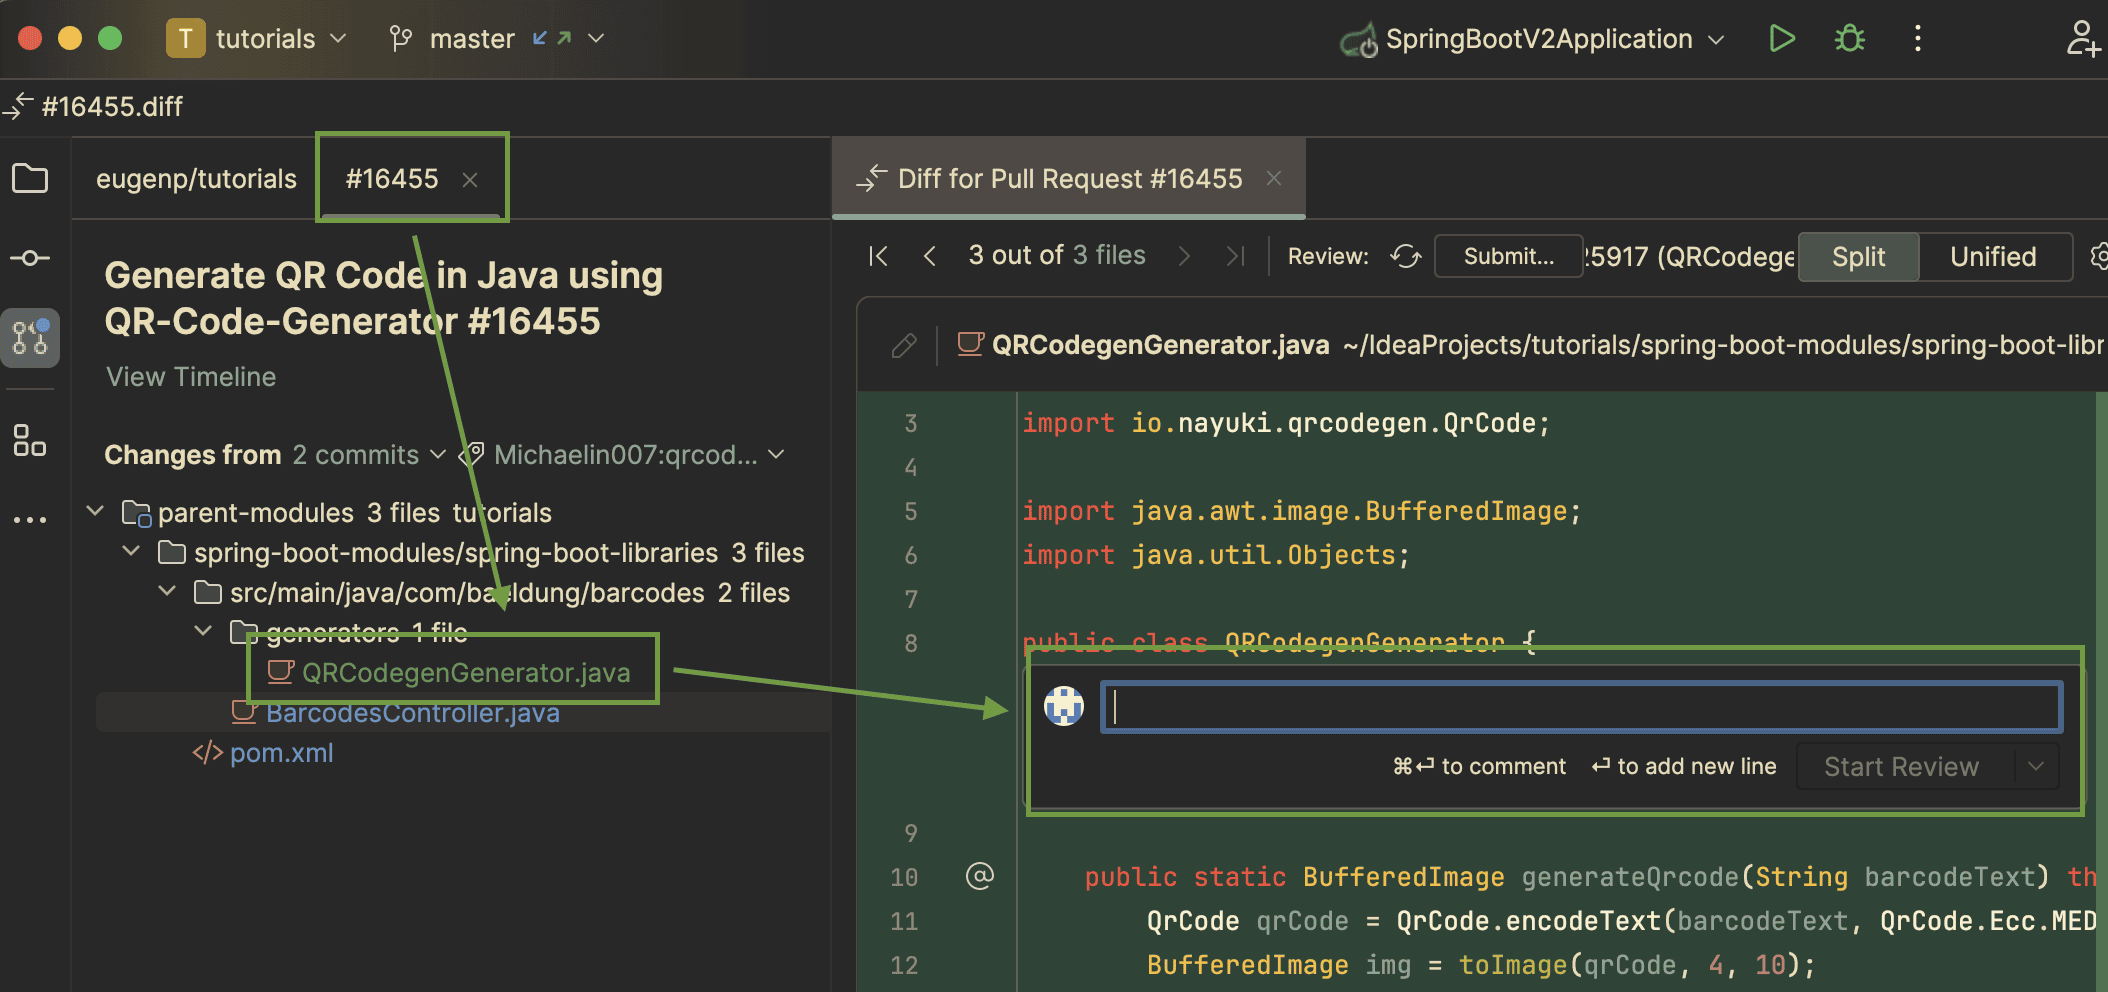
We can see the list of files included in a specific PR. We can also add comments directly in the IDE:

Comment a pull request

Furthermore, we can check out a PR like any other branch.

10. Conclusion

IntelliJ offers great Git integration and an intuitive user interface for working with the most common Git features.

In this article, we learned how to configure IntelliJ to use with Git, create repositories and branches, commit changes, and resolve merge conflicts. Furthermore, we learned how to retrieve the Git history, review pull requests, and work with multi-module projects.

To learn more, see the official IntelliJ documentation.