1. Overview

In this tutorial, we’re going to look at how to add a license header to our IntelliJ IDEA project files. The license header typically describes a project file’s permitted usage and ownership.

We assume that you have a basic knowledge of IntelliJ, therefore, we’ll dive straight to the point.

2. Configuring the License Header

Let’s open any of our existing projects to configure the license header. We first need to access the Preference window by click on the IntelliJ IDEA menu item or pressing the Command + Comma keys.

The new pop-up window will display a list of menus on the left, from which we can click on Editor > Copyright > Copyright Profiles. For quicker access, we can just type Copyright in the Preference window’s search bar.

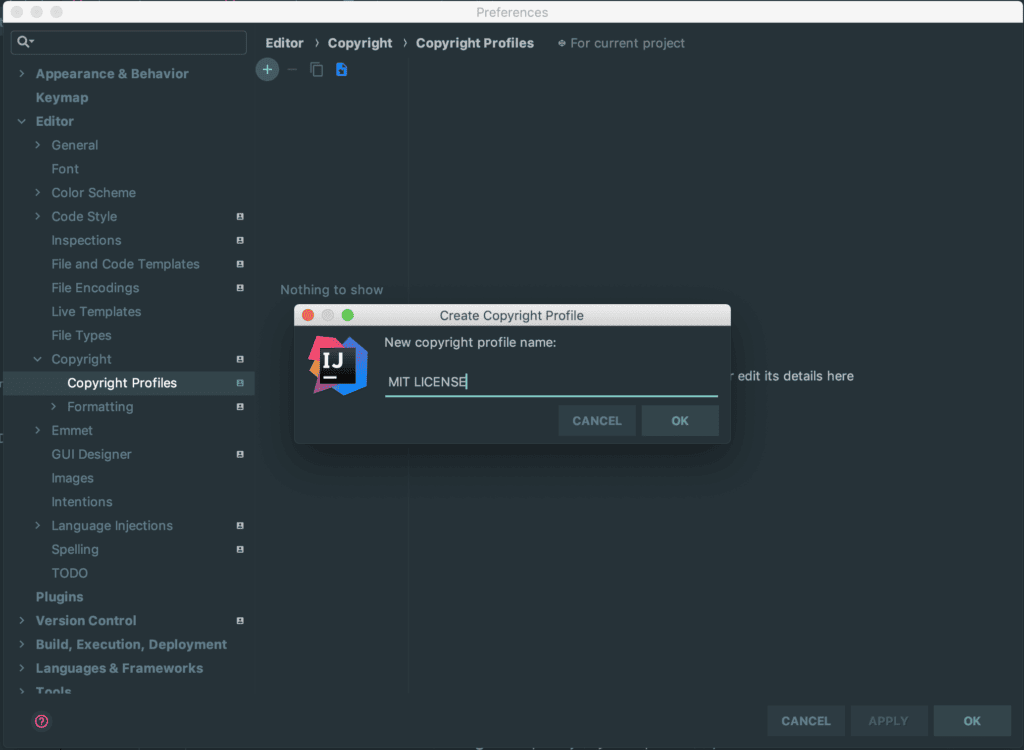
On the right pane of the window, let’s click the “+” button at the top to create a new Copyright Profile.

We start by giving it a name — MIT License, for example  and then click “OK”:

Copyright Profile

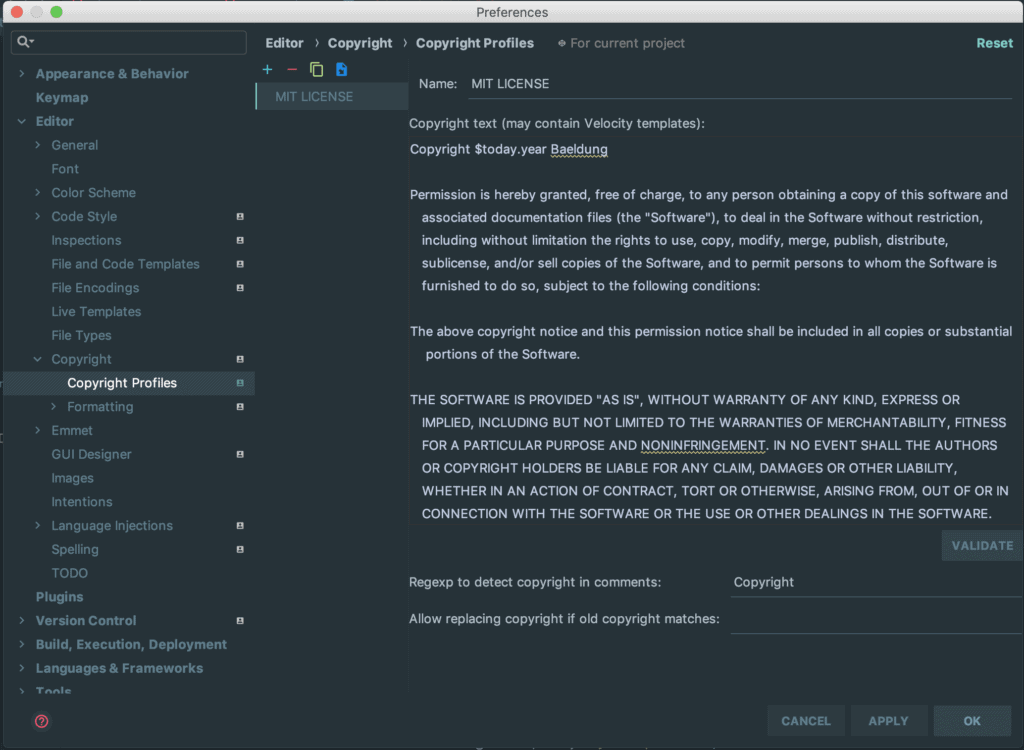
After this, we’ll add the license text to the text area.

We used a sample text that eventually should be replaced with our own:

Copyright Profiles

We replaced the with a placeholder – $today.year. It’ll be translated automatically by IntelliJ to the current year every time we use the profile.

IntelliJ defines additional variables that we can use in our copyright profile. For details please review the help page.

Finally, let’s click the “VALIDATE” button, just right below the license text, to validate our text and make sure everything is in order, and then click “APPLY” to save the profile.

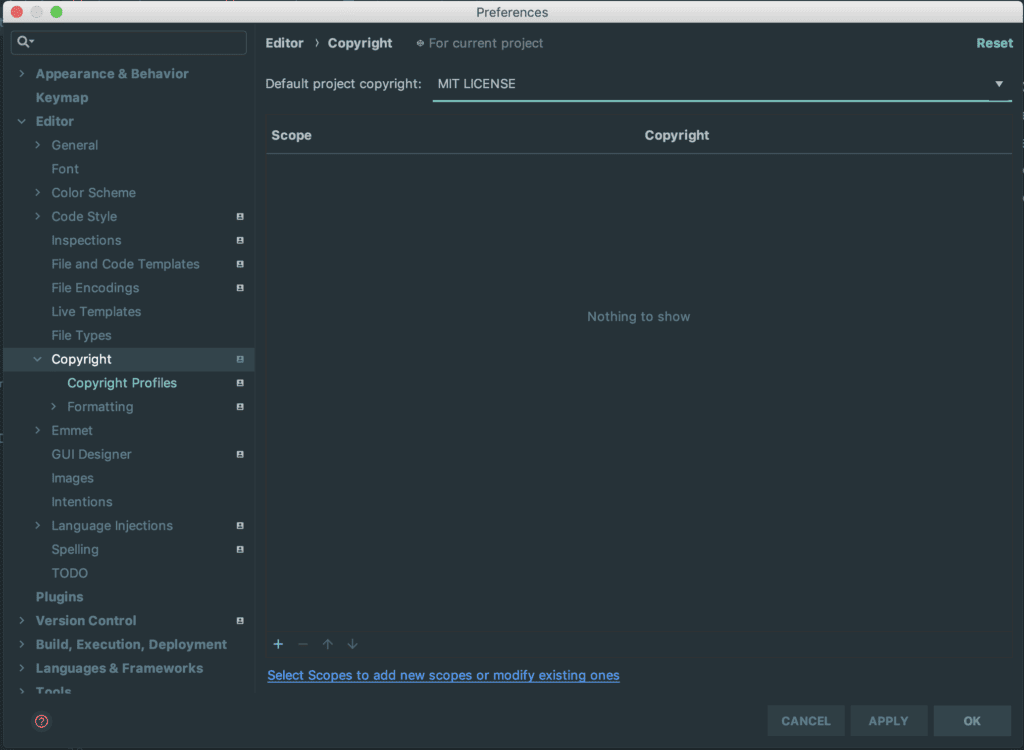
The next thing is to set the profile as a default one. We can achieve that by clicking on Editor > Copyright and selecting the MIT License as the default project copyright:

MIT License

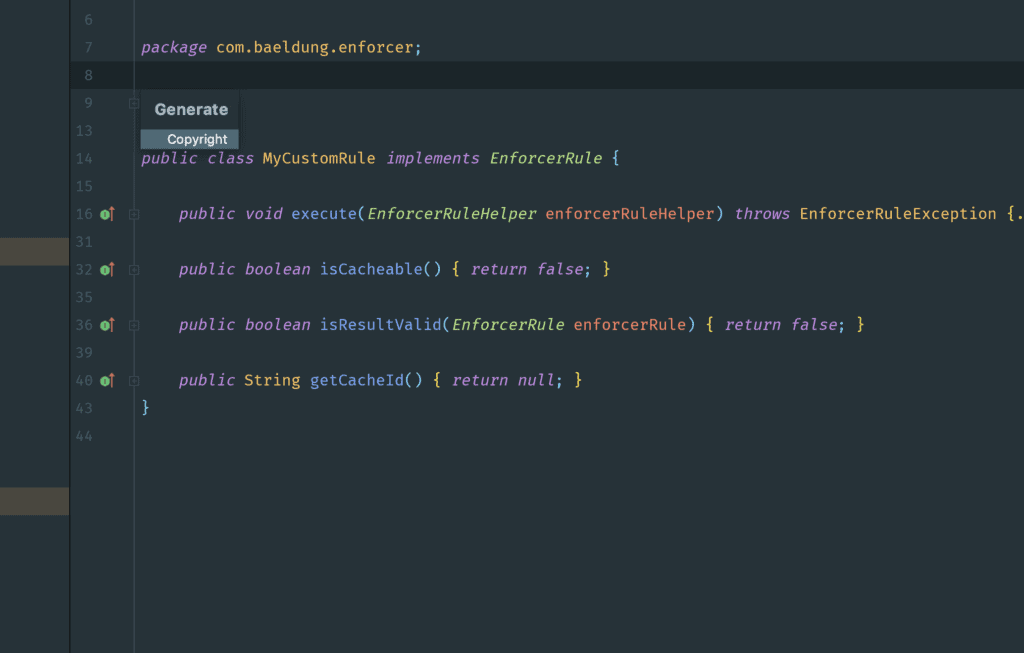
Now, it’s time to use the copyright profile in our project files. We can achieve this by pressing the Control + Return keys and selecting the copyright menu:

package

This will apply the Copyright text we previously set as a default to the topmost part of our project file.

If perhaps we’re not satisfied with the format of the resulting text, we can go to Preferences > Editor > Copyright > Copyright Profiles to edit it and click “APPLY”. After that, we’ll have to clear the existing text and press Control + Return keys to apply the updated text.

Subsequently, any new project file we create will automatically have the license header, eliminating the need to add it manually.

4. Conclusion

In this quick article, we learned how to configure IntelliJ IDEA to add license headers automatically to all of our project files – which can come quite handy on larger codebases.