1. Overview
Cryptocurrency is a secure and decentralized value store. It adopts a peer-to-peer (P2P) network for propagation and verification of transactions.
BitcoinJ is a Java library that simplifies the process of creating Bitcoin applications that enable users to perform cryptocurrency transactions seamlessly.
In this tutorial, we’ll explore BitcoinJ by delving into its key features and components. Also, we’ll explore how to create a wallet, fund the wallet, and send some coins to another wallet.
2. What Is BitcoinJ?
BitcoinJ is a Java library to simplify the process of creating Bitcoin applications. It provides tools to create and manage Bitcoin wallets, send and receive transactions, and integrate with Bitcoin’s main network mainnet, testnet, and regtest networks.
Also, it provides Simplified Payment Verification (SPV) to interact with the Bitcoin network without downloading the whole blockchain.
3. Features of BitcoinJ
BitcoinJ allows us to easily create Bitcoin wallets, including generating addresses, managing private and public keys, and handling seed phrases for wallet recovery.
Furthermore, it provides functionality for sending and receiving Bitcoin transactions, enabling us to build an application that can handle Bitcoin transfers.
Additionally, it supports integration with the Bitcoin main network (mainnet) where real-world Bitcoin transactions occur. Also, it supports the testnet and regtest network for testing and prototyping.
Finally, it allows event listeners to respond to various events, such as incoming transactions or changes in the blockchain.
4. Basic Setup
To start interacting with the library, let’s add bitcoinj-core dependency to the pom.xml:
<dependency>
    <groupId>org.bitcoinj</groupId>
    <artifactId>bitcoinj-core</artifactId>
    <version>0.17-alpha4</version>
</dependency>
This dependency provides the Wallet and WalletKitApp classes to create a Bitcoin wallet.
Also, let’s add the slf4j-api and slf4j-simple dependencies for logging:
<dependency>
    <groupId>org.slf4j</groupId>
    <artifactId>slf4j-api</artifactId>
    <version>2.1.0-alpha1</version>
</dependency>
<dependency>
    <groupId>org.slf4j</groupId>
    <artifactId>slf4j-simple</artifactId>
    <version>2.1.0-alpha1</version>
</dependency>
These dependencies are essential to log the activities of the application.
5. The Wallet Class
The wallet is an important component in cryptocurrency because it provides functionality to manage transactions. The BitcoinJ library provides the Wallet and WalletKitApp classes to create a wallet.
5.1. Creating Wallet
Before creating a wallet, we need to define the network the wallet interacts with.
BitcoinJ supports three types of networks – mainnet for production, testnest for testing, and regtest for local regression testing.
Let’s create the NetworkParameters object to connect to a test network:
NetworkParameters params = TestNet3Params.get();
Next, let’s create a Wallet instance that accepts the NetworkParameters as a parameter:
void createWallet() throws IOException {
    Wallet wallet = Wallet.createDeterministic(params, Script.ScriptType.P2PKH);
    File walletFile = new File("baeldung.dat");
    wallet.saveToFile(walletFile);
}
In the method above, we create a Wallet that interacts with the test network. We use the P2PKH script type that represents a Pay-to-Pubkey-Hash address, which is a common type of Bitcoin address. Finally, we save the wallet as baeldung.dat.
Notably, the wallet address, seed phrase, and public and private keys are generated while creating the wallet.
5.2. Retrieving Wallet Details
After creating a wallet, we can retrieve essential details like the address, public key, private key, and the seed phrase:
Wallet loadWallet() throws IOException, UnreadableWalletException {
    File walletFile = new File("baeldung.dat");
    Wallet wallet = Wallet.loadFromFile(walletFile);
    logger.info("Address: " + wallet.currentReceiveAddress().toString());
    logger.info("Seed Phrase: " + wallet.getKeyChainSeed().getMnemonicString());
    logger.info("Balance: " + wallet.getBalance().toFriendlyString());
    logger.info("Public Key: " + wallet.findKeyFromAddress(wallet.currentReceiveAddress()).getPublicKeyAsHex());
    logger.info("Private Key: " + wallet.findKeyFromAddress(wallet.currentReceiveAddress()).getPrivateKeyAsHex());
    return wallet;
}
Here, we load the wallet from the baeldung.dat file by invoking the loadFromFile() method on the Wallet instance. Then, we log the address, seed phrase, and balance of the wallet to the console.
Additionally, we log the public and private keys to the console.
5.3. Recovering Wallet
In case where we lose access to the wallet file but have the seed phrase, we can recover the wallet using the seed phrase:
Wallet loadUsingSeed(String seedWord) throws UnreadableWalletException {
    DeterministicSeed seed = new DeterministicSeed(seedWord, null, "", Utils.currentTimeSeconds());
    return Wallet.fromSeed(params, seed);
}
In the code above, we create a DeterministicSeed object that accepts the seed phrases and time as arguments. Then we call the Wallet.fromSeed() method, passing params and seed as arguments. This creates a new Wallet instance from the provided seed phrase and network parameter.
5.4. Securing Wallet
We need to keep the private key and seed phrase private from unauthorized access. Gaining access to the private key can allow attackers to access our wallets and spend the available funds.
BitcoinJ provides the encrypt() method to set a password for our wallet:
// ...
wallet.encrypt("password");
wallet.saveToFile(walletFile);
// ...
Here, we invoke the encrypt() method on the Wallet object. It accepts the intended password as an argument. With the wallet encrypted, no one can access the private key without decrypting the wallet first:
// ...
Wallet wallet = Wallet.loadFromFile(walletFile);
wallet.decrypt("password");
// ...
Here, we decrypt the wallet with the password we used to encrypt it. Notably, it’s important to keep the wallet file, seed phrase, and private key from external sources.
5.5. Connecting to a Peer Group
Currently, our wallet is in isolation and isn’t aware of transactions because it’s not in synchronization with the blockchain. We need to connect to a peer group network:
void connectWalletToPeer() throws BlockStoreException, UnreadableWalletException, IOException {
    Wallet wallet = loadWallet();
    BlockStore blockStore = new MemoryBlockStore(params);
    BlockChain chain = new BlockChain(params, wallet, blockStore);
    PeerGroup peerGroup = new PeerGroup(params, chain);
    peerGroup.addPeerDiscovery(new DnsDiscovery(params));
    peerGroup.addWallet(wallet);
    peerGroup.start();
    peerGroup.downloadBlockChain();
}
Here, we first load the wallet and then create a BlockStore instance which stores the blockchain in memory. Also, we create a BlockChain instance, which manages the data structure behind Bitcoin.
Finally, we create a PeerGroup instance to establish network connections. These classes are necessary to interact with testnet and synchronize our wallet with the network.
However, downloading the whole blockchain may be resource-intensive. Hence, WalletKitApp class uses SPV by default to simplify this process.
6. The WalletKitApp Class
BitcoinJ provides the WalletKitApp class which simplifies the process of setting up a wallet. The class abstracts away creating BlockStore, BlockChain and PeerGroup instances, making it easier to work with the Bitcoin network.
Let’s create a wallet using the WalletKitApp and log the wallet details after creation:
NetworkParameters params = TestNet3Params.get();

WalletAppKit kit = new WalletAppKit(params, new File("."), "baeldungkit") {
    @Override
    protected void onSetupCompleted() {
        logger.info("Wallet created and loaded successfully.");
        logger.info("Receive address: " + wallet().currentReceiveAddress());
        logger.info("Seed Phrase: " + wallet().getKeyChainSeed());
        logger.info("Balance: " + wallet().getBalance().toFriendlyString());
        logger.info("Public Key: " + wallet().findKeyFromAddress(wallet().currentReceiveAddress())
          .getPublicKeyAsHex());
        logger.info("Private Key: " + wallet().findKeyFromAddress(wallet().currentReceiveAddress())
          .getPrivateKeyAsHex());
        wallet().encrypt("password");
    }
};
kit.startAsync();
kit.awaitRunning();
kit.setAutoSave(true);;
Here, we set up a new wallet with testnet parameters and we specify the directory to store the wallet data. We start the WalletAppKit object asynchronously. We enable auto-save to locally store the latest wallet information.
Here’s the wallet details:
[ STARTING] INFO com.baeldung.bitcoinj.Kit - Wallet created and loaded successfully.
[ STARTING] INFO com.baeldung.bitcoinj.Kit - Receive address: moqVLcdRFjyXehgRAK5bJBK6rDN2vq14Wc
[ STARTING] INFO com.baeldung.bitcoinj.Kit - Seed Phrase: DeterministicSeed{unencrypted}
[ STARTING] INFO com.baeldung.bitcoinj.Kit - Balance: 0
The wallet currently has zero Bitcoin.
6.1. Adding an Event Listener
We can add an event listener to the wallet to respond to various events, such as incoming transactions:
kit.wallet()
  .addCoinsReceivedEventListener((wallet, tx, prevBalance, newBalance) -> {
      logger.info("Received tx for " + tx.getValueSentToMe(wallet));
      logger.info("New balance: " + newBalance.toFriendlyString());
  });
The event listener above logs incoming transactions with transaction ID and the amount received.
Moreover, let’s add an event listener to log the current wallet balance when we send a coin to another wallet:
kit.wallet()
  .addCoinsSentEventListener((wallet, tx, prevBalance, newBalance) -> logger.info("new balance: " + newBalance.toFriendlyString()));
The code above listens to an event to send coins out of the wallet and log the new balance.
6.2. Receiving Bitcoin
Let’s fund our wallet by requesting test bitcoins from a Bitcoin testnet faucet:
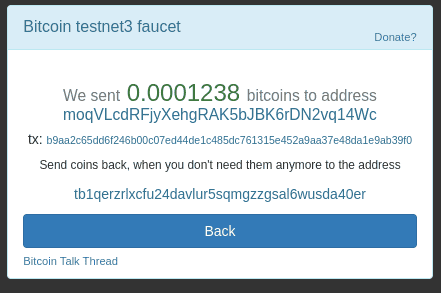
In the image above, we sent 0.0001238 bitcoins to our wallet address. However, this undergoes some confirmation before our wallet receives it. Notably, our application must be running to be in sync with the test blockchain.
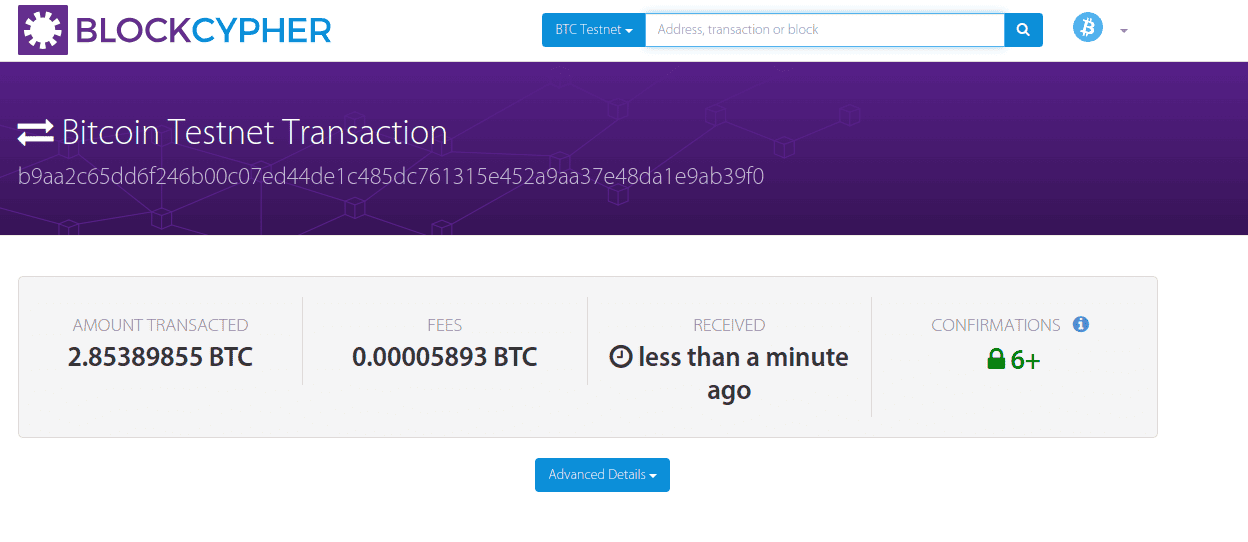
Next, let’s verify the transaction on a blockchain explorer like BlockCypher:
Finally, let’s re-execute our program and check the log for the received coin:

The wallet balance is now updated to reflect the received Bitcoin.
6.3. Sending Bitcoin
We can easily send a Bitcoin to another address by creating a Coin instance and specifying the amount to send:
String receiveAddress = "n1vb1YZXyMQxvEjkc53VULi5KTiRtcAA9G";
Coin value = Coin.valueOf(200);
final Coin amountToSend = value.subtract(Transaction.REFERENCE_DEFAULT_MIN_TX_FEE);
final Wallet.SendResult sendResult = kit.wallet()
  .sendCoins(kit.peerGroup(), Address.fromString(params, receiveAddress), amountToSend);
In the code above, we specify the address to send 200 satoshi. Also, we subtract the transaction fee for the miner. Finally, we call sendCoins(), which initiates the process of transferring the coin.
7. Conclusion
In this article, we learned how to use the BitcoinJ library by interacting with a Bitcoin test network. We discussed key features such as wallet management, transaction handling, network integration, and event handling.
As always, the complete source code for the examples is available over on GitHub.