1. 简介
本文将深入探讨如何在 Java 中实现图像缩放(resize)。我们会覆盖从 Java 原生 API 到主流第三方库的多种方案,包括 Graphics2D、Image.getScaledInstance(),以及 Imgscalr、Thumbnailator 和 Marvin 等开源库。
需要说明的是,图像缩放分为放大(upscale)和缩小(downscale)。本文示例主要聚焦于缩小图像,因为这在实际项目中更为常见,比如生成缩略图、上传头像等场景。
2. 使用 Java 原生 API 缩放图像
Java 标准库提供了两种常见方式来处理图像缩放:
- ✅ 使用
java.awt.Graphics2D - ✅ 使用
Image.getScaledInstance()
2.1 使用 java.awt.Graphics2D
Graphics2D 是 Java 2D 图形渲染的核心类,支持对图像、形状和文本的高质量绘制。
以下是一个使用 Graphics2D 缩放图像的典型实现:
BufferedImage resizeImage(BufferedImage originalImage, int targetWidth, int targetHeight) throws IOException {
    BufferedImage resizedImage = new BufferedImage(targetWidth, targetHeight, BufferedImage.TYPE_INT_RGB);
    Graphics2D graphics2D = resizedImage.createGraphics();
    graphics2D.drawImage(originalImage, 0, 0, targetWidth, targetHeight, null);
    graphics2D.dispose();
    return resizedImage;
}
缩放前后效果对比:
⚠️
BufferedImage.TYPE_INT_RGB指定图像颜色模型,不包含透明通道(Alpha)。若原图含透明信息,建议使用TYPE_INT_ARGB,否则可能导致背景变黑。
提升画质:使用 RenderingHints
Graphics2D 支持通过 RenderingHints 控制渲染质量与性能的平衡。例如,开启双线性插值可显著提升缩放后图像的平滑度:
graphics2D.setRenderingHint(RenderingHints.KEY_INTERPOLATION, RenderingHints.VALUE_INTERPOLATION_BILINEAR);
其他常用 hint 还包括抗锯齿(OP_ANTIALIASING)、颜色渲染优先级等。具体可参考 Oracle 官方文档。
2.2 使用 Image.getScaledInstance()
这是最简单的缩放方式,代码简洁但性能较差,适合对性能要求不高的场景。
BufferedImage resizeImage(BufferedImage originalImage, int targetWidth, int targetHeight) throws IOException {
    Image resultingImage = originalImage.getScaledInstance(targetWidth, targetHeight, Image.SCALE_DEFAULT);
    BufferedImage outputImage = new BufferedImage(targetWidth, targetHeight, BufferedImage.TYPE_INT_RGB);
    outputImage.getGraphics().drawImage(resultingImage, 0, 0, null);
    return outputImage;
}
缩放效果示例(美食图片):
缩放模式选择
getScaledInstance() 支持指定缩放算法:
Image.SCALE_DEFAULT:默认算法Image.SCALE_SMOOTH:质量优先,适合缩小图像 ✅Image.SCALE_FAST:速度优先Image.SCALE_REPLICATE:使用ReplicateScaleFilterImage.SCALE_AREA_AVERAGING:基于区域平均,质量较好但慢 ❌
推荐使用 SCALE_SMOOTH,尤其在生成缩略图时画质更佳。
3. Imgscalr 库
Imgscalr 是一个轻量级图像处理库,底层基于 Graphics2D,API 简洁,在画质、性能和易用性之间取得了良好平衡。
添加 Maven 依赖
<dependency>
    <groupId>org.imgscalr</groupId>
    <artifactId>imgscalr-lib</artifactId>
    <version>4.2</version>
</dependency>
基础用法
最简单的调用方式,自动保持宽高比:
BufferedImage simpleResizeImage(BufferedImage originalImage, int targetWidth) throws Exception {
    return Scalr.resize(originalImage, targetWidth);
}
效果展示(水果图片):
高级配置
Imgscalr 提供了丰富的参数控制:
| 参数 | 说明 |
|---|---|
method |
缩放策略:AUTOMATIC, BALANCED, QUALITY, SPEED, ULTRA_QUALITY |
mode |
缩放模式:AUTOMATIC, FIT_EXACT, FIT_TO_WIDTH, FIT_TO_HEIGHT |
OP_ANTIALIAS |
启用抗锯齿,提升边缘平滑度 |
完整示例:
BufferedImage resizeImage(BufferedImage originalImage, int targetWidth, int targetHeight) throws Exception {
    return Scalr.resize(originalImage, Scalr.Method.AUTOMATIC, Scalr.Mode.AUTOMATIC, targetWidth, targetHeight, Scalr.OP_ANTIALIAS);
}
缩放结果:
✅ 优点:
- 自动处理透明通道
- 支持链式调用
- 内置抗锯齿、锐化等优化
- 兼容所有 Java Image I/O 支持的格式(JPG, PNG, GIF, BMP 等)
4. Thumbnailator 库
Thumbnailator 是另一个流行的图像缩放库,采用渐进式双线性缩放算法,画质优秀,API 极其简洁。
添加依赖
<dependency>
    <groupId>net.coobird</groupId>
    <artifactId>thumbnailator</artifactId>
    <version>0.4.11</version>
</dependency>
单图缩放
支持设置输出格式和质量(0.0 ~ 1.0):
BufferedImage resizeImage(BufferedImage originalImage, int targetWidth, int targetHeight) throws Exception {
    ByteArrayOutputStream outputStream = new ByteArrayOutputStream();
    Thumbnails.of(originalImage)
        .size(targetWidth, targetHeight)
        .outputFormat("JPEG")
        .outputQuality(1)  // 质量 100%
        .toOutputStream(outputStream);
    byte[] data = outputStream.toByteArray();
    ByteArrayInputStream inputStream = new ByteArrayInputStream(data);
    return ImageIO.read(inputStream);
}
效果对比(人物照片):
批量处理
Thumbnailator 的批量处理功能非常实用,比如批量生成缩略图:
Thumbnails.of(new File("/images/photos").listFiles())
    .size(300, 300)
    .outputFormat("JPEG")
    .outputQuality(0.80)
    .toFiles(Rename.PREFIX_DOT_THUMBNAIL);
这会为目录下所有图片生成以 .thumbnail 为前缀的缩略图,简单粗暴。
✅ 支持格式:JPG, PNG, GIF, BMP, WBMP 等。
5. Marvin 图像处理框架
Marvin 是一个功能丰富的图像处理框架,支持基础操作(缩放、旋转、裁剪)和高级滤镜(模糊、浮雕、纹理等)。
添加依赖
<dependency>
    <groupId>com.github.downgoon</groupId>
    <artifactId>marvin</artifactId>
    <version>1.5.5</version>
    <type>pom</type>
</dependency>
<dependency>
    <groupId>com.github.downgoon</groupId>
    <artifactId>MarvinPlugins</artifactId>
    <version>1.5.5</version>
</dependency>
图像缩放示例
BufferedImage resizeImage(BufferedImage originalImage, int targetWidth, int targetHeight) {
    MarvinImage image = new MarvinImage(originalImage);
    Scale scale = new Scale();
    scale.load();
    scale.setAttribute("newWidth", targetWidth);
    scale.setAttribute("newHeight", targetHeight);
    scale.process(image.clone(), image, null, null, false);
    return image.getBufferedImageNoAlpha();
}
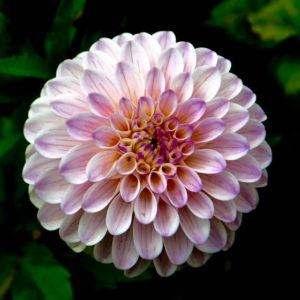
缩放效果(花卉图片):
⚠️ 缺点:
- API 略显繁琐,需手动 clone 图像
- 不支持细粒度缩放参数配置
- 性能一般,适合功能集成而非高频调用
6. 最佳实践与性能对比
图像处理是典型的 CPU 密集型操作,盲目追求画质可能导致性能瓶颈。以下是针对一张 1920x1920 图像缩放到 200x200 的性能测试结果(平均耗时):
| 方法 | 耗时(ms) | 推荐场景 |
|---|---|---|
Graphics2D |
34 | ✅ 高性能 + 可控质量 |
Image.getScaledInstance() |
235 | ❌ 仅用于简单 Demo |
| Imgscalr | 143 | ✅ 画质与性能平衡 |
| Thumbnailator | 547 | ✅ 画质优先,支持批量 |
| Marvin | 361 | ⚠️ 功能多但性能一般 |
关键建议
✅ 保持宽高比:缩放时注意维持原始图像比例,避免拉伸变形。可计算目标尺寸时使用:
double ratio = Math.min((double) targetWidth / originalWidth, (double) targetHeight / originalHeight);
int finalWidth = (int) (originalWidth * ratio);
int finalHeight = (int) (originalHeight * ratio);
✅ 按需选择库:
- 高并发服务 →
Graphics2D+ 自定义缓存 - 快速开发 →
Imgscalr - 生成高质量缩略图 →
Thumbnailator - 多种图像处理需求 →
Marvin
✅ 注意内存:大图缩放可能引发 OutOfMemoryError,建议:
- 使用
InputStream而非File加载 - 缩放后及时
dispose()图形资源 - 考虑异步处理或队列化
7. 总结
本文系统介绍了 Java 中图像缩放的多种实现方式:
- 原生
Graphics2D:性能最优,控制最细 getScaledInstance():简单但慢,不推荐生产使用- Imgscalr:综合表现最佳,推荐大多数场景
- Thumbnailator:API 友好,适合批量和高质量需求
- Marvin:功能全面,适合复杂图像处理
选择方案时应权衡 性能、画质、开发效率和维护成本。对于大多数 Web 应用,Imgscalr 或 Thumbnailator 是更优选择,避免自己造轮子踩坑。


