1. 概述
Visual Studio Code (VSCode) 编辑器在Java开发者中越来越受欢迎。根据Baeldung的调查,VSCode在Java开发者使用的集成开发环境(IDE)中排名第三。
虽然像Maven和Gradle这样的构建工具简化了依赖管理,但初学者在学习Java时往往不使用它们。VSCode提供了手动将JAR文件添加到Java项目的便捷设置。
本教程将学习如何通过settings.json和Referenced Libraries部分手动向VSCode项目添加JAR文件。
2. 为什么要手动添加JAR文件?
手动添加JAR文件对初学者来说是很好的学习体验,特别是学习类路径管理时。此外,对于小型项目和快速原型开发也很理想。另外,一些遗留代码可能需要手动管理JAR。
⚠️ 但手动管理JAR对于大型项目并不理想,因为:
- 难以管理依赖版本
- 容易产生版本冲突
- 维护成本高
构建工具如Maven和Gradle通过简化外部库的添加和更新过程解决了这些瓶颈。
3. 使用VSCode创建Java项目
在VSCode中创建Java应用,需要先安装Java Extension Pack。然后通过以下步骤操作:
- 打开命令面板:点击工具栏的View → 选择Command Palette,或使用快捷键Ctrl + Shift + P
- 输入"Java: Create Java Project"并选择
- 选择构建工具时,选择"No build tools"选项
- 输入项目名称并保存到指定目录
VSCode将创建如下结构的项目:
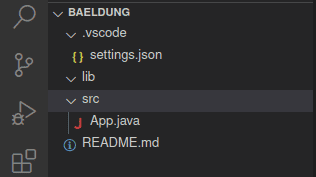
其中:
- .vscode 文件夹包含settings.json配置文件
- lib 文件夹用于存放外部JAR文件
- src 文件夹存放源代码
4. 通过settings.json添加JAR文件
创建项目后,项目会包含*.vscode文件夹,其中包含settings.json*文件。该文件允许我们指定外部依赖路径、编译类输出路径和源代码路径。手动管理依赖时,这个文件至关重要。
4.1 理解settings.json
settings.json管理项目设置,初始内容如下:
{
    "java.project.sourcePaths": ["src"],
    "java.project.outputPath": "bin",
    "java.project.referencedLibraries": [
        "lib/**/*.jar"
    ]
}
其中:
java.project.referencedLibraries:指定JAR文件路径- 值通常定义为数组以容纳多个路径
- 默认已注册lib文件夹,该目录下的JAR会自动加入类路径
4.2 添加JAR文件
修改默认生成的App类,使用SLF4J库输出日志:
class App {
    static Logger logger = LoggerFactory.getLogger(App.class);
    public static void main(String[] args) throws Exception {
        logger.info("Hello World!");
    }
}
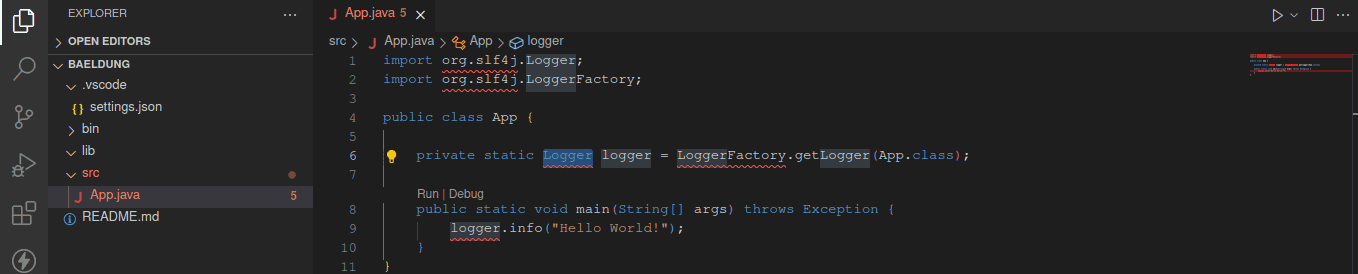
由于SLF4J库不在类路径中,VSCode会标记Logger对象为错误:
按以下步骤解决:
- 下载slf4j-api-2.1.0-alpha1.jar和slf4j-simple-2.1.0-alpha1.jar
- 将JAR文件放入lib文件夹:
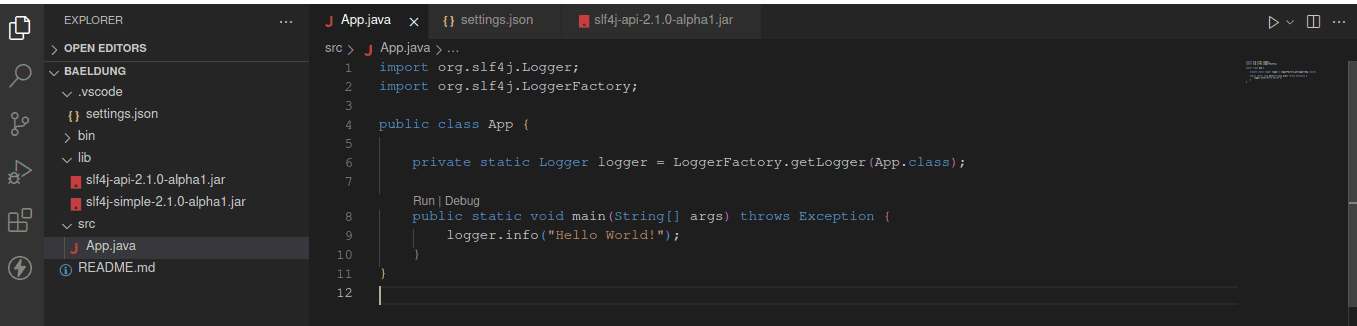
✅ 添加后即可正常导入依赖(因默认注册了lib文件夹)
如需引用其他位置的JAR文件,在settings.json中添加绝对路径:
{
    "java.project.sourcePaths": ["src"],
    "java.project.outputPath": "bin",
    "java.project.referencedLibraries": [
        "lib/**/*.jar",
        "/home/user/external_libs/slf4j-api-2.1.0-alpha1.jar",
        "/home/user/external_libs/slf4j-simple-2.1.0-alpha1.jar"
    ]
}
注意:路径需根据实际位置修改,示例中使用了
/home/user/external_libs/目录
5. 通过侧边栏选项添加JAR文件
VSCode在Java项目中默认会在侧边栏创建'JAVA PROJECTS'区域。展开后包含Referenced Libraries和JRE System Library选项:
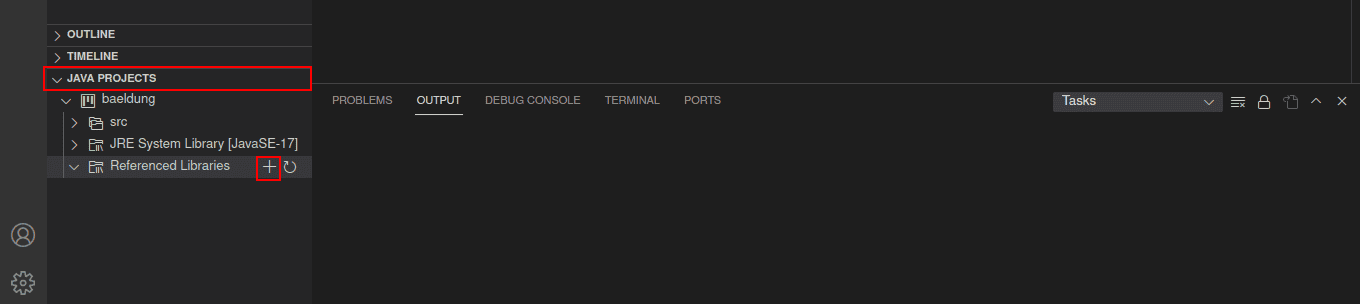
添加JAR文件的步骤:
- 点击Referenced Libraries旁边的加号(+)按钮
- 选择要添加的JAR文件:
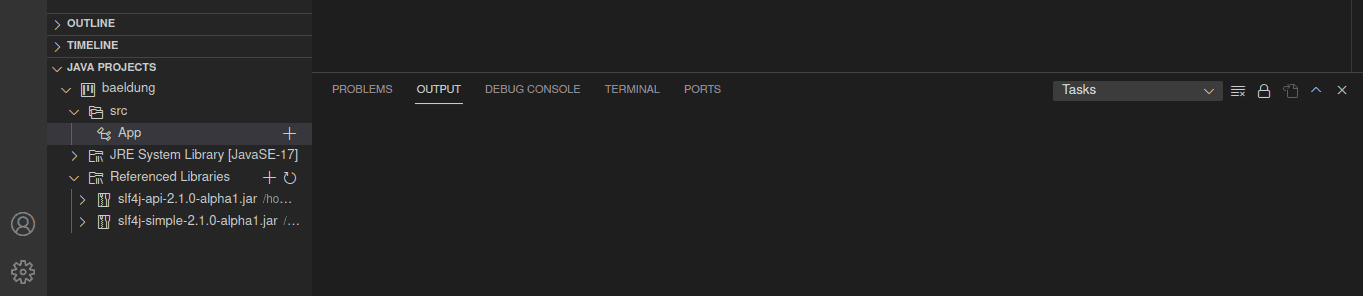
✅ 添加后:
- Referenced Libraries区域会更新显示新JAR
- settings.json文件会自动添加JAR路径
提示:通过settings.json添加JAR时,侧边栏也会同步更新
6. 总结
本文学习了在VSCode中创建无构建工具的Java项目,并通过两种方式添加外部JAR:
- 在settings.json中指定JAR路径
- 通过侧边栏的Referenced Libraries区域添加
虽然手动管理JAR适合小型项目和学习场景,但生产环境强烈推荐使用Maven/Gradle以避免版本冲突和管理难题。