1. Overview
While Linux and Android share a lot of features, desktop devices rarely use Android. So, to integrate the two operating systems, we might want to control an Android mobile device with a Linux system for tasks like testing an app, transferring data, mirroring screens, or other purposes. Luckily, there are many open-source tools available that enable users to control an Android phone with Linux without requiring any complex setup or root permission on the phone.
In this tutorial, we’ll explore two popular tools, Scrcpy and KDE Connect, to control an Android device from a Linux system.
2. Scrcpy
Scrcpy is an open-source, high-performance tool that enables mirroring and control of an Android device like a phone using Linux. It doesn’t require root permissions on Android or even the installation of any app on the mobile device.
2.1. Install via Package
Before installing Scrcpy on Linux, we must install ADB (Android Debug Bridge). To install ADB, we can execute a command that depends on the Linux distribution.
For Debian, let’s employ apt:
$ sudo apt install adb -y
Afterward, let’s install Scrcpy on Linux using this snap command:
$ snap install scrcpy
However, the above Snap command might not install the latest version of Scrcpy on the system.
If we require the newest features like audio forwarding, we can install Scrcpy via its source code and get the most recent version.
2.2. Install From Sources
To install from the sources, we first get the Scrcpy dependencies:
$ sudo apt install ffmpeg libsdl2-2.0-0 adb wget \
    gcc git pkg-config meson ninja-build libsdl2-dev \
    libavcodec-dev libavdevice-dev libavformat-dev libavutil-dev \
    libswresample-dev libusb-1.0-0 libusb-1.0-0-dev
Next, we clone the Scrcpy repository via the git clone command:
$ git clone https://github.com/Genymobile/scrcpy
Cloning into 'scrcpy'...
...
Receiving objects: 100% (32870/32870), 6.00 MiB | 680.00 KiB/s, done.
Resolving deltas: 100% (21715/21715), done.
Then, we’ve to navigate to the scrcpy directory:
$ cd scrcpy
Next, we execute the installation script to install Scrcpy:
$ ./install_release.sh
[scrcpy] Downloading prebuilt server...
--2024-06-14 12:48:28--  https://github.com/Genymobile/scrcpy/releases/download/v2.4/scrcpy-server-v2.4
...
Finally, let’s execute the scrcpy -v command to verify the success of the installation:
$ scrcpy -v
scrcpy 2.4 <https://github.com/Genymobile/scrcpy>
 ...
Here, we can see that the latest version of Scrcpy has been successfully installed.
2.3. Set Up Android Device
Now, to connect the Android device with Linux, we enable the Developer options and USB debugging option.
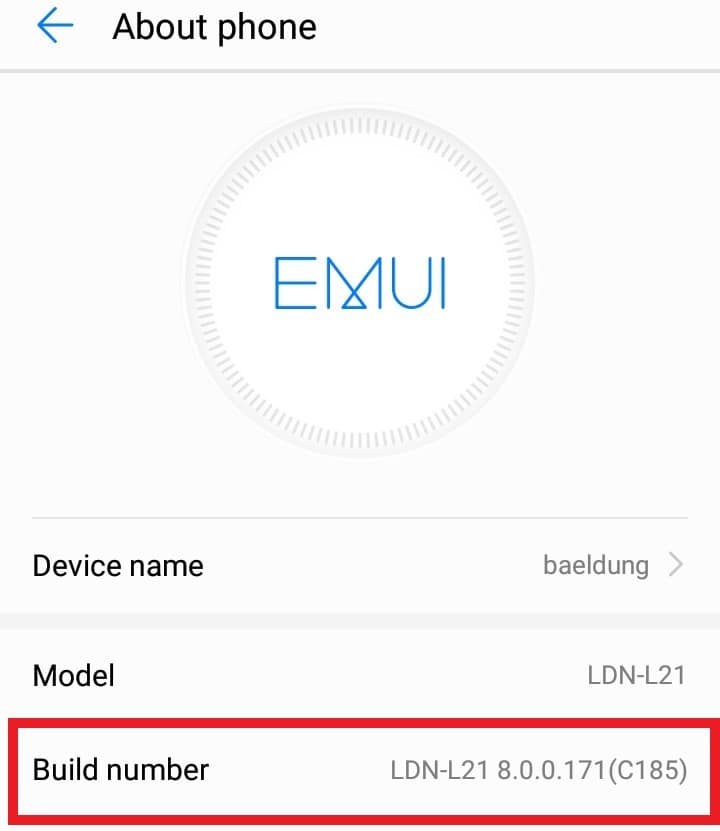
While this can happen in different ways, on the demo device, let’s go to Settings > System > About Phone and tap on the Build Number option multiple times until the Developer mode is enabled notification appears on the screen:
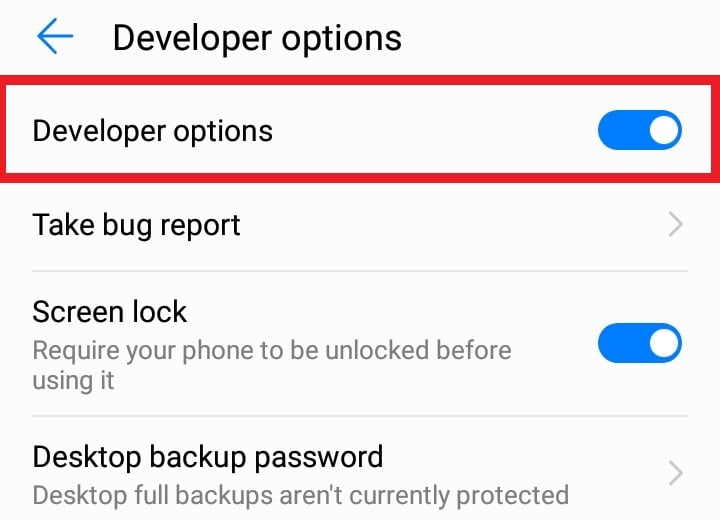
Now, we head to Settings > System > Developer options and enable Developer options and USB debugging options:
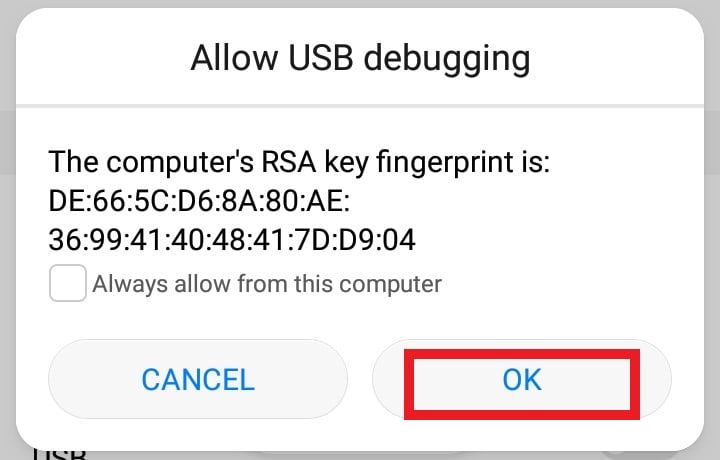
Next, we connect Android to the Linux system using a USB cable. We should see an Allow USB debugging prompt on Android. Here, we press OK:
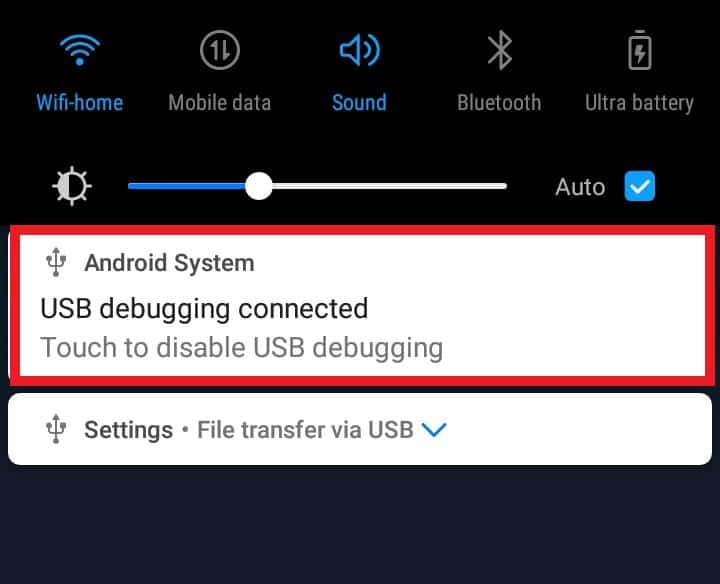
Finally, we are presented with a USB debugging connected notification on the Android device:
We can now connect from Linux to Android via a USB cable or wirelessly.
2.4. Connect to Android Device
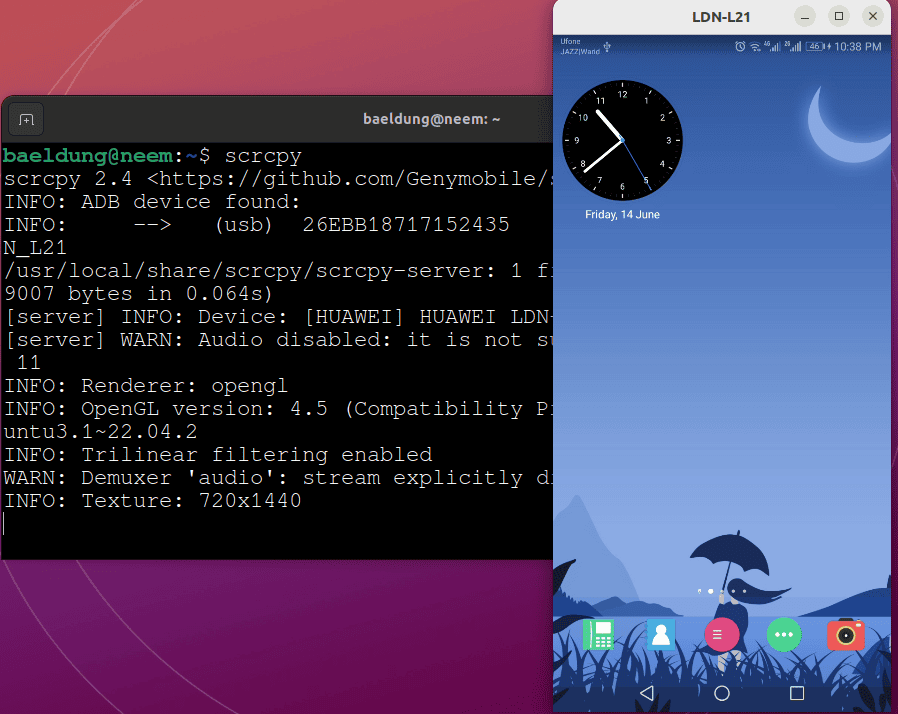
To connect to Android via USB cable, we run the scrcpy command in the Linux terminal:
$ scrcpy
Thus, we mirror the screen, so that we can easily control it:
However, if we want to connect to Android wirelessly, we first need to know the IP address of the Android device. We can check it by running this adb command:
$ adb shell ip route
192.168.1.0/24 dev wlan0  proto kernel  scope link  src 192.168.1.121
Notably, both Android and Linux should be connected to the same network. Moreover, Android is connected to Linux via a USB cable.
Afterward, we configure an unused port for the TCP/IP connection between the two devices:
$ adb tcpip 4500
Next, we disconnect the USB cable and execute the adb command with the Android IP address and configured port number to establish a connection:
$ sudo adb connect 192.168.1.121:4500
connected to 192.168.1.121:4500
Finally, we run the scrcpy command:
$ scrcpy
At this point, Linux mirrors the Android screen wirelessly:
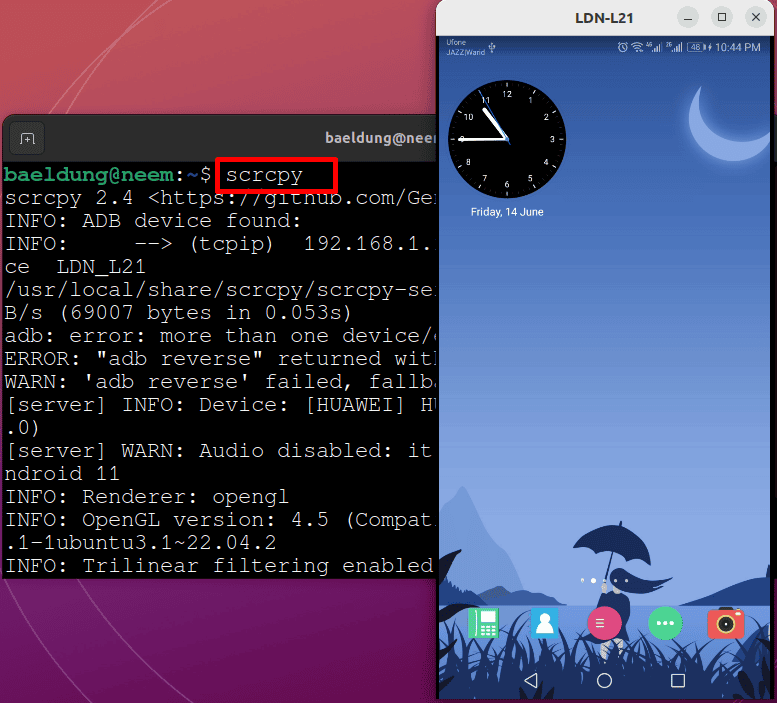
Thus, we can fully control the Android device.
2.5. Control Session Options
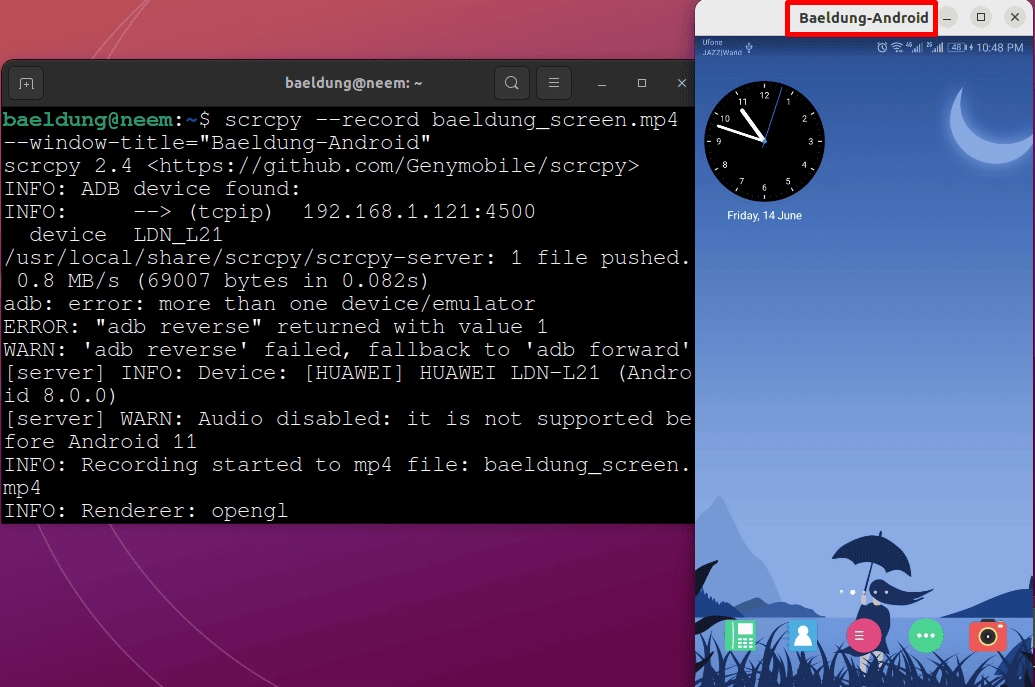
We can record the Android screen using the –record option and also change the window title via the –window-title option of the scrcpy command:
$ scrcpy --record baeldung_screen.mp4 --window-title="Baeldung-Android"
scrcpy 2.4 <https://github.com/Genymobile/scrcpy>
...
INFO: Recording complete to mp4 file: baeldung_screen.mp4
In this case, when we end the session, the screen recording is stored in the baeldung_screen.mp4 file:
Additionally, we can limit the session time using the –time-limit option:
$ scrcpy --time-limit=4
scrcpy 2.4 <https://github.com/Genymobile/scrcpy>
...
INFO: Time limit reached
WARN: Killing the server...
Moreover, we can obtain the Android device camera information using the –list-cameras option:
$ scrcpy --list-cameras
scrcpy 2.4 <https://github.com/Genymobile/scrcpy>
...
[server] INFO: List of cameras:
    --camera-id=0    (back, 4208x3120, fps=[15, 20, 24, 30])
    --camera-id=1    (front, 3264x2448, fps=[15, 20, 24, 30])
    --camera-id=2    (back, 1600x1200, fps=[15, 20, 24, 30])
There are many other options that Scrcpy offers to control Android with Linux seamlessly.
3. KDE Connect
KDE Connect is an open-source tool that enables users to connect their Android phone to a Linux system and perform various actions, including file transfer.
3.1. Installation
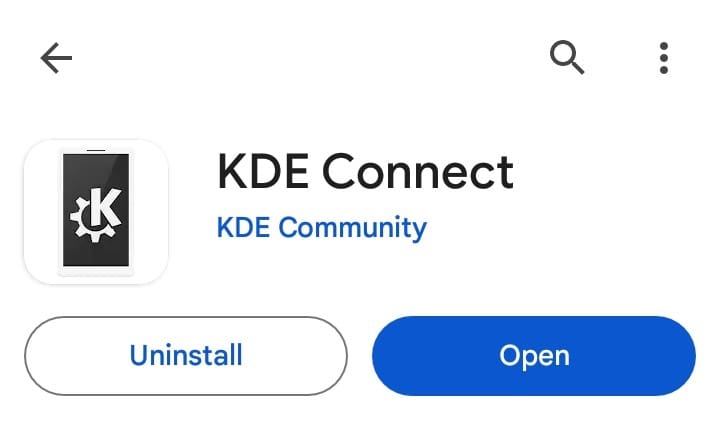
To use KDE Connect, we install its Android app via the Google Play Store on the Android device:
Next, we also install KDE Connect on the Linux system:
$ sudo apt install kdeconnect -y
Reading package lists... Done
Building dependency tree... Done
Reading state information... Done
...
Alternatively, we can build the application from its source code using CMake.
3.2. Connect to Android Device
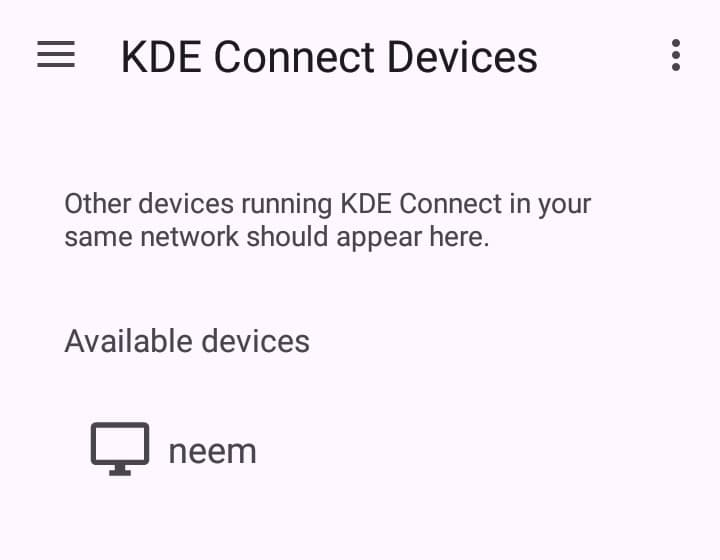
Let’s now connect the Android device with Linux by opening the KDE Connect application on both devices.
The Android app should automatically detect the Linux system:
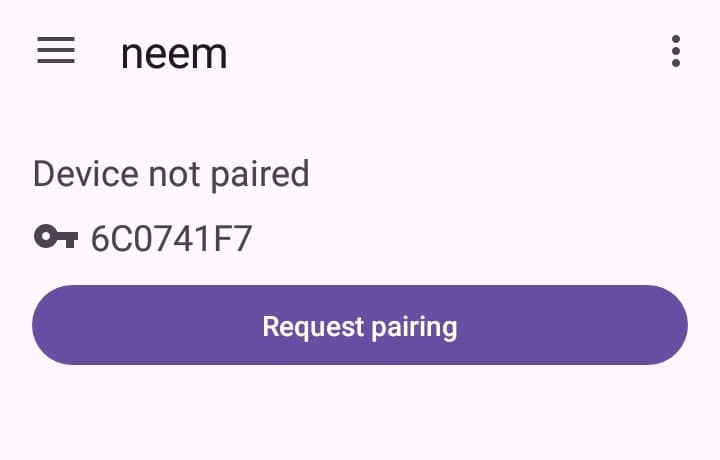
Next, we click on the Linux device name and press the Request Pairing button:
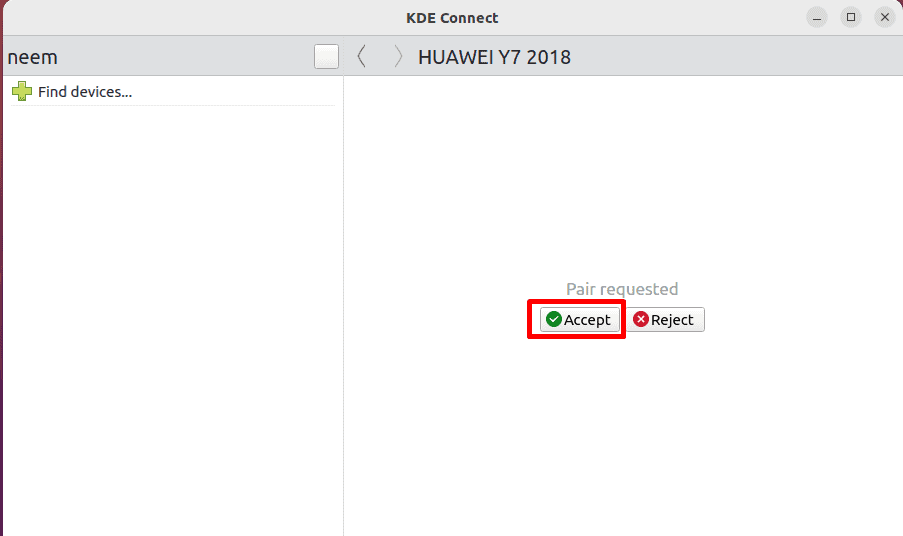
Now, on the Linux KDE Connect application, we press the Accept button:
Thus, the Android device should connect with Linux:
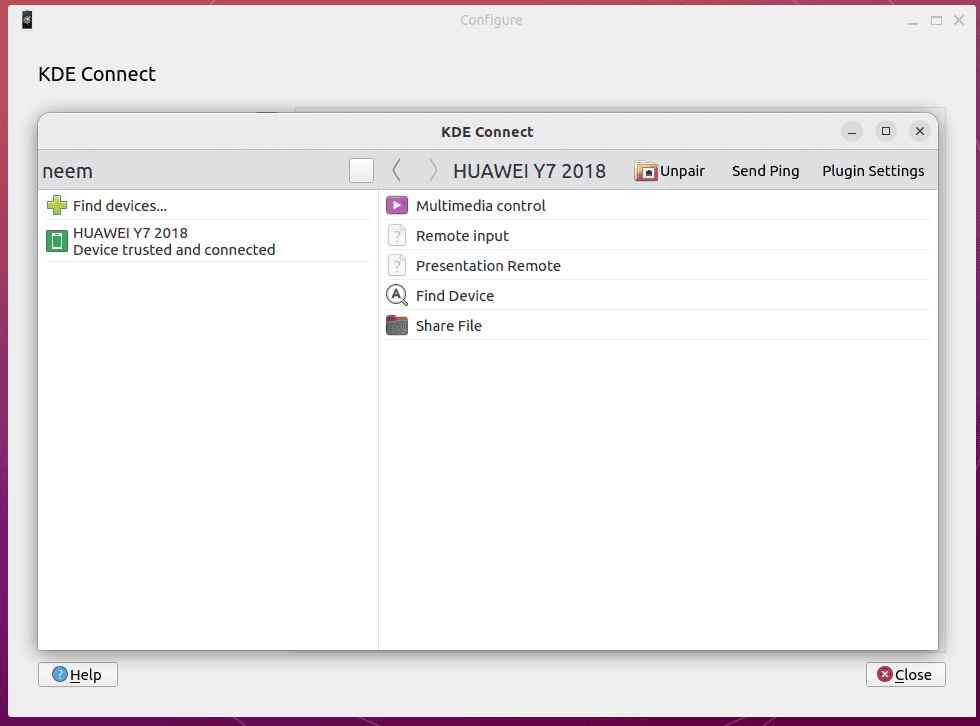
At this point, a connection is established.
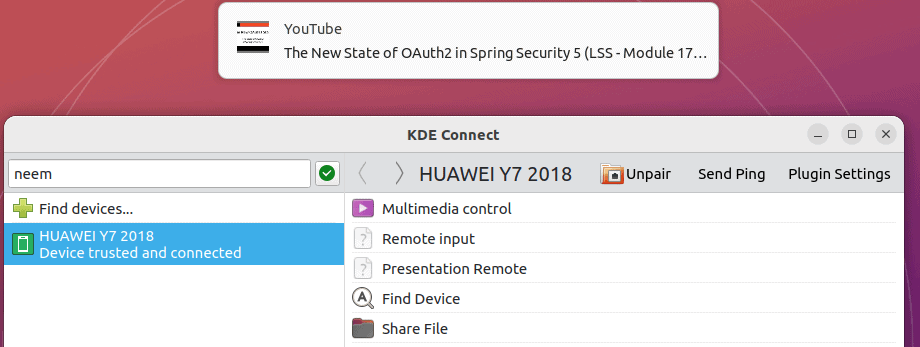
3.3. Control Session Activities
There are many functions that KDE Connect offers.
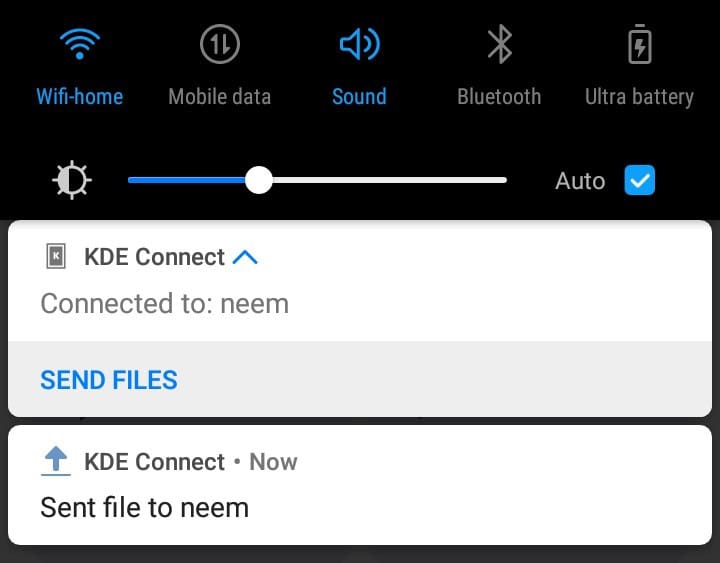
For instance, we can transfer files from Android to Linux:
Moreover, we can locate the Android device by pressing the Find Device option from the Linux KDE Connect application. This action rings the Android device, thereby enabling us to find it if misplaced:

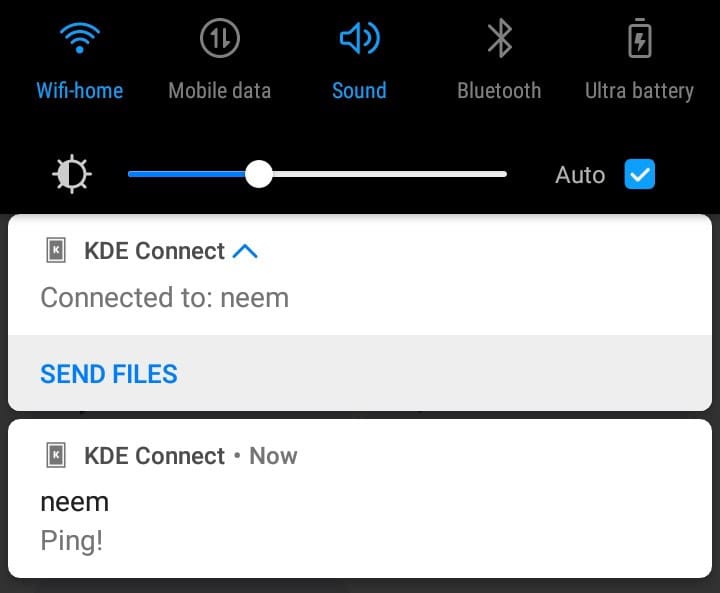
Additionally, we can also ping both devices:
Furthermore, KDE Connect fetches Android notifications to make them available on the Linux device in real-time:
This way, we can continuously extract information from the Android device.
4. Scrcpy and KDE Connect
Scrcpy and KDE Connect are popular tools for controlling Android devices using Linux. However, each has its unique features and purpose. So, we can leverage either or both of them depending on the use case.
Let’s outline a comparison between both solutions to get a better idea about their applicability to a certain case:
Attribute
Scrcpy
KDE Connect
Purpose
Mirror the screen and control Android from Linux
Integrate and monitor Android from Linux
Features
Real-time screen mirroring
Screen recording
Audio forwarding
Control Android via mouse and keyboard
Camera mirroring
Shared clipboard
Mirroring as webcam
File sharing
Android notification syncing
Control multimedia remotely
Presentation remote
Reply to SMS from Linux
Locate phone
Android as a virtual keypad
Connection Method
USB and Wireless connection (via TCP/IP)
Wireless connection
Supported Platforms
Linux, Windows, and macOS
Linux, Windows, macOS, and BSD
Setup
Install ADB and Scrcpy on Linux and enable Developer options and USB debugging on Android. Then, connect them both using a USB cable or wirelessly.
Install KDE Connect on Android and Linux and connect them using the same Wi-Fi network.
In general, Scrcpy is more tailored towards direct interaction, while KDE Connect is suited for specific functions.
5. Conclusion
In this article, we used Scrcpy and KDE Connect to control an Android device using Linux. Scrcpy enables users to mirror and record their Android screen from Linux and also control it via mouse and keyboard. On the other hand, KDE Connect enables communication between both devices, such as transferring files and syncing notifications.