1. Introduction
APT (Advanced Package Tool) is a package manager for Debian-based Linux distributions like Ubuntu. It utilizes software repositories, which are online libraries of pre-compiled packages. APT automates the download, resolution of dependencies, and configuration of these packages, making software management on these systems efficient.
In contrast to the standard online repositories used by package managers like APT in Debian-based systems, local APT repositories are locally hosted collections of software packages. They offer several advantages, particularly for organizations managing multiple systems. Local repositories are useful controlled environments, testing cases, offline installations, and reduced bandwidth usage.
In this tutorial, we’re going to explore several ways to set up a Local APT repository:
- with dpkg-scanpackages
- over LAN with Apache
- with reprepro and Apache
- with apt-mirror
We’ll discuss each of the above methods in detail. Notably, some of these methods require a client machine for testing purposes. All commands in this tutorial have been tested on Ubuntu 20.04.
2. Setting Up a Local APT Repository With dpkg-scanpackages
One of the simplest yet effective methods to create a local repository is the dpkg-scanpackages tool. This utility, part of the dpkg suite, enables us to generate the necessary metadata for a collection of .deb packages, effectively turning any directory into a functional Debian repository.
By following a few fairly straightforward steps, we can create a repository that’s easily accessible to APT. This enables installing and managing local packages alongside those from official sources.
2.1. Install dpkg-dev and Create Package Directory
The dpkg-scanpackages utility is a command-line tool used in Debian-based systems to create package indexes for a local repository.
Although this utility is typically installed by default, we might have to install it through the dpkg-dev package:
$ sudo apt-get install dpkg-dev
Once installed, we can now create a directory at /usr/local/repos to store the .deb packages:
$ sudo mkdir -p /usr/local/repos
For this tutorial, we use the nginx .deb package. Let’s navigate to the repos directory and download it from source:
$ cd /usr/local/repos
$ sudo wget http://archive.ubuntu.com/ubuntu/pool/main/n/nginx/nginx_1.22.0-1ubuntu3_amd64.deb
...

nginx_1.22.0-1ubuntu3_amd64.deb   100%[===========================================================>]   3.87K  --.-KB/s    in 0s

2024-07-22 07:08:35 (104 MB/s) - ‘nginx_1.22.0-1ubuntu3_amd64.deb’ saved [3966/3966]
Alternatively, we can copy previously downloaded packages .deb packages available in the /var/cache/apt/archives/ directory to the repos directory:
$ sudo cp /var/cache/apt/archives/<package> /usr/local/repos/
Hence, we’ve successfully added a .deb package to the new package directory.
2.2. Configuring Local Repository
Now, let’s generate the Packages.gz zip file from the package(s) in the repos directory and compress it:
$ dpkg-scanpackages . /dev/null | gzip -9c | sudo tee Packages.gz > /dev/null
dpkg-scanpackages: warning: Packages in archive but missing from override file:
dpkg-scanpackages: warning:   nginx
dpkg-scanpackages: info: Wrote 1 entries to output Packages file.
Now, let’s add the repos directory path to sources.list:
$ echo "deb [trusted=yes] file:/usr/local/repos ./" | sudo tee -a /etc/apt/sources.list
deb [trusted=yes] file:/usr/local/repos ./
It’s good practice to verify that the appended directory path is in the sources.list file:
$ tail -5 /etc/apt/sources.list
deb http://security.ubuntu.com/ubuntu focal-security universe
# deb-src http://security.ubuntu.com/ubuntu focal-security universe
deb http://security.ubuntu.com/ubuntu focal-security multiverse
# deb-src http://security.ubuntu.com/ubuntu focal-security multiverse
deb [trusted=yes] file:/usr/local/repos ./
Finally, we update the package cache:
$ sudo apt-get update
Get:1 file:/usr/local/repos ./ InRelease
Ign:1 file:/usr/local/repos ./ InRelease
Get:2 file:/usr/local/repos ./ Release
Ign:2 file:/usr/local/repos ./ Release
Get:3 file:/usr/local/repos ./ Packages
Ign:3 file:/usr/local/repos ./ Packages
...
The output above shows APT fetches packages from the repos directory we created.
Additionally, we can confirm APT has recognized the local repository by checking the availability of the nginx package:
$ apt-cache policy nginx
nginx:
  Installed: (none)
  Candidate: 1.22.0-1ubuntu3
  Version table:
     1.22.0-1ubuntu3 500
        500 file:/usr/local/repos ./ Packages
     1.18.0-0ubuntu1.5 500
As seen above, the local repository is now visible to APT.
3. Setting Up a Local Repository Over LAN With Apache
In this method, we set up a local repository similar to the previous section but with the Apache Web server.
Setting up a local repository with a Web server enables us to host the Debian packages over HTTP, making them accessible to multiple machines on the network.
3.1. Install Apache and Setup Package Repository
To begin, let’s install Apache:
$ sudo apt install apache2
By default, Apache serves the /var/www/html directory. Hence, let’s create the package directory named repos in this path:
$ sudo mkdir -p /var/www/html/repos
However, we have to create another directory based on the server architecture (amd64 or i386):
$ sudo mkdir -p /var/www/html/repos/amd64
Hence, we’ve successfully installed Apache and set up the package directory.
3.2. Add Local Repository to APT
Now, we copy a .deb package to the amd64 directory.
For this example, let’s use the amd64 version of the postfix package:
$ cd /var/www/html/repos/amd64
$ sudo wget http://archive.ubuntu.com/ubuntu/pool/main/p/postfix/postfix_2.11.0-1_amd64.deb
--2024-07-23 03:41:29--  http://archive.ubuntu.com/ubuntu/pool/main/p/postfix/postfix_2.11.0-1_amd64.deb
Resolving archive.ubuntu.com (archive.ubuntu.com)... 185.125.190.81, 185.125.190.83, 91.189.91.81, ...
Connecting to archive.ubuntu.com (archive.ubuntu.com)|185.125.190.81|:80... connected.
HTTP request sent, awaiting response... 200 OK
Length: 1085128 (1.0M) [application/vnd.debian.binary-package]
Saving to: ‘postfix_2.11.0-1_amd64.deb’

postfix_2.11.0-1_amd64.deb        100%[===========================================================>]   1.03M   756KB/s    in 1.4s

2024-07-23 03:41:36 (756 KB/s) - ‘postfix_2.11.0-1_amd64.deb’ saved [1085128/1085128]
Next, we create the Packages.gz file via dpkg-scanpackages:
$ dpkg-scanpackages . /dev/null | gzip -9c | sudo tee Packages.gz > /dev/null
dpkg-scanpackages: warning: Packages in archive but missing from override file:
dpkg-scanpackages: warning:   postfix
dpkg-scanpackages: info: Wrote 1 entries to output Packages file.
Optionally, we can create a Release file to contain the repository metadata:
$ echo "Origin: Baeldung Repository" | sudo tee Release
$ echo "Label: Baeldung Label" | sudo tee -a Release
$ echo "Suite: stable" | sudo tee -a Release
$ echo "Codename: local" | sudo tee -a Release
$ echo "Architectures: amd64 i386" | sudo tee -a Release
$ echo "Components: main" | sudo tee -a Release
$ echo "Description: This is a local Repository" | sudo tee -a Release
Since we’ve set up the local repository, let’s add the path to sources.list:
$ echo "deb [trusted=yes] http://localhost/repos/ amd64/" | sudo tee -a /etc/apt/sources.list
deb [trusted=yes] http://localhost/repos/ amd64/
Then, we update the package cache:
$ sudo apt-get update
Ign:1 http://localhost/repos amd64/ InRelease
Get:2 http://localhost/repos amd64/ Release [106 B]
Ign:3 http://localhost/repos amd64/ Release.gpg
Ign:4 http://localhost/repos amd64/ Packages
...
The command output shows that APT now recognizes the local repository hosted with Apache.
Let’s confirm the availability of the postfix package using the apt-cache policy command:
$ apt-cache policy postfix
postfix:
  Installed: (none)
  Candidate: 3.4.13-0ubuntu1.4
  Version table:
...
     3.4.10-1ubuntu1 500
        500 http://archive.ubuntu.com/ubuntu focal/main amd64 Packages
     2.11.0-1 500
        500 http://localhost/repos amd64/ Packages
Alternatively, we can download and view the local repository by entering the server’s IP address with the repos/amd64 path in a Web browser:
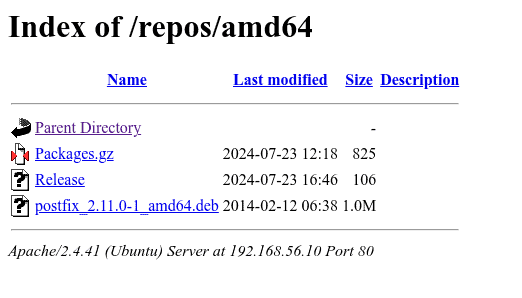
Hence, we’ve successfully set up a local repository over LAN with Apache.
4. Setting Up a Local APT Repository with reprepro and Apache
reprepro is a tool used in Debian-based Linux distributions for managing local repositories of software packages. It helps system administrators and developers create, maintain, and distribute custom repositories. Additionally, reprepro can sign packages and generate repository metadata.
In this method, we set up a local repository with repropro and make it available on the Internet to client machines using Apache.
4.1. Install reprepro and Generate GPG key
To begin, let’s log in to the server as the root user and install the reprepro package:
$ apt-get install reprepro
Next, we install gnupg and dpkg-sig packages for key generation and signing of the Debian packages:
$ apt-get install gnupg dpkg-sig
Once installed, we can now generate the key with –gen-key option:
$ gpg --gen-key
gpg (GnuPG) 2.2.19; Copyright (C) 2019 Free Software Foundation, Inc.
This is free software: you are free to change and redistribute it.
There is NO WARRANTY, to the extent permitted by law.

gpg: directory '/root/.gnupg' created
gpg: keybox '/root/.gnupg/pubring.kbx' created
Note: Use "gpg --full-generate-key" for a full featured key generation dialog.

GnuPG needs to construct a user ID to identify your key.

Real name: baeldung
Email address: [email protected]
You selected this USER-ID:
    "baeldung <[email protected]>"

Change (N)ame, (E)mail, or (O)kay/(Q)uit? O
...
gpg: /root/.gnupg/trustdb.gpg: trustdb created
gpg: key 5CCAC30D1DBB40EC marked as ultimately trusted
gpg: directory '/root/.gnupg/openpgp-revocs.d' created
gpg: revocation certificate stored as '/root/.gnupg/openpgp-revocs.d/83CB92A14380717980A148445CCAC30D1DBB40EC.rev'
public and secret key created and signed.

pub   rsa3072 2024-07-24 [SC] [expires: 2026-07-24]
      83CB92A14380717980A148445CCAC30D1DBB40EC
uid                      baeldung <[email protected]>
sub   rsa3072 2024-07-24 [E] [expires: 2026-07-24]
For this example, let’s download and use the amd64 version of the powertop package:
$ wget http://archive.ubuntu.com/ubuntu/pool/main/p/powertop/powertop-dbg_2.9-0ubuntu1_amd64.deb
Once the download is complete, we sign the package with the dpkg-sig utility:
$ export GPG_TTY=$(tty)
$ dpkg-sig --sign builder powertop-dbg_2.9-0ubuntu1_amd64.deb
Processing powertop-dbg_2.9-0ubuntu1_amd64.deb...
Signed deb powertop-dbg_2.9-0ubuntu1_amd64.deb
Hence, we’ve successfully signed the powertop package.
4.2. Configuring Local Repository
Let’s create file system layouts that support the distribution (like Debian or Ubuntu) we’re using:
$ mkdir -p /var/packages/ubuntu
$ mkdir /var/packages/ubuntu/conf
$ mkdir -p /var/packages/debian
$ mkdir /var/packages/debian/conf
To create a local repository, reprepo searches for four configuration files in the directory provided with the –confdir option or within the conf/ subdirectory of the base directory:
- distributions: defines managed distributions
- options: sets global configuration options for all distributions
- updates: syncs with external repositories
- pulls: syncs within the same reprepro database
Let’s create the distributions file in the conf directory:
$ cat /var/packages/ubuntu/conf/distributions
Origin: baeldung.com
Label: baeldung.com
Codename: precise
Architectures: i386 amd64 source
Components: main
Description: Baeldung Local APT Repository
SignWith: yes
DebOverride: override.precise
DscOverride: override.precise
Save and exit the file. Next, we create the options file:
$ cat /var/packages/ubuntu/conf/options
verbose
ask-passphrase
basedir .
We can skip the updates and pulls files, as they are not necessary in this case.
Finally, let’s create an empty override.precise file:
$ touch /var/packages/ubuntu/conf/override.precise
Thus, we’ve successfully configured the local repository to be ready for use by reprepro.
4.3. Build Local Repository and Add Packages
Now, let’s the downloaded powertop package to the repository via reprepro:
$ cd /var/packages/ubuntu
$ reprepro includedeb precise /root/powertop-dbg_2.9-0ubuntu1_amd64.deb
/root/powertop-dbg_2.9-0ubuntu1_amd64.deb: component guessed as 'main'
Exporting indices...
We can verify the result by listing the packages in the repository:
$ reprepro list precise
precise|main|amd64: powertop-dbg 2.9-0ubuntu1
Additionally, we delete packages from the repository using the remove command:
$ reprepro remove precise <package>
Hence, we’ve successfully built and added a package to the local repository with reprepro.
4.4. Configuring Repository Access Using Apache VirtualHost
One of the best ways to configure access to the repository is using Apache.
So, let’s configure a virtual host in the Apache configuration repo.conf file:
$ cat /etc/apache2/sites-available/repo.conf
<VirtualHost *:80>
    DocumentRoot /var/packages
    ServerName <server_ip>

    ErrorLog /var/log/apache2/error.log
    CustomLog /var/log/apache2/access.log combined
    LogLevel warn

    ServerSignature On

    <Directory "/var/packages">
        Options Indexes FollowSymLinks MultiViews
        DirectoryIndex index.html
        Require all granted
    </Directory>

    <Directory "/var/packages/*/conf">
        Require all denied
    </Directory>

    <Directory "/var/packages/*/db">
        Require all denied
    </Directory>
</VirtualHost>
Once ready, let’s enable the site:
$ a2ensite repo.conf
Enabling site repo.
..
Then, we activate the configuration with a reload of the apache2 service:
$ systemctl reload apache2
However, since we signed the packages with a gpg key, client machines have to download that same key. So, let’s place it in the root of the Apache Web server:
$ cd /var/packages/
$ gpg --armor --output local-packages.key --export [email protected]
As seen above, we store the key in the local-packages.key file.
4.5. Connecting Client Machine
To connect a client, we first ensure the correct local-packages.key file is available locally:
$ curl -H GET <server_ip>/local-packages.key > local-packages.key
  % Total    % Received % Xferd  Average Speed   Time    Time     Time  Current
                                 Dload  Upload   Total   Spent    Left  Speed
100  2448  100  2448    0     0  1195k      0 --:--:-- --:--:-- --:--:-- 1195k
Then, we add it to the apt repository key ring:
$ apt-key add local-packages.key
OK
Next, we update the sources.list file with the repository link:
$ echo "deb http://<server_ip>/ubuntu precise main" | sudo tee -a /etc/apt/sources.list
$ echo "deb http://<server_ip>/ubuntu precise main" | sudo tee -a /etc/apt/sources.list
Let’s attempt an update:
$ apt-get update
Hit:1 http://<server_ip>/ubuntu precise InRelease
Get:2 http://security.ubuntu.com/ubuntu focal-security InRelease [128 kB]
...
Thus, we verify that apt recognizes the local repository, let’s update the package cache.
5. Setting Up a Local APT Repository With apt-mirror
apt-mirror is a tool that creates local copies of remote Ubuntu or Debian repositories. It retrieves all packages, including binaries and source files.
It’s flexible and enables us to choose which repositories to mirror. Creating a local copy reduces Internet bandwidth usage for multiple machines on a network.
5.1. Install Apache and Configure Package directory
To begin with, we acquire a Web server like Apache or Nginx to serve the local repository.
For this example, let’s install the apache2 Web server:
$ sudo apt-get install apache2
apache2 service starts automatically after installation by default.
Next, we create a package directory named ubuntu for the local repository under /var/www/html/:
$ sudo mkdir -p /var/www/html/ubuntu
Hence, we’ve installed Apache and configured the package directory.
5.2. Install and Configure apt-mirror
Now, let’s install the apt-mirror utility:
$ sudo apt-get install apt-mirror
Once installed, apt-mirror stores its configuration in the /etc/apt/mirror.list file. We edit this file and set the base_path variable to the newly created /var/www/html/ubuntu directory.
In this case, we use vim to edit /etc/apt/mirror.list:
$ sudo vim /etc/apt/mirror.list
Then, we update the base_path variable and comment out the deb-src repositories to minimize download size:
############# config ##################
#
set base_path    /var/www/html/ubuntu
...
set nthreads     20
set _tilde 0
#
############# end config ##############

deb http://archive.ubuntu.com/ubuntu focal main restricted universe multiverse
deb http://archive.ubuntu.com/ubuntu focal-security main restricted universe multiverse
deb http://archive.ubuntu.com/ubuntu focal-updates main restricted universe multiverse
...
#deb-src http://archive.ubuntu.com/ubuntu focal main restricted universe multiverse
clean http://archive.ubuntu.com/ubuntu
At this point, we should be good to go.
5.3. Verify Setup
After saving the file, we can now mirror the remote packages:
$ sudo apt-mirror
Downloading 114 index files using 20 threads...
...
Processing translation indexes: [TTT]

Downloading 555 translation files using 20 threads...
...
Processing DEP-11 indexes: [DDD]

Downloading 88 dep11 files using 20 threads...
...
Processing cnf indexes: [CCC]

Downloading 24 cnf files using 20 threads...
...
Processing indexes: [PPP]

466.2 GiB will be downloaded into archive.
Downloading 103454 archive files using 20 threads...
Begin time: Thu Jul 25 01:39:33 2024
Notably, the mirroring process usually takes a lot of time, so we can execute the mirror process in the background using the nohup command:
$ nohup sudo apt-mirror &
Then, we monitor with the tail command:
$ tail nohup.out
Once the mirror is complete, the mirrored packages should be in the ubuntu directory:
$ ls -l /var/www/html/ubuntu/
total 20
drwxr-xr-x 3 root root  4096 Jul 25 01:39 mirror
drwxr-xr-x 3 root root  4096 Jul 25 01:16 skel
drwxr-xr-x 2 root root 12288 Jul 25 01:39 var
These packages are also accessible via the Web browser on the http://<server_ip>/ubuntu/ path:
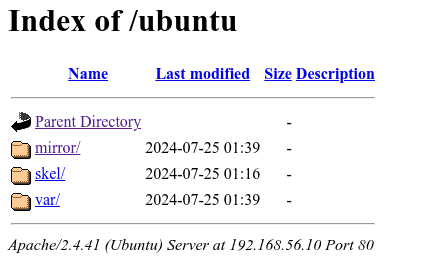
Hence, we’ve successfully created a local APT repository using apt-mirror.
5.4. Scheduling Mirroring With a Cron Job
To keep the local repository up-to-date, it’s recommended we set up a cron job and run apt-mirror periodically, optimally when the bandwidth usage is low.
For this example, let’s update the mirror daily at 1:00 AM using crontab:
$ sudo crontab -e
00  01  *  *  *  /usr/bin/apt-mirror
Hence, we’ve successfully scheduled mirroring to ensure updates in the local repository.
6. Conclusion
In this article, we’ve learned how to create local APT repositories to enhance package management in Debian-based environments like Ubuntu.
In particular, we explored several ways to create local APT repositories using tools such as dpkg-scanpackages, apache2, reprepro, and apt-mirror. Although each approach works, which one we choose mainly depends on the environment and requirements.