1. Introduction
BIOS (Basic Input/Output System) is the software that manages the computer’s hardware. The device manufacturer typically packages it. The processing of updating BIOS is sometimes referred to as flashing.
In this tutorial, we’ll see how we can update/flash the BIOS:
2. Why Do We Need to Update the BIOS?
2.1. Performance and Stability
BIOS updates can include improvements in power management. This can increase the system’s efficiency and counter issues such as lag or freezing.
2.2. Security
Throughout a product’s lifetime, hardware vendors are always looking for vulnerabilities that might affect their customers’ computing environment. Companies like Intel and AMD regularly publish security advisories (bug fixes) and security briefs for their products.
This consequently translates into the updates for a consumer’s BIOS, which are normally distributed by the PC manufacturer.
2.3. New Capabilities
Advances in technology normally imply new ways to exploit a device’s capabilities. Consumers can take advantage of these new features through a BIOS update.
Additionally, updates may sometimes be meant to fix hardware compatibility issues.
3. Precautions
Before updating the BIOS, some safety measures must be taken. Otherwise, our computer could be rendered unusable.
3.1. Power Supply
We first need to ensure that our PC is plugged in during the entire process. If we use a desktop, we should connect to a UPS (Uninterruptible Power Supply). A power interruption could damage the motherboard and make it inoperable.
Needless to say, we shouldn’t attempt to switch off the system while the update operation is taking place.
3.2. Vendor-Specific Advice
We must also consult with our hardware manufacturer’s page for our specific computer model. For instance, Dell advises that we sequentially upgrade the BIOS to avoid potential compatibility issues that could arise by skipping intermediate upgrades.
4. Updating the BIOS
Finally, let’s see how we can get a newer version of our BIOS.
4.1. Linux Vendor Firmware Service (LVFS)
LVFS is a service that hosts firmware updates from various OEMs (Original Equipment Manufacturers) and ODMs ( Original Design Manufacturers ) such as Dell, HP, Lenovo, and many others. We can search for supported devices from here.
LVFS allows vendors to upload their firmware as a .cab file at no cost. End users can also freely query the registry for the latest updates.
Before updating our BIOS, we can also check for the current BIOS info using tools like dmidecode. To do a firmware update, we can use several clients, such as the fwupd daemon or a GUI software manager like GNOME Software. Here’s a list of fwupd graphical tools for various desktop environments.
We’ll be using the fwupd commandline tool here (called fwupdmgr). This tool should already be installed by default and started at booting. If not, we can download and start it using the commands below:
$ sudo apt install fwupd
$ sudo service fwupd start
To display all updatable devices detected by fwupd, we can run:
$ fwupdmgr get-devices
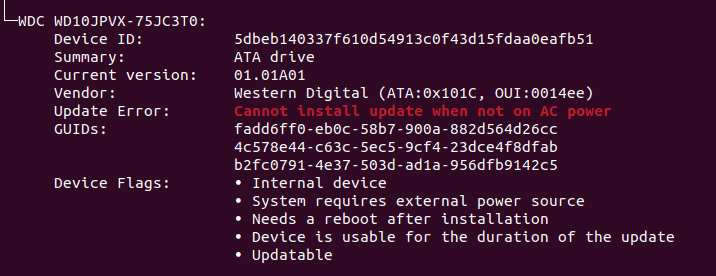
Sometimes, we may get a warning message about the system’s ability to update after a fwupd command (like the one above). Here’s a possible warning we might get:
WARNING: UEFI firmware can not be updated in legacy BIOS mode
See https://github.com/fwupd/fwupd/wiki/PluginFlag:legacy-bios for more information.
The message tells us that we are running in legacy mode. The solution is simple. Simply change your boot settings to UEFI mode (non-CSM). Notice also that our warning message came with a link to a possible solution to our problem. Therefore, if we run into another error, we can refer to the suggested resource.
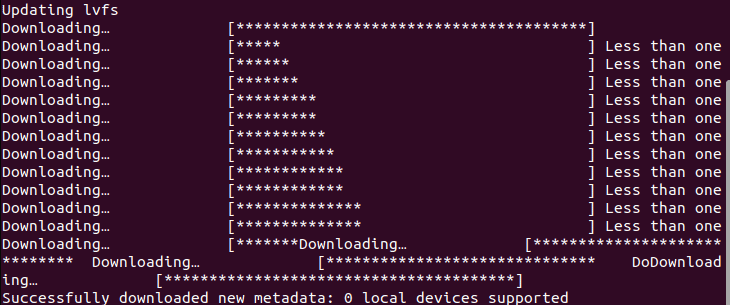
Before installing any updates, we first need to fetch device metadata from the LVFS servers. This metadata contains information such as the update protocol, device ID, etc., which is necessary to carry out the update. To get metadata:
$ fwupdmgr refresh
Let’s now update our system if the fwupd manager found any newer versions:
$ fwupdmgr update
The above command will download & install any updates. Updates that can be applied immediately will be effected. Meanwhile, those that can’t be affected in a live environment will be applied at the next reboot.
4.2. Manual Update
The previously shown method of flashing the BIOS involves doing so from within the operating system. We can also update the BIOS itself. A possible use case is if we don’t have an OS installed.
Additionally, it’s possible that our system may not support UEFI capsule updates and, therefore, not listed on the LVFS devices list. The reasons for this can range from the legacy system to the vendor choosing not to upload their firmware on LVFS.
In the above cases, we would have to refer to vendor-specific instructions. For example, HP and Dell allow updates by creating a bootable USB BIOS.
The steps for each manufacturer are different, so it’s best to check their official documentation.
5. Conclusion
In this article, we’ve seen how we can upgrade the BIOS on our system. Recall that we need to have our computer powered on for the entire process, lest we cause permanent damage to it.