1. Overview
In this tutorial, we’ll discuss how we can clean a Linux system of unused files and directories to free up disk space. First, we’ll see how to carry out the clean-up process manually. We’ll make use of tools such as du and ncdu. Additionally, we’ll go over the removal of cached files, old logs, temporary files, and unused dependencies. We’ll also explore how to manage old kernels effectively.
Finally, we’ll take a look at system cleaning tools such as Bleachbit both through its graphical user interface (GUI) and command-line interface (CLI).
2. Cleaning up the System Manually
Manually cleaning up our system can be time consuming. However, it gives us a lot of control over what’s being removed and kept.
In this section, we’ll go over the different steps to clean up our Linux system.
2.1. Check for Largest Directories and Files With du
du is a disk usage utility that displays the size and free space information of attached disks.
It’s pretty straightforward to use. By default, it recursively shows the size of files and directories in the current directory:
$ du | sort -nr
10039072    .
5231636    ./Downloads
3103376    ./GitHub
2836848    ./GitHub/books
1460532    ./GitHub/books/_
1376280    ./GitHub/books/.git
...
Now, we’ll list the top ten largest directories in our root directory:
$ du -k | sort -nr | head -n10
Here’s the output:
10039460 /home
6259300  /usr
902400   /var
67024    /boot
34816    /opt
8712     /etc
1052     /run
572      /root
20       /mnt
16       /lost+found
As we can see, /home takes the most space out of all the directories. The /home directory is where we typically store our user data. So, we might need to investigate it further to find the unnecessary files and directories that take up a lot of space.
Using du is good for a general overview of the file sizes. However, going through a lot of files can be cumbersome. Therefore, we might need to use something that makes this process much easier, like ncdu.
2.2. Find out the Disk Usage With ncdu
ncdu is a command-line TUI utility that lets us analyze the disk space used by files in a more readable format.
By default, it doesn’t ship with most Linux distributions. However, it should be available in the package repository of our distribution and we can install it through a package manager using the package name ncdu.
Once, ncdu is installed, we simply type the command followed by the path that we want to analyze:
$ ncdu /home/hey
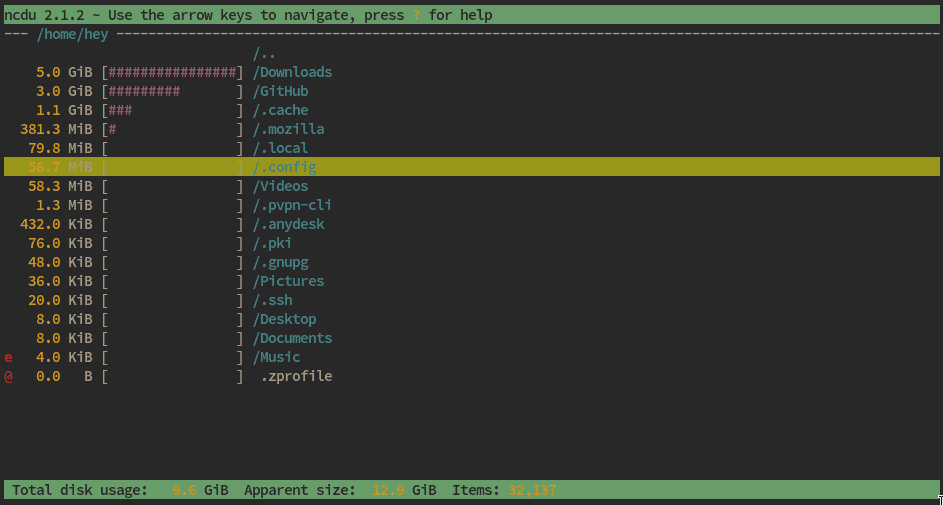
We can navigate through the file system using the arrow keys,
2.3. Remove Cached Files
Some programs are written in a way that they perform faster. For that reason, these programs might cache files that might take a lot of space. These cached files are safe to remove because they can be created by the program when required.
*Most of the time, programs store cache contents in the ~/.cache* directory. Therefore, we can use ncdu to remove the largest, unnecessary directories and files inside this directory.
**
Apart from that, our package manager also caches the installation packages, even after the installation. For instance, the apt package manager caches these packages inside the /var/cache/apt/archives directory. We can safely remove these packages after the installation process.
2.4. Remove Old Logs
System and application logs can take a huge amount of space depending on how long the system has been running. Sometimes, a Linux server is configured to store logs for an indefinite amount of time. Therefore, it’s obvious that the size of these files will increase over time.
In general, the /var/log directory is the standard for storing log files on almost all Linux distributions, as required by the Filesystem Hierarchy Standard (FHS), which defines the directory structure and contents in Linux and other Unix-like operating systems.
Let’s take a look at the size of our /var/log directory. Typically, we need sudo because log files have restricted permissions for non-privileged users:
$ sudo du -sh /var/log
2.5G /var/log
The safest way to delete log files is to keep the most recent log files and delete only the oldest ones with this script. Let’s save it as remove-old-logs.sh:
#!/bin/bash

echo "Total space occupied by /var/log: "
du -sh /var/log

# Check if the "exec" parameter was passed
if [ "$1" == "exec" ]; then
    exec_mode=true
    echo "Running in deletion mode..."
else
    exec_mode=false
    echo "Dry run: to actually delete the files, run the script with the 'exec' parameter."
fi

# Find and display the space occupied by files older than a week
logs=$(sudo find /var/log -type f -mtime +7)
total_size=0

echo "Log files found:"
for file in $logs; do
    size=$(sudo du -k "$file" | cut -f1)
    total_size=$((total_size + size))
    echo "$file - $(du -h "$file" | cut -f1)"
    # If in exec mode, delete the file
    if [ "$exec_mode" = true ]; then
        sudo rm -f "$file"
    fi
done

# Convert total_size from KB to MB
total_size_mb=$(echo $total_size | awk '{printf "%.2f MB\n", $1/1024}')

if [ "$exec_mode" = true ]; then
    echo "Total space recovered: $total_size_mb"
else
    echo "Total space recoverable: $total_size_mb"
    echo "To actually delete the files, run the script with the 'exec' parameter."
fi
In dry-run mode, it identifies and lists all log files older than one week without deleting them, and returns the total recoverable space. To run in this mode, let’s execute the script without any parameters:
$ sudo ./remove-old-logs.sh
Total space occupied by /var/log:
2.5G    /var/log
Dry run: to actually delete the files, run the script with the 'exec' parameter.
Log files found:
/var/log/vnetlib - 196K
/var/log/mintupdate.log.5.gz - 4,0K
/var/log/syslog.2.gz - 968K
[...]
/var/log/journal/[...]-000000000008a066-000615f214f92659.journal - 65M
/var/log/journal/[...]-00000000000df3a8-00061757b03d030f.journal - 81M
/var/log/journal/[...]-0000000000128858-000619858c452bea.journal - 97M
[...]
Total space recoverable: 2399.12 MB
To actually delete the files, run the script with the 'exec' parameter.
This output reported the size of each log file eligible for deletion. In particular, files in /var/log/journal are very large, as the systemd journal collects extensive logging data from system services, kernel messages, and applications.
Running the script in exec mode recovers significant disk space:
$ sudo ./remove-old-logs.sh exec
Total space occupied by /var/log:
2.5G    /var/log
Running in deletion mode...
Log files found:
[...]
Total space recovered: 2399.12 MB
This reduced our /var/log space from 2.5GB to 151MB.
2.5. Remove Temporary Files
As the name suggests, temporary files are those that are removed once we reboot our system. But what if we plan on keeping our system up 24/7? For a long-running system, these temporary files will pile up and will take a lot of space.
By default, temporary files are stored inside the /tmp directory. We can use ncdu to remove the unnecessary files under this directory. However, we should avoid deleting files that we aren’t sure of because it might break the current session of our system.
2.6. Remove Unused Dependencies
Most distributions come with a package manager. This package manager is responsible for the management of packages and their dependencies. Most package managers, like apt, yum, and pacman, are quite good at removing dependencies that are not in use.
However, there are scenarios when our package manager decides to keep orphaned dependencies. For instance, the make dependencies often become unnecessary after building a package. Therefore, we might want to remove them.
We can use apt on Ubuntu-based distributions to remove the unused dependencies:
$ apt-get autoremove
Similarly, we can use dnf on Fedora and RHEL:
$ dnf autoremove
On Arch-based distributions, we can use pacman to retrieve the unused packages first and, then, remove them.
$ pacman -Rsn $(pacman -Qdtq)
2.7. Remove Unused Kernels and Kernel Headers
Maintaining multiple versions of the Linux kernel can be useful for fallback options in case of problems with a new update. However, keeping too many old kernels can take up a lot of disk space. Different distributions use different strategies for dealing with this problem:
- Fedora 31 and later automatically keep the current kernel and the two previous versions by default
- The same Fedora policy also applies to Ubuntu Desktop as of 16.04 LTS
- However, Ubuntu Server, Linux Mint and other Debian-based distributions keep all old kernels
- Since openSUSE 12.1, the multiversion kernel feature preserves the desired number of older kernels
- Arch Linux typically retains only the current and one previous kernel version
- Gentoo has app-admin/eclean-kernel, an easy tool to remove old kernels
These defaults may change in the future, but it’s clear that the problem of too many installed kernels is mainly a concern of some deb-based distributions. In such distributions, we can use this old kernel removal script which identifies and protects the current kernel, shows old versions of kernels and modules before removing them, and provides both dry-run and exec modes.
Let’s save it as remove-old-kernels.sh:
#!/bin/bash -e

# Retrieve and display kernel information
uname -a
IN_USE=$(uname -r)
echo "Your in-use kernel is $IN_USE"

# List old kernels to be removed
OLD_KERNELS=$(dpkg --get-selections |
    grep -vE "linux-headers-generic|linux-image-generic" |
    grep -v "${IN_USE%%-generic}" |
    grep -Ei 'linux-image|linux-headers|linux-modules' |
    awk '{print $1}')

echo "Old kernels to be removed:"
echo "$OLD_KERNELS"

# List old modules to be removed
OLD_MODULES=$(ls /lib/modules |
    grep -v "${IN_USE%%-generic}" |
    grep -v "${IN_USE}")

echo "Old modules to be removed:"
echo "$OLD_MODULES"

# Perform removal if "exec" argument is provided
if [ "$1" == "exec" ]; then
    # Remove old kernels
    apt-get purge $OLD_KERNELS
    # Remove old modules
    for module in $OLD_MODULES; do
        rm -rf /lib/modules/$module/
    done
else
    echo "If all looks good, run it again with: sudo $0 exec"
fi
Let’s try it in dry-run mode:
$ sudo ./remove-old-kernels.sh
[sudo] password for francesco:
Linux asusrog 5.15.0-116-generic #126-Ubuntu SMP Mon Jul 1 10:14:24 UTC 2024 x86_64 x86_64 x86_64 GNU/Linux
Your in-use kernel is 5.15.0-116-generic
Old kernels to be removed:
linux-headers-5.15.0-112
[...]
linux-image-5.15.0-100-generic
[...]
linux-modules-5.15.0-100-generic
[...]
Old modules to be removed:
5.15.0-100-generic
[...]
If all looks good, run it again with: sudo ./remove-old-kernels.sh exec
In our case, it identified a really long list of kernels, modules, and headers to remove. Let’s proceed:
$ sudo ./remove-old-kernels.sh exec
Linux asusrog 5.15.0-116-generic #126-Ubuntu SMP Mon Jul 1 10:14:24 UTC 2024 x86_64 x86_64 x86_64 GNU/Linux
Your in-use kernel is 5.15.0-116-generic
Old kernels to be removed:
[...]
Old modules to be removed:
[...]
After this operation, 1.727 MB disk space will be freed.
Do you want to continue? [Y/n] Y
[...]
In this way, we relieved our system of the kernels that had accumulated over the past few years.
3. Bleachbit
Bleachbit is a powerful system cleaner that helps us free up disk space and maintain privacy by deleting unnecessary files and erasing traces of our activities. It offers both a graphical user interface (GUI) and a command-line interface (CLI). While the GUI is user-friendly and ideal for desktop users, the CLI is especially useful for remote management of Linux servers via SSH.
BleachBit can work in both user and root mode. In user mode we can clean up our home directory, while in root mode you have the ability to clean up the entire system. Typically, in the Applications menu of our distribution, BleachBit adds a link for each of the two modes.
The version of BleachBit available in many repositories is often outdated. We can download the latest version for our distribution from the official BleachBit download page.
3.1. GUI version
Once launched, we can check the required options from the list to clean:
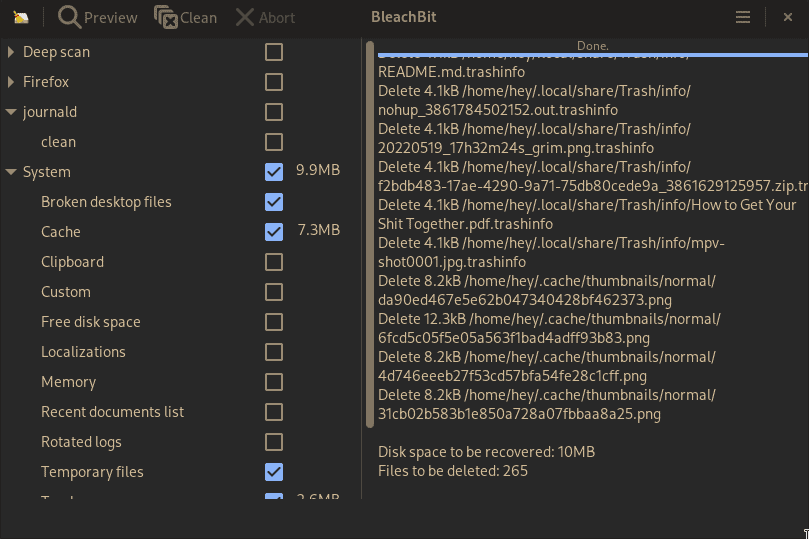
In the BleachBit GUI, there is an option called Wipe Free Space that we should select with caution. It works very slowly, especially on large disks, and doesn’t actually free any space. In addition, it can cause system crashes or unresponsiveness by filling all available free space on the hard disk until it’s completely used up.
3.2. CLI Version
To get started, we can list all the available cleaning options. There are over 200 options in total:
$ bleachbit --list
[...]
apt.autoclean
apt.autoremove
apt.clean
[...]
Not all options are intended to free disk space. For example, the system.free_disk_space option performs a wipe of free disk space to prevent recovery of deleted files. This process can be very slow and can cause the system to become unresponsive or crash, as it’s equivalent to the Wipe Free Space option discussed earlier. Another option, system.memory, clears the cache stored in RAM, but it doesn’t affect available disk space.
Once we’ve identified the cleaners we want to apply, we can use the –preview mode to see what would be deleted without actually removing any files:
$ sudo bleachbit --preview apt.autoclean apt.autoremove apt.clean apt.package_lists \
bash.history system.cache system.desktop_entry system.recent_documents \
system.rotated_logs system.tmp system.trash
[...]
Delete 24,6kB /var/lib/apt/lists/partial
Delete 4,1kB /var/lib/apt/lists/auxfiles
Delete 4,1kB /var/lib/apt/lists/ubuntu.mirror.garr.it_ubuntu_dists_jammy-backports_restricted_cnf_Commands-amd64
[...]
Disk space to be recovered: 320,5MB
Files to be deleted: 860
Special operations: 6
This way we can check the complete list of files to be removed and have an estimate of the space freed up. To proceed with the removal, let’s use the –clean mode instead of –preview.
4. Conclusion
In this article, we discussed how to clean up our Linux system. We began with manual cleanup techniques, using tools such as du and ncdu to identify and remove large files and directories.
We also discussed how to clean up cached files, old logs, and temporary files, as well as how to remove unused dependencies and old kernels.
Finally, we examined BleachBit, both as a GUI-based utility and through its command-line interface, which provides a comprehensive approach to system cleanup.