1. Overview
Often, there are applications that we need on a daily basis. In these cases, we can create quick launchers for these specific programs on the desktop of our graphical environment. Thus, we can enhance user experience, customization, and accessibility. This method is particularly useful in different scenarios, such as accessing frequently used applications, automating tasks, and maintaining a more organized workspace.
In this tutorial, we’ll check out methods to create launchers on a Linux desktop using the terminal, Graphical User Interface (GUI), and a third-party tool, known as Arronax.
Notably, our examples involve creating a launcher for the Cheese application in a Ubuntu 22.04 GNOME desktop.
2. Using the Shell
On Linux, we can use the terminal to create a launcher on the desktop. For instance, we’ll create a launcher for the Cheese application.
However, before that, we need to identify the path to the Cheese executable.
To do so, let’s run the which command in the terminal:
$ which cheese
/usr/bin/cheese
The output displays /usr/bin/cheese as the absolute path to the cheese executable.
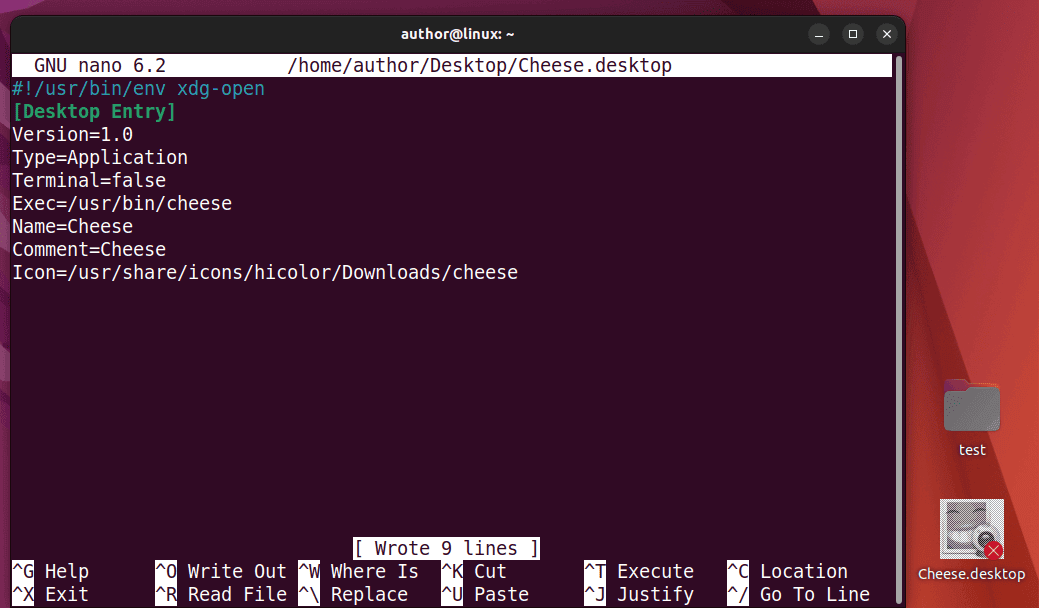
Now, we create a Desktop entry file named Cheese.desktop using the nano editor:
$ nano ~/Desktop/Cheese.desktop
Then, we add the code to the Desktop entry file:
#!/usr/bin/env xdg-open
[Desktop Entry]
Version=1.0
Type=Application
Terminal=false
Exec=/usr/bin/cheese
Name=Cheese
Comment=Cheese
Icon=/usr/share/icons/hicolor/Downloads/cheese
Let’s break down the script above:
- Type defines the category of the Cheese.desktop file as an Application
- Terminal set as false indicates the application doesn’t need a terminal
- Exec refers to the path to the executable as /usr/bin/cheese
- Name sets Cheese as the name of the launcher
- Comment defines the description for the launcher
- Icon specifies /usr/share/icons/hicolor/Downloads/cheese as the icon path for the launcher
After adding the code, we press CTRL+O and Return to save the Cheese.desktop file and CTRL+X to exit the nano editor.
Consequently, we can see the Cheese.desktop file with an X sign on our desktop:
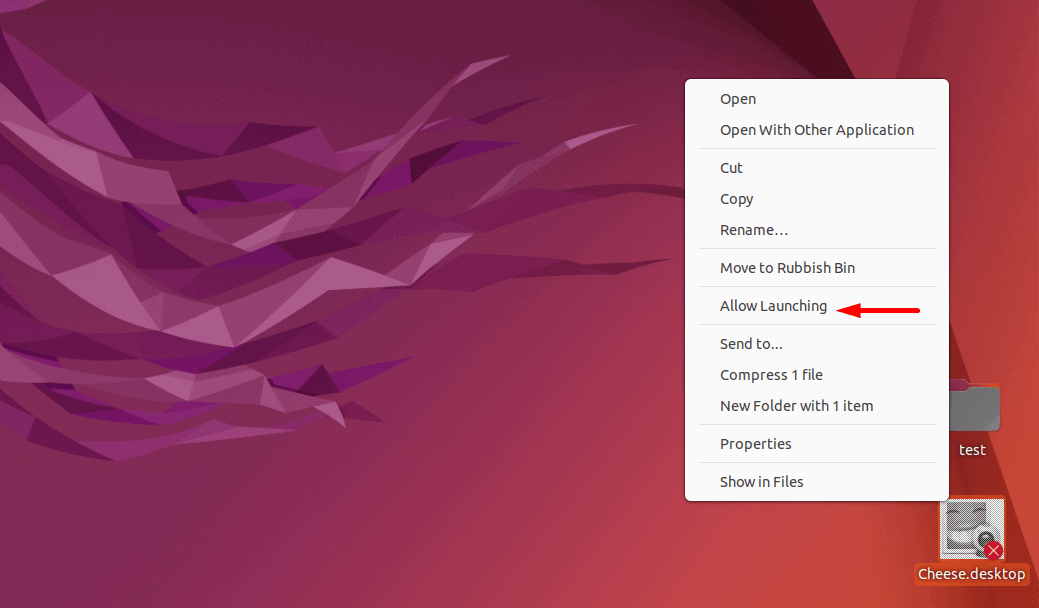
Now, we right-click on the Cheese.desktop file and select the Allow Launching option:
After that, we double-click on the Cheese launcher placed on the desktop:
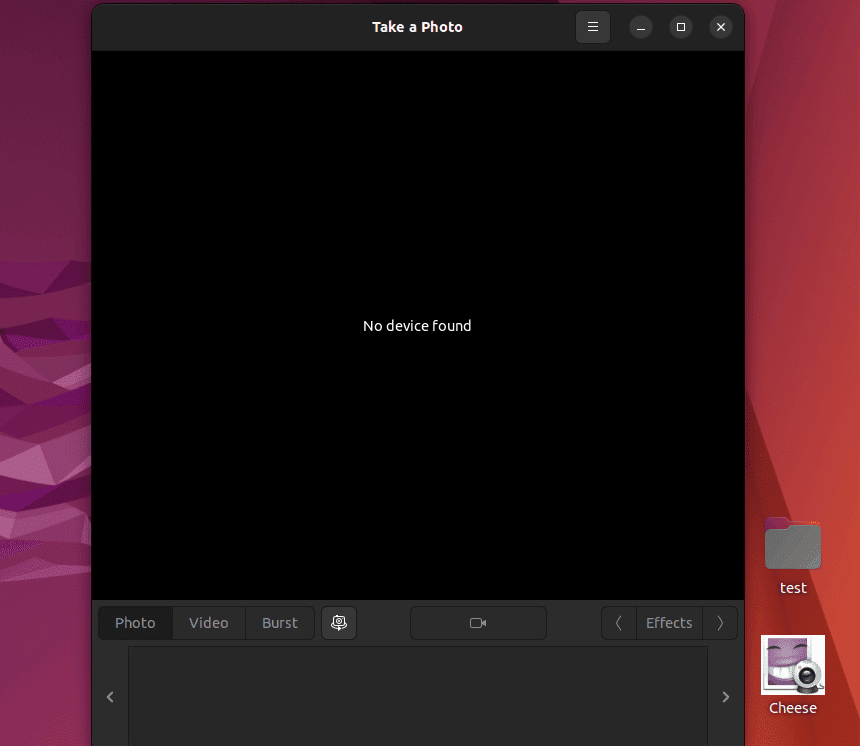
Thus, we can now open the Cheese application on our system via the launcher.
3. Using the GUI
We can also use the GUI to create a launcher on a Linux desktop.
Of course, we can employ a graphical editor to repeat the steps from the previous section and create a launcher, populating its contents via an application like gedit.
In particular, for this visual approach, we access and use the original .desktop file of the required application without the need to create a new one.
Now, let’s create a launcher for the Cheese application via the GUI.
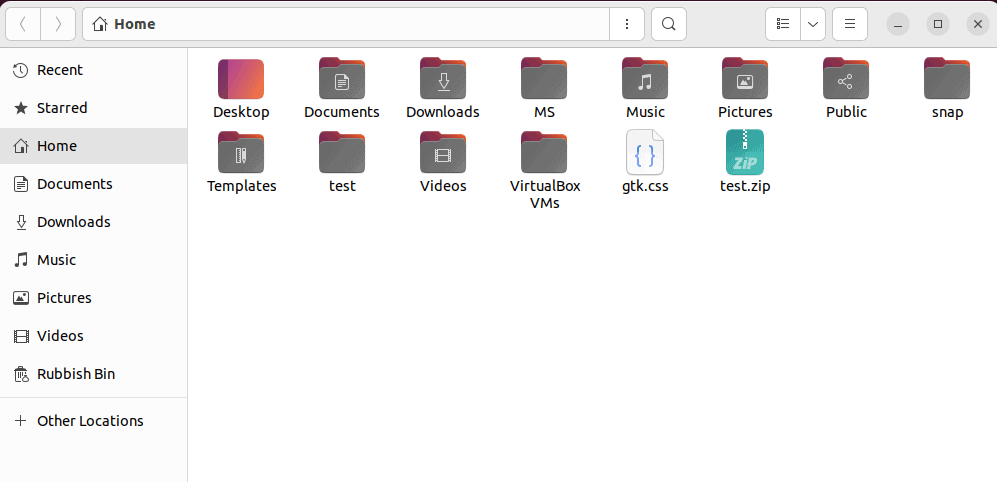
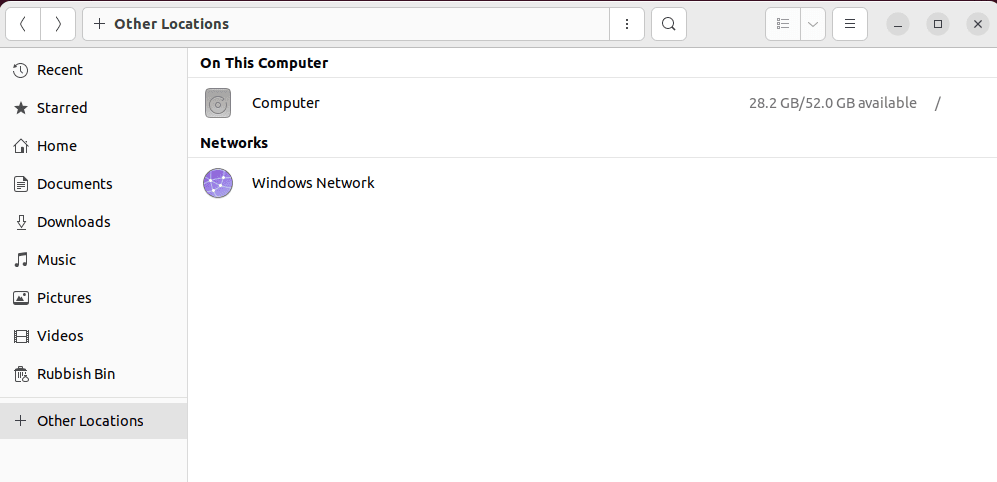
To begin with, we open the Home directory and click on Other Locations from the left-side panel:
After that, we click on Computer under the On This Computer section:
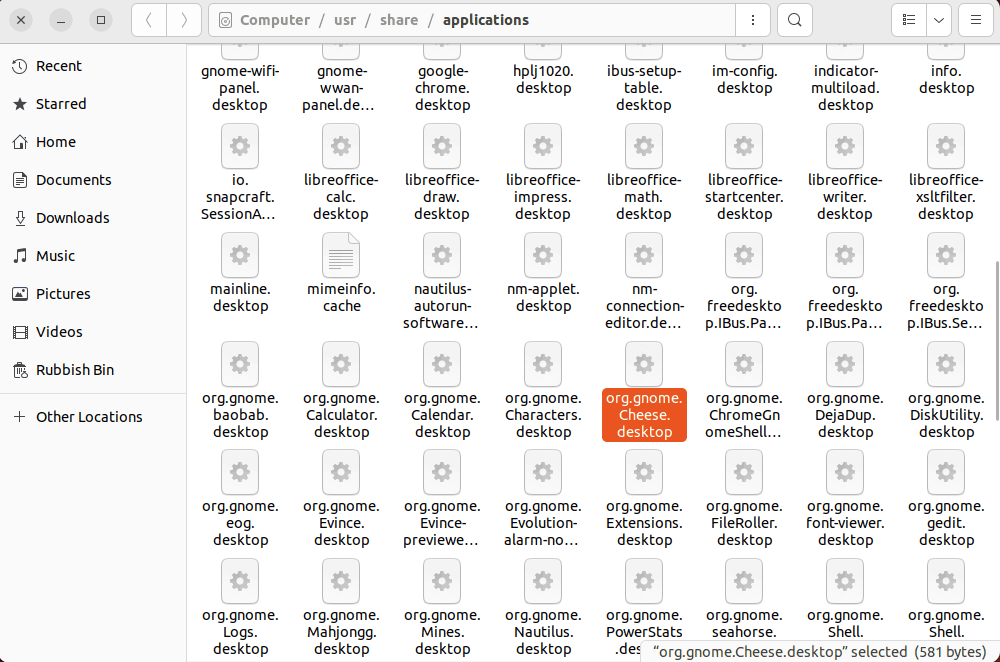
Then, we navigate to the /usr/share/applications directory where the org.gnome.Cheese.desktop file exists:
Next, we right-click on the org.gnome.Cheese.desktop file and select the Copy option from the context menu: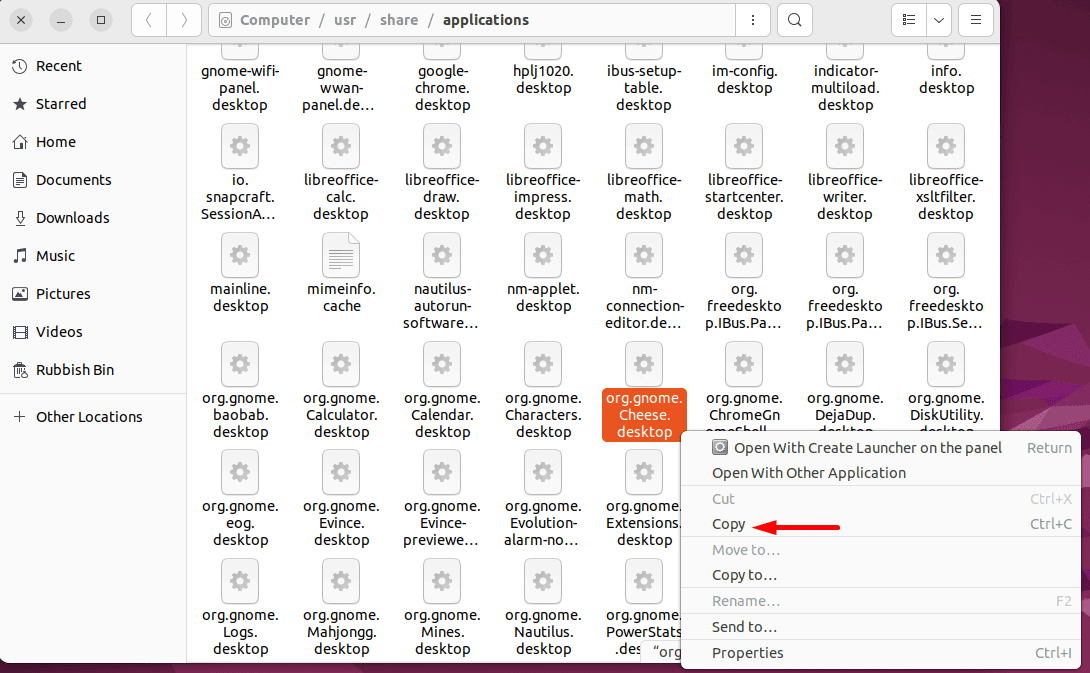
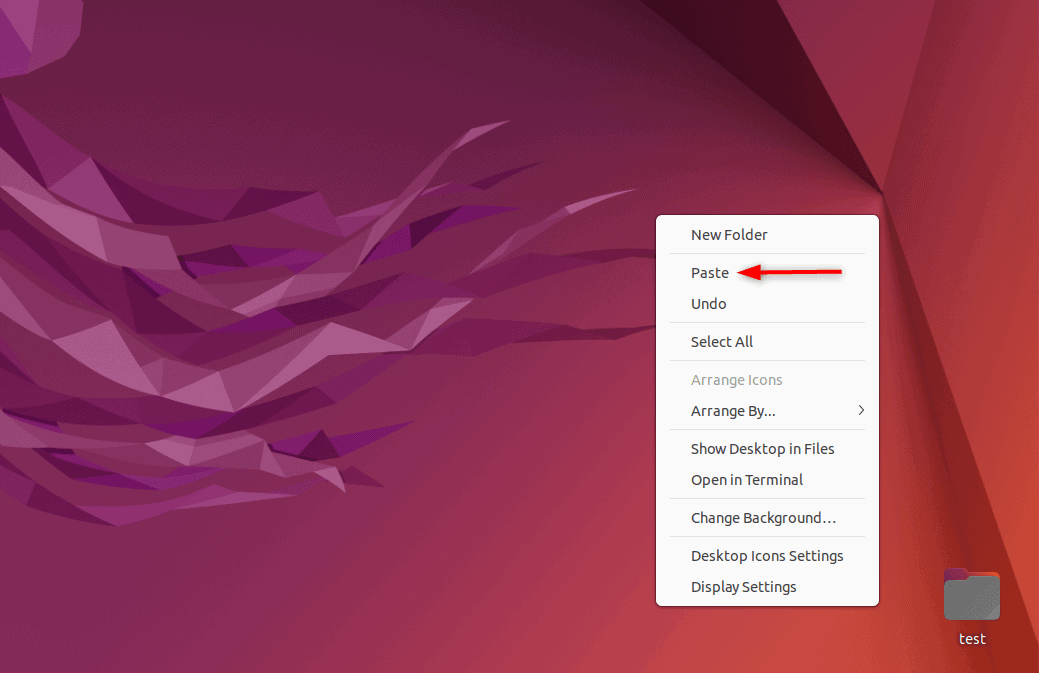
After that, we right-click on the desktop, and select the Paste option to paste the org.gnome.Cheese.desktop file on our desktop:
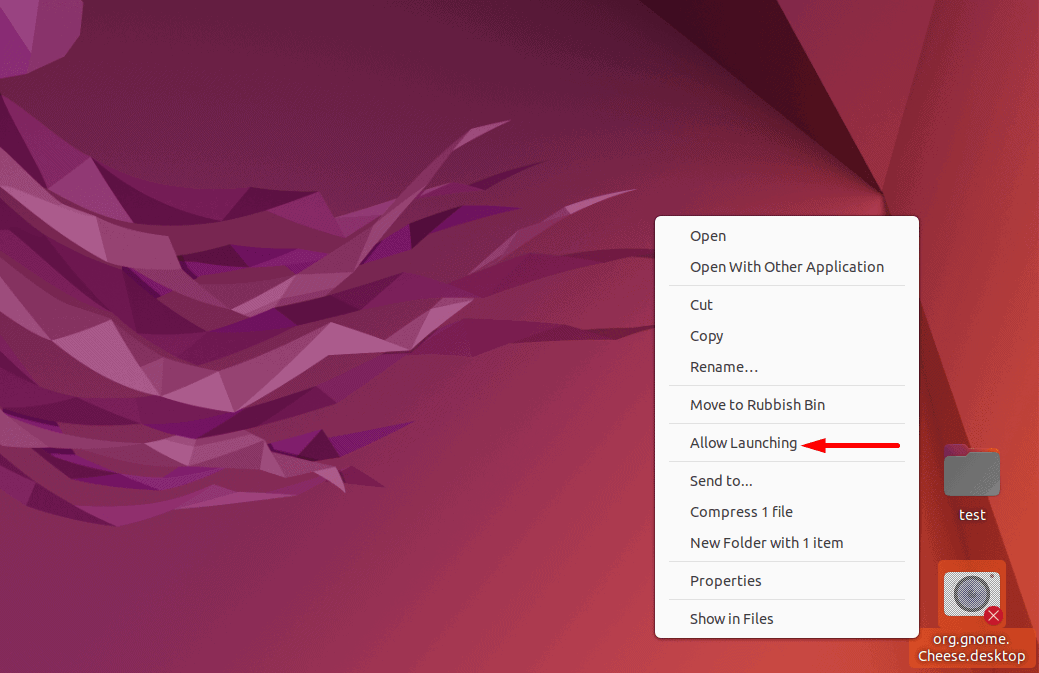
Then, we right-click on the org.gnome.Cheese.desktop file and select the Allow Launching option:
Finally, we double-click on the Cheese launcher to open the application:
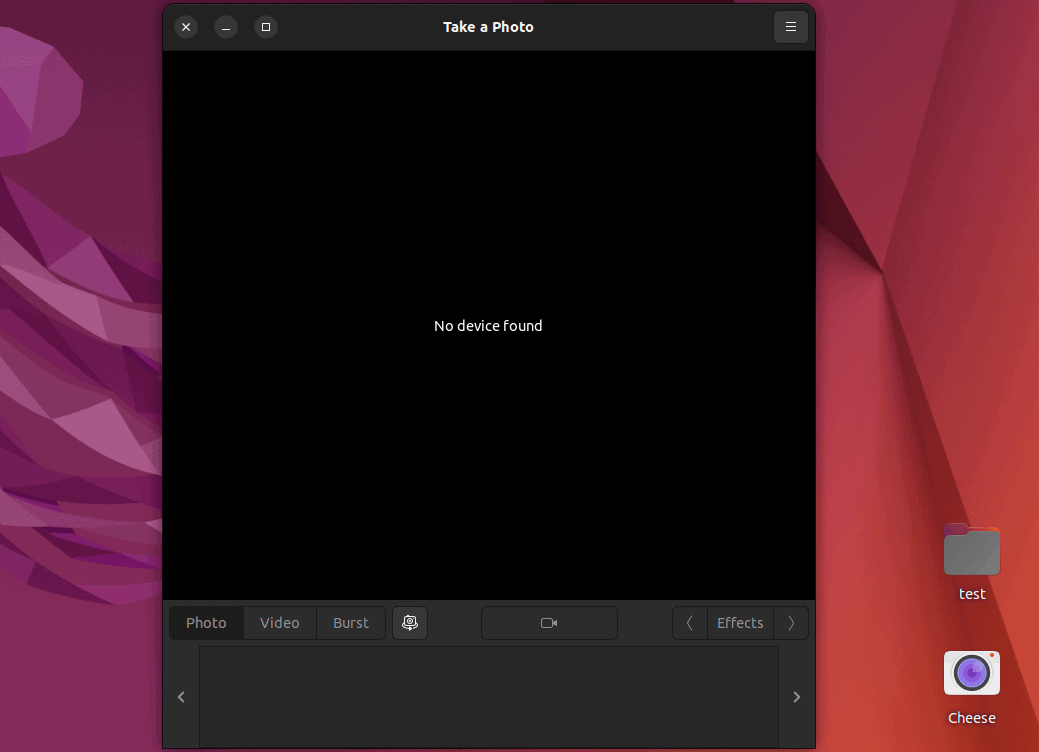
Now, each time we open it, the launcher opens the Cheese application on our desktop.
4. Using a Third-party Tool
Third-party tools such as Arronax may offer a more user-friendly and intuitive approach for creating launchers on the desktop. Moreover, we can use this tool to create custom application launchers with the help of a graphical interface.
To do so, first, we install the Arronax application on our system.
4.1. Installing the Arronax Application
To begin with the Arronax installation, we first add the diesch/stable repository to the system via add-apt-repository:
$ sudo add-apt-repository ppa:diesch/stable
Then, we use apt to update the packages list to include the newly added repository:
$ sudo apt update
Next, we install arronax along with the arronax-nautilus extension for integration via apt:
$ sudo apt install arronax arronax-nautilus
After a successful installation, we move towards creating a launcher on the desktop with Arronax.
4.2. Creating a Launcher With Arronax
To create a launcher with Arronax, first, we open the Activities menu, type Arronax, and open it:

Then, we click on the Create a new application starter option under the menu bar of the Arronax application: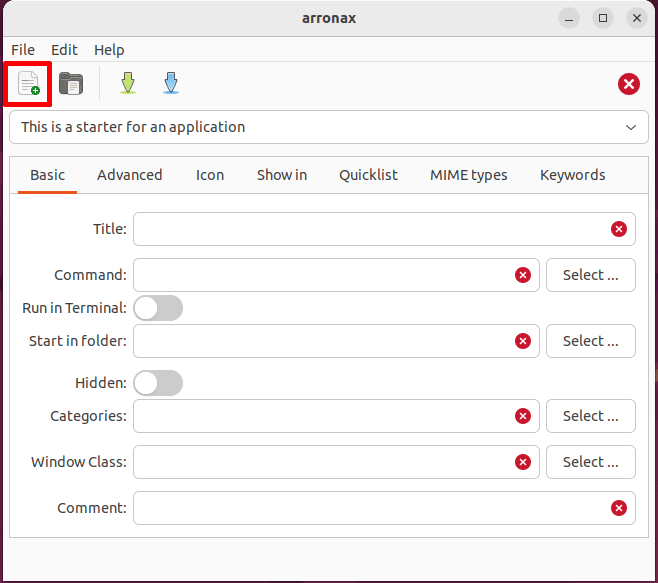
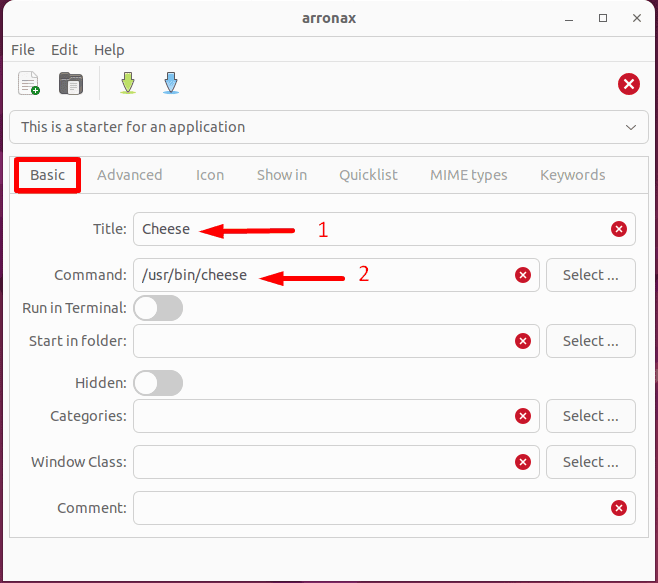
Now, we switch to the Basic tab, add Cheese as the Title, and the /usr/bin/cheese path in the Command field:
Then, we move to the Icon tab and click on the Browse files option to look for the directory that contains the Cheese icon file:
![]()
Next, we navigate to the /usr/share/icons/hicolor/Downloads directory, select the cheese image as an icon, and click Open:
![]()
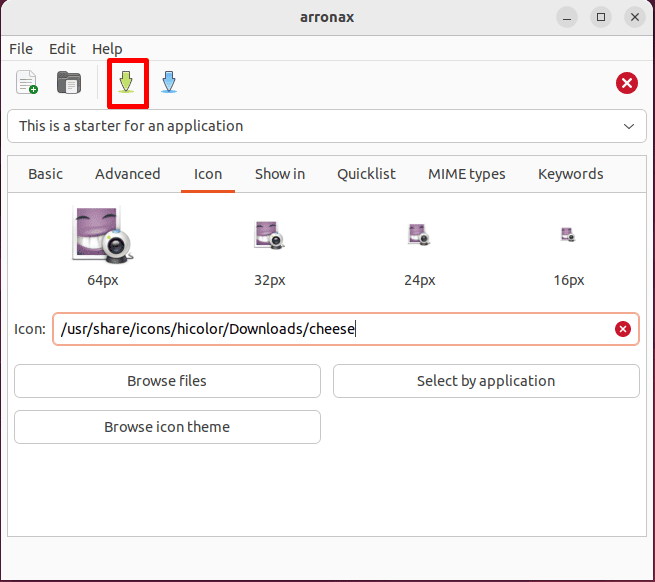
After that, we click on the Save to application starter option to save the launcher with the added settings:
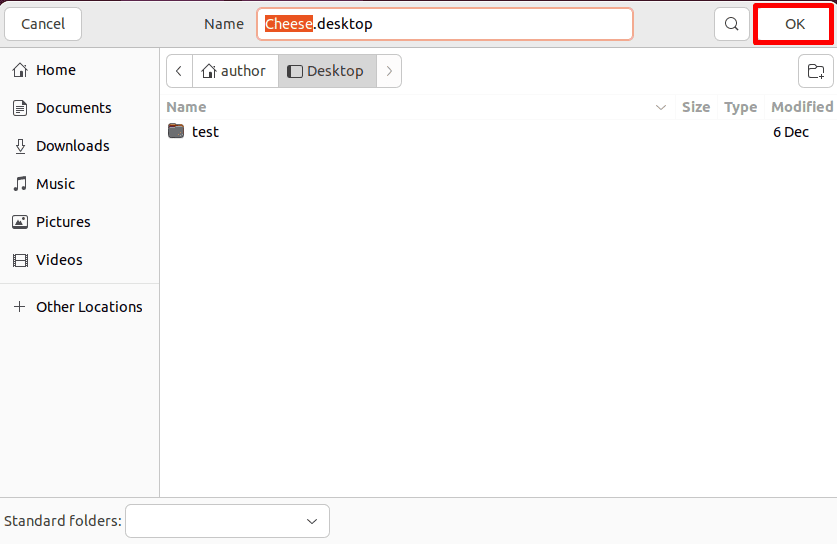
Following that, we add Cheese as the Name of our .desktop file and click OK:
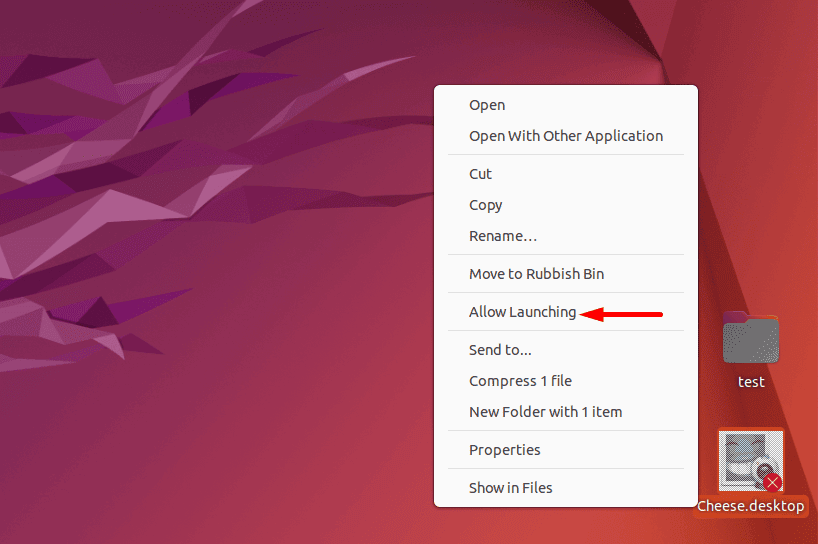
Now, we move to the desktop, right-click on the Cheese.desktop file, and select the Allow Launching option:
Finally, we double-click on the Cheese launcher file:
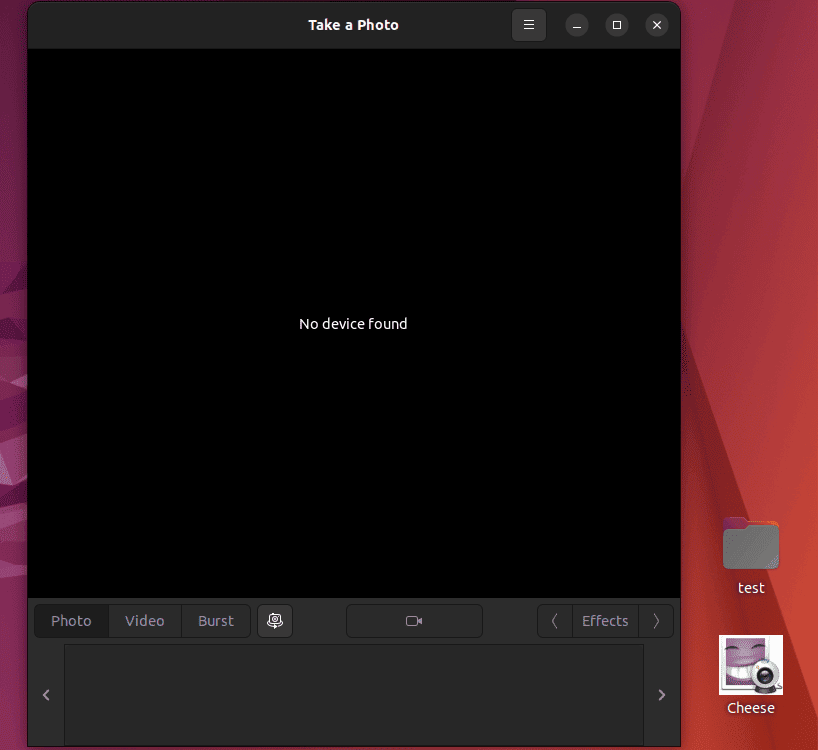
Thus, the launcher opens the Cheese application on our Linux desktop.
5. Conclusion
In this article, we explored several methods to create launchers on a Linux desktop.
Particularly, we can use the terminal method when we want to create a launcher with a new .desktop file for the application. Meanwhile, the basic GUI method is a great choice, when we need to use the original .desktop file to launch an application. On the other hand, third-party tools, such as Arronax, offer an intuitive way to create custom application launchers.
Ultimately, we can select any of these methods as per the requirements of creating a launcher on our Linux desktop.