1. Introduction
Thanks to the Internet, we’re all acquainted with GIF (Graphics Interchange Format) files. These files typically contain short animations composed of multiple frames that come together to produce a motion effect. Creating captivating visual content often involves working with animated .gif files. Moreover, there are times when we need to extract these individual frames for editing, analysis, or creative repurposing.
In this article, we’ll explore how to split an animated .gif file into its constituent frames using straightforward tools and methods.
2. History of GIF File Format
The Graphics Interchange Format, better known as GIF, has a rich history dating back to 1987. Introduced by CompuServe, GIF was designed to be an efficient way to display images on the early Internet. Moreover, its ability to support both static and animated images made it a popular choice for web designers and digital artists alike back in the day.
Over the years, the GIF file format evolved from a simple image format into a cultural phenomenon, giving rise to countless memes and becoming a staple of online communication. Despite the growth of newer technologies, the GIF remains a well-received medium for expression and creativity.
3. Tools for Splitting GIF
Now, let’s learn how to use some common image editing tools in Linux to split GIF images into the resulting frames. In the coming examples, we’ll use the GIF file example.gif.
3.1. ImageMagick
ImageMagick is a powerful and versatile command-line tool used for image manipulation, making it ideal for our task of splitting an animated .gif file into its individual frames. The tool’s flexibility and wide range of features enable us to efficiently handle various image processing needs.
To install ImageMagick on Ubuntu or Debian systems, we can use the package manager:
$ sudo apt-get install imagemagick
Once installed, we’ll use the convert command for splitting a .gif file into separate frames:
$ convert animation.gif frame%03d.png
In this case, convert is the primary ImageMagick command we use. The file, animation.gif, represents our input .gif file, whereas frame%03d.png specifies the naming pattern for the output frames. By using %03d, we ensure that the frame numbers are zero-padded to three digits (frame000.png, frame001.png, and so on).
Next, let’s split example.gif into its constituent frames:
$ mkdir imagemagick
$ convert example.gif imagemagick/imgmgk-%03d.png
$ ls imagemagick
imgmgk-000.png
imgmgk-001.png
...
imgmgk-101.png
imgmgk-102.png
Here, we’re creating a folder named imagemagick using the mkdir command, where we’ll store our image frames. Then, we run the convert command to produce a series of image files named imgmgk-000.png, imgmgk-001.png, and so on, corresponding to each frame of the original .gif file.
By using the ls command, we can see that there are 103 frames in total, corresponding to 103 output images ranging from imgmgk-000.png to imgmgk-102.png. The imagemagick directory will be populated with these files:
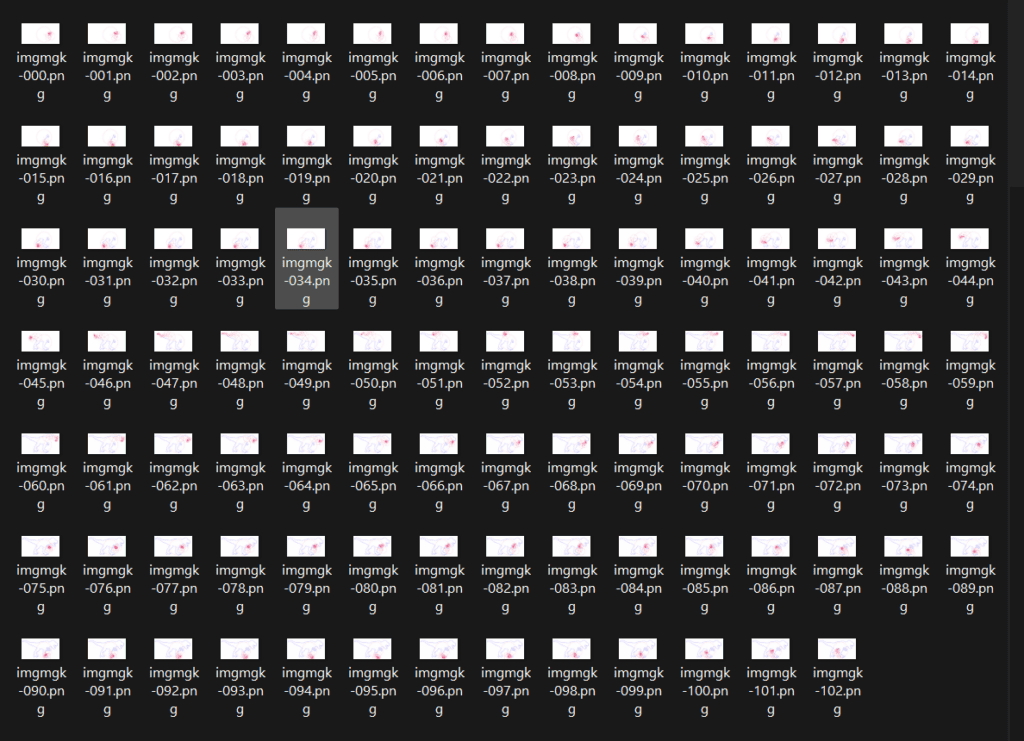
Here, we can see all the frames in the imagemagick directory.
3.2. GraphicsMagick
GraphicsMagick is a robust and efficient image processing tool, often regarded as a faster alternative to ImageMagick. It’s particularly useful for our task of splitting an animated .gif file into individual frames due to its performance and ease of use.
To begin with, let’s see how to install GraphicsMagick on our Linux systems:
$ sudo apt-get install graphicsmagick
Next, let’s learn the basic command for splitting a .gif file into separate frames using GraphicsMagick:
$ gm convert animation.gif +adjoin frame%03d.png
Here, we use the gm convert command from GraphicsMagick. The animation.gif file is our input file, and +adjoin ensures that each frame is saved as a separate file. frame%03d.png specifies the naming pattern for the output frames, with %03d ensuring zero-padded three-digit frame numbers (frame000.png, frame001.png, and the rest).
For instance, let’s split example.gif into separate frames:
$ mkdir graphicsmgk
$ gm convert example.gif +adjoin graphicsmgk/frame%03d.png
$ ls graphicsmgk
frame000.png
frame001.png
...
frame101.png
frame102.png
Running the gm convert command will produce a series of image files named frame000.png, frame001.png, and so on, corresponding to each frame of the original .gif file. This method enables us to easily access and manipulate individual frames, providing greater control over our animated content.
3.3. FFmpeg
FFmpeg is a powerful multimedia framework widely used for processing video and audio files. Its efficiency and versatility make it an excellent tool for splitting an animated .gif file into individual frames.
Let’s see the command to install FFmpeg on Ubuntu or Debian:
$ sudo apt-get install ffmpeg
After installation, let’s split a GIF file using FFmpeg:
$ ffmpeg -i animation.gif frame%03d.png
In this command, -i animation.gif specifies the input .gif file, while frame%03d.png designates the naming pattern for the output frames.
Let’s see a practical example of splitting a .gif file named example.gif:
$ mkdir ffm
$ ffmpeg -i example.gif ffm/frame%03d.png
$ ls ffm
frame001.png
frame002.png
...
frame102.png
frame103.png
By running the ffmpeg command, we can produce a series of image files, named frame001.png, frame002.png, and so on. These images correspond to each frame of the original .gif file. Notably, FFmpeg generates 103 frames, matching the number generated by ImageMagick and GraphicsMagick.
3.4. GIMP
GIMP (GNU Image Manipulation Program) is a free and versatile image editor that provides a range of tools for image manipulation, making it useful for splitting an animated .gif file into individual frames.
Let’s see the command to install GIMP in Ubuntu or Debian:
$ sudo apt-get install gimp
Once we’ve installed GIMP, we can use the following steps for splitting a .gif file into separate frames:
- Open GIMP.
- Import the .gif file by going to File > Open and selecting our .gif file.
- In the Layers dialog (usually on the right side), each frame of the .gif file will be listed as a separate layer.
- To save each frame as an individual image, we need to export each layer individually. To that end, we should only set the visibility of the image we want to save.
- After going to File > Export As, we can choose a filename pattern like frame%03d.png to ensure that we save each frame with a unique name.
In GIMP, each frame of an animated .gif file is treated as a separate layer. Therefore, by opening the .gif file, we can see all the frames listed in the Layers dialog. We can export any of these frames individually. This is useful if we don’t want to export all the frames and just want to export a specific frame.
For example, in the below image, we can see that we turned on the 100th frame’s visibility, and we’re saving that image as frame100.png separately using the process outlined above:
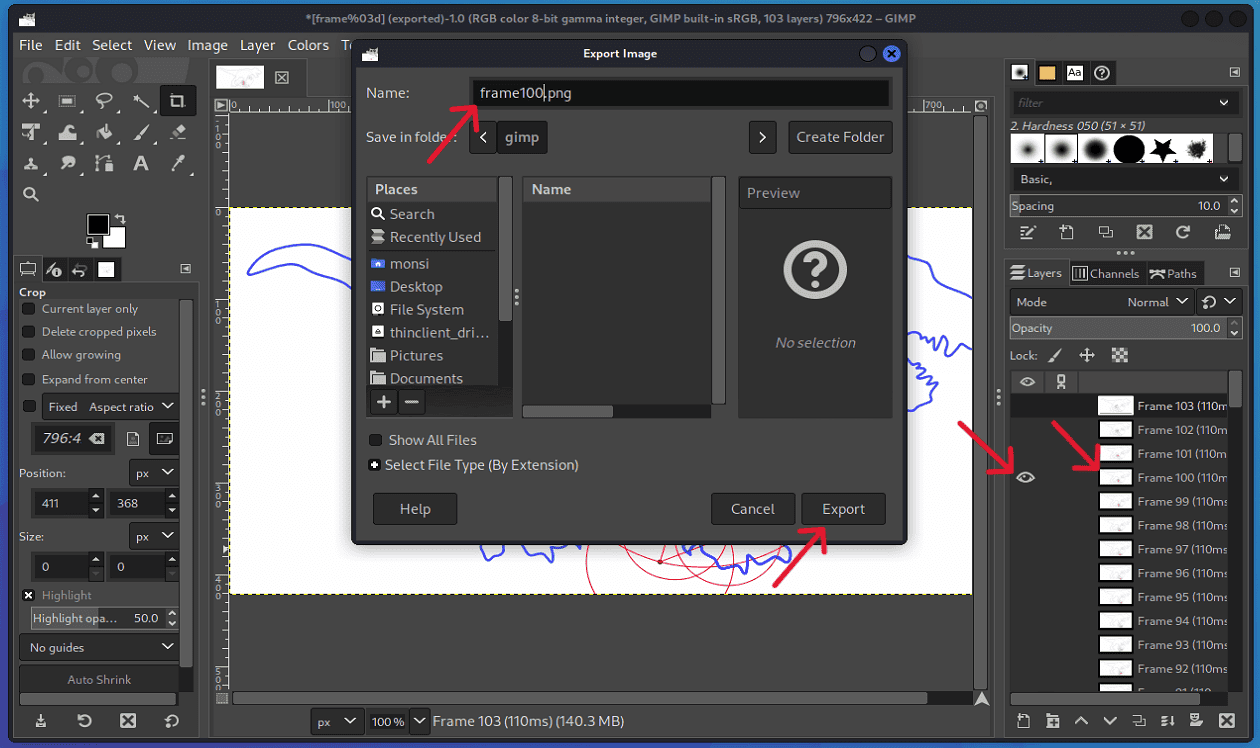
Consequently, we’ve successfully extracted the 100th frame from the .gif file.
4. Conclusion
GIF is a popular format for animated images. Splitting a GIF into its individual frames allows us to edit, analyze, and repurpose the content with greater control and flexibility. Moreover, by extracting each frame, we can look into the finer details of the animation, enhancing our creative projects or technical work.
In this article, we explored the history of GIFs and learned how to split them using various tools. In particular, we covered the installation and usage of ImageMagick, GraphicsMagick, FFmpeg, and GIMP, each offering a unique approach to decomposing an animated GIF. By mastering these tools, we gain the ability to manipulate and customize our animations efficiently, enriching our digital content creation skills.