1. Overview
Sometimes, we might want to change the GNOME panel format to create a more personalized desktop experience. This task is essential in different scenarios, such as setting a 12-hour or 24-hour clock or aligning with the international time conventions.
In this tutorial, we’ll explore different methods for changing the GNOME panel time format using the gsettings command, System Settings, the dconf Editor, and GNOME shell extensions such as Date Menu Formatter and Panel Date Format.
2. Using the gsettings Command
gsettings is a command-line tool used to interact with the dconf database which stores configuration settings for the GNOME desktop. In addition, we can use it to change the GNOME panel time format.
To do so, let’s run the gsettings command in our terminal:
$ gsettings set org.gnome.desktop.interface clock-format 12h
Here, we passed 12h as our desired GNOME panel clock-format:

Consequently, the above command displays the current GNOME panel time with AM and PM indicators respectively.
Now, we set the clock-format of our GNOME panel time to 24h:
$ gsettings set org.gnome.desktop.interface clock-format 24h
As a result, the GNOME panel displays time without AM and PM indicators and follows a 24-hour cycle:

This way, we can influence the basic format of the GNOME clock with built-in settings.
3. Using System Settings
System Settings offer a user-friendly graphical interface to configure different aspects of the GNOME desktop. Moreover, we can use it to change the GNOME panel time format.
For this, we launch the Activities menu, type Settings, and open it:

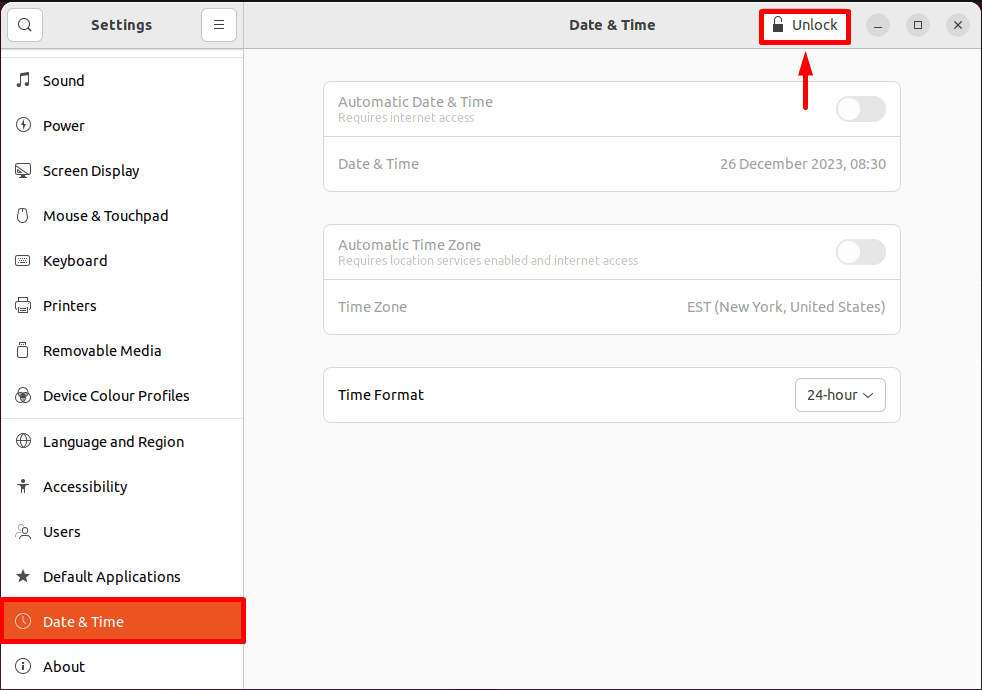
Then, we switch to Date & Time settings and click on the Unlock button to unlock our user profile:
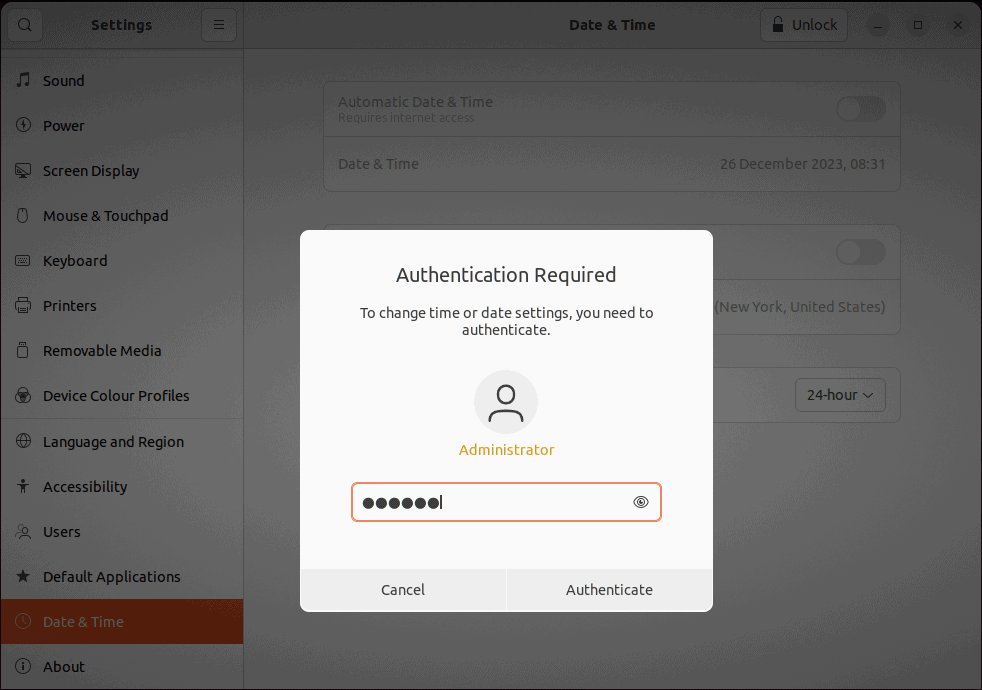
After that, we enter our system password for authentication:
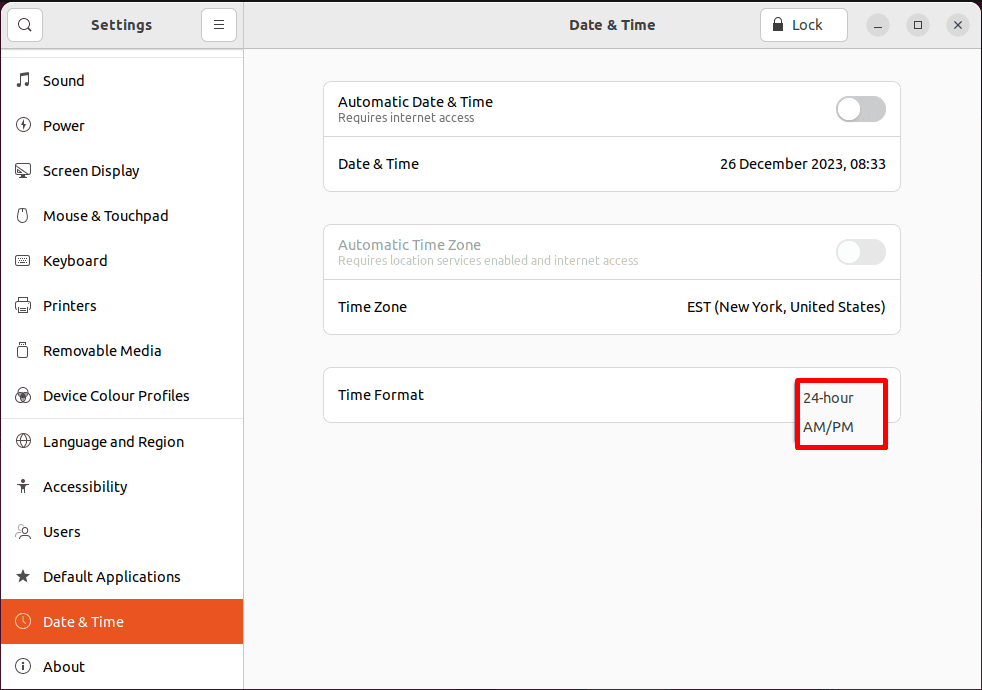
From the Time Zone drop-down menu, we select AM/PM as our new Time Format:
As a result, we can see the updated GNOME panel time format on our system:

Basically, we adjusted the same setting we modified earlier, but via the graphical user interface (GUI).
4. Using the dconf Editor
The dconf Editor is a graphical tool used to view and modify the configuration setting stored in the dconf database. We can use it to explore and edit our GNOME desktop settings in a more structured and interactive manner.
In this case, we’ll use the dconf Editor to change our GNOME panel time format.
To do so, first, we open a terminal and use apt to install the dconf Editor on the system:
$ sudo apt install dconf-editor
After successful installation, we move to the Activities menu, type dconf Editor, and open it:

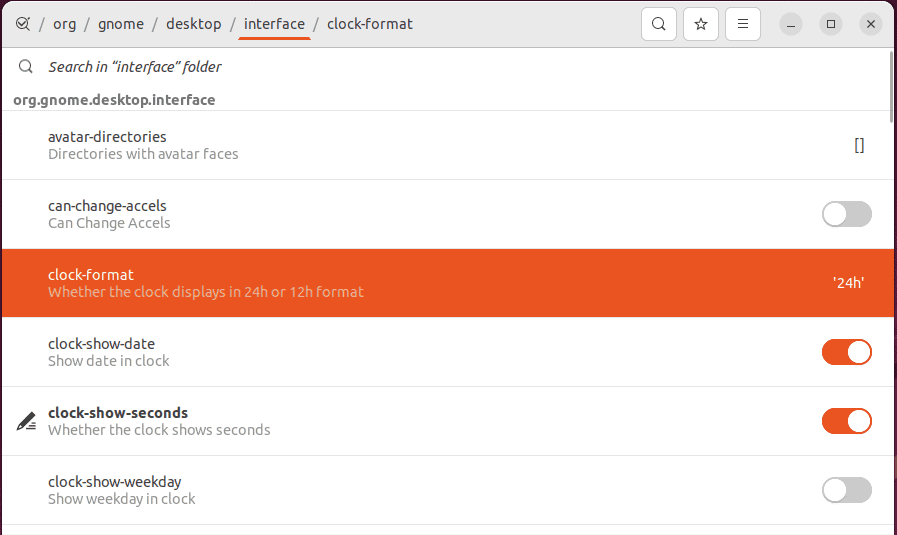
Then, we navigate to the org/gnome/desktop/interface path, select 24h as the clock-format, and turn on the clock-show-seconds toggle:
Let’s check the result:

Consequently, the GNOME panel displays time in a 24-hour format along with the seconds.
5. Using GNOME Shell Extensions
On Linux, we can also use different GNOME shell extensions to change our GNOME panel time format. Specifically, we can utilize the Extension Manager to manage such extensions.
For this, first, we might need to install Extension Manager on our system:
$ sudo apt install gnome-shell-extension-manager
Now, let’s explore some GNOME shell extensions for changing the GNOME panel time format.
5.1. Installing the Panel Date Format Extension
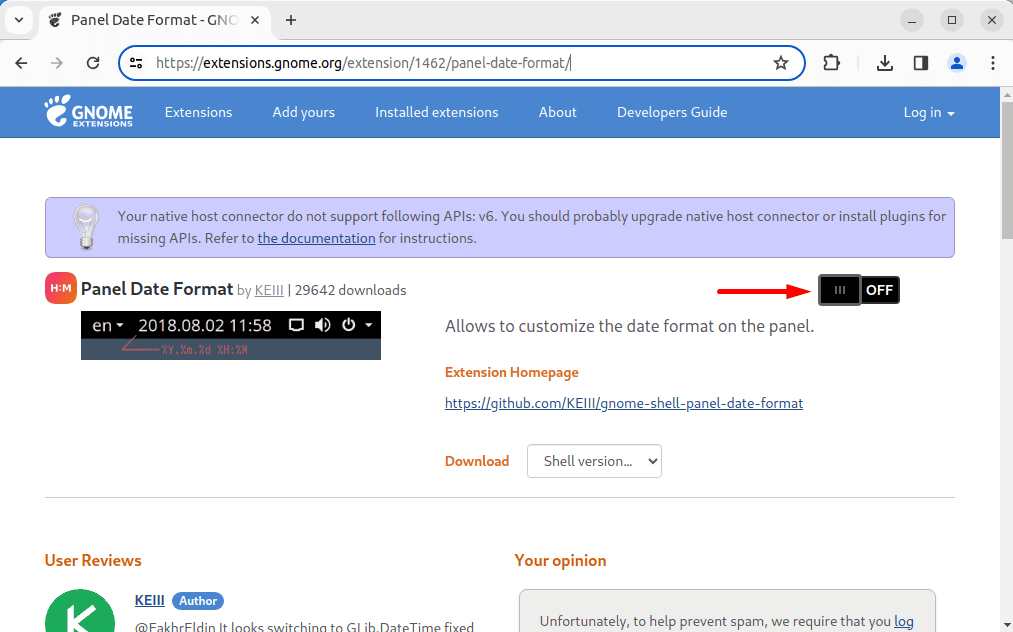
The Panel Date Format GNOME extension enables us to customize the date format on the panel.
To install it on our system, we visit the Panel Date Format GNOME extension page and click on its toggle:
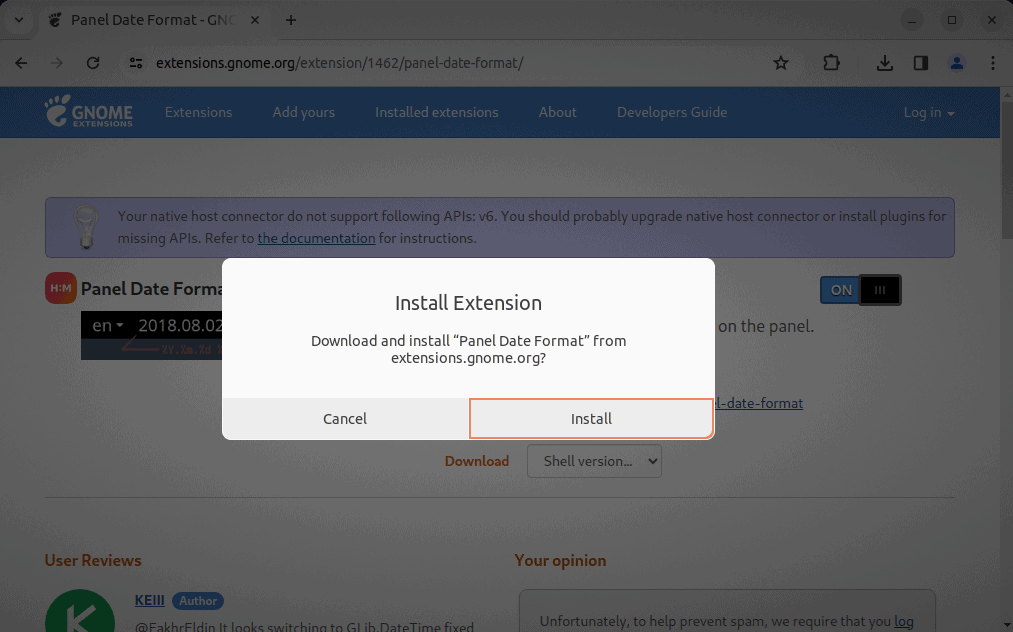
Next, we click on Install to start the installation of the Panel Date Format extension:
After installation, the Panel Date Format extension starts running on the menu bar:

As a result, the Panel Date Format extension automatically shows the GNOME panel time in the YYYY.MM.DD hh:mm format. Unlike other extensions, Panel Date Format only supports a single setting and has no further configuration when enabled.
5.2. Installing the Date Menu Formatter Extension
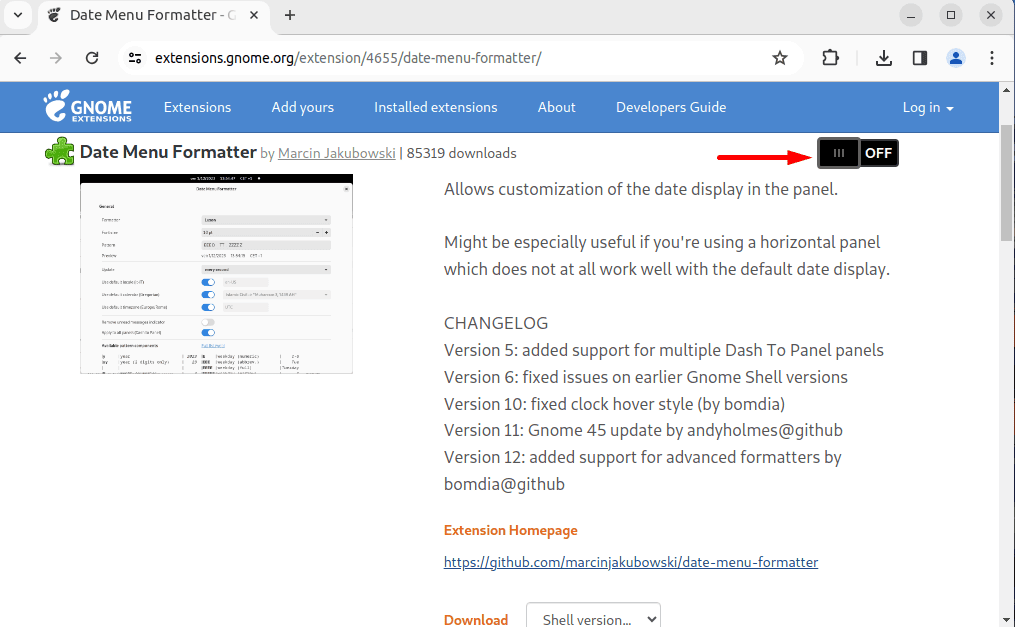
The Date Menu Formatter extension enables customization of the date display in the panel. Moreover, we can use it to change the format of our GNOME panel time.
For this, we visit the Date Menu Formatter GNOME extension page and click on its toggle:
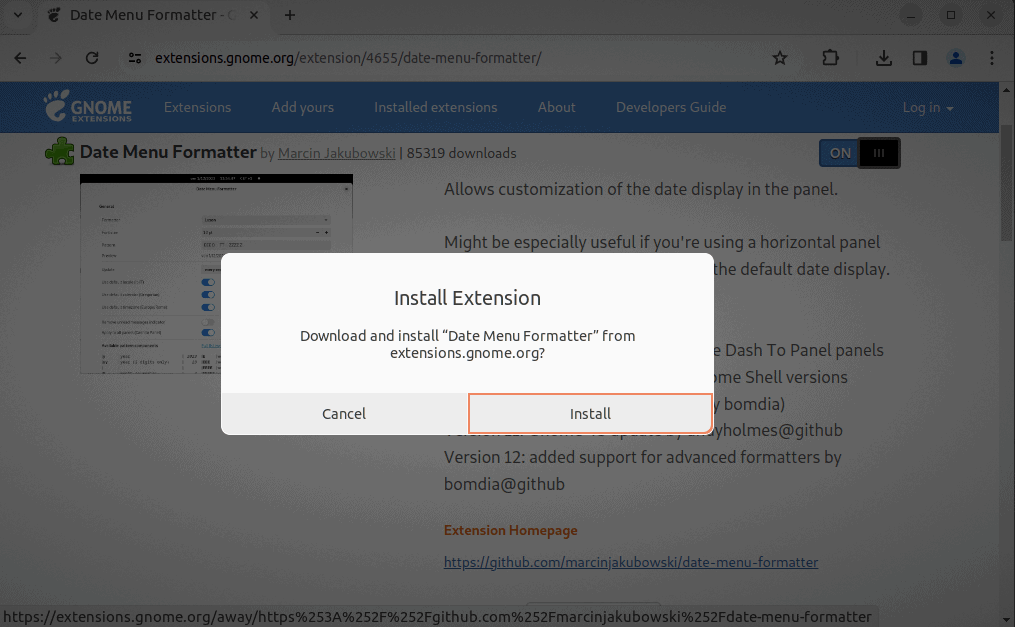
Then, click on Install to start the installation of the Date Menu Formatter extension:
Next, we open the Activities menu, type Extension Manager, and open it:

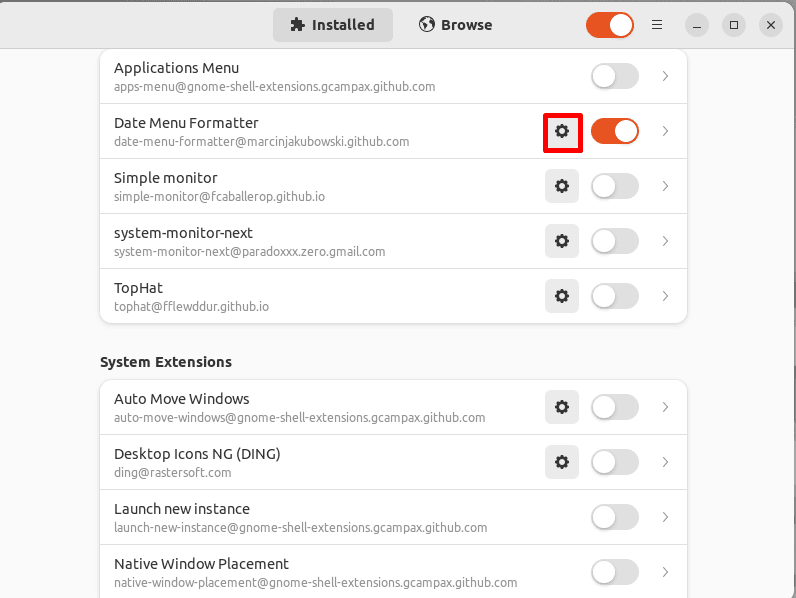
Then we switch to the Installed tab, look for Date Menu Formatter, and click on the gear icon to open its settings:
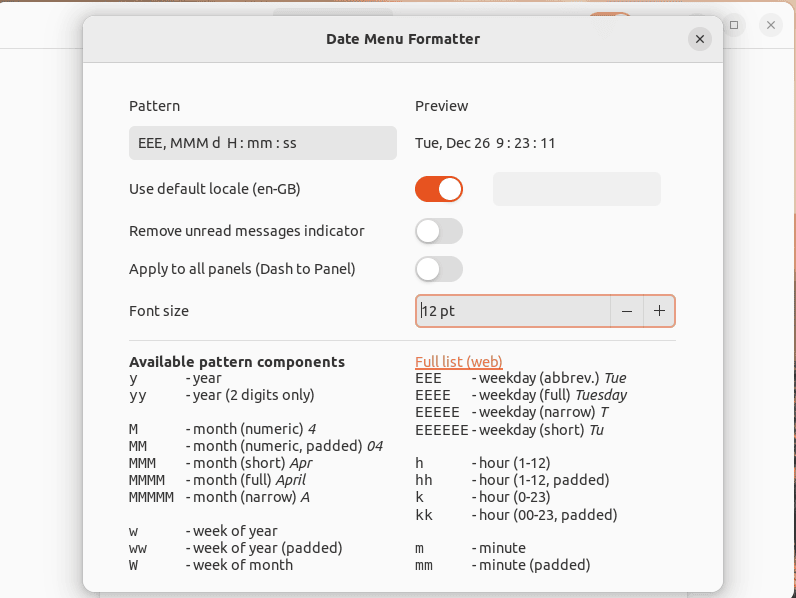
Here, we set the Pattern as EEE, MMM, d H:mm:ss and its Font size to 12 pt:
At last, we close the Date Menu Formtter extension settings to check the result:
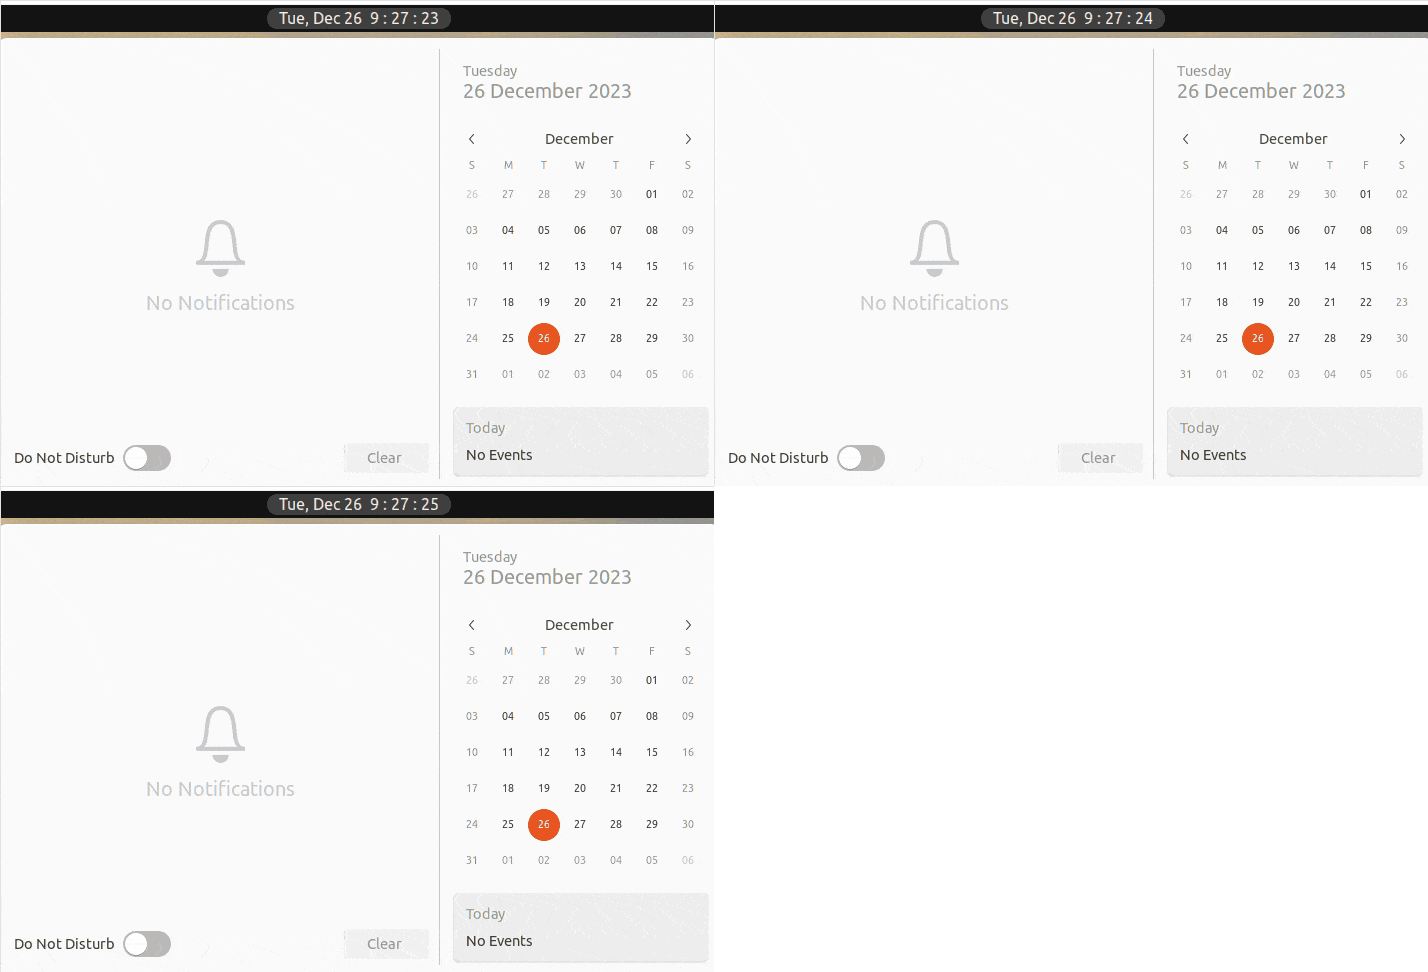
Thus, the changes reflect the GNOME panel time format.
6. Conclusion
In this article, we learned different methods for changing the GNOME panel format. These methods included using the gsettings command, System Settings, the dconf Editor, as well as the Date Menu Formatter and Panel Date Format GNOME shell extensions.
We saw that the gsettings command, System Settings, and the dconf Editor all change the same setting in terms of the 12-hour and 24-hour time format. On the other hand, GNOME shell extensions such as Date Menu Formatter and Panel Date Format enable us to customize the format of GNOME panel format as per requirements.
Ultimately, we can select any of these methods according to our requirements of setting the GNOME panel time format.