1. Introduction
MySQL is an open-source relational database management system that powers many web applications, from small blogs to large e-commerce platforms. Moreover, its popularity stems from its performance, reliability, and the extensive ecosystem of tools and resources available to support it.
Managing MySQL databases on Linux requires a combination of robust tools to ensure efficient administration, performance tuning, and maintenance. In addition, Linux has several command-line and graphical tools that we can use to access and manipulate MySQL databases.
In this tutorial, we’ll explore some of the most powerful and widely used MySQL admin tools available for different Linux distros.
2. MySQL Workbench
MySQL Workbench is a powerful GUI tool developed by Oracle for MySQL database design, development, and administration. Furthermore, it provides an integrated environment that enables database administrators and developers to design, model, generate, and manage databases visually.
Let’s look at some of the features of MySQL Workbench:
- It lets us visually design the database using entity-relationship diagrams. Moreover, we can create, modify, and reverse-engineer database schemas.
- It provides an SQL editor for executing queries and scripts, with syntax highlighting and code completion to improve productivity.
- We can also perform database administration tasks such as user management, back up, restore, and server configuration through the Workbench interface.
- Finally, it includes a performance dashboard and query profiling to assist in identifying and resolving performance bottlenecks.
2.1. Installation
To install MySQL Workbench, we can visit their official download page and select a version compatible with our distro. They also have an archive list of earlier releases.
Once we download the package, we can install it using the dpkg command on Debian-based systems:
$ sudo dpkg -i downloaded_workbench_package.deb
Alternatively, we can also use rpm on Red Hat-based systems and Fedora:
$ sudo rpm -i downloaded_workbench_package.rpm
Let’s now look at how to use MySQL Workbench.
2.2. Basic Usage
Let’s start with launching MSQL Workbench:
$ sudo mysql-workbench
As a result, the Workbench window will pop up with different options available:
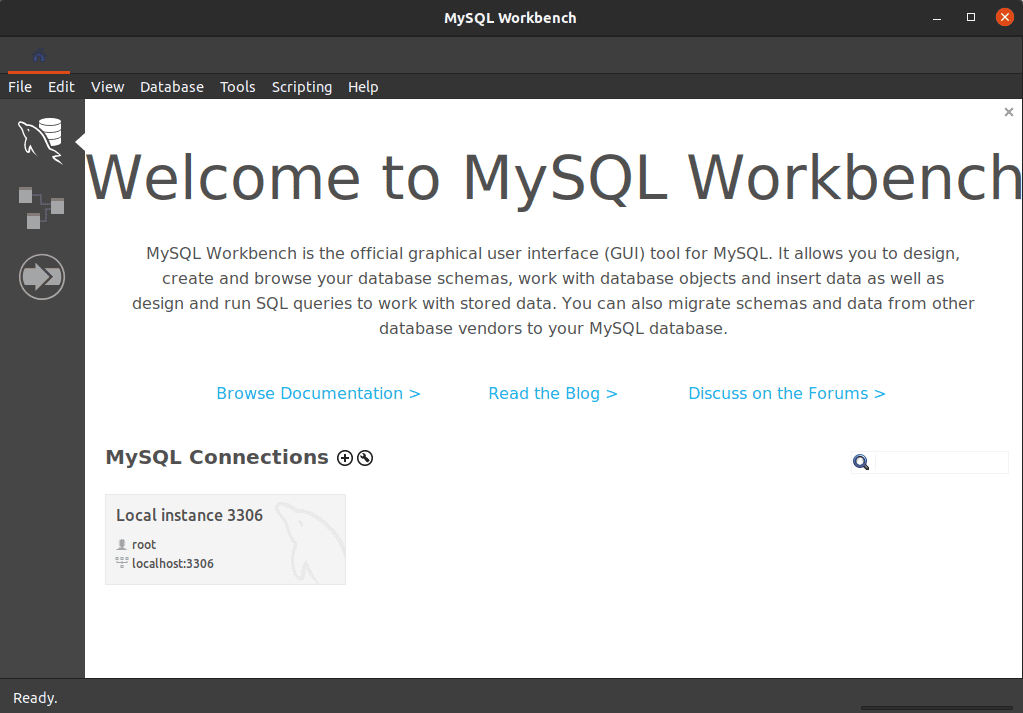
From here, we can perform different functions.
For example, to connect to a MySQL server, let’s click the plus + button next to the MySQL Connections heading above:
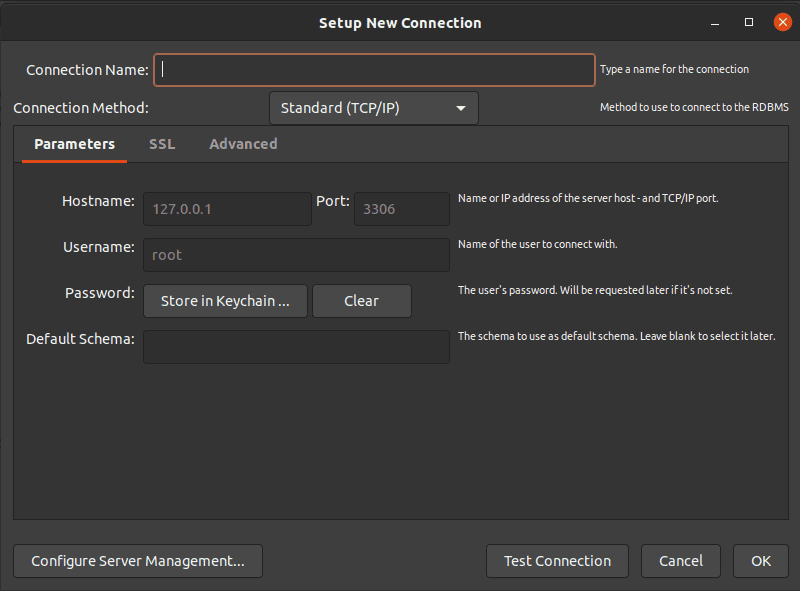
Next, we can enter the hostname, port, and username. Moreover, we can optionally save the password in the vault for convenience.
Finally, we can click the Test Connection button to ensure the details are correct and the connection is successful. We can click the OK button to save the connection settings.
On a successful connection, we’ll see the database overview, and we can perform functions such as creating databases, creating tables, running SQL queries, backups, and restoring.
3. Adminer
Adminer is a full-featured database management tool written in PHP. It’s a lightweight alternative to phpMyAdmin, that offers a simple, single-file application to manage databases such as MySQL, Postgres, Oracle, SQLite, and more.
Despite its simplicity, Adminer offers a comprehensive set of features for database management, including SQL execution, database and table management, and user administration. Moreover, it focuses on security, with built-in protection against common threats such as SQL injection.
3.1. Basic Usage
To run Adminer locally, we need to ensure that we have PHP and a web server such as Apache or Nginx installed.
Let’s move to an empty directory and then download the latest version of Adminer:
$ wget https://www.adminer.org/latest.php -O adminer.php
Next, we can run PHP’s built-in server and point it to the downloaded adminer.php file:
$ php -S localhost:8080/adminer.php
We can now open any web browser and navigate to http://localhost:8080/adminer.php:
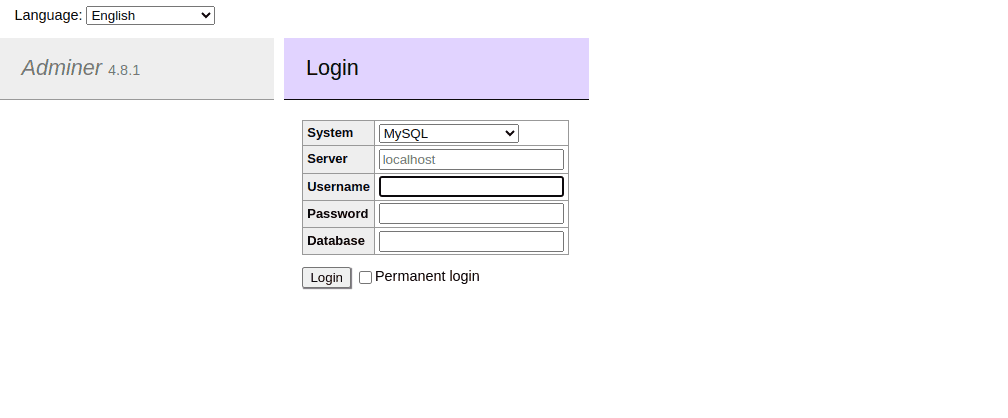
From here, we can enter our username and password to access all databases available locally. We can also specify a database to access it directly:
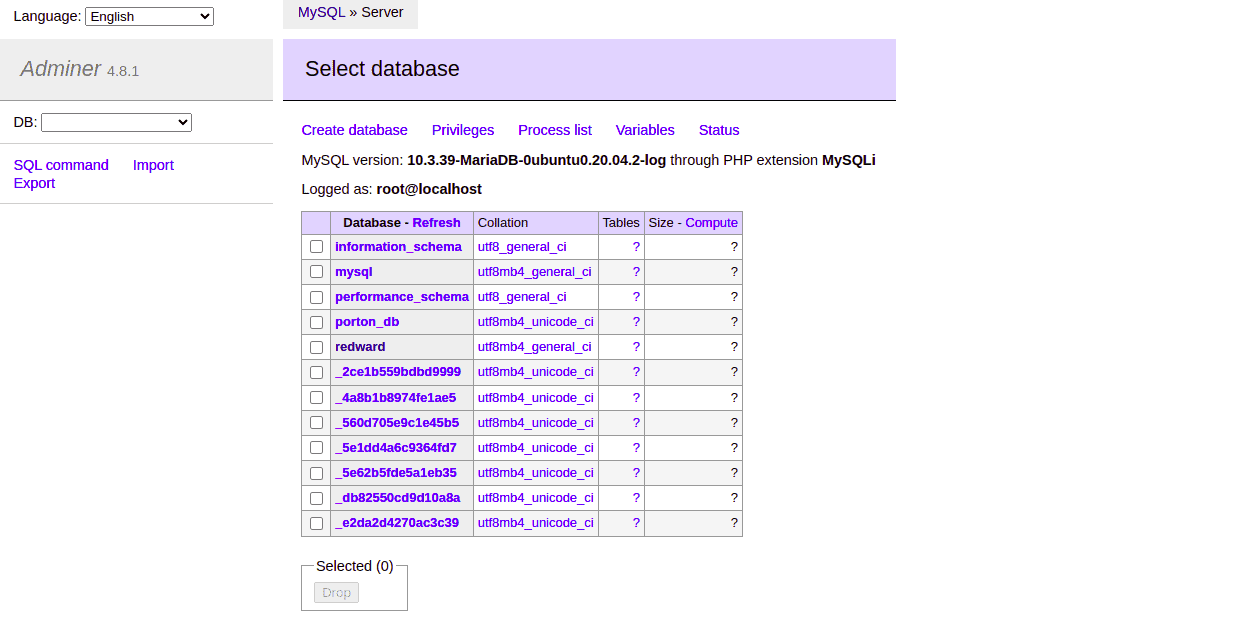
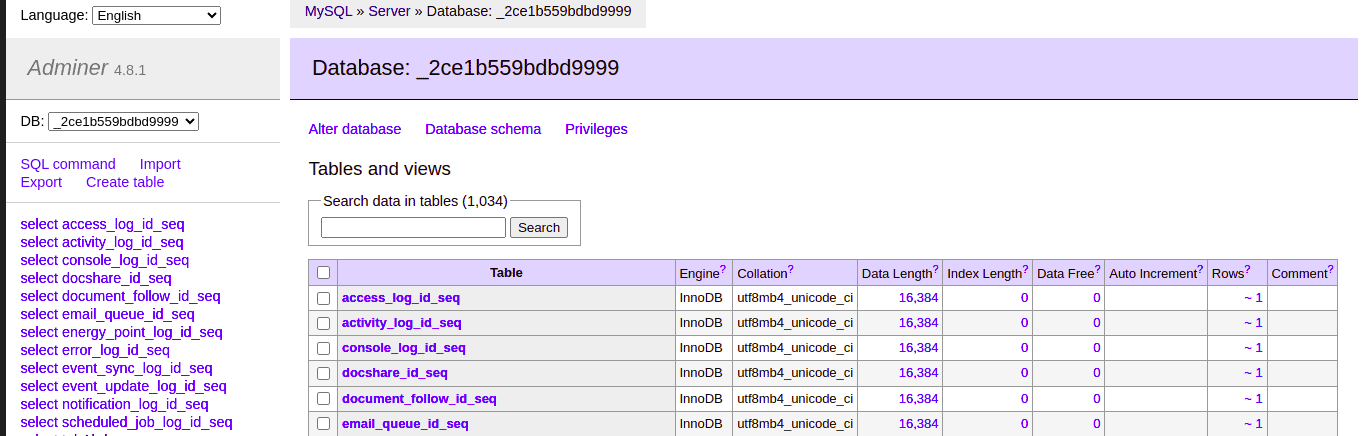
The database menu lists all available databases, and we can select one to view the tables within and subsequently select tables to view the fields:
We can alter the database tables by selecting a table from the table list, and clicking on the Alter table option:
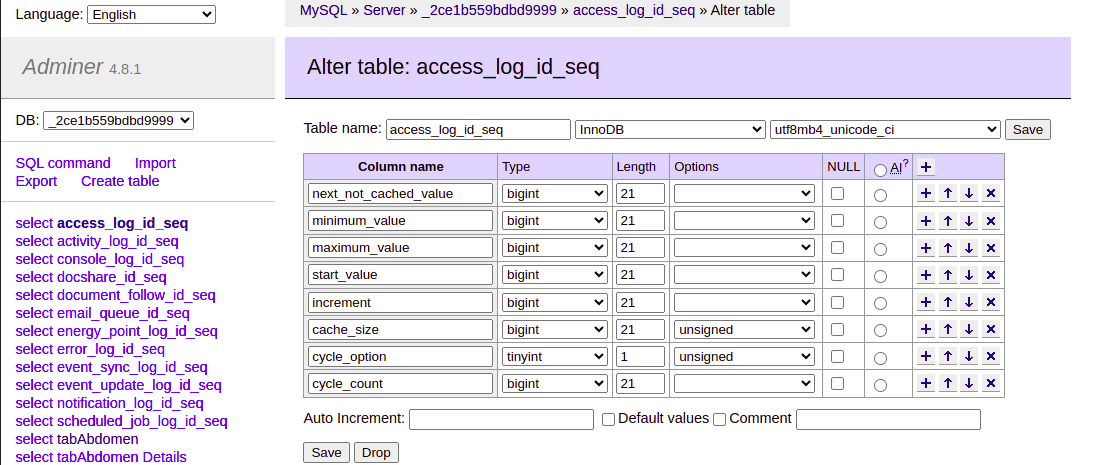
This gives us access to all the fields within the table, and we can alter the values of each field to our preference and save the changes.
4. MyCLI
MyCLI is a command line tool for MySQL that offers autocompletion and syntax highlighting. In addition, it keeps a history of executed commands, allowing us to recall and reuse queries quickly. This makes it a powerful and user-friendly tool for interacting with MySQL databases.
Designed to improve productivity and enhance the user experience, MyCLI is particularly popular among developers and database administrators who prefer working from the command line.
Let’s look at how to install and use MyCLI in Linux.
4.1. Installation
The installation process of MyCLI in Linux is straightforward and can be done using pip, the Python package installer. Before proceeding, we need to ensure both Python and pip are installed and available on the system.
Next, let’s use pip to install MyCLI:
$ pip install mycli
We can verify the installation by checking the version:
$ mycli --version
Version: 1.27.2
This command should display the installed version of MyCLI, confirming that the installation was successful.
4.2. Basic Usage
Let’s start with connecting to a database:
$ mycli -u username -p -h hostname database_name
We should replace username, hostname, and database_name with our credentials.
We’re using the -u and -h options to specify the username and the hostname, respectively. Moreover, the -p option prompts for a password.
Once the connection is established, we can use different MySQL commands to interact with the database.
For example, we can show all databases:
SHOW DATABASES;
We can also select a database:
USE database_name;
Furthermore, we can show all tables within a database:
SHOW TABLES;
We can refer to the MySQL page to access the list of all available MySQL commands.
Finally, MyCLI can be customized through a configuration file in the ~/.myclirc directory. Some common settings we can adjust include setting the default user, enabling or disabling syntax highlighting, and setting a default database.
5. Summary
In this article, we’ve explored different Linux MySQL admin tools and some basic usage examples. Managing MySQL databases on Linux effectively requires a mix of tools tailored to different aspects of database administration.
MySQL Workbench and Adminer offer robust GUI options, while MyCLI provides powerful command-line capabilities. Choosing the right tools for our needs ensures efficient and effective MySQL database management on Linux.