1. Introduction
Vim is a powerful and versatile text editor that comes preinstalled on many Linux distributions. Known for its efficiency and extensive feature set, Vim is used by developers and system administrators for editing code and configuration files. Moreover, its modal nature, where different modes are used for different tasks, sets it apart from other text editors.
In this tutorial, we’ll learn about the basics of using Vim, including navigation, text editing, and searching.
2. Installing Vim
We can easily install Vim on our Linux distribution. For example, to install Vim in Ubuntu or Debian, we can use the apt-get install command:
$ sudo apt-get update
$ sudo apt-get install vim
To verify that Vim is successfully installed, let’s check its version:
$ vim --version
VIM - Vi IMproved 9.1 (2024 Jan 02, compiled Apr 27 2024 15:01:43)
Included patches: 1-377
...
This command displays the installed Vim version along with other relevant information, such as the included features.
3. Modes of Vim
Modes in Vim are essential to its functionality as they enable us to perform different tasks efficiently. Vim operates in several modes, each serving a specific purpose. Let’s learn about the four primary modes available in Vim:
- Normal mode: This is the default mode when we open Vim. In normal mode, we can navigate the text, delete or copy content, and switch to other modes. It’s primarily used for executing commands and moving around the file.
- Insert mode: This mode allows us to insert and edit text. When in insert mode, we can type as we would in any standard text editor. We enter Insert mode from Normal mode by pressing i, a, o, or other variants.
- Visual mode: This mode is used for selecting text. Once text is selected, we can perform operations such as deleting, copying, or changing the selected content. We enter Visual mode from Normal mode by pressing v for character-wise selection, V for line-wise selection, or Ctrl-v for block-wise selection.
- Command-line mode: This mode is also known as ex mode. It enables us to execute commands that affect the entire file or Vim itself, such as saving, quitting, or setting options. We enter command-line mode from normal mode by typing a colon (:).
4. Basic Operations
Now that we have Vim installed on our Linux system, let’s start looking into the basics of operating Vim.
4.1. Opening and Exiting Vim
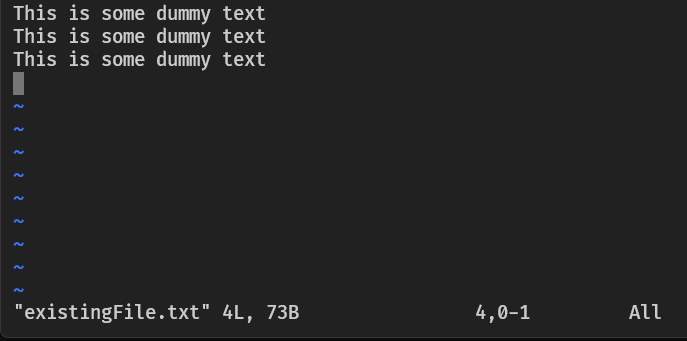
First, let’s understand how to open a file for manipulation and exit the file from Vim. We begin by opening an existing file with Vim:
$ vim existingFile.txt
This command opens existingFile.txt in Vim, allowing us to view and edit its contents.
However, if we want to open a completely new file, we can do so in a similar way. If the file doesn’t exist, Vim will create a new file with that name and open it:
$ vim newFile.txt
When we open a file, we can see it on our console:
To close an already open file, we need to apply a couple of steps:
- Press Esc to ensure we’re in Normal mode.
- Type :wq and press Enter to write (save) the file and quit Vim.
These steps will save the file with the changes we made during our editing session. Alternatively, we can quit without saving changes by typing :q! and pressing Enter.
4.2. Navigating a File
Vim provides multiple ways to move the cursor within a file. We can use the arrow keys for traditional movement, or we can utilize the h, j, k, and l keys, which correspond to left, down, up, and right movements, respectively.
We can also scroll through a file by page. To scroll inside a page, we can use the Ctrl-u and Ctrl-d shortcuts to move up and down the current page, respectively. On the other hand, if we want to scroll page by page, we can use Ctrl-b to move up one page and Ctrl-f to move down one page.
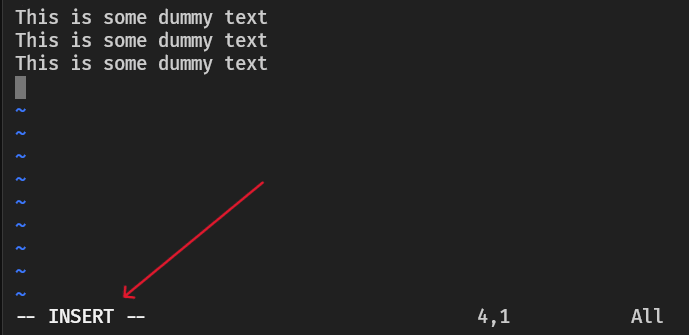
4.3. Inserting and Appending Text
Let’s now look into editing a file’s content, which is done using the insert mode in Vim. We can insert, append, or even delete text or lines in this mode. Notably, when we enter insert mode, it’ll be indicated at the bottom of the console:
We can press i to insert text before the cursor, a to append text after the cursor, or o to add a new line below the cursor.
For example, pressing i and then typing will insert text at the cursor’s current position:
$ vim existingFile.txt
// Before Inserting
This is some dummy text
        ^
        |
   cursor here

// After Inserting (by pressing 'i')
This is awesome dummy text
        ^
        |
   cursor here
All three commands (i, a, o) have capital letter equivalents. For example, we can also use I to insert text at the beginning of the line, A to append text at the end of the line, or O to add a new line above the cursor.
Let’s add some text at the end of the previous line by pressing A:
// Before Appending
This is awesome dummy text
        ^
        |
   cursor here

// After appending (by pressing 'A')
This is awesome dummy text made by us
                                     ^
                                     |
                                cursor here
This way, we’re able to append the text made by us to the end of the line.
4.4. Deleting Text
We can use x to delete the character under the cursor, or X to delete the character before the cursor.
Let’s try to delete some characters in the previous line using x:
// Before Deleting
This is awesome dummy text made by us
        ^
        |
    cursor here

// After deleting (by pressing 'x' three times)
This is some dummy text made by us
        ^
        |
   cursor here
Similarly, we use dw to delete text from the cursor to the end of a word, or daw to delete the entire word.
Let’s try to delete the word some from the previous example. For this, we need to use daw:
// Before Deleting the Word
This is some dummy text made by us
        ^
        |
    cursor here

// After deleting (by pressing 'daw')
This is dummy text made by us
        ^
        |
    cursor here
Finally, to delete a line, we use dd. Let’s delete the entire line where the cursor is located:
// Before Deleting the Line
This is dummy text made by us
        ^
        |
    cursor here

// After deleting the line (by pressing 'dd')

^
|
cursor here
Here, we’ve successfully deleted the entire line.
4.5. Reverting Changes
To undo any of our actions, we can use u. Let’s undo the line deletion operation from the previous example:
// Before Undo

^
|
cursor here

// After Undo (by pressing 'u')
This is dummy text made by us
        ^
        |
    cursor here
By pressing u, we’re able to revert the line deletion made previously.
4.6. Copying and Pasting Text
Copying and pasting is a very important feature for manipulating text in a file. Consequently, Vim has support for this as well.
- Copying (yanking) text: to copy text, we use the y command. This command has two variations: yy yanks the entire line, and yw yanks a word.
- Pasting text: we use the p command to paste the yanked text after the cursor, or P to paste it before the cursor.
Let’s see an example of copying and pasting text in existingFile.txt:
// Copying the word "text" (by pressing 'yw')
This is dummy text made by us
              ^
              |
         cursor here

// Pasting the Word (by pressing 'p')
This is dummy text made by us text
                              ^
                              |
                         cursor here
In this example, we moved our cursor to the position of the word text, and pressed yw. This essentially copied the word. Therefore, we can now paste that word wherever we want inside the file. We chose to paste the word at the end of the line.
4.7. Searching and Replacing Text
Let’s now look into how to perform searching and replacing operations in Vim.
To search for a word in Vim, we use the / command followed by the word we want to find. Pressing n moves to the next occurrence, while N moves to the previous occurrence.
/foo   # Search for the word "foo"
n      # Move to the next occurrence
N      # Move to the previous occurrence
Vim also supports powerful search capabilities using regular expressions. For example, to find lines starting with foo, we use:
/^foo # Search for lines starting with "foo"
Additionally, to find a word followed by any character and bar, we use:
/foo.bar # Search for "foo" followed by any character and "bar"
To replace text, we use the :s command. For example, to replace the first occurrence of foo with bar on the current line, we use:
:s/foo/bar # Replace "foo" with "bar" on the current line
To replace all occurrences of foo with bar on the current line, we add the g flag. Moreover, for replacing across the entire file, we use the % symbol.
:s/foo/bar/g     # Replace all occurrences of "foo" with "bar" on the current line
:%s/foo/bar/g    # Replace all occurrences of "foo" with "bar" in the entire file
5. Conclusion
In this article, we learned about installing Vim, opening and closing files, and understanding the different modes that make Vim unique. We covered essential editing commands, including how to insert, delete, copy, and paste text. Additionally, we explored searching and replacing text using both simple commands and advanced regular expressions.
Vim’s efficiency and versatility make it an essential skill for developers and system administrators alike. If we master Vim, we can navigate, edit, and manage text files with speed and precision, significantly enhancing our productivity.