1. Overview
As with users of any other operating system, Linux users may sometimes need help finding good webcam applications that enable them to capture videos for various use cases, such as recording guides.
In this tutorial, we’ve gathered a list of some reliable webcam applications for Linux. We’ll also see how to capture videos using these webcam applications. Specifically, we’ll be using Ubuntu for demonstration purposes.
2. Cheese
Cheese is a popular webcam application that comes by default in Ubuntu and many other Linux distributions. It enables users to take photos and capture videos using their built-in or external webcam. Moreover, Cheese offers users fancy filters and special effects.
Several points distinguish Cheese from other webcam applications:
- offers a countdown feature
- enable users to capture multiple photos at once using burst mode
- shows a preview of previously captured videos and photos in the interface
Overall, Cheese isn’t an advanced webcam application but a simple, user-friendly, lightweight tool that allows users to capture photos and videos. Additionally, it’s not resource-intensive and works perfectly on older hardware as well.
2.1. Cheese Installation
First of all, we head to the Linux Show Applications option to see if we already have Cheese installed on the system.
If it’s not installed and we want to use it, we can install Cheese via the apt command on Ubuntu:
$ sudo apt install cheese -y
Reading package lists... Done
Building dependency tree... Done
Reading state information... Done
Suggested packages:
  gnome-video-effects-frei0r
...
Alternatively, we can install Cheese through Snap.
2.2. Capture Video From Webcam via Cheese
To capture videos with Cheese, we first open the application. Then, we go to the Video tab and click on the video record icon:
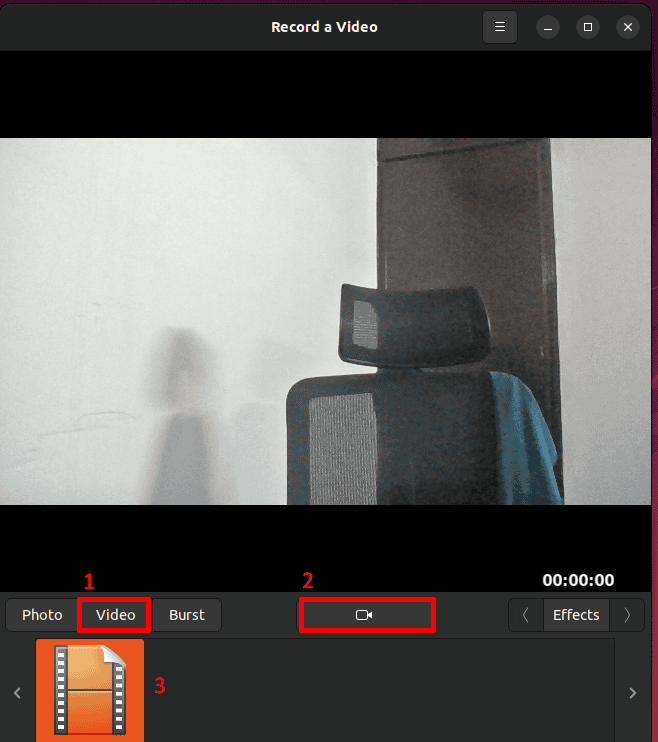
When we want to stop the recording, we click the video record icon again, which changes to a stop icon. Moreover, we can observe that the previously captured videos are displayed in the preview gallery at the bottom of the interface.
3. Webcamoid
Webcamoid is an open-source, cross-platform webcam application with support for Linux, FreeBSD, Windows, Android, and macOS. In addition to taking pictures and capturing videos, Webcamoid offers numerous advanced features, including screen capture support, over 60 effects, background replacement, high customization, and support for numerous video formats.
What makes Webcamoid different is that it can manage multiple webcams and also supports setting up a virtual webcam to feed video recordings to other programs.
Overall, it’s a powerful fully-featured webcam app with a simple user interface.
3.1. Webcamoid Installation
We can install Webcamoid in Ubuntu from its official repository:
$ sudo apt install webcamoid
Reading package lists... Done
Building dependency tree... Done
Reading state information... Done
The following NEW packages will be installed:
  webcamoid
...
Alternatively, we can build the application from its source code.
3.2. Capture Video From Webcam via Webcamoid
Moving forward, let’s discuss how we can record a video using Webcamoid.
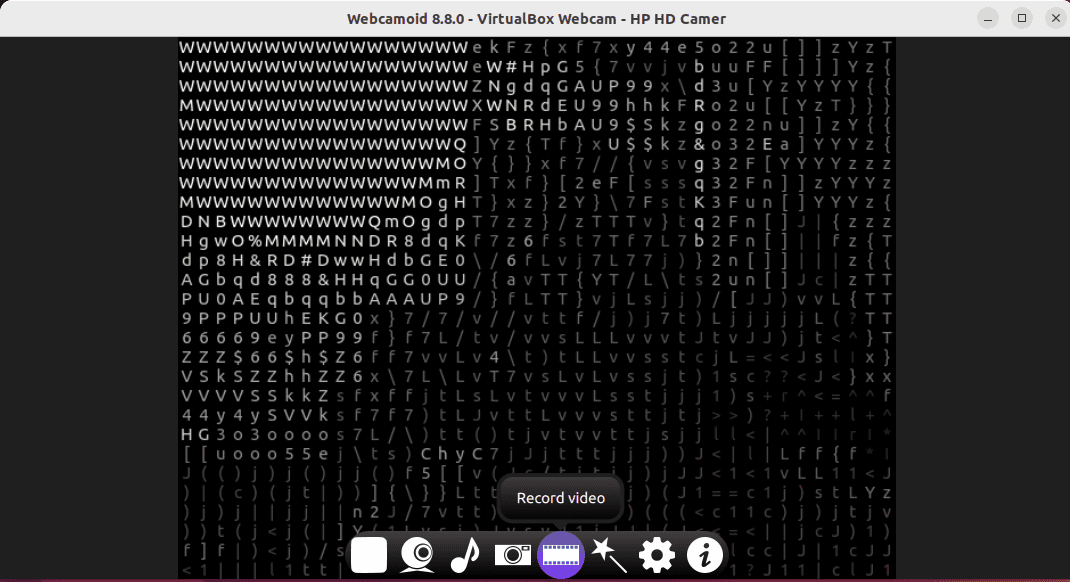
First, we open the Webcamoid application and click on the Record Video button:
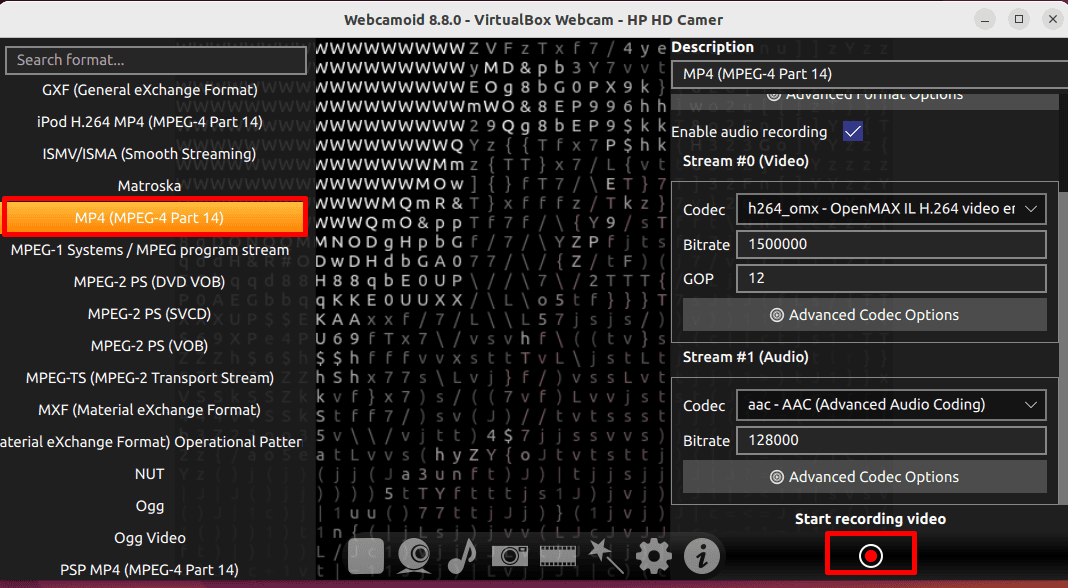
Next, we need to select the format for the video and tweak other video settings if required. Once everything is set according to preference, we can click the Start Recording Video button. After capturing the video, we can click the Stop Recording Video button to end the recording:
The videos are stored in the Webcamoid directory inside the Videos directory by default.
To check if the videos saved successfully, we can run the ls command in this directory:
$ ls ~/Videos/Webcamoid
'Video 2024-07-27 08-01-20.webm'  'Video 2024-07-27 08-04-49.webm'
'Video 2024-07-27 08-02-56.webm'
Of course, we can change the format if desired.
4. OBS Studio
OBS Studio is a popular, open-source application for video-capturing and live streaming, available for Linux, Windows, and macOS. It enables users to record video, create unlimited scenes, mix audio, apply effects like noise suppression, and broadcast in real-time. Additionally, OBS Studio supports the creation of scenes from multiple sources such as webcams, images, texts, browser windows, and more.
OBS Studio stands out for its support of advanced streaming functionality and seamless transitioning between multiple scenes.
Overall, we can utilize this popular tool to capture, edit, and broadcast video. It’s mostly used by content creators and streamers.
4.1. OBS Studio Installation
To install OBS Studio on Ubuntu, we first add its PPA repository:
$ sudo add-apt-repository ppa:obsproject/obs-studio
Repository: 'deb https://ppa.launchpadcontent.net/obsproject/obs-studio/ubuntu/ jammy main'
Description:
Latest stable release of OBS Studio
More info: https://launchpad.net/~obsproject/+archive/ubuntu/obs-studio
Adding repository.
Press [ENTER] to continue or Ctrl-c to cancel.
...
Next, we can install the application via apt:
$ sudo apt install obs-studio
Reading package lists... Done
Building dependency tree... Done
Reading state information... Done
The following additional packages will be installed:
...
OBS Studio is ready to capture videos from the webcam.
4.2. Capture Video From Webcam via OBS Studio
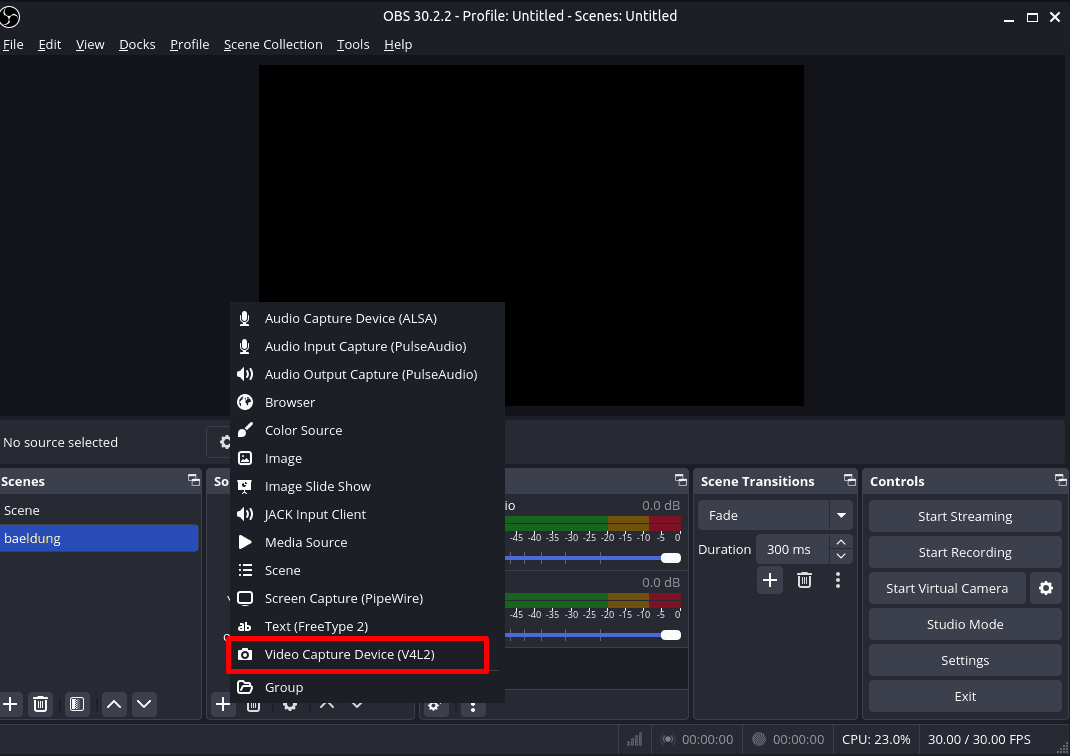
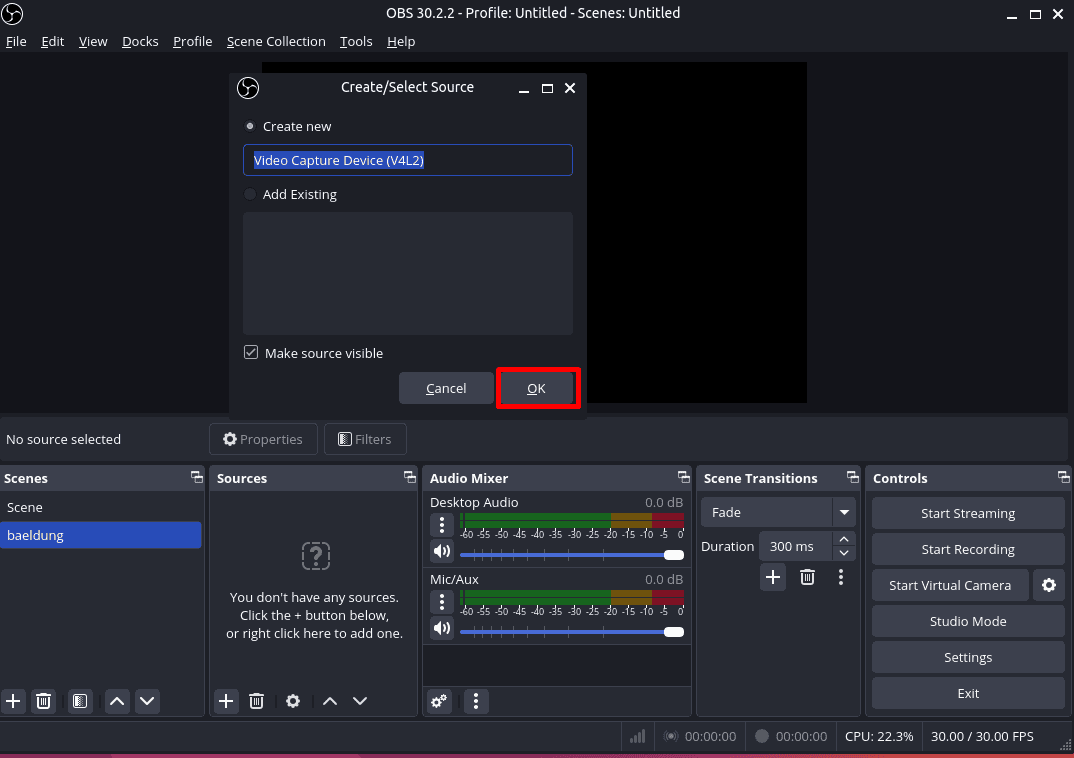
To record a video from a webcam using OBS Studio, we open it and perform the desired scene settings. Then, we click on the add icon in the source section and select the Video Capture Device option:
Next, let’s press the OK button to confirm the camera source:
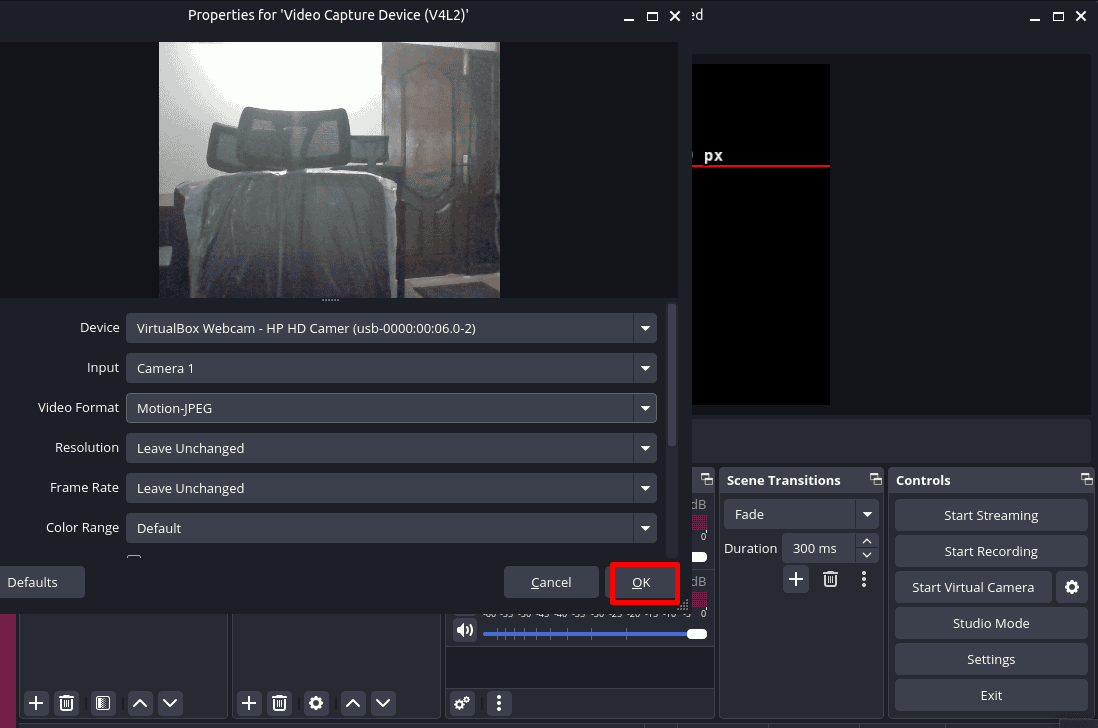
Afterward, we can tweak the video settings and press OK to confirm:
Finally, we can click on the Start Recording button to capture video and the Stop Recording button to end it:
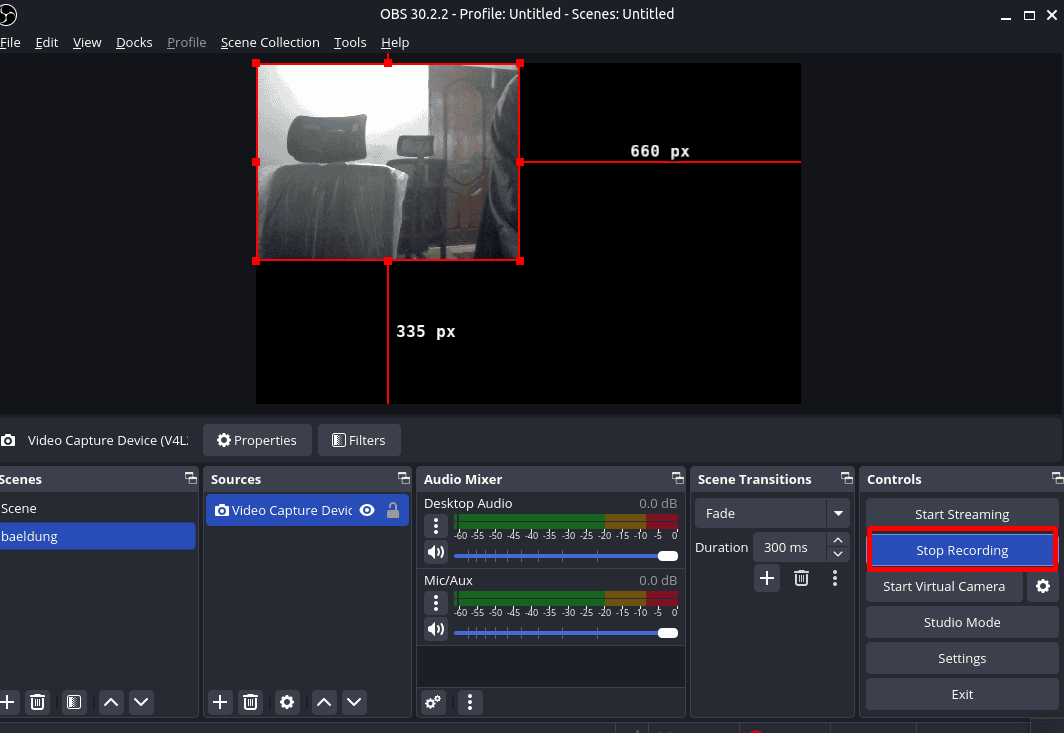
Notably, we can change different aspects of the video and capture.
Of course, OBS Studio also enables streaming these videos on different platforms including YouTube and Twitch.
5. FFmpeg
FFmpeg is a powerful command-line toolbox utility that aids in converting, recording, manipulating, and streaming videos and audio. If we prefer CLI instead of GUI applications, we can use FFmpeg to capture videos in Linux. In addition to recording videos, we can seamlessly encode, decode, and convert their formats.
5.1. FFmpeg Installation
We can install FFmpeg in the Ubuntu system from its official repository:
$ sudo apt install ffmpeg -y
Reading package lists... Done
Building dependency tree... Done
Reading state information... Done
The following additional packages will be installed:
...
FFmpeg has much more to offer in addition to capturing video.
5.2. Capture Video From Webcam via FFmpeg
To capture a video in MP4 format from a webcam, we can execute a fairly simple ffmpeg command:
$ ffmpeg -f v4l2 -i /dev/video0 baeldung.mp4
ffmpeg version 4.4.2-0ubuntu0.22.04.1 Copyright (c) 2000-2021 the FFmpeg developers
  built with gcc 11 (Ubuntu 11.2.0-19ubuntu1)
  ...
 /frame=   84 fps= 19 q=29.0 size=     256kB time=00:00:01.33 bitrate=1573.1kbits/frame=   92 fps= 18 q=29.0 size=     512kB time=00:00:01.60 bitrate=2621.6kbits/s dup=70 drop=0 speed=0.315x
To stop the video, we can press the CTRL + C hotkey. Now, let’s confirm if the baeldung.mp4 file is saved successfully by running the ls command:
$ ls
baeldung.mp4  Documents  Music     Public  Templates
Desktop       Downloads  Pictures  snap    Videos
As expected, we see the video recording file is available.
6. Conclusion
In this article, we listed a custom list of the top four webcam tools to capture videos in Linux from a webcam.
In general, if we prefer CLI, we can opt for FFmpeg. When looking for a basic webcam application, we can try Cheese. However, if we need advanced features, we can use OBS Studio or Webcamoid.