1. Overview
nudge4j allows developers to see the impact of any operation straight-away and provides an environment in which they can explore, learn, and ultimately spend less time debugging and redeploying their application.
In this article, we will explore what nudge4j is, how it works, and how any Java application in development might benefit from it.
2. How nudge4j Works
2.1. A REPL in Disguise
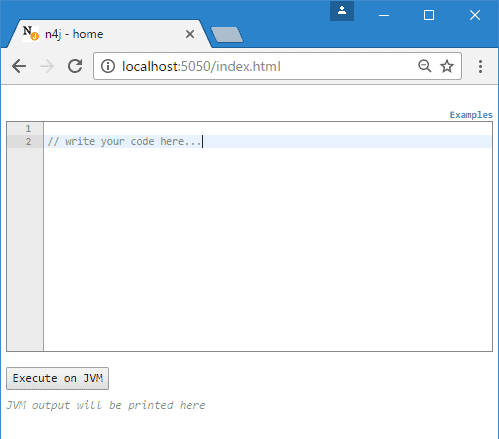
nudge4j is essentially a read-eval-print-loop (REPL) in which you talk to your Java application within a browser window via a simple page containing just two elements:
- an editor
- the Execute on JVM button
You can talk to your JVM in a typical REPL cycle:
- Type any code into the editor and press Execute on JVM
- The browser posts the code to your JVM, which then runs the code
- The result is returned (as a string) and displayed below the button
nudge4j comes with a few examples to try straight-away, like querying how long the JVM has been running and how much memory is currently available. I suggest you start with these before writing your own code.
2.2. The JavaScript Engine
The code which is sent by the browser to the JVM is JavaScript that manipulates Java objects (not to be confused with any JavaScript that runs on the browser). The JavaScript is executed by the built-in JavaScript engine Nashorn.
Don’t worry if you don’t know (or like) JavaScript – for your nudge4j needs, you can just think of it as an untyped Java dialect.
Note that I am aware that saying that “JavaScript is untyped Java” is a huge simplification. But I want Java developers (who may be prejudiced towards anything that is JavaScript) to give nudge4j a fair chance.
2.3. Scope of JVM Interaction
nudge4j lets you access any Java class which is accessible from your JVM, allowing you to call methods, create objects, etc. This is very powerful, but it might not be sufficient while working with your application.
In some situations, you might want to reach one or more objects, specific to your application only, so that you can manipulate them. nudge4j allows for that. Any object that needs to be exposed can be passed as an argument at instantiation time.
2.4. Exception Handling
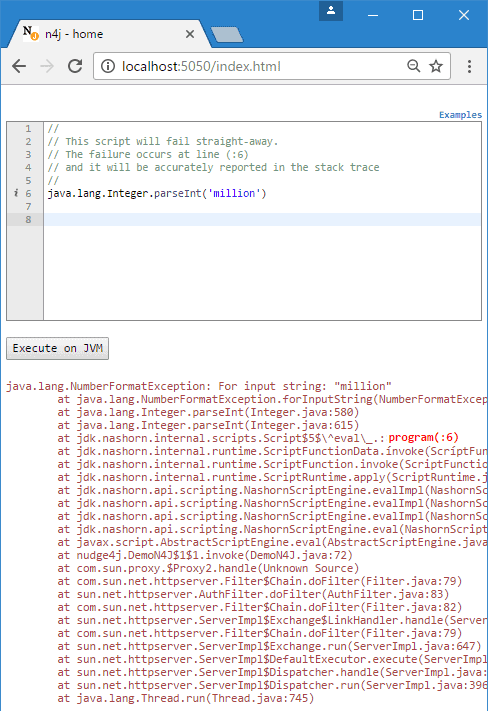
The design of nudge4j recognizes the possibility that users of the tool might make mistakes or cause errors on the JVM. In both of these cases, the tool is designed to report the full stack trace in order to guide the user to rectify the mistake or error.
Let’s look at a screenshot in which a snippet of code that has been executed results in an Exception being thrown:
3. Adding nudge4j to Your Application
3.1. Just Copy and Paste
The integration with nudge4j is achieved somewhat unconventionally, as there are no jar files to add to your classpath, and there are no dependencies to add to a Maven or Gradle build.
Instead, you are required to simply copy and paste a small snippet of Java code – around 100 lines – anywhere into your own code before you run it.
You’ll find the snippet on the nudge4j home page – there’s even a button on the page that you can click to copy the snippet to your clipboard.
This snippet of code might appear quite abstruse at first. There are a few reasons for that:
- The nudge4j snippet can be dropped into any class; therefore, it could not make any assumption regarding the imports, and any class it contained had to be fully qualified
- To avoid potential clashes with variables already defined, the code is wrapped in a function
- Access to the built-in JDK HttpServer is done via introspection in order to avoid restrictions which exist with some IDEs (e.g. Eclipse) for packages beginning with “com.sun.*”
So, even though Java is already a verbose language, it had to be made even more verbose to provide for a seamless integration.
3.2. Sample Application
Let’s start with a standard JVM application where we pretend that a simple java.util.HashMap holds most of the information that we want to play with:
public class MyApp {
    public static void main(String args[]) {
        Map map = new HashMap();
        map.put("health", 60);
        map.put("strength", 4);
        map.put("tools", Arrays.asList("hammer"));
        map.put("places", Arrays.asList("savannah","tundra"));
        map.put("location-x", -42 );
        map.put("location-y", 32);

        // paste original code from nudge4j below
        (new java.util.function.Consumer<Object[]>() {
            public void accept(Object args[]) {
                ...
                ...
            }
        }).accept(new Object[] {
            5050,  // <-- the port
            map    // <-- the map is passed as a parameter.
        });
    }
}
As you can see from this example, you simply paste in the nudge4j snippet at the end of your own code. Lines 12-20 in the example here serve as a placeholder for an abbreviated version of the snippet.
Now, let’s point the browser to http://localhost:5050/. The map is now accessible as args[1] in the editor from the browser by simply typing:
args[1];
This will provide a summary of our Map (in this case relying on the toString() method of the Map and its keys and values).
Suppose we want to examine and modify the Map entry with the key value “tools”.
To get a list of all available tools in the Map, you would write:
map = args[1];
map.get("tools");
And to add a new tool to the Map, you would write:
map = args[1];
map.get("tools").add("axe");
In general, few lines of code should be sufficient to probe any Java application.
4. Conclusion
By combining two simple APIs within the JDK (Nashorn and Http server) nudge4j gives you the ability to probe into any Java 8 Application.
In a way, nudge4j is just a modern cut off an old idea: give developers access to the facilities of an existing system via a scripting language – an idea that can make an impact on how Java developers could spend their day coding.

