1. Overview

OpenAPI is a language-agnostic and platform-independent specification that standardizes the REST APIs. OpenAPI makes it easy for the users to understand the APIs without dwelling deep into the code. Swagger-UI generates a visual document from this OpenAPI specification that helps visualize and test the REST APIs.

In this tutorial, let’s learn how to generate OpenAPI documentation, test REST APIs, and configure JWT authentication for our OpenAPI using Springdoc-OpenAPI in a Spring Boot application.

2. Swagger-UI

Swagger-UI, a collection of HTML, Javascript, and CSS files, generates a user interface based on the OpenAPI specification. Let’s use the Springdoc-OpenAPI library to automate the generation of OpenAPI documents for the REST APIs and use Swagger-UI to visualize these APIs.

Writing an OpenAPI document specification can be challenging when the number of APIs in an application keep increasing. Springdoc-OpenAPI helps us to auto-generate the OpenAPI document. Further, let’s try to use this library and generate the OpenAPI document.

2.1. Dependencies

Straightaway, let’s start by adding Springdoc-OpenAPI dependencies:

<dependency>
    <groupId>org.springdoc</groupId>
    <artifactId>springdoc-openapi-ui</artifactId>
    <version>1.7.0</version>
</dependency>

This dependency also adds Swagger-UI web-jars to our Spring Boot application.

2.2. Configuration

Next, let’s start the application and hit the URL http://localhost:8080/swagger-ui.html in the browser.

As a result, we get the Swagger-UI page:

Swagger Default

Similarly, the OpenAPI v3.0 document will be available at http://localhost:8080/v3/api-docs.

Additionally, let’s add descriptions, terms of service,  and other meta-information for our User APIs using @OpenAPIDefinition:

@Configuration
@OpenAPIDefinition(
  info =@Info(
    title = "User API",
    version = "${api.version}",
    contact = @Contact(
      name = "Baeldung", email = "[email protected]", url = "https://www.baeldung.com"
    ),
    license = @License(
      name = "Apache 2.0", url = "https://www.apache.org/licenses/LICENSE-2.0"
    ),
    termsOfService = "${tos.uri}",
    description = "${api.description}"
  ),
  servers = @Server(
    url = "${api.server.url}",
    description = "Production"
  )
)
public class OpenAPISecurityConfiguration {}

Also, we can externalize the configurations and meta-information. For example, define api.version, tos.uri, and api.description in the application.properties or application.yaml file.

2.3. Test

Finally, let’s test the Swagger-UI and check the OpenAPI documentation.

For this, start the application and open the URL http://localhost:8080/swagger-ui/index.html for the Swagger-UI:

swagger-config

Similarly, the OpenAPI document will be available at http://localhost:8080/v3/api-docs:

{
    "openapi": "3.0.1",
    "info": {
      "title": "User API",
      "termsOfService": "terms-of-service",
     ...
     ...
}

3. JWT Authentication

Springdoc-OpenAPI generates the documentation based on our application REST APIs. Additionally, this documentation can be customized using the Springdoc-OpenAPI annotations.

In this section, let’s learn to configure the JWT-based authentication for our OpenAPIs.

We can configure the JWT authentication for OpenAPI per operation, class, or global level.

3.1. Per-Operation Configuration

To begin with, let’s declare JWT authentication only for specific operations. Let’s define this configuration:

@Configuration
@SecurityScheme(
  name = "Bearer Authentication",
  type = SecuritySchemeType.HTTP,
  bearerFormat = "JWT",
  scheme = "bearer"
)
public class OpenAPI30Configuration {}

@SecurityScheme annotation adds the securitySchemes to the components section of the OneAPI Specification. @SecurityScheme defines a security mechanism that can be used by our APIs. *The supported security schemes are APIKey, HTTP Authentication (Basic and Bearer), OAuth2, and OpenID Connect*. In this case, let’s use HTTP Bearer Authentication as our security scheme.

For HTTP Bearer token-based authentication, we need to choose the security scheme as bearerAuth and bearer format as JWT.

Since we like to protect only a specific operation, we need to specify the operation that requires authentication. For operation-level authentication, we should use the @SecurityRequirement annotation on the operation:

@Operation(summary = "Delete user", description = "Delete user")
@SecurityRequirement(name = "Bearer Authentication")
@DeleteMapping
description = "A JWT token is required to access this API...",
public String deleteUser(Authentication authentication) {}

With these configurations in place, let’s redeploy the application and hit the URL http://localhost:8080/swagger-ui.html:

Per-Operation

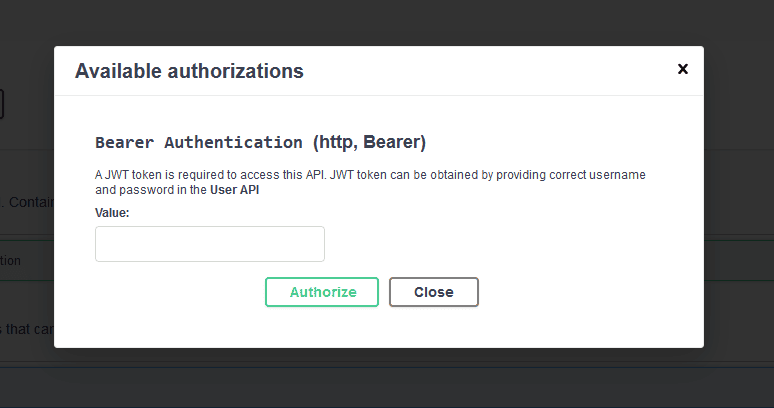
Clicking on the lock icon opens a login dialog for the user to provide an access token to invoke the operation:

Authyentication Modal

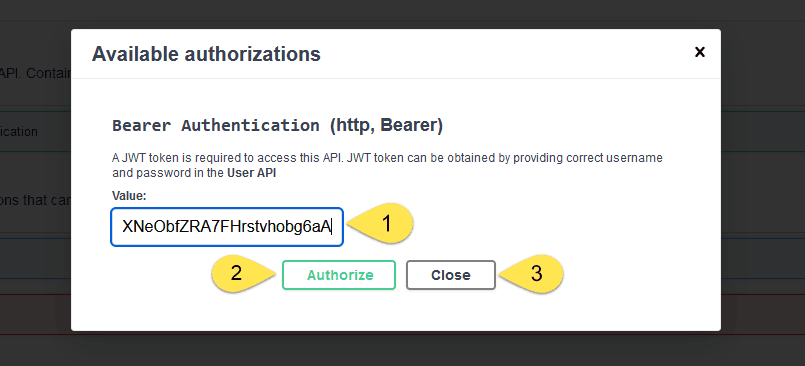
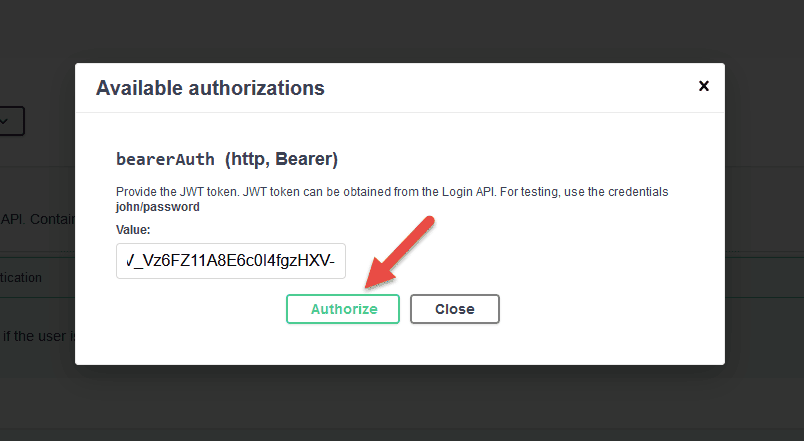
For this example, a JWT token can be obtained by providing john/password or jane/password to the authentication API*.* Once we get the JWT  token, we can pass it in the value textbox and click on Authorize button and then the Close button:

Authenticate

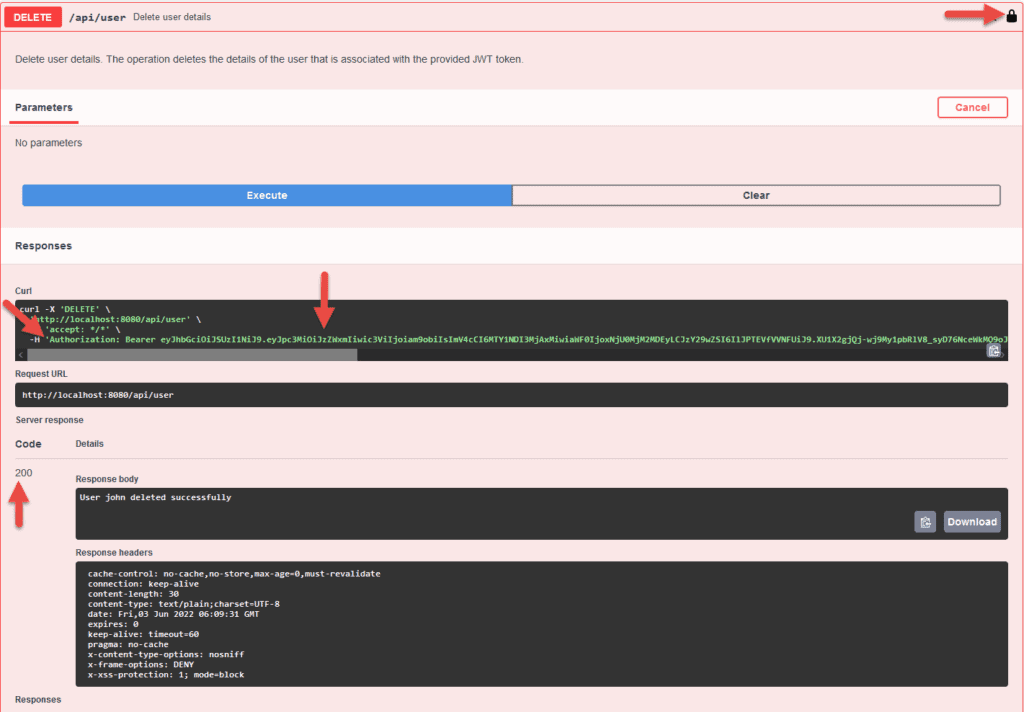
With the JWT token in place, let’s invoke the deleteUser API:

Delete-Operation

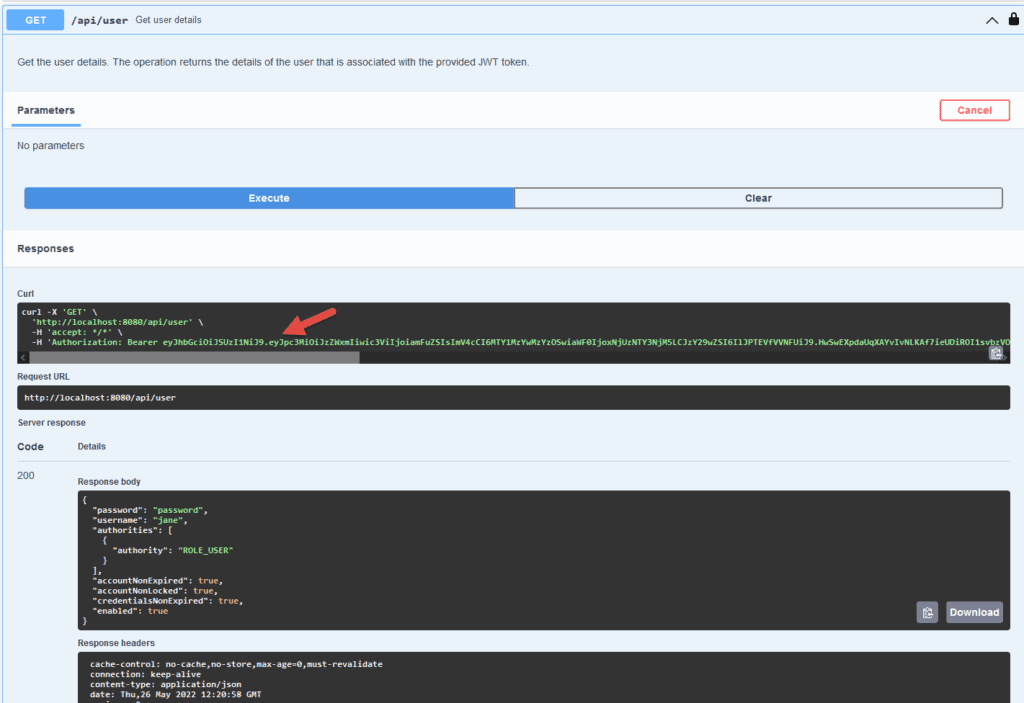
As a result, we see the operation will be provided with a JWT token as indicated by the Securedicon, and Swagger-UI provides this token as an HTTP Bearer in the Authorization header. Finally, with this configuration in place, we can successfully invoke the protected deleteUser API.

So far, we have configured an operation-level security configuration. Likewise, let’s check the OpenAPI JWT security class and global configurations.

3.2. Class Level Configuration

Similarly, we can provide OpenAPI authentication to all the operations in a class. Declare the @SecurityRequirement annotation on the class that contains all APIs. Doing so will provide authentication to all the APIs in that particular class:

@RequestMapping("/api/user")
@RestController
@SecurityRequirement(name = "bearerAuth")
@Tag(name = "User", description = "The User API. Contains all the operations that can be performed on a user.")
public class UserApi {}

Consequently, this configuration enables the security of all the operations in the class UserApi. As a result, assuming that the class has two operations, the Swagger-UI looks like this:

Per Class

3.3. Global Configuration

Typically, we prefer to keep the OpenAPI authentication to all the APIs in an application. For these situations, we can declare the security at a global level using Spring @Bean annotation:

@Configuration
public class OpenAPI30Configuration {
@Bean
public OpenAPI customizeOpenAPI() {
    final String securitySchemeName = "bearerAuth";
    return new OpenAPI()
      .addSecurityItem(new SecurityRequirement()
        .addList(securitySchemeName))
      .components(new Components()
        .addSecuritySchemes(securitySchemeName, new SecurityScheme()
          .name(securitySchemeName)
          .type(SecurityScheme.Type.HTTP)
          .scheme("bearer")
          .bearerFormat("JWT")));
    }
}

With this global configuration, the Springdoc-OpenAPI configures JWT authentication to all the OpenAPIs in the application:

Global Configuration

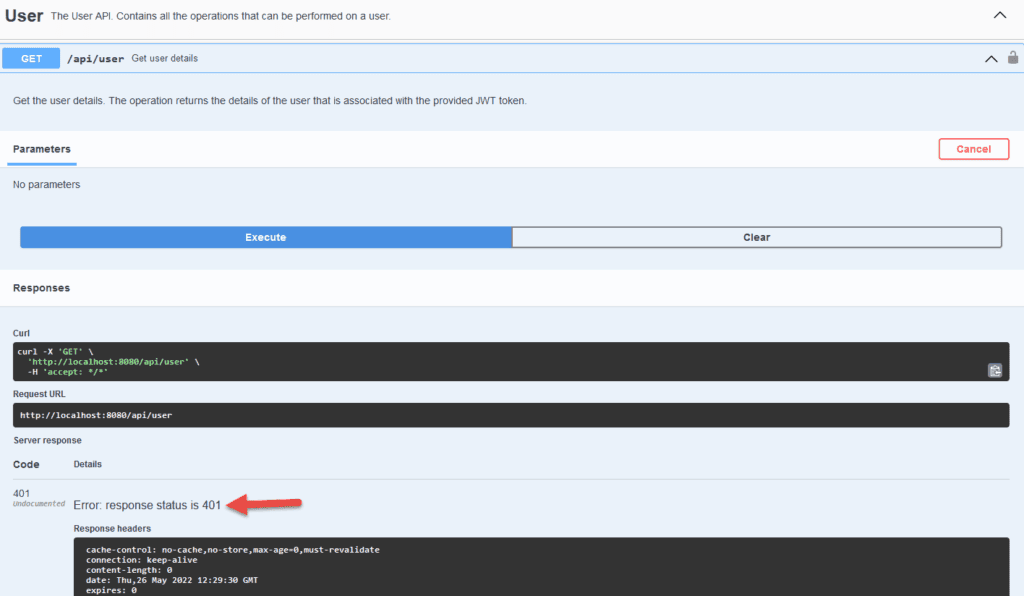
Let’s try to invoke the GET API:

401

Eventually, we get HTTP 401 Unauthorized. The API is secured, and we haven’t provided the JWT token. Next, let’s provide the JWT token and check the behavior.

Click on Authorize button and provide the JWT token to invoke the operations. We can obtain the bearer token from the authentication API available in the swagger console:

Authentication Token

Finally, with the JWT token configured, let’s reinvoke the API:

Authentication-Success

At this point, with the correct JWT token, we can invoke our secured APIs successfully.

4. Conclusion

In this tutorial, we learned how to configure JWT authentication to our OpenAPIs. Swagger-UI provides a tool to document and test the REST APIs based on OneAPI specification. The Swaggerdoc-OpenAPI tool helps us generate this specification based on the REST APIs that are part of our Spring Boot application.

As always, the complete source code is available over on GitHub.