1. 概述
持续集成(CI)与持续交付(CD)能够提升代码质量、自动化测试并简化部署流程。然而,随着项目数量的增加,在多个仓库中维护多份 CI 配置会变得繁琐且容易出错。
本文将介绍如何通过共享 GitLab CI/CD 的 YAML 配置,在多个项目之间高效管理 CI/CD 流水线。
2. 定义自定义 CI/CD 配置
我们首先来看一个名为 ci-common 的项目下的 .gitlab-ci.yml 文件,它位于 GitLab 组 baeldung-developers 下:
hello_world:
  script:
    - echo "Hello, world!"

.greeting:
  script:
    - echo "$GREETING"
GitLab CI/CD 不会直接运行 .greeting 这个隐藏任务,除非我们通过 extends 扩展它。
接下来,我们可以通过 GitLab 的“自定义 CI/CD 配置”功能在其他项目中复用该配置。其格式如下:
<filepath>[@<full group path>/<project path>][:refname]
如果配置文件与当前项目在同一仓库中,可以省略 group 和 project 信息;若文件在非默认分支中,则需要指定 refname。
以 proj-use-custom-ci-config 项目为例,我们可以在 GitLab 的 CI/CD 设置中配置如下:

⚠️ 该方法虽然简单,但缺乏灵活性,无法在引用时进行修改。
3. 使用组级自定义项目模板
GitLab 提供了 组级自定义项目模板 功能,可用于初始化新项目时自动包含预定义的 CI/CD 配置。但该功能仅在 GitLab Premium 和 Ultimate 版本中可用。
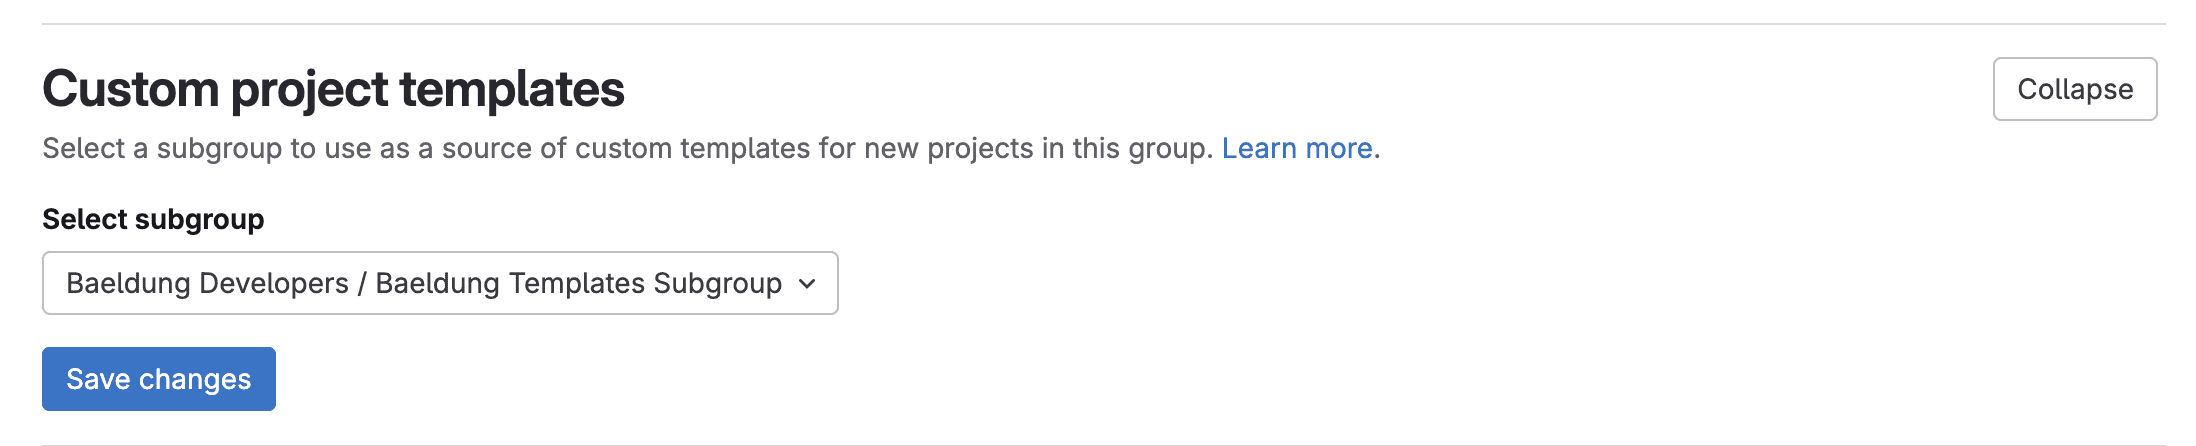
我们建议在一个专用子组中维护所有模板项目。例如,我们创建了 Baeldung Templates Subgroup 子组,并在其中创建了 ci-common 项目,其 .gitlab-ci.yml 内容如前所述。
然后在 GitLab 组设置中配置该子组为模板源:
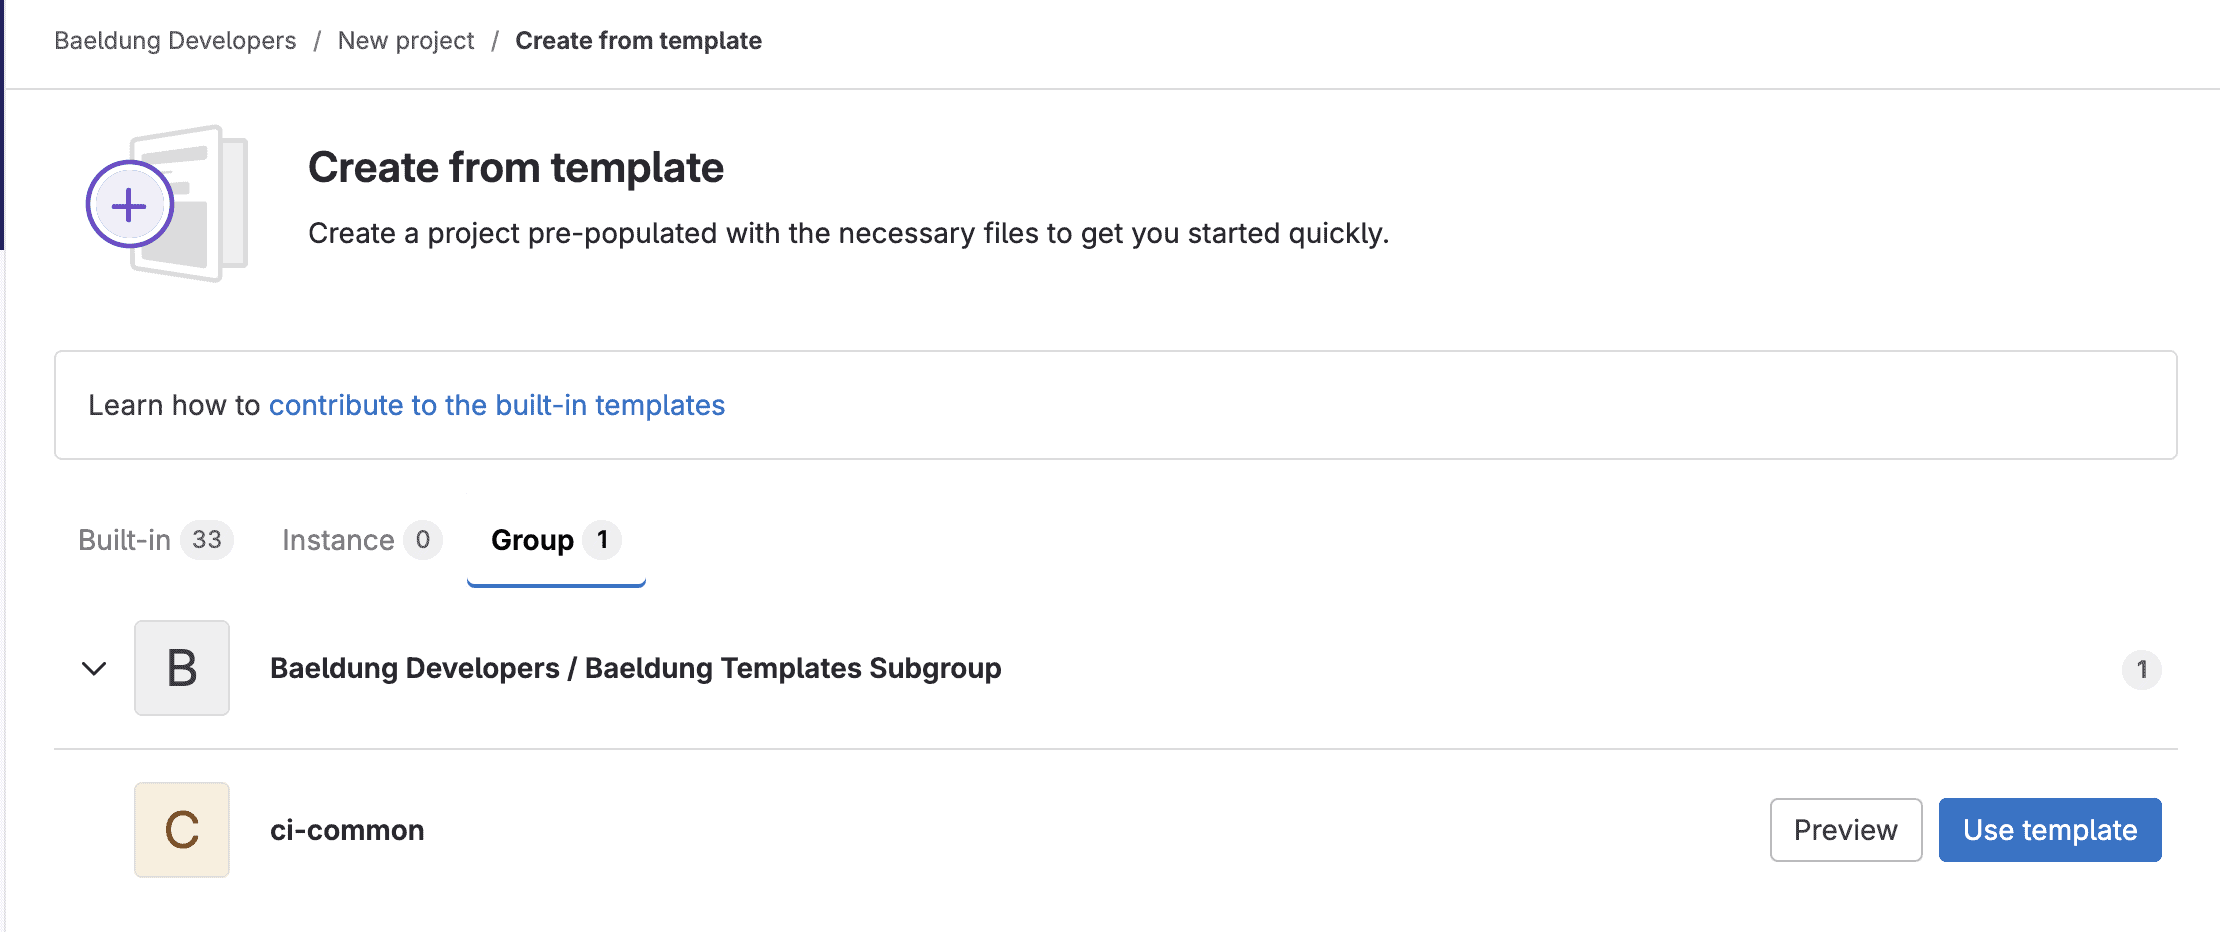
创建新项目时,选择“从模板创建”即可:
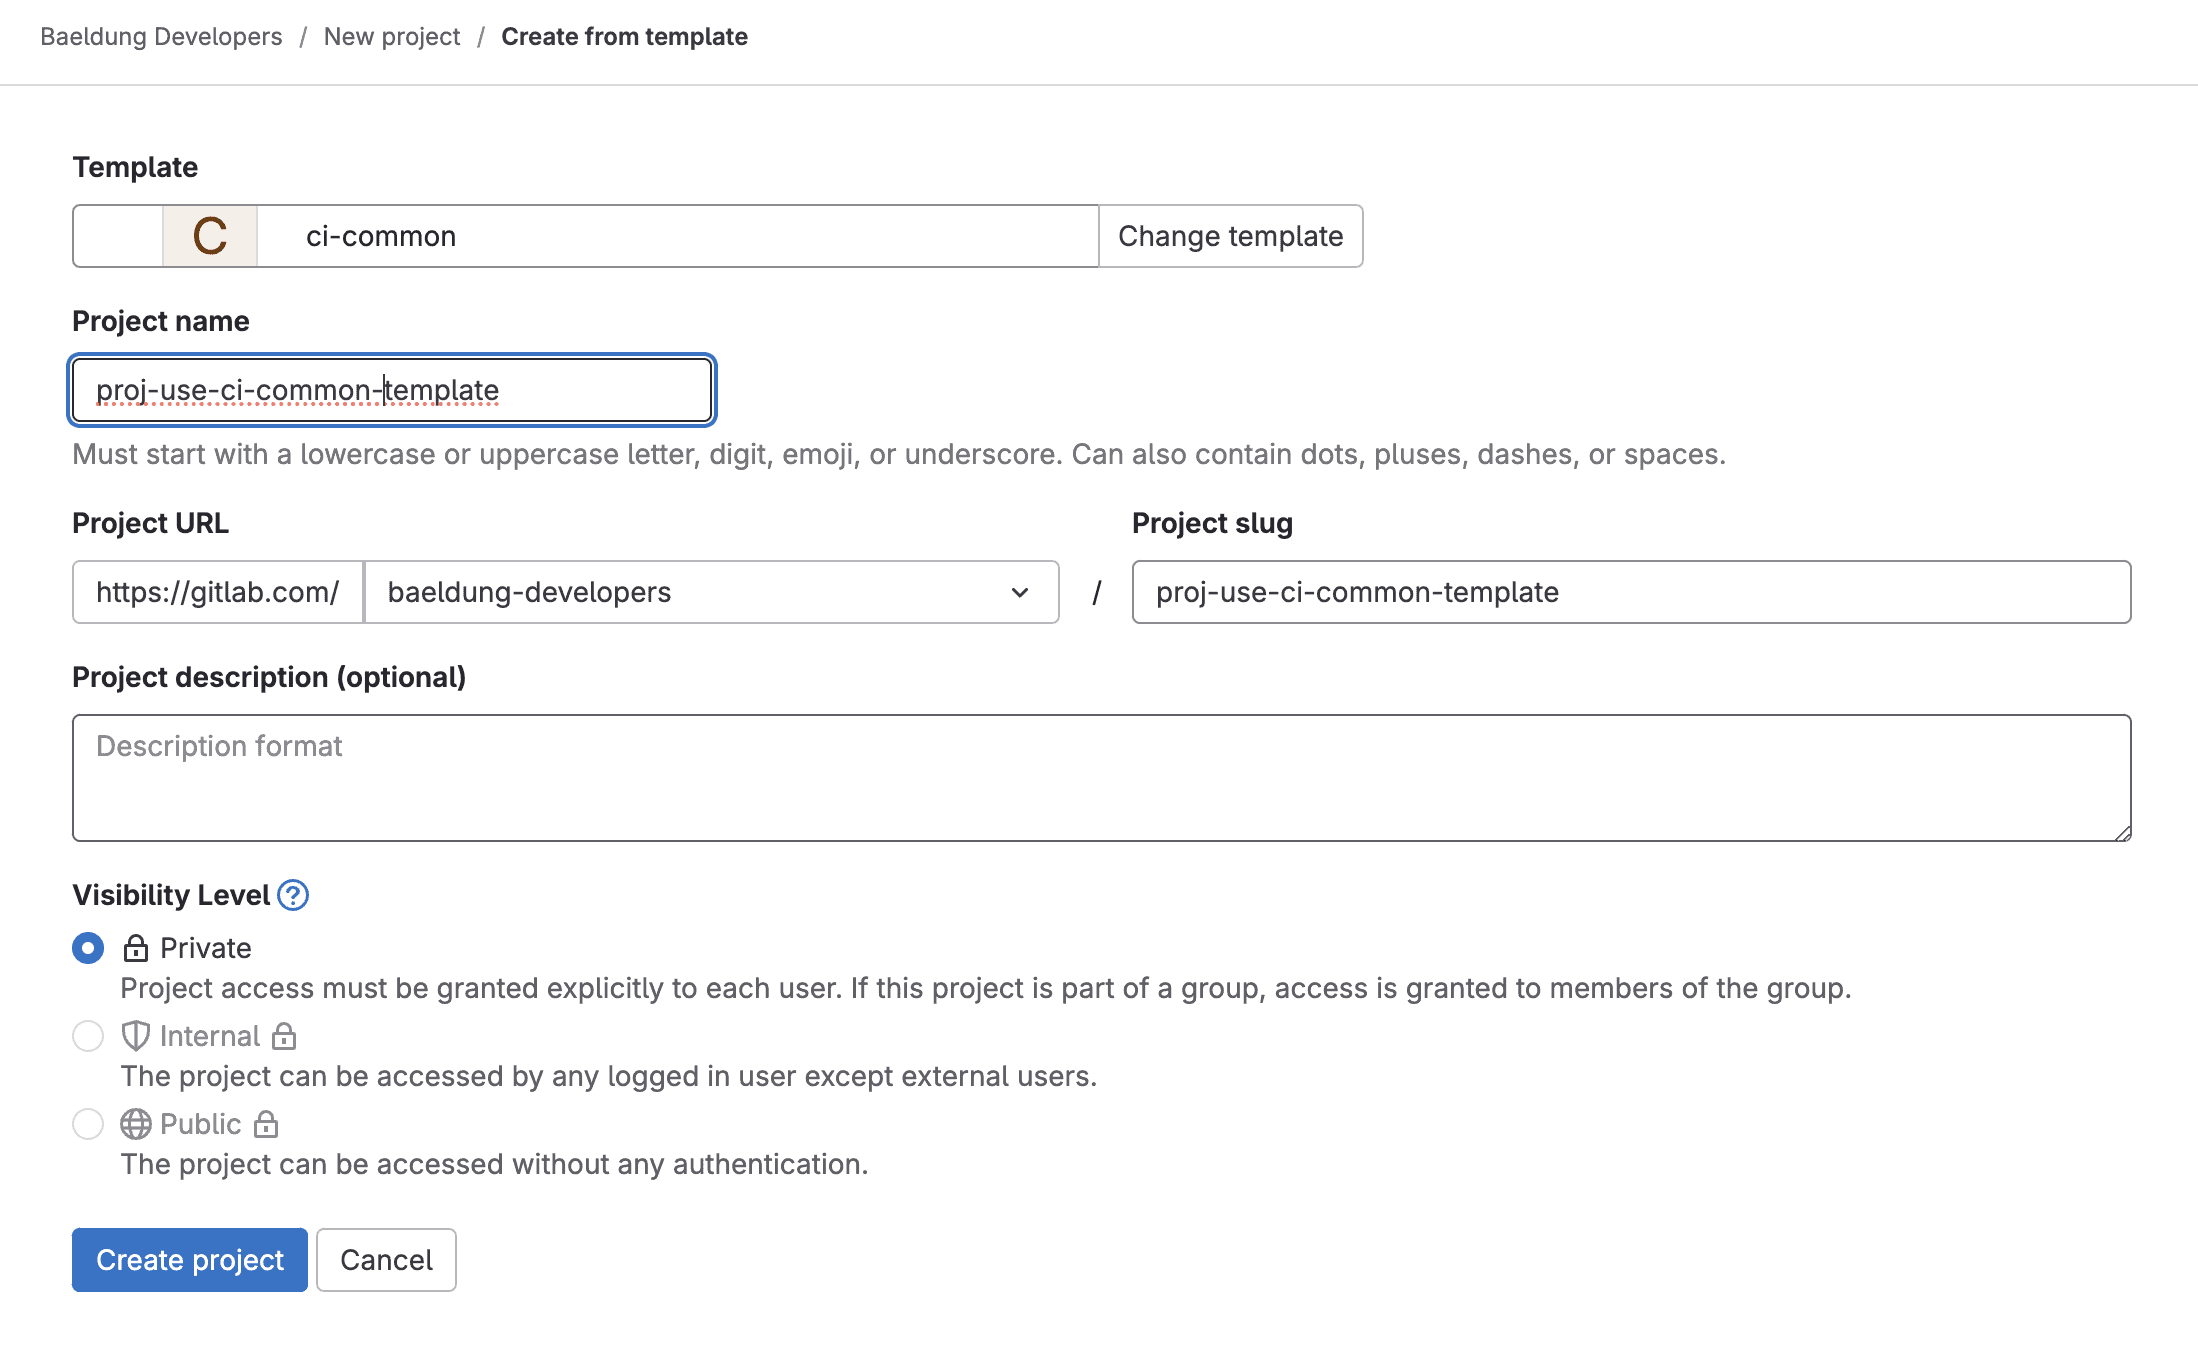
填写项目名称和模板信息后完成创建:
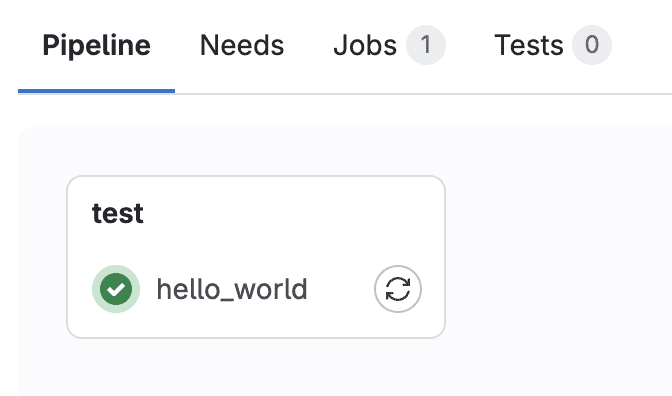
✅ 模板项目中的 CI/CD 配置已成功复用。⚠️ 但需要注意:模板更新后,已创建的项目不会自动同步。
4. 引用静态 YAML 文件
GitLab 支持使用 include 和 trigger 关键字来引用外部 YAML 文件,从而实现 CI/CD 配置的共享。
4.1. 扩展项目流水线
以 proj-include-static-yaml 项目为例,其 .gitlab-ci.yml 内容如下:
include:
  - project: baeldung-developers/ci-common
    file: .gitlab-ci.yml
这样,ci-common 项目中的 hello_world 任务将被引入并执行:
我们还可以在本地覆盖配置:
include:
  - project: baeldung-developers/ci-common
    file: .gitlab-ci.yml

hello_world:
  script:
    - echo "Hello, world! (modified)"
GitLab 使用“就近优先”策略处理冲突,确保本地配置生效。
我们也可以扩展隐藏任务:
hello_world_greeting:
  extends: .greeting
  variables:
    GREETING: "Hello, world!"
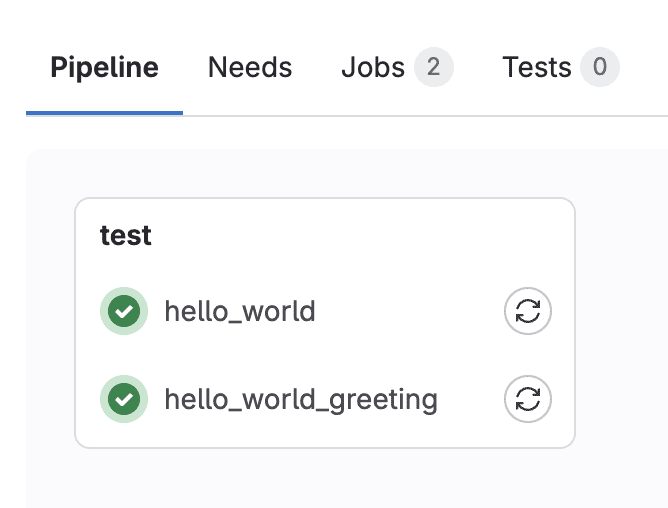
这样,hello_world 和 hello_world_greeting 两个任务都会执行:
4.2. 多项目下游流水线
我们还可以使用 trigger 关键字触发其他项目的流水线,实现多项目协作:
trigger_job_1:
  trigger:
    project: baeldung-developers/ci-common
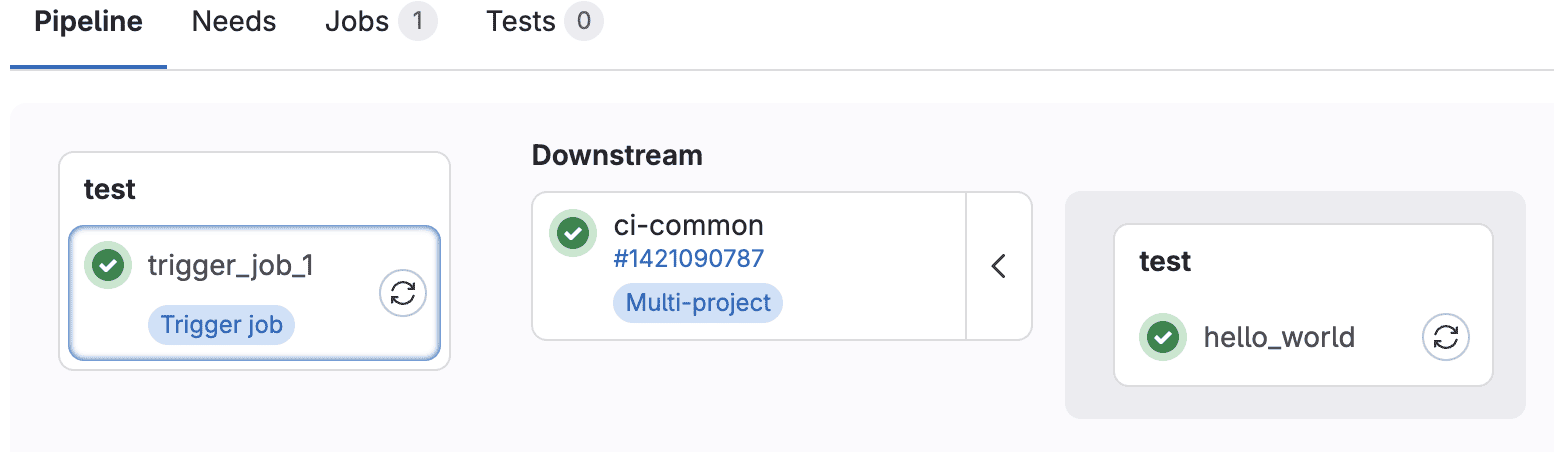
⚠️ 注意:使用 trigger 无法引用自定义 YAML 文件。
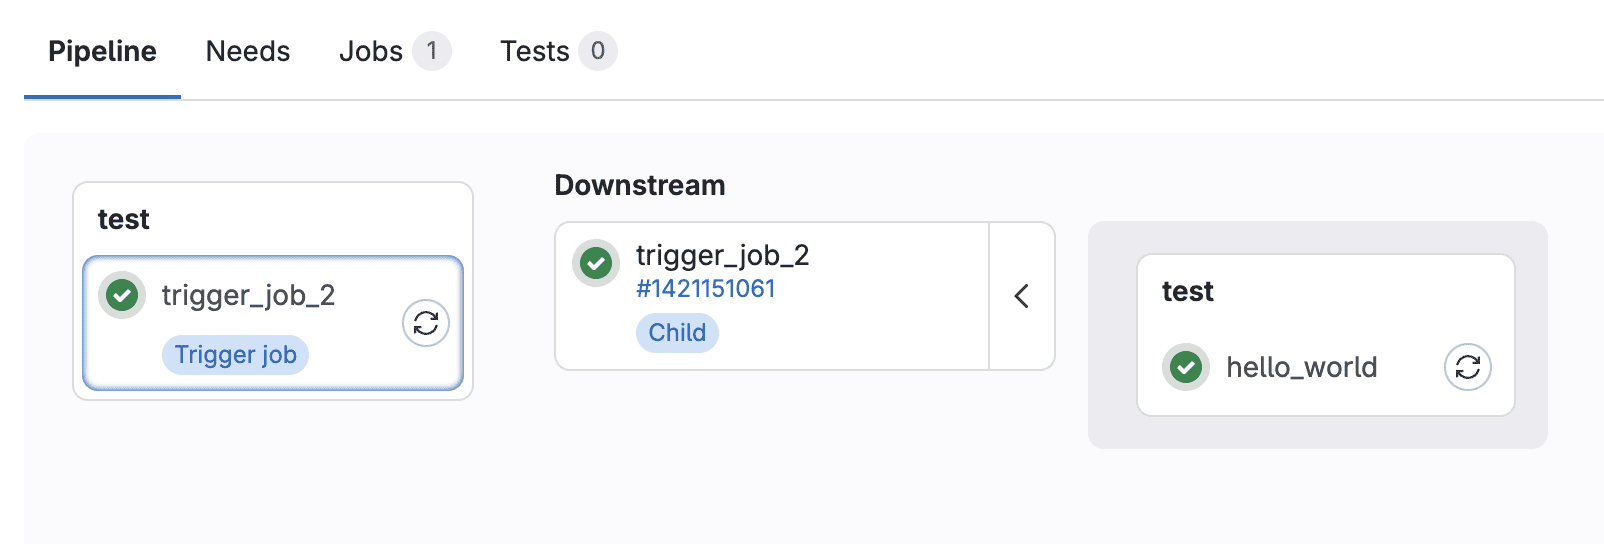
4.3. 父子下游流水线
父子流水线允许我们在当前项目中触发子流水线,并引用外部 YAML 文件:
trigger_job_2:
  trigger:
    include:
      - project: baeldung-developers/ci-common
        file: .gitlab-ci.yml
5. 使用自定义 Docker 镜像
5.1. 项目结构
我们创建一个名为 docker-ci-files 的项目,结构如下:
./
├── Dockerfile
└── jobs
    ├── hello-world.yml
    └── test.yml
YAML 文件内容简单定义了任务:
# jobs/hello-world.yml
hello_world:
  script:
    - echo "Hello, world!"
# jobs/test.yml
test_job:
  script:
    - echo "test job"
Dockerfile 用于打包这些配置:
FROM alpine:latest
COPY ./jobs/hello-world.yml ./hello-world.yml
COPY ./jobs/test.yml ./test.yml
5.2. 构建 Docker 镜像
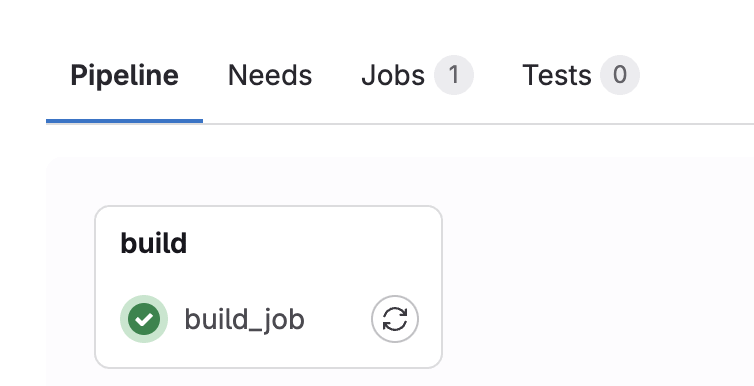
在 .gitlab-ci.yml 中定义构建任务:
stages:
  - build

build_job:
  image: docker:stable
  services:
    - docker:dind
  stage: build
  script: |
    echo "$DOCKER_PASSWORD" | docker login -u "$DOCKER_USER" --password-stdin $DOCKER_REGISTRY
    docker build -t $DOCKER_REGISTRY/baeldung-developers/docker-ci-files:v1 .
    docker push $DOCKER_REGISTRY/baeldung-developers/docker-ci-files:v1
5.3. 从 Docker 镜像中引用 YAML
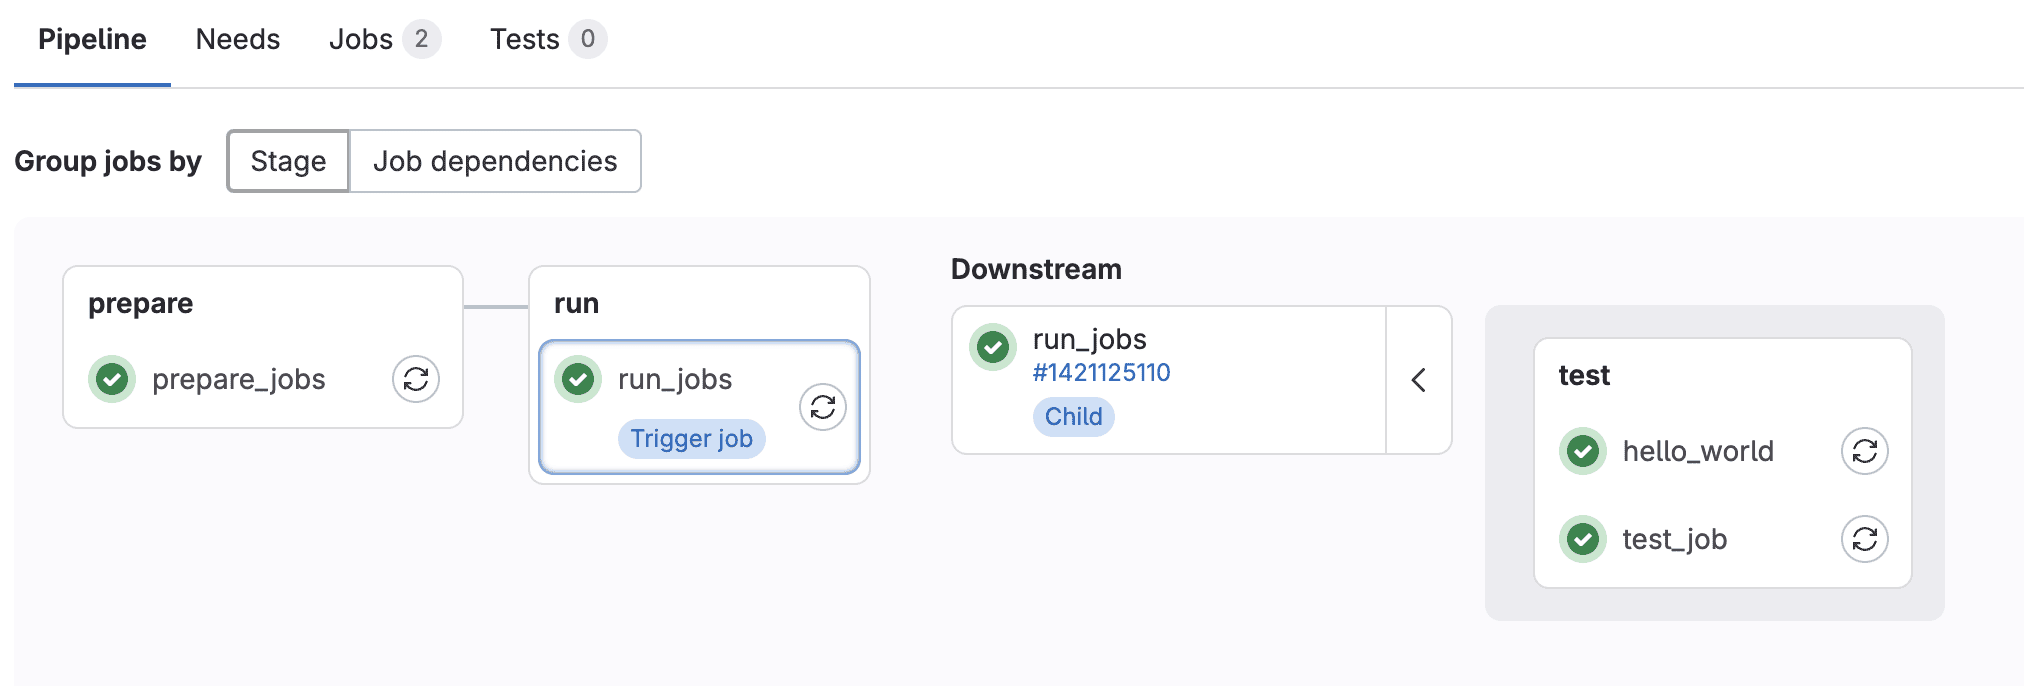
在 proj-use-docker-ci 项目中定义 .gitlab-ci.yml:
stages:
  - prepare
  - run

prepare_jobs:
  stage: prepare
  image: $DOCKER_REGISTRY/baeldung-developers/docker-ci-files:v1
  script:
    - cp /test.yml ${CI_PROJECT_DIR}/test.yml
    - cp /hello-world.yml ${CI_PROJECT_DIR}/hello-world.yml
  artifacts:
    paths:
      - test.yml
      - hello-world.yml

run_jobs:
  stage: run
  needs: [prepare_jobs]
  trigger:
    strategy: depend
    include:
      - artifact: test.yml
        job: prepare_jobs
      - artifact: hello-world.yml
        job: prepare_jobs
6. 使用 CI/CD 组件
GitLab 提供了 CI/CD 组件 功能,可以更灵活地封装和复用流水线逻辑。
6.1. 创建组件
我们创建一个名为 ci-components 的项目,结构如下:
.
├── README.md
└── deploy_service
    ├── README.md
    └── template.yml
组件定义如下:
spec:
  inputs:
    stage:
      default: deploy
    services:
      type: array
---
deploy_monolith:
  stage: $[[ inputs.stage ]]
  parallel:
    matrix:
      - SERVICE: $[[ inputs.services ]]
  script: |
    echo "deploying $SERVICE"
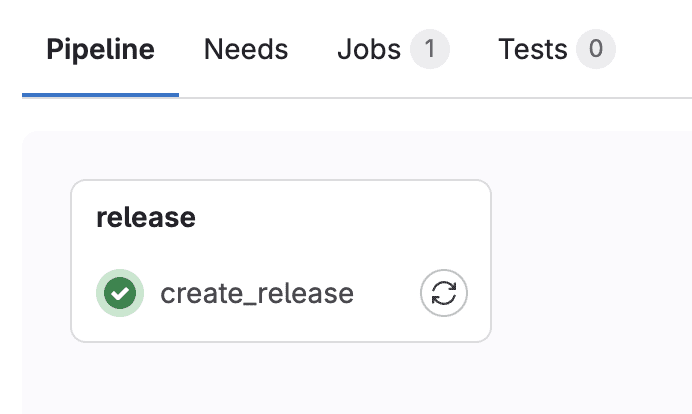
在 .gitlab-ci.yml 中添加发布任务:
stages: [release]

create_release:
  stage: release
  image: registry.gitlab.com/gitlab-org/release-cli:latest
  script: echo "Creating release $CI_COMMIT_TAG"
  rules:
    - if: $CI_COMMIT_TAG
  release:
    tag_name: $CI_COMMIT_TAG
    description: "Release $CI_COMMIT_TAG of components repository $CI_PROJECT_PATH"
推送标签后,发布任务将自动执行:
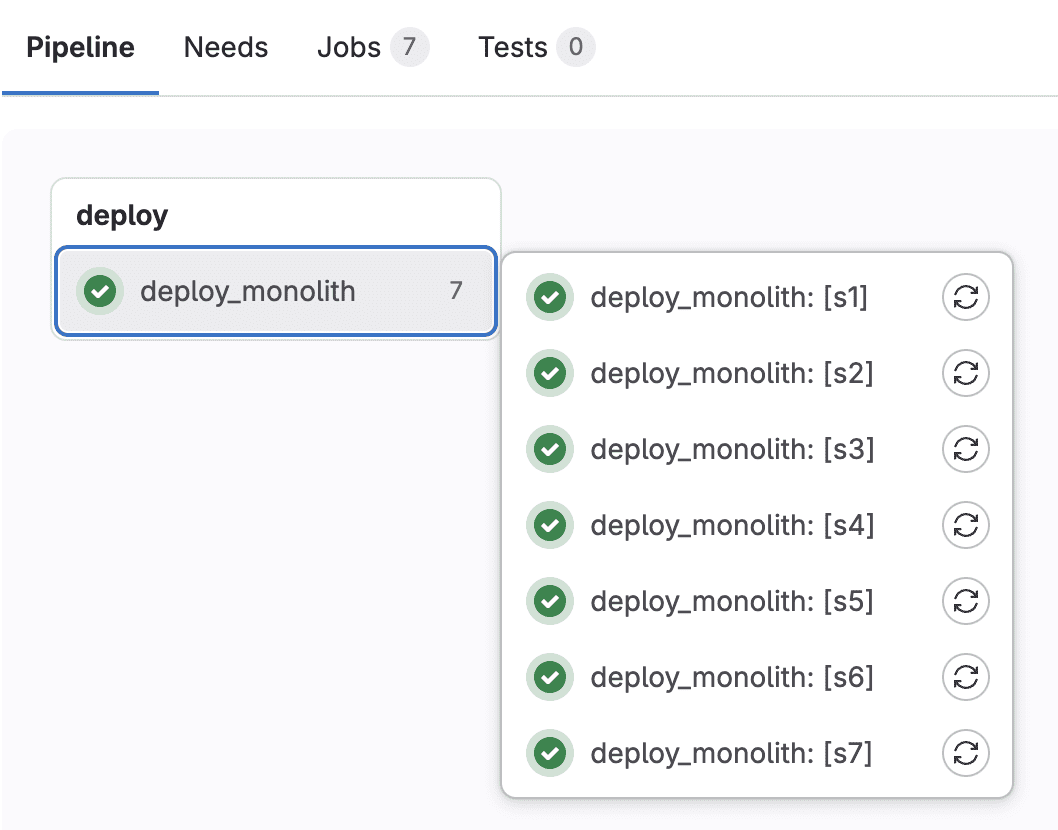
6.2. 部署服务模块
在另一个项目中引用组件:
stages:
  - deploy

include:
  - component: $CI_SERVER_FQDN/baeldung-developers/ci-components@[1.0.0]
    inputs:
      services: [s1, s2, s3, s4, s5, s6, s7]
7. 总结
本文介绍了多种在 GitLab 中跨项目共享 CI/CD 配置的方法,包括:
- 使用自定义 CI/CD 配置
- 利用组级项目模板
- 引用外部 YAML 文件(
include/trigger) - 构建自定义 Docker 镜像
- 使用 GitLab CI/CD 组件
这些方法各有优劣,适用于不同场景。合理使用这些技术,可以大幅提升 CI/CD 流程的可维护性和一致性。
完整示例代码请参考 GitHub 仓库。