1. Overview
Jenkins is an industry-leading automation server. It’s commonly used for general-purpose task automation, such as running nightly builds, automated test suites, CI/CD pipelines, GitOps jobs, etc.
One of the prime reasons for Jenkins’ popularity is its extensibility. Jenkins allows us to extend its functionality via plugins, thus providing nearly infinite possibilities for what it can do. The open-source community develops and maintains a variety of Jenkins plugins. One such plugin is AnsiColor. This plugin allows us to customize the console output using the ANSI escape codes.
In this quick tutorial, we’ll discuss how to install, configure, and use the AnsiColor plugin in Jenkins. So, let’s get started.
2. Installing AnsiColor Plugin
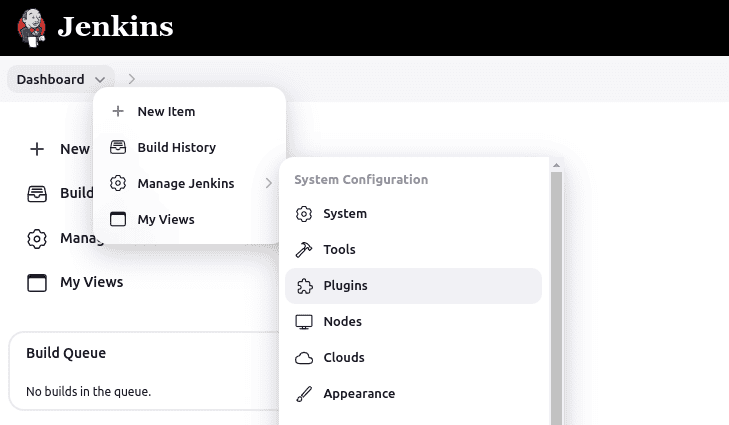
To install the AnsiColor plugin, first, navigate to the Dashboard -> Manage Jenkins -> Plugins:
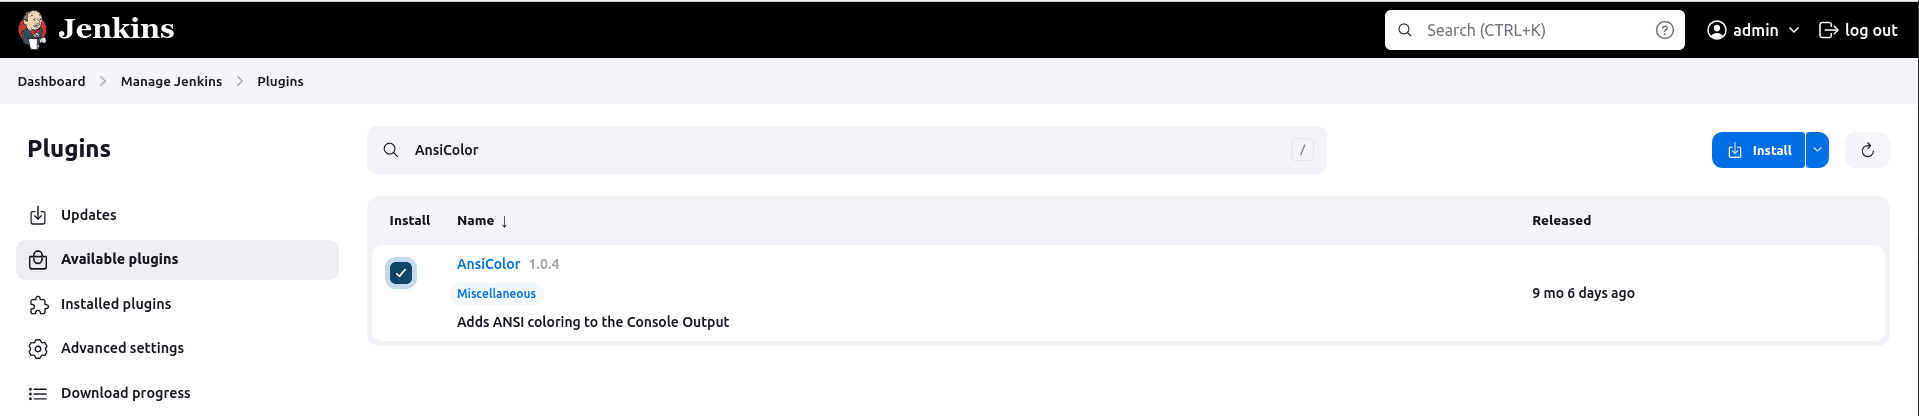
Next, click on Available Plugins and, using the search bar, search for the AnsiColor plugin.
Finally, select the checkbox and click on the Install button:
3. Using AnsiColor in a Freestyle Project
In the previous section, we installed the AnsiColor plugin. Now, let’s see how to use it with the freestyle project.
First, navigate to the main dashboard and create an empty freestyle project job.
Then, click the Configure button, navigate to the Build Environment section, and select the Color ANSI Console Output checkbox.
Next, navigate to the Build Steps section, select the Execute shell, and add the following ANSI code block to the given text box:
#!/bin/bash

echo -e "\033[31;1m Hello world \033[0m"
Finally, click on the Save button to save the configuration.
Now, let’s run this job and see the console output:
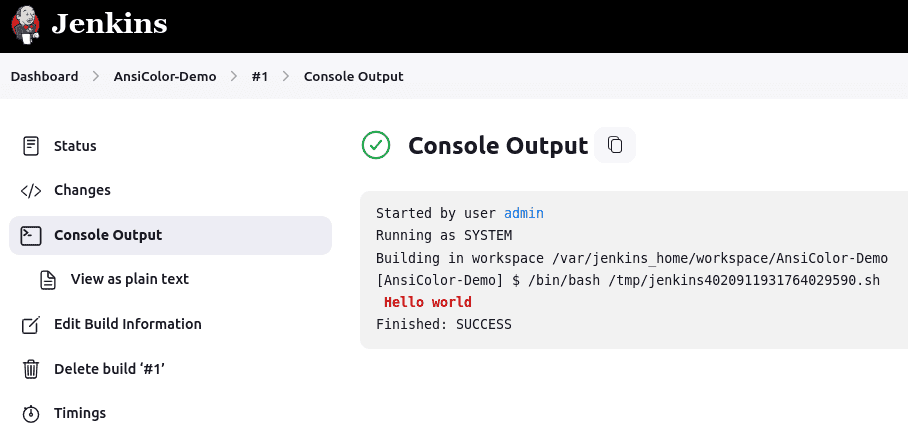
Here, we can see that the Hello world text is printed in red color.
4. Using AnsiColor in a Pipeline
In the previous example, we used the AnsiColor plugin with the freestyle project. Now, let’s see how to use it with the pipeline.
4.1. Using Color Map in a Step
First, create an empty pipeline job, then click the Configure button, and navigate to the Pipeline section.
Next, let’s create a pipeline script with the following configuration:
pipeline {
    agent any

    stages {
        stage('demo') {
            steps {
                // Using xterm colormap
                ansiColor('xterm') {
                    echo "\033[31;1m Executing demo stage: \033[0m"
                }

                echo "\033[31;1m command-1 \033[0m"
                echo "\033[31;1m command-2 \033[0m"
            }
        }
    }
}
In this example, we’ve used xterm color map with the ansiColor() code block.
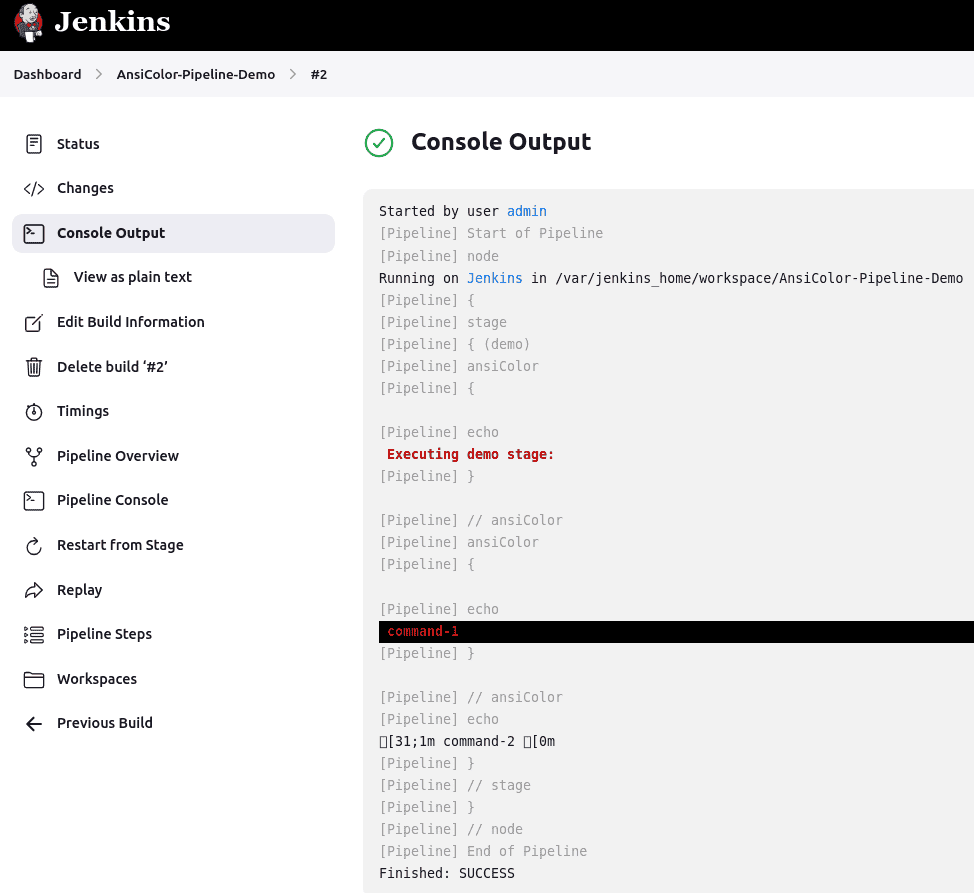
Now, let’s run the pipeline and see the result:
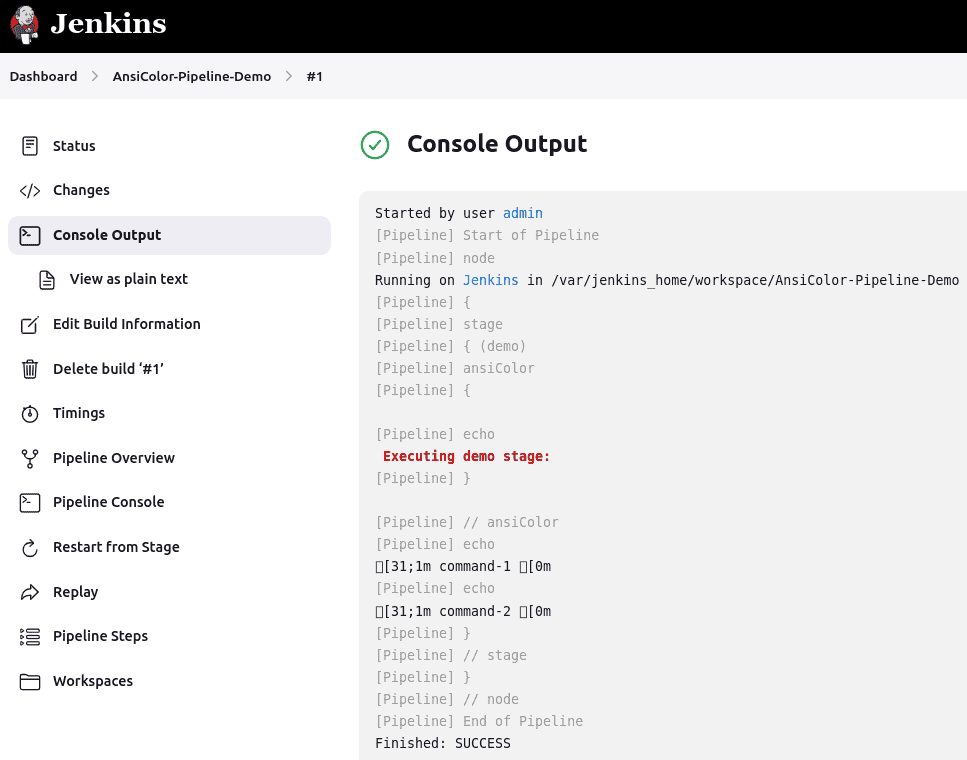
In the console output, we can see that the first line is only printed in red.
4.2. Using Multiple Color Maps in a Step
One of the good things about the pipeline is that it allows us to use multiple AnsiColor blocks within a step. To understand this, let’s modify the pipeline script:
pipeline {
    agent any

    stages {
        stage('demo') {
            steps {
                // Using xterm
                ansiColor('xterm') {
                    echo "\033[31;1m Executing demo stage: \033[0m"
                }

                // Using vga
                ansiColor('vga') {
                    echo "\033[31;1m command-1 \033[0m"
                }

                echo "\033[31;1m command-2 \033[0m"
            }
        }
    }
}
In this example, the first echo statement uses xterm color map, whereas the next uses the vga color map.
Now, let’s run the pipeline and see the output:
Here, we can see that the pipeline displays the output using different color maps.
4.3. Setting Color Map for a Pipeline
In the previous examples, we saw how to use single and multiple AnsiColor blocks within the same pipeline. However, this isn’t the most efficient way of using the AnsiColor plugin. Because most of the time, we use the same color map for the entire pipeline. So, let’s see how to set the color map for the entire pipeline:
pipeline {
    agent any

    // AnsiColor at pipeline level
    options {
        ansiColor('xterm')
    }

    stages {
        stage('demo') {
            steps {
                echo "\033[31;1m Executing demo stage: \033[0m"
                echo "\033[31;1m command-1 \033[0m"
                echo "\033[31;1m command-2 \033[0m"
            }
        }
    }
}
In this example, we’ve used the options directive to set the color map at the pipeline level.
Now, let’s run the pipeline and check the console output:
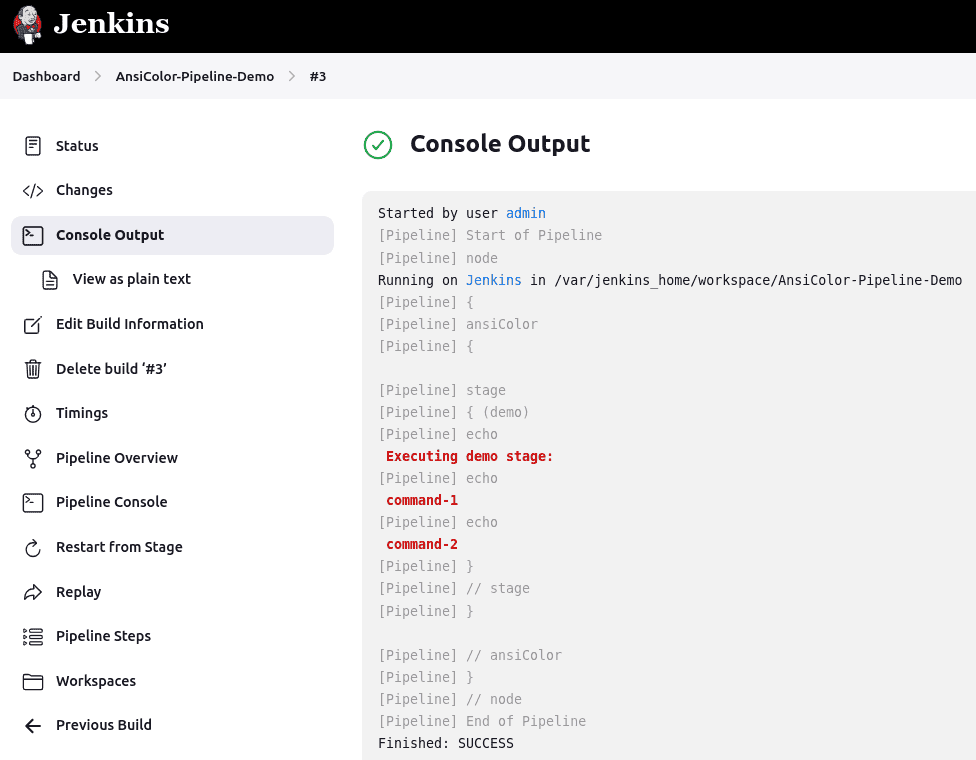
Here, we can see that the pipeline uses the xterm color map for all echo statements.
4.4. Setting Color Map at a Controller Level
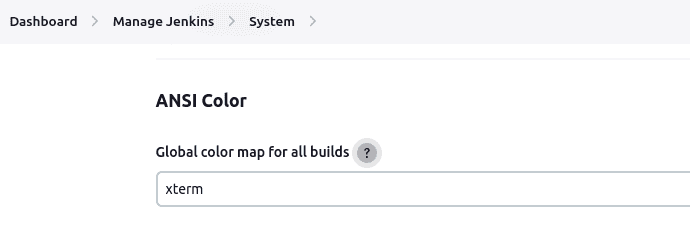
Apart from this, we can also set the AnsiColor color map at the Jenkins controller level. To do this, first, navigate to Dashboard -> Manage Jenkins -> System, then navigate to the ANSI Color, and enter the appropriate color map name in the Global color map for all builds text box:
Now, let’s write a pipeline without any AnsiColor block:
pipeline {
    agent any

    stages {
        stage('demo') {
            steps {
                echo "\033[31;1m Executing demo stage: \033[0m"
                echo "\033[31;1m command-1 \033[0m"
                echo "\033[31;1m command-2 \033[0m"
            }
        }
    }
}
Next, let’s run the pipeline and see the output:
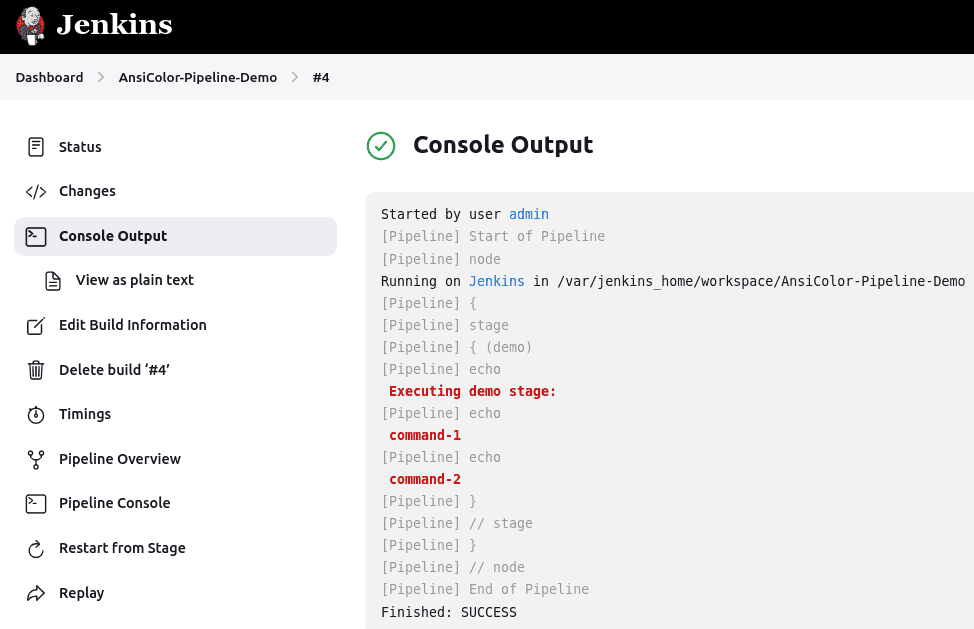
Here, we can see that the pipeline shows the colored output using the xterm color map.
5. Working With Color Maps
So far, we worked with the default color maps only. However, Jenkins allows us to customize the existing color maps and add new color maps. Let’s see how to do this in the Jenkins controller.
To edit the existing color map, first navigate to Dashboard -> Manage Jenkins -> System. Then, click on the Advanced button under the ANSI Color option. Here, we can see the color configuration of the in-built color maps and modify it according to our needs.
Similarly**, click the Add color map button to add a new color map and specify the respective HTML hex color codes.**
6. Conclusion
In this article, we discussed how to use the AnsiColor plugin in Jenkins.
First, we discussed using the AnsiColor plugin with the free-style project. Next, we discussed using the AnsiColor plugin with the Jenkins pipelines.
Finally, we discussed how to customize the existing color maps and add new color maps.