1. 概述
Jenkins 是自动化 软件开发生命周期 的强大工具。作为一个开源平台,Jenkins 支撑了无数的 CI/CD 流水线,帮助团队更快、更可靠地构建、测试和部署代码。
Jenkins 就像一把瑞士军刀——功能强大、用途广泛,但也有一些学习曲线。因此,我们需要遵循一些最佳实践来充分发挥其潜力,优化工作流,确保 CI/CD 流程顺畅。
在本文中,我们将介绍一系列 Jenkins 最佳实践,帮助你更好地使用这一工具。
2. 自动化 Job 定义
在 Jenkins 中,Job 定义是我们软件构建的蓝图。通过自动化这些蓝图,可以节省大量时间和精力。你可以把 Jenkins 想象成一个不知疲倦的助手,能根据代码仓库的变化自动创建、更新甚至删除 Job。
Jenkins 提供了多种自动管理 Job 的方式。对于使用 GitHub、GitLab、Bitbucket 或 Gitea 等平台的团队,Organization Folders 是首选方案之一:
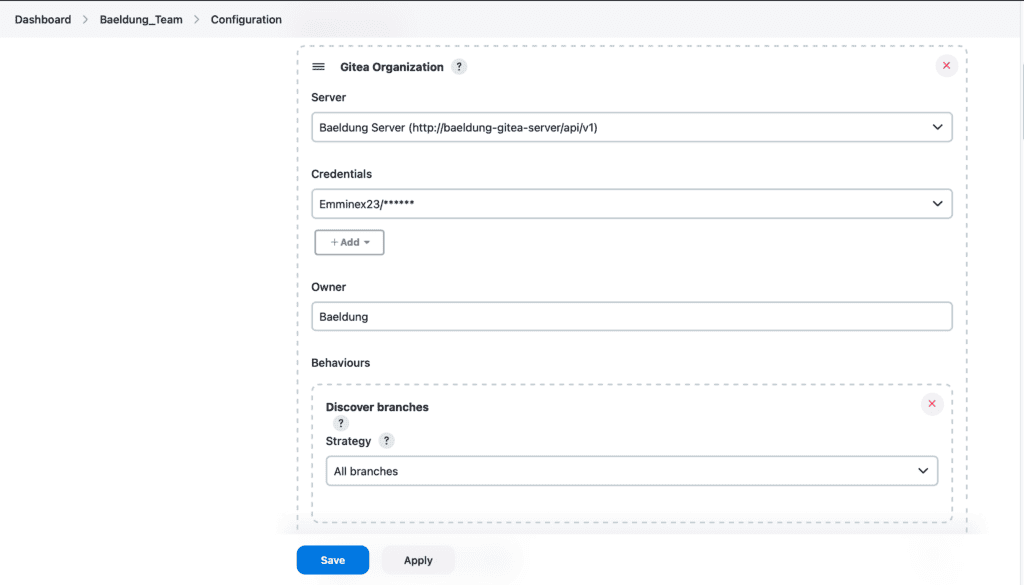
通过 Organization Folders,Jenkins 可以自动检测新仓库并设置相应的 Job。✅ 这确保了所有内容始终保持同步,无需手动干预。
另外,如果你的项目包含多个分支,Multibranch Pipeline 提供了一种更简洁的解决方案。它能为每个分支自动生成对应的流水线任务,简化管理流程。
当然,如果你希望拥有更多控制权,也可以手动定义流水线任务,以满足特定的构建需求。
3. 高效管理 Jenkins Job
高效管理 Jenkins Job 就像保持一个整洁的工作台——所有东西都有归属,需要时能快速找到。这不仅让我们的工作更轻松,也提升了整个团队的开发效率。
首先,建议使用文件夹和视图对 Job 进行逻辑分组。这样可以让 Jenkins 仪表盘更清晰、易于导航。
但有效的 Job 管理远不止是整理。我们还应使用具有描述性的名称和标签,让团队成员一眼就能明白每个 Job 的用途。
此外,合理利用自动化机制也很重要。比如设置构建触发器,当代码库有新提交时自动启动构建任务。
最后,别忘了定期清理。就像下班前整理工作台一样,我们要定期检查并删除不再使用的 Job,避免堆积。
4. 构建结果报告
构建报告就像是 Jenkins 的健康体检报告,能让我们深入了解构建过程中的质量与性能,提前发现问题,保持构建流程健康运行。
Jenkins 自带多种报告功能,覆盖构建流程的多个方面。例如编译警告就像是代码问题的早期信号。
静态代码分析报告可以识别潜在 bug、安全漏洞或风险代码。覆盖率报告则告诉我们有多少代码被测试覆盖,避免出现盲区。
此外,性能测试报告有助于优化应用的速度和效率。
为了更好地利用这些报告,推荐使用 Warnings Next Generation 插件:
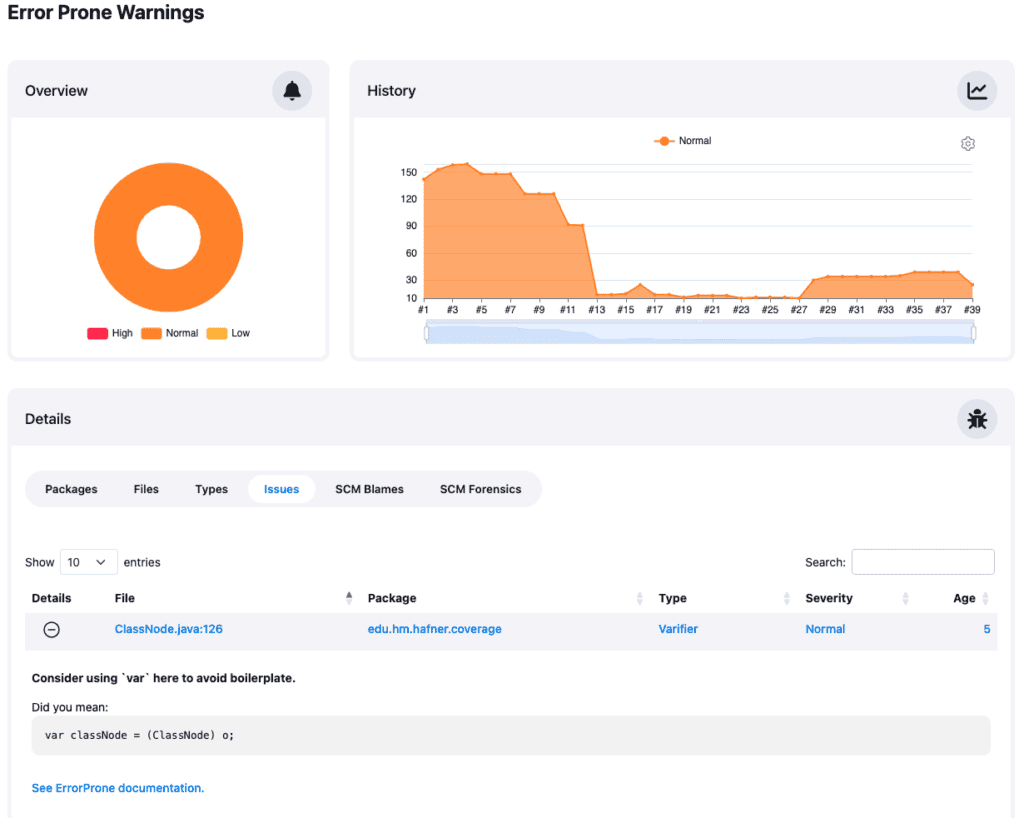
该插件整合了多种报告,并统一展示在一个易于阅读的仪表盘中。✅ 这样我们可以快速识别趋势、跟踪进度并定位问题区域。
5. 使用 Agent 构建任务
Jenkins 控制器负责协调整个 CI/CD 流水线,而实际的构建和测试任务则由 Agent(代理节点)来完成。这些工作节点提供了执行任务所需的计算资源,合理使用它们可以显著提升 Jenkins 的性能。
使用 Agent 的一大优势是提升安全性。将构建任务分发到独立的机器上,可以将控制器与潜在风险(如资源耗尽或构建崩溃)隔离,确保控制器的稳定性和可用性。
此外,使用 Agent 还能实现横向扩展。随着项目规模扩大和构建需求增加,我们可以轻松添加更多 Agent 来分担负载,从而支持并行处理更多构建任务,保持流水线高效运转。
6. 保障控制器安全与备份
Jenkins 控制器就像是整个 CI/CD 流程的指挥中心,负责调度任务、管理插件等关键操作。正因为如此,它也是攻击者的目标,安全防护至关重要。
幸运的是,Jenkins 默认启用了内置的安全机制。但仍需保持警惕,定期更新 Jenkins 及其插件,修复潜在漏洞。
此外,可以设置强密码或集成组织的单点登录系统,提升认证安全性。同时,限制对敏感区域的访问,只授予必要权限。
同样重要的是定期备份控制器。这相当于为 CI/CD 流程上了一份保险。无论是硬件故障、网络攻击,还是误操作删除,有最新的备份都能帮你快速恢复。
⚠️ 但备份只有在定期测试、确保可恢复的情况下才是有用的。
7. 避免资源冲突与调度过载
想象一下,我们的 Jenkins 流水线就像一条繁忙的高速公路,多个构建任务同时运行。有时它们需要共享相同资源,比如数据库或网络服务。就像现实中的交通一样,如果所有任务同时抢占资源,就会导致拥堵。
在 Jenkins 中,这就表现为资源冲突和调度过载,可能导致构建变慢甚至失败。好在我们有办法让“交通”顺畅运行。
一种方法是错峰调度任务。不要让所有构建同时启动,可以使用 Jenkins 的内置调度功能,或在 cron 表达式中使用 H 语法引入随机性,让构建任务分散执行,减少资源竞争。
即使调度得当,有时冲突仍不可避免。这时可以借助 Lockable Resources 插件。它就像路口的红绿灯,确保每次只有一个构建能访问关键资源。
如果仍然存在拥堵,可以使用 Throttle Concurrent Builds 插件:
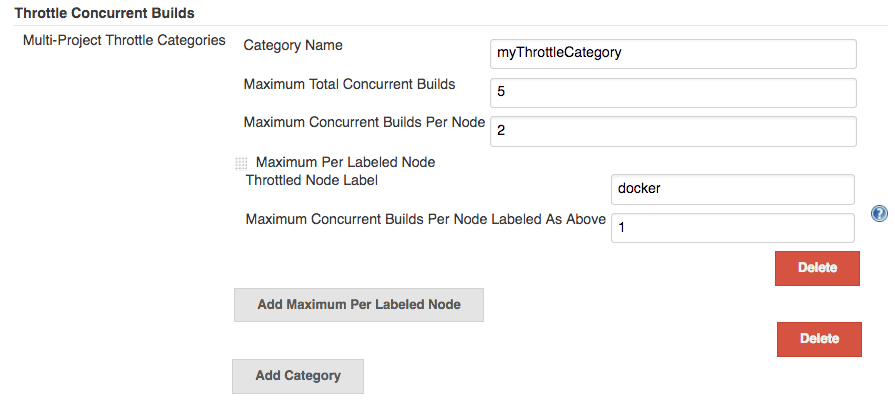
该插件限制同时运行的构建数量,✅ 确保资源不被压垮,构建流程更稳定。
8. 总结
在本文中,我们快速回顾了一些 Jenkins 最佳实践,这些实践可以帮助我们构建更高效、更可靠的 CI/CD 流水线。
持续优化 Jenkins 配置,结合这些实践,能够确保我们的 CI/CD 流程始终是团队的重要资产。✅
无论你是刚开始使用 Jenkins,还是已经熟练掌握,遵循这些最佳实践都将帮助你走得更远、更稳。