1. Overview
Managing Jenkins user access in a complex development environment can be challenging. Role-Based Access Control (RBAC) provides a granular approach to assigning permissions, ensuring that users have access only to the resources and actions they need. By configuring RBAC, we enforce security policies effectively while maintaining flexibility in the development processes.
In this tutorial, we’ll look into various ways to configure RBAC for Jenkins users.
2. Using a Role-Based Authorization Strategy Plugin
RBAC is a security strategy to regulate access based on the predefined roles of a user. Each role encompasses a set of permissions that dictates all the actions a user can perform within the system.
2.1. Installing the Role-Based Authorization Strategy Plugin
Let’s first install the Role-based Authorization Strategy Plugin on Jenkins:
- Log in to the Jenkins instance as an administrator and then navigate to the dashboard.
- Click on “Manage Jenkins” on the sidebar and then select “Manage Plugins”.
- Search for “Role-based Authorization Strategy” in the list of available plugins.
- Finally, check the box next to the plugin and click “Install without restart” or “Download now and install after restart” depending on your preference.
- Once installed, restart Jenkins to apply the changes.
After the Jenkins server is restarted, we’re ready to use the Role-based Authorization Strategy plugin.
2.2. Define Global Security and Roles
Global security and global roles help to establish a robust access control framework within Jenkins. This ensures the confidentiality, integrity, and availability of resources to different users.
The global security settings serve as the foundation for controlling access to Jenkins at an overarching level. By configuring global security, administrators can enforce authentication mechanisms, such as user accounts and passwords, LDAP integration, or single sign-on solutions, to verify a user’s identity before granting access.
Let’s look at the steps to define global security:
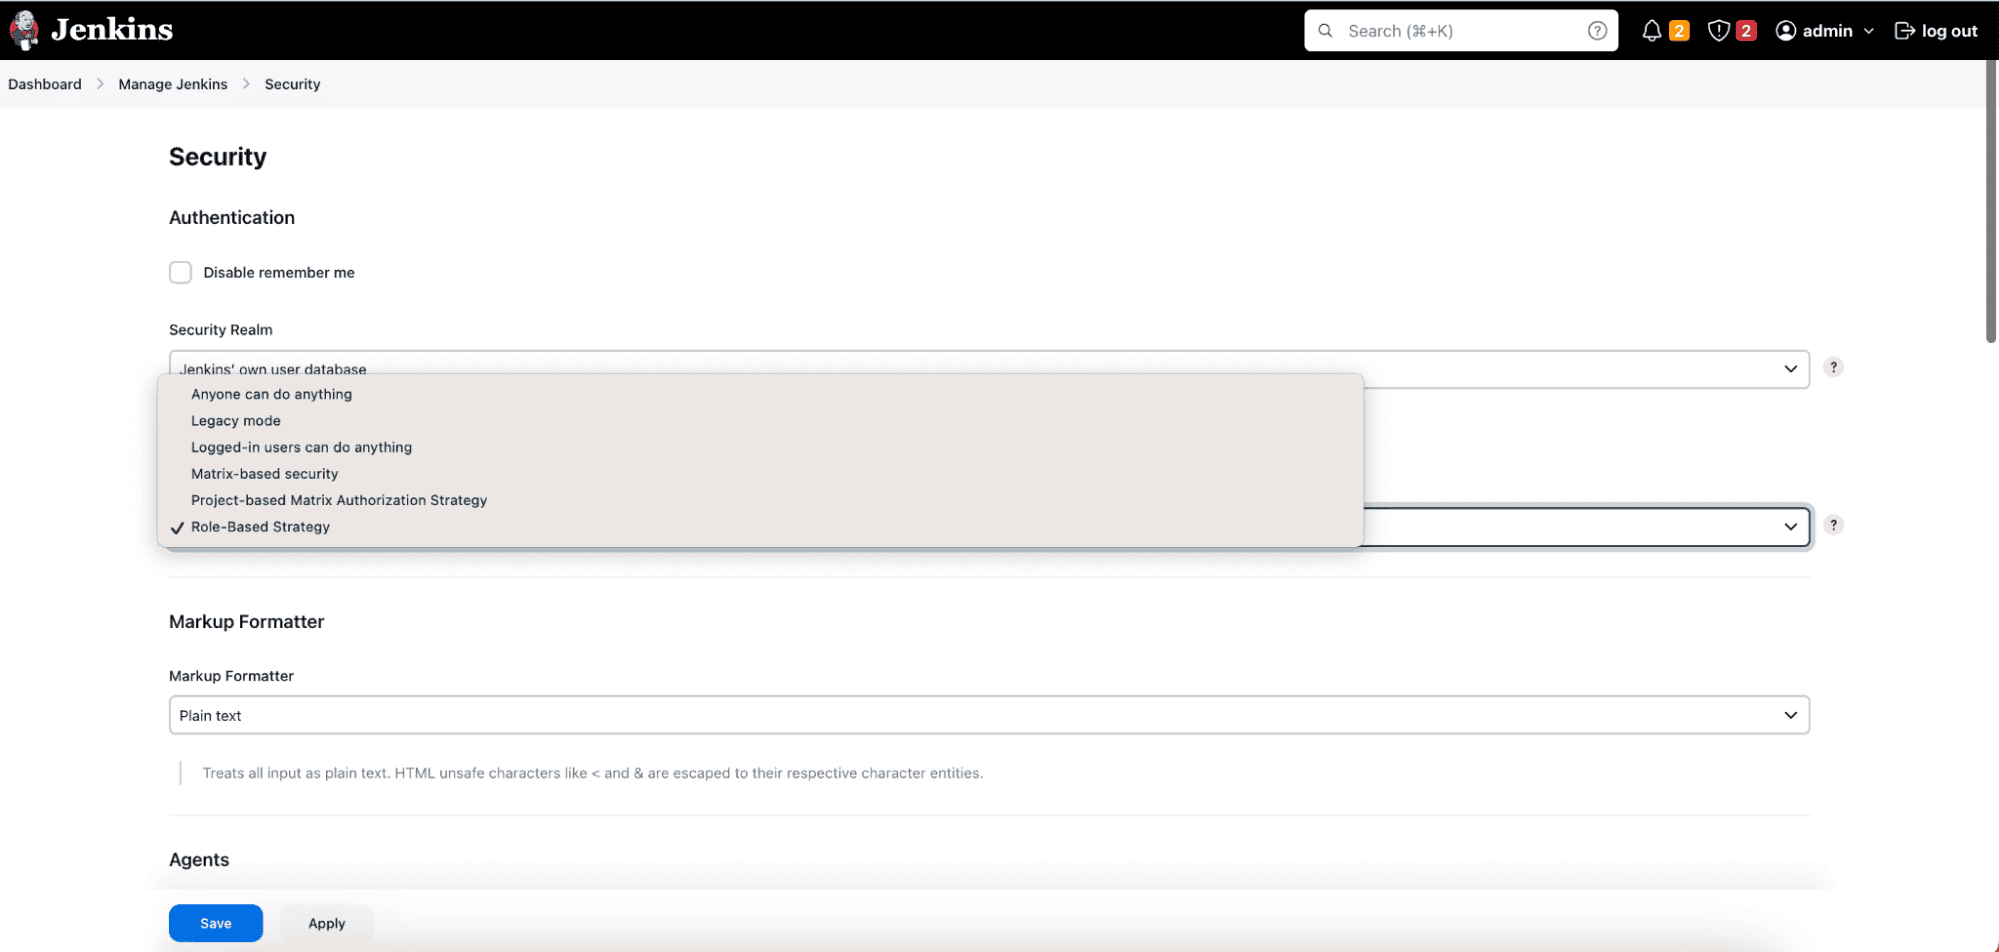
- Click on “Manage Jenkins” from the sidebar and Select “Configure Global Security”. Scroll down to the “Authorization” section.
- Then, choose “Role-Based Strategy” from the dropdown menu.
So far, we’ve configured the global security. Let’s configure global roles:
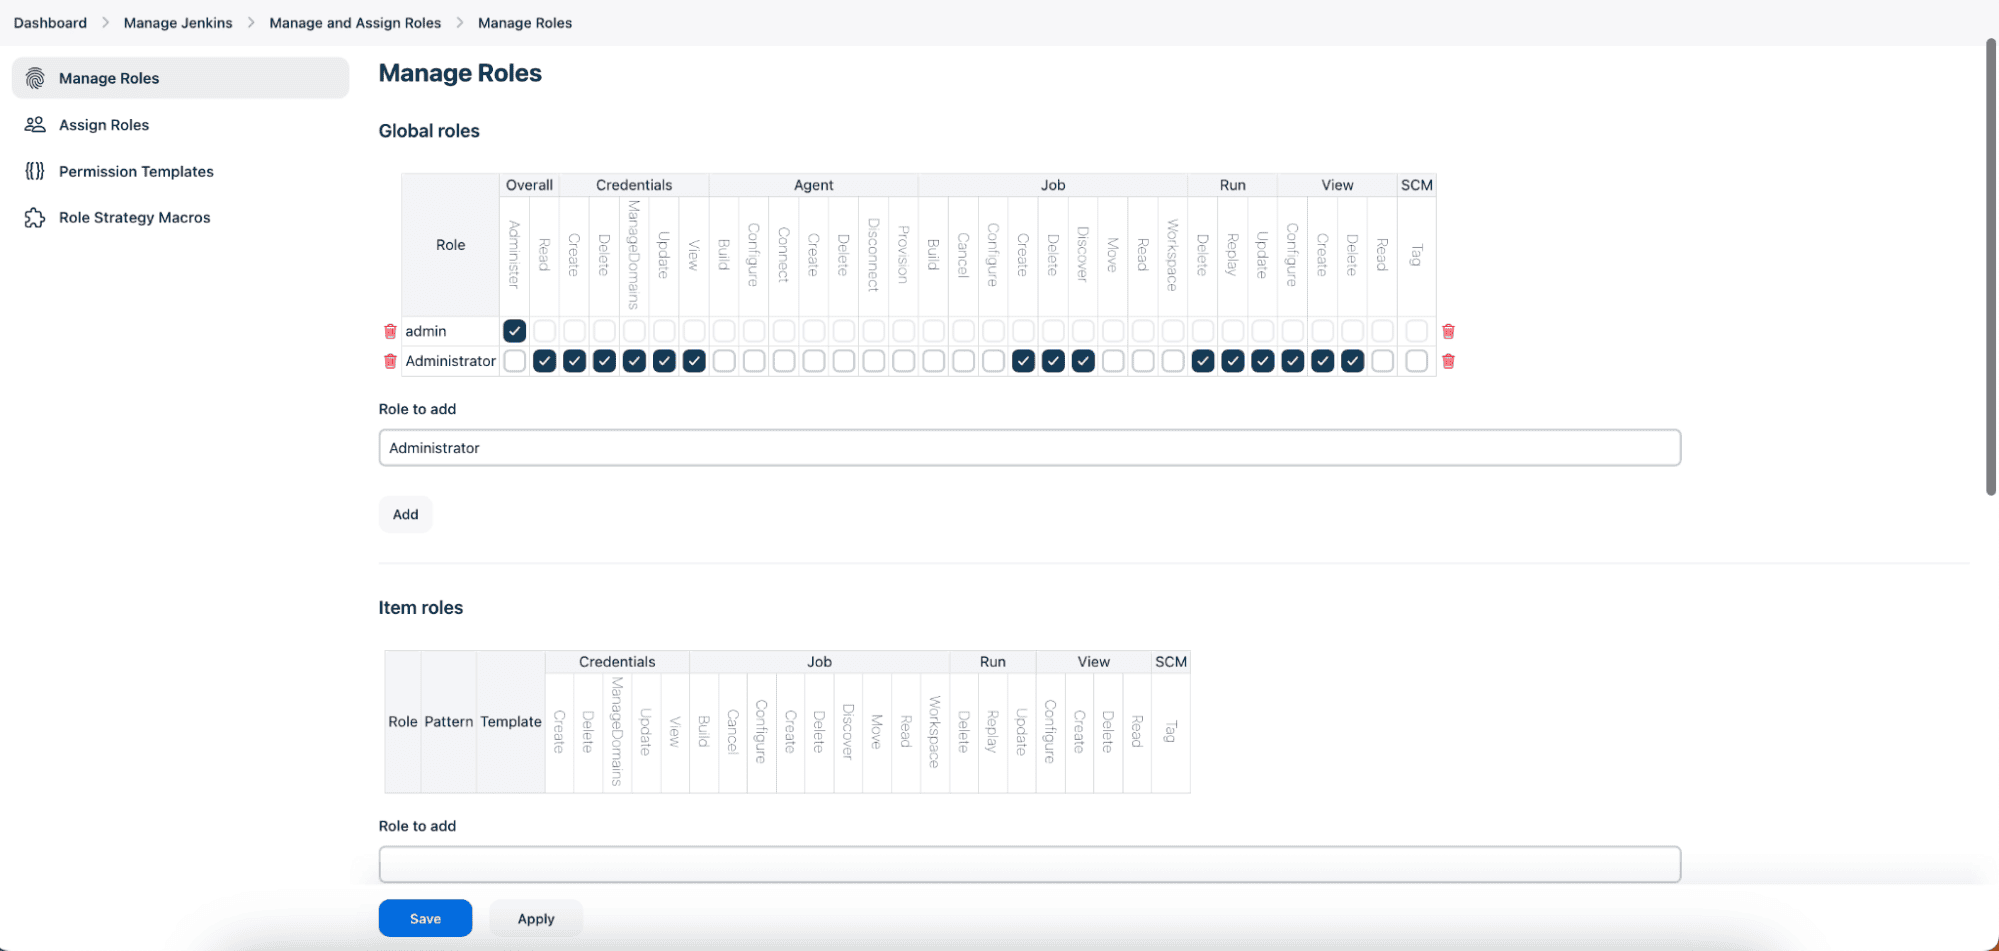
- Under the “Role-based Authorization Strategy” section, click on “Manage and Assign Roles”.
- Then click on “Add Role” to define a new global role.
- Enter a name for the role (for example, Administrator, Developer, QA Engineer).
- Select the desired permissions for the role by checking the corresponding boxes. For example, we’ve selected the “Administrator” role for the admin user above.
- Click “Add” to create the role. Finally, click “Save” to save the changes.
2.3. Assign Global Roles to Users
Now that we’ve created global roles for various types of users, let’s assign these roles to a specific user:
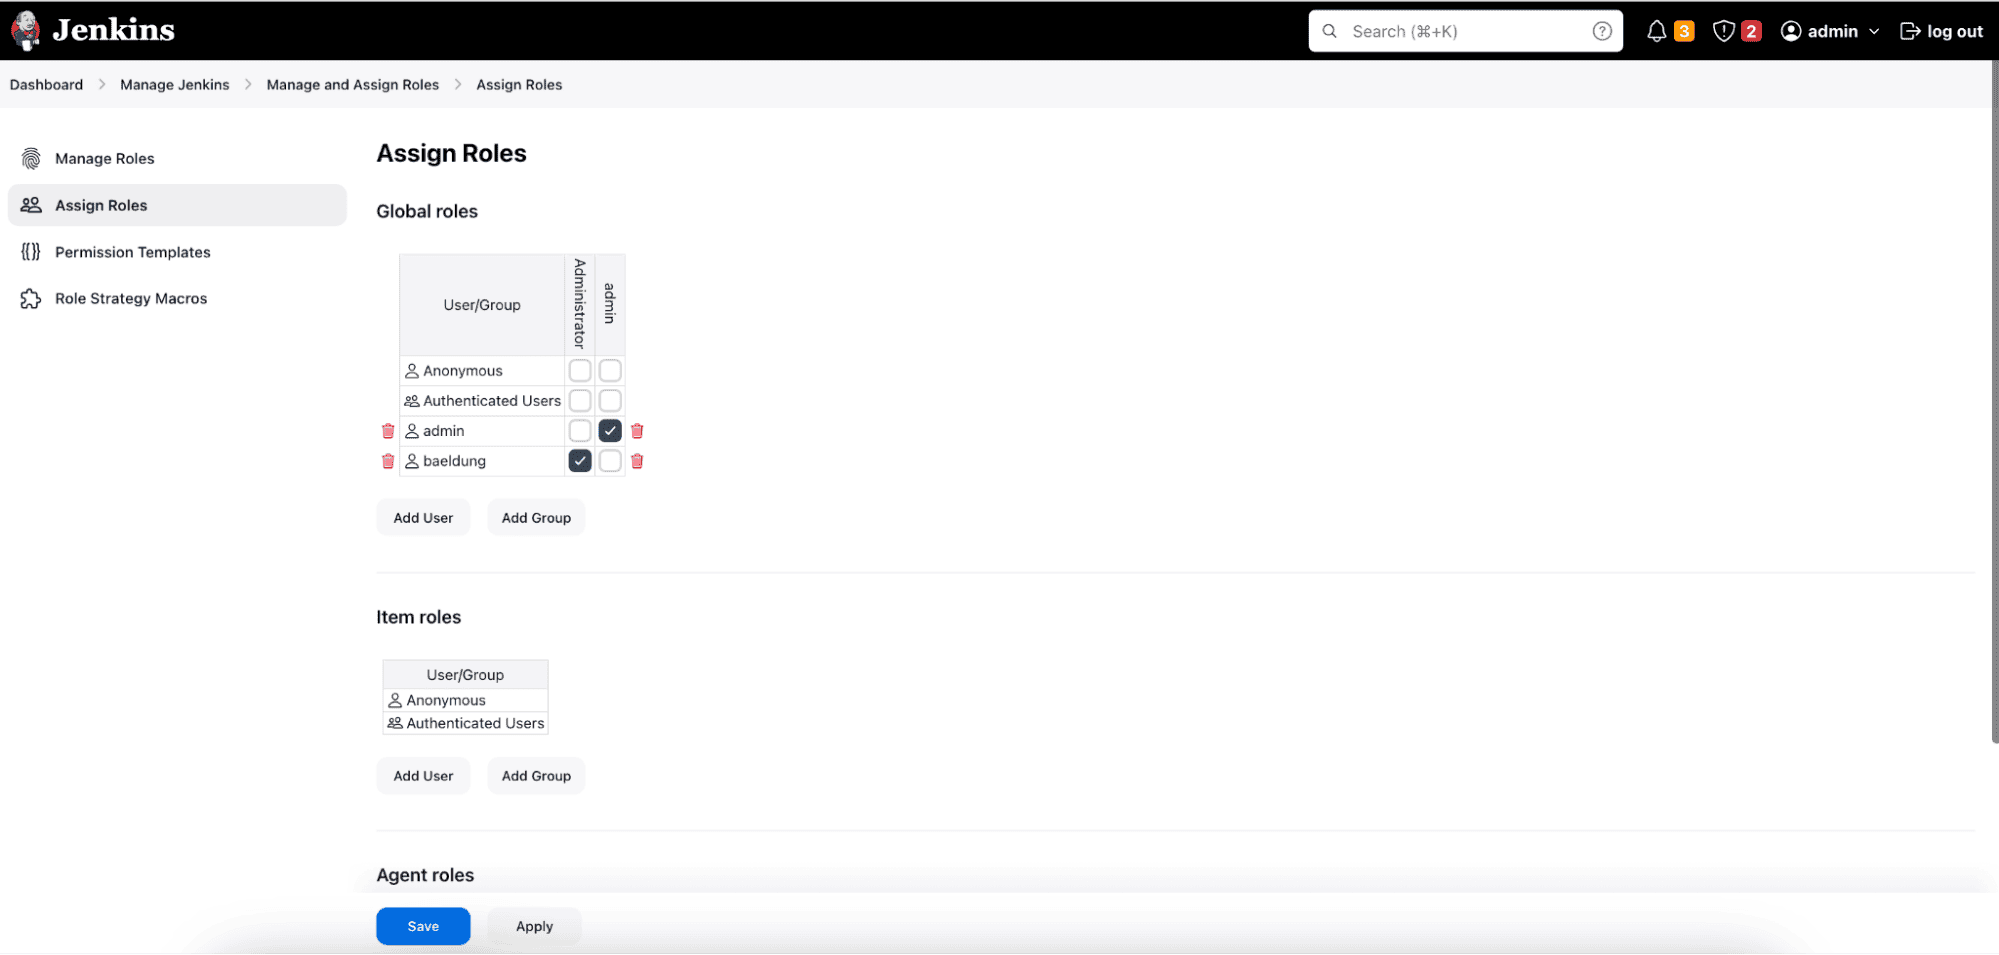
- Go back to “Manage Jenkins” > “Manage and Assign Roles”.
- Then, click on “Assign Roles” next to the user to whom we want to assign one or more roles.
- Check the box next to the appropriate role(s) for the user.
- Click “Save” to apply the changes.
2.4. Test and Verify
Once roles are defined and assigned, it’s essential to test user access to ensure that permissions are applied correctly. To do that, we’ll log in as different users with assigned roles and verify that they can perform the expected actions based on the permissions assigned.
3. Using Matrix-Based Security
The Matrix-based security method in Jenkins allows administrators to define access control permissions using a matrix-like grid interface. To demonstrate, let’s look at how to configure Matrix-based security.
3.1. Enable Matrix-based Security
- First, navigate to the Jenkins dashboard and click on “Manage Jenkins” from the sidebar.
- Then, select “Configure Global Security in Jenkins plugin”.
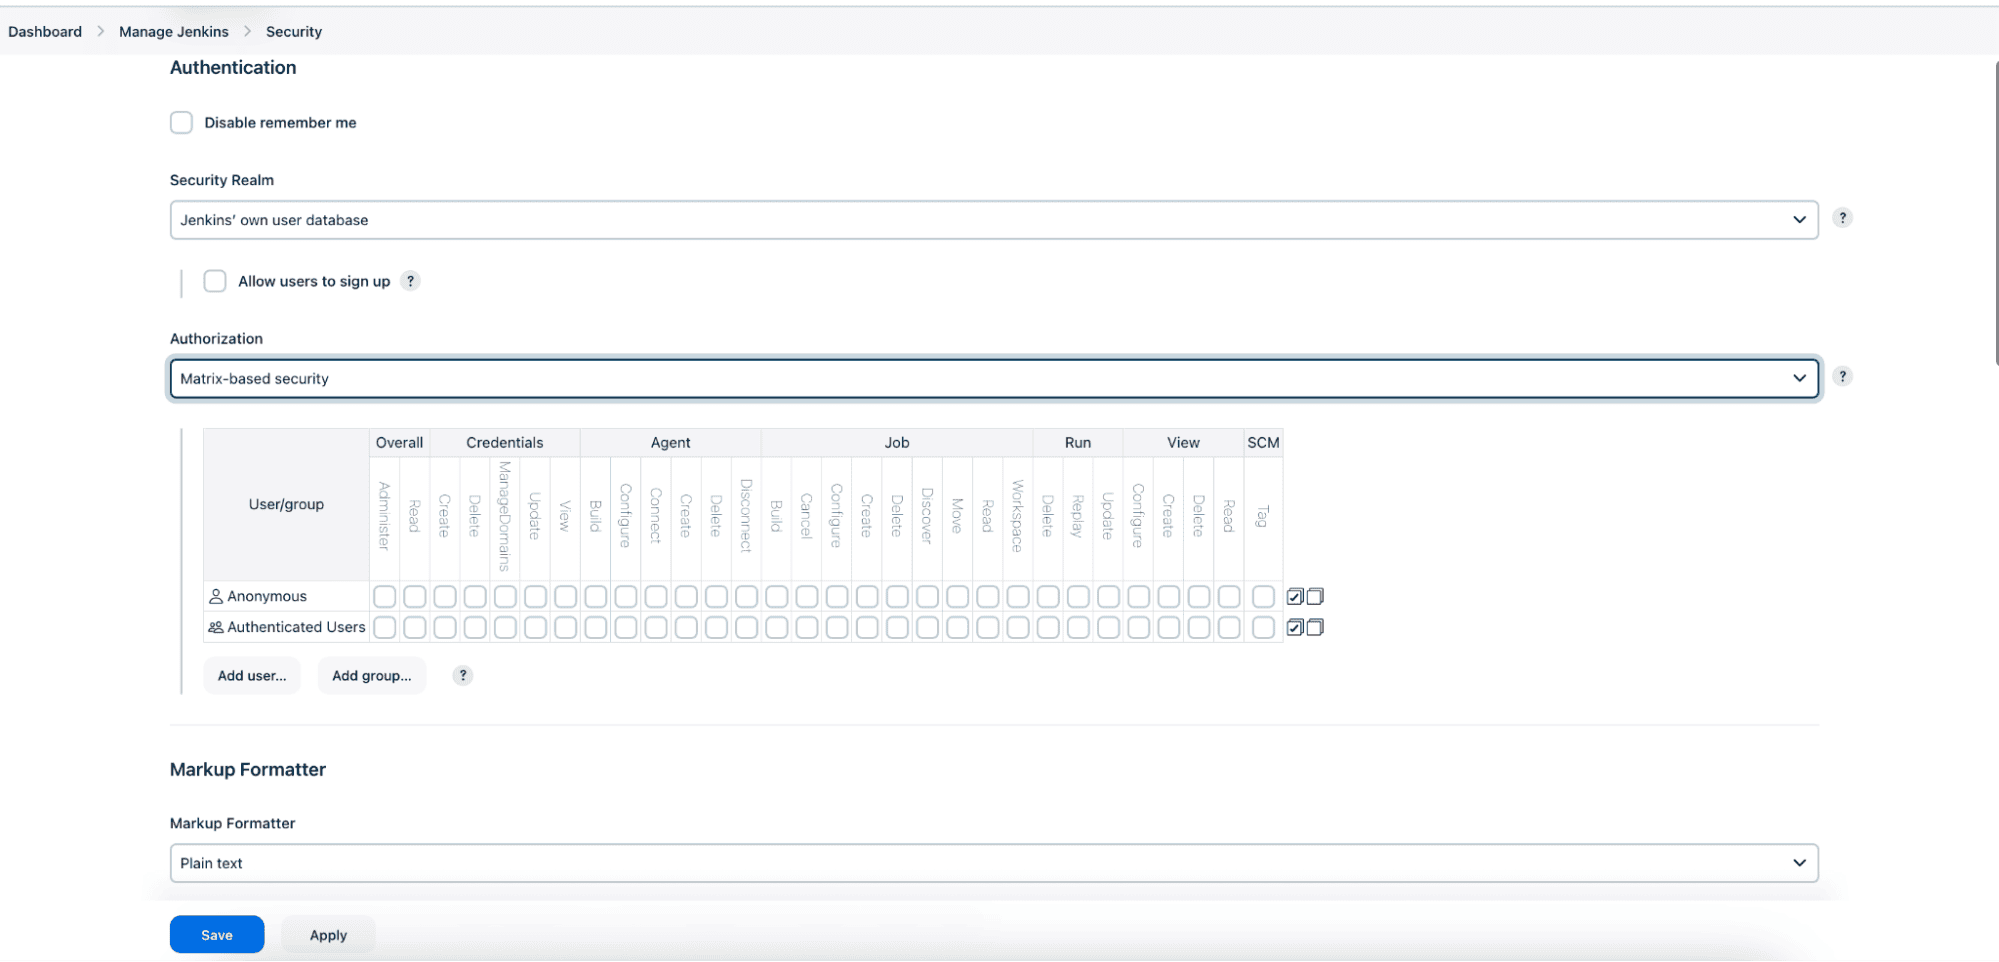
- Scroll down to the “Authorization” section.
- Choose “Matrix-based security” as the authorization method.
Note that the “Legacy mode” option is disabled to use the Matrix-based security method exclusively.
3.2. Configure Permissions
After enabling Matrix-based security, we’ll see a matrix grid interface where we can define permissions:
- The rows represent individual users or groups, while the columns represent a specific permission or action such as Overall, Job, Run, Read, Write, and others.
- Checkboxes within the grid indicate whether a user or group has permission for a particular action.
- By default, only the administrator has all permissions. We can grant or revoke permissions for individual users or groups by checking or unchecking the corresponding checkboxes.
- To grant permissions, first, we need to ensure that the desired users or groups are listed in the leftmost column of the matrix grid.
- Finally, click on “Add user or group” to add a user/group if it’s not already listed. Enter the username/group name and click “Add”.
3.3. Test and Verify
Again, log in with different user accounts or simulate user actions to verify that permissions are enforced correctly.
4. Conclusion
In this article, we configured Role-Based Access Control (RBAC) in Jenkins. It’s essential for maintaining a secure and efficient development environment. By defining roles, assigning permissions, and regularly reviewing access controls, we can effectively manage user access in Jenkins and mitigate the risk of unauthorized actions.