1. Overview
Jenkins is an open-source automation server that can streamline different actions. For example, we can use Jenkins to download, compile, and run code at regular intervals or in specific conditions. Due to the potential ad-hoc execution of tasks and often unknown results, Jenkins provides a notification system that employs e-mails.
In this tutorial, we’ll see two different ways to send email notifications from Jenkins. They can be very useful when we want to be notified immediately about issues in a pipeline.
2. Environment Setup
To begin with, we set up the environment. Let’s use Docker Compose because it enables us to do that fairly simply:
- create a container that runs the Jenkins Docker image
- use MailHog in a separate container to test the email-sending functionality
Let’s begin with the configuration.
2.1. Configure Docker Compose
Let’s create the docker-compose.yaml file which describes the desired environment:
version: '3.7'

services:

    mailhog:
      image: mailhog/mailhog:v1.0.1
      container_name: mailhog
      networks:
        - jenkins
      ports:
        - 1025:1025
        - 8025:8025

    jenkins:
      image: jenkins/jenkins:2.361.1-lts-jdk11
      container_name: jenkins
      networks:
        - jenkins
      ports:
        - 8080:8080
        - 50000:50000

networks:
  jenkins:
There are a few important details here that we need to know about. First, let’s see the network configuration. Both of the containers use the same network. This is important because otherwise, they wouldn’t be able to communicate with each other.
Next, let’s take a look at the ports of these containers. MailHog uses port 1025 for the SMTP server. Therefore, we need to use this port from Jenkins to send emails. The other port can be used to access a user interface from a Web browser. Jenkins provides its user interface on port 8080.
2.2. Running the Containers
Let’s start the Docker containers:
$ docker-compose up -d
Now we can access them at the ports described above.
Let’s start with MailHog and open http://localhost:8025/ in a Web browser:
The emails should appear in a list as soon as we send them from Jenkins.
Now, let’s visit http://localhost:8080/ to open the Jenkins UI as well.
2.3. Jenkins Setup
The Jenkins container may take a while to fully load the services, during which time it shows a loading indicator on the UI. After that, we see a password prompt where we enter the generated admin password.
On the next screen, we should install all the suggested plugins and wait for the process to finish. Then, we can optionally create a new user. In this case, we continue as the administrator. Similarly, on the Instance Configuration page, we can just click Save and Finish. Now, we can use all the necessary functionalities.
3. Built-in Solution
Jenkins provides a built-in solution for sending emails.
3.1. Basic Configuration
We can configure this in the Manage Jenkins menu under the Configure System option.
Let’s scroll down to the bottom of the page and take a look at the E-mail Notification section:

Here, we can configure the SMTP details, which should comprise the address and port of the MailHog container:
- since both containers can see each other, the SMTP server can simply be mailHog
- under the Advanced Settings section, we set the port to 1025
We can even test this configuration after ticking the checkbox and providing an email address. Let’s apply the configuration and send a test email. We can verify that a new email appeared on the list of the MailHog UI.
3.2. Usage in a Job
We can send test emails from the settings, but in real-world scenarios, we want to receive emails about relevant events.
For example, we might want to be notified when a build fails. So, let’s create a simple job that only prints a message:
- Select New Item from the left-side menu
- Create a Freestyle project with the name Email Test Job
- At the Configuration screen, scroll to Build Steps
- Add an Execute shell step
For the last point, we use a simple script:
echo "Test job for sending emails."
Under Build Steps, we can also add some actions that execute after the job. So, we create an E-mail Notification post-build action. Let’s set an email address as the recipient and save the job configuration:
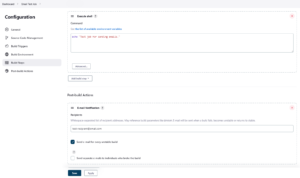
After that, we save the configuration.
3.3. Testing the Setup
Since we already have the job configured, we can just click Build Now to run it and check the result.
Consequently, we see the expected message in the console output but don’t receive any emails. This is expected.
This email notification is triggered only for certain events:
- build fails
- build is unstable
- build returns to stable
This means we should create a situation where one of these events happens.
For example, we can create a failing build by modifying the executed shell script. Let’s exit with a non-zero exit code from the script. This makes Jenkins treat it as a failed build:
echo "Test job for sending emails."
exit 1
Now, we run the job again and check the result. This execution is marked as failed in Jenkins and we also received an email from MailHog. The email subject is Build failed in Jenkins: Email Test Job #2. We can see the details in the body.
Conversely, let’s remove the exit command from the script and rerun the job. This time, the build status is successful and we receive another email that states the Jenkins build is back to normal: Email Test Job #3.
However, sometimes we need to be notified about more events. In such cases, we can turn to plugins.
4. Email Extension Plugin
In addition to the built-in mechanism, we can also use the Email Extension plugin to send emails from Jenkins. Most importantly, it supports more events than the built-in solution, although the default is to send emails only when a build fails.
4.1. Configuration
Let’s open the Configure System menu. We should see a section titled Extended E-mail Notification.
Let’s use the same SMTP configuration values from the previous example: mailHog as the SMTP server and 1025 as the port. We can customize the settings further, but this is enough for the current example.
Unfortunately, we can’t test the configuration directly in the plugin. Let’s try it in the previously used job.
4.2. Usage in a Job
To use the Email Extension plugin, we change the configuration of the Email Test Job that we already have from the previous sections. Let’s remove the previous post-build action and add a new one named Editable Email Notification.
To start, let’s put an email address into the Project Recipients List field. This address should receive the notifications.
Next, we set the triggers:
- Open Advanced Settings.
- Scroll down to Triggers.
We can already see the trigger that sends an email any time a build fails:
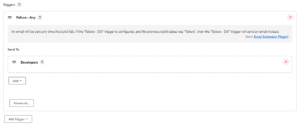
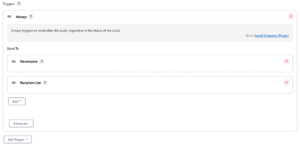
Let’s delete this and replace it with a trigger of type Always. We can find many other types of triggers here, too. There are also a lot of other configuration options. For example, we can set who receives the notifications, what the subject is, the content of the emails, or even add attachments.
However, we keep the default settings for this example and save the job:
Let’s run the resulting job and take a look at our Inbox in MailHog. We received an email about the successful build. Let’s change the shell script of the job again and exit with an error code:
echo "Test job for sending emails."
exit 1
If we run the job again, we get an email notification about the failure.
Let’s remove the exit command from the script and test it one last time. As a result, we get an email that says the build is fixed.
5. Sender Email Address
While we can set different hooks and get email notifications on many addresses, the sender for such messages is usually the same within a Jenkins environment. In fact, when it comes to email communication, Jenkins originates all messages from the address of the administrator.
Notably, Jenkins doesn’t natively enable setting up different senders for different jobs at the local level.
5.1. Global Setup
During the initial Jenkins setup process, we can usually set the email address of the administrator. This can be critical due to several characteristics of this address:
- point of contact for support
- sender address for notifications
So, if we don’t configure the administrator email address during the initial setup process, we might need to do it later.
5.2. Check Email Identity
To configure the email address of the administrator on a Jenkins installation, we perform several steps:
- Go to Manage Jenkins
- Enter Configure System
- Open Jenkins Location
- Locate System Admin e-mail address
In the field at the last step, we may see address not configured yet <nobody@nowhere>. If everything else apart from the administrator address is correctly configured, we might still get all notifications from the address not configured yet <nobody@nowhere> email identity.
5.3. Set Email Identity
If we want another address as the sender of email notifications and alerts, then we just change the contents of the System Admin e-mail address field we located in the last section.
The string should adhere to the RFC 5322 mailbox format like the example:
- (optional) display name such as Name
- mandatory email address in angle brackets (usually unnecessary when a name isn’t provided)
Alternatively, we can use a Groovy script for the same purpose:
import jenkins.model.*

def jenkinsLocationConfiguration = JenkinsLocationConfiguration.get()
jenkinsLocationConfiguration.setAdminAddress("NAME] <[EMAIL_ADDRESS]>")

jenkinsLocationConfiguration.save()
Once configured like this, Jenkins should continue sending messages with the new identity.
6. Conclusion
In this article, we saw two different approaches for sending email notifications from Jenkins.
First, we used the built-in solution which can send emails when a build fails or becomes stable again. Next, we used the Email Extension plugin which can be used when we need more control over the events that trigger the notifications. Finally, we checked how to set the email address of the sender for system messages.
While both approaches work, choosing between them comes down to functional requirements and convenience.