1. 概述
端到端测试是评估软件产品整体功能的关键环节。它能发现单元测试和集成测试阶段可能遗漏的问题,确保软件按预期运行。
执行包含多用户步骤和旅程的端到端测试非常繁琐。因此,自动化测试是更可行的方案。
本文将介绍如何使用 Playwright 和 TypeScript 实现端到端测试自动化。
2. 什么是 Playwright 端到端测试?
Playwright 端到端测试是帮助开发者和测试人员模拟真实用户与网站交互的过程。使用 Playwright 可以自动化以下任务:
- 点击按钮
- 填写表单
- 页面导航
它支持主流浏览器:Chrome、Firefox、Safari 和 Edge。
3. Playwright 端到端测试的先决条件
使用 Playwright 需要安装:
- NodeJS 18+
- TypeScript
安装方式有两种:
- 命令行安装
- VS Code 安装
本文采用 VS Code 安装方式:
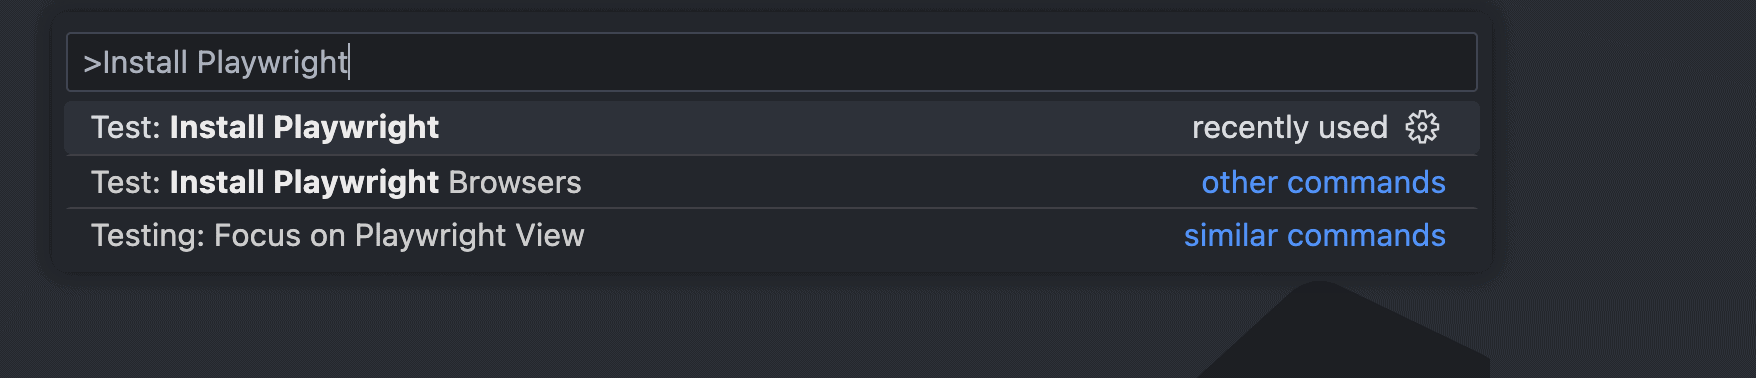
- 从 VS Code 商店安装 Playwright 后,打开命令面板运行 Install Playwright:
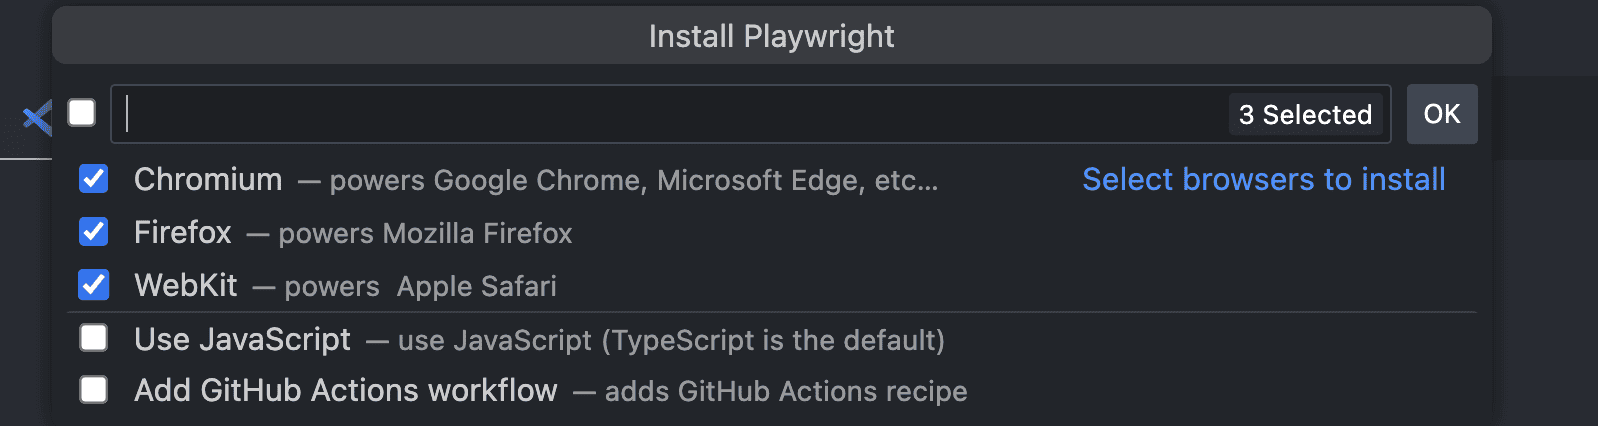
- 安装所需浏览器,点击 OK:
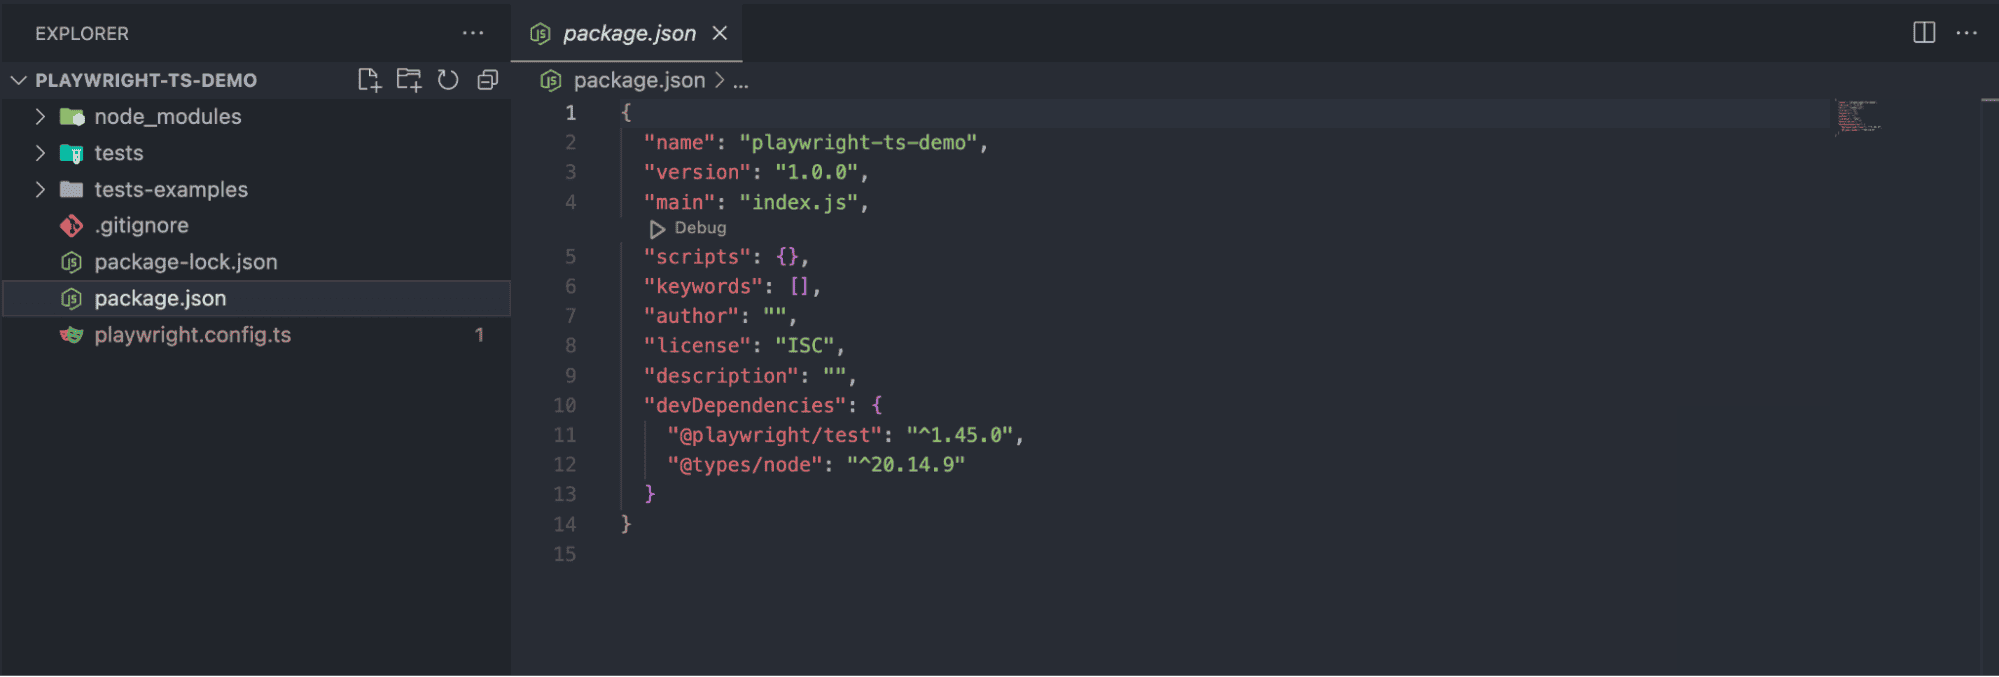
- 安装完成后生成项目结构,依赖配置在 package.json 中:
4. 如何使用 Playwright 执行端到端测试?
端到端测试覆盖最终用户的典型使用场景。本文以 LambdaTest 电商测试平台 为例编写测试。
建议使用云测试平台(如 LambdaTest)提升测试的可扩展性和可靠性。LambdaTest 是 AI 驱动的测试执行平台,支持在 3000+ 真实浏览器和操作系统上运行 Playwright 自动化测试。
4.1. 测试场景 1
- 在 LambdaTest 电商测试平台注册新用户
- 断言验证用户注册成功
4.2. 测试场景 2
- 断言验证用户已登录
- 在首页搜索商品
- 选择商品并加入购物车
- 断言验证购物车添加了正确商品
4.3. 测试配置
创建配置文件覆盖 storageState fixture 实现每个工作进程单次认证。使用 testInfo.parallelIndex 区分不同工作进程。
同时配置 LambdaTest 能力参数。新建 base 文件夹和 page-object-model-fixture.ts 文件:
const modifyCapabilities = (configName, testName) => {
    let config = configName.split("@lambdatest")[0];
    let [browserName, browserVersion, platform] = config.split(":");
    capabilities.browserName = browserName;
    capabilities.browserVersion = browserVersion;
    capabilities["LT:Options"]["platform"] =
        platform || capabilities["LT:Options"]["platform"];
    capabilities["LT:Options"]["name"] = testName;
};
可通过 LambdaTest 能力生成器 快速生成这些参数。接下来配置项目名称(格式如 chrome:latest:macOS Sonoma@lambdatest):
projects: [
    {
        name: "chrome:latest:macOS Sonoma@lambdatest",
        use: {
            viewport: {
                width: 1920,
                height: 1080,
            },
        },
    },
    {
        name: "chrome:latest:Windows 10@lambdatest",
        use: {
            viewport: {
                width: 1280,
                height: 720,
            },
        },
    },
核心代码分两部分。第一部分声明 testPages 常量并扩展 pages 类型:
const testPages = baseTest.extend<pages, { workerStorageState: string; }>({
    page: async ({}, use, testInfo) => {
        if (testInfo.project.name.match(/lambdatest/)) {
            modifyCapabilities(testInfo.project.name, `${testInfo.title}`);
            const browser =
                await chromium.connect(
                    `wss://cdp.lambdatest.com/playwright?capabilities=
                    ${encodeURIComponent(JSON.stringify(capabilities))}`
                );
            const context = await browser.newContext(testInfo.project.use);
            const ltPage = await context.newPage();
            await use(ltPage);

            const testStatus = {
                action: "setTestStatus",
                arguments: {
                    status: testInfo.status,
                    remark: getErrorMessage(testInfo, ["error", "message"]),
                },
            };
            await ltPage.evaluate(() => {},
                `lambdatest_action: ${JSON.stringify(testStatus)}`
            );
            await ltPage.close();
            await context.close();
            await browser.close();
        } else {
            const browser = await chromium.launch();
            const context = await browser.newContext();
            const page = await context.newPage();
            await use(page);
        }
    },

    homePage: async ({ page }, use) => {
        await use(new HomePage(page));
    },
    registrationPage: async ({ page }, use) => {
        await use(new RegistrationPage(page));
    },
});
第二部分设置 workerStorageState,确保每个并行工作进程单次认证:
storageState: ({ workerStorageState }, use) =>
    use(workerStorageState),

workerStorageState: [
    async ({ browser }, use) => {
        const id = test.info().parallelIndex;
        const fileName = path.resolve(
            test.info().project.outputDir,
            `.auth/${id}.json`
        );
    },
],
通过工作进程范围的 fixture 实现单次认证。确保在干净环境中认证,需取消存储状态:
const page = await browser.newPage({ storageState: undefined });
最后在配置文件中更新认证流程(包含测试场景 1 的用户注册步骤)。
4.4. 实现:测试场景 1
创建页面对象类管理元素定位器和交互函数。在 tests 文件夹新建 pageobjects 文件夹,首页类如下:
import { Page, Locator } from "@playwright/test";
import { SearchResultPage } from "./search-result-page";

export class HomePage {
    readonly myAccountLink: Locator;
    readonly registerLink: Locator;
    readonly searchProductField: Locator;
    readonly searchBtn: Locator;
    readonly logoutLink: Locator;
    readonly page: Page;

    constructor(page: Page) {
        this.page = page;
        this.myAccountLink = page.getByRole("button", { name: " My account" });
        this.registerLink = page.getByRole("link", { name: "Register" });
        this.logoutLink = page.getByRole("link", { name: " Logout" });
        this.searchProductField = page.getByPlaceholder("Search For Products");
        this.searchBtn = page.getByRole("button", { name: "Search" });
    }

    async hoverMyAccountLink(): Promise<void> {
        await this.myAccountLink.hover({ force: true });
    }

    async navigateToRegistrationPage(): Promise<void> {
        await this.hoverMyAccountLink();
        await this.registerLink.click();
    }
}
操作步骤:
- 悬停 "My account" 按钮展开菜单
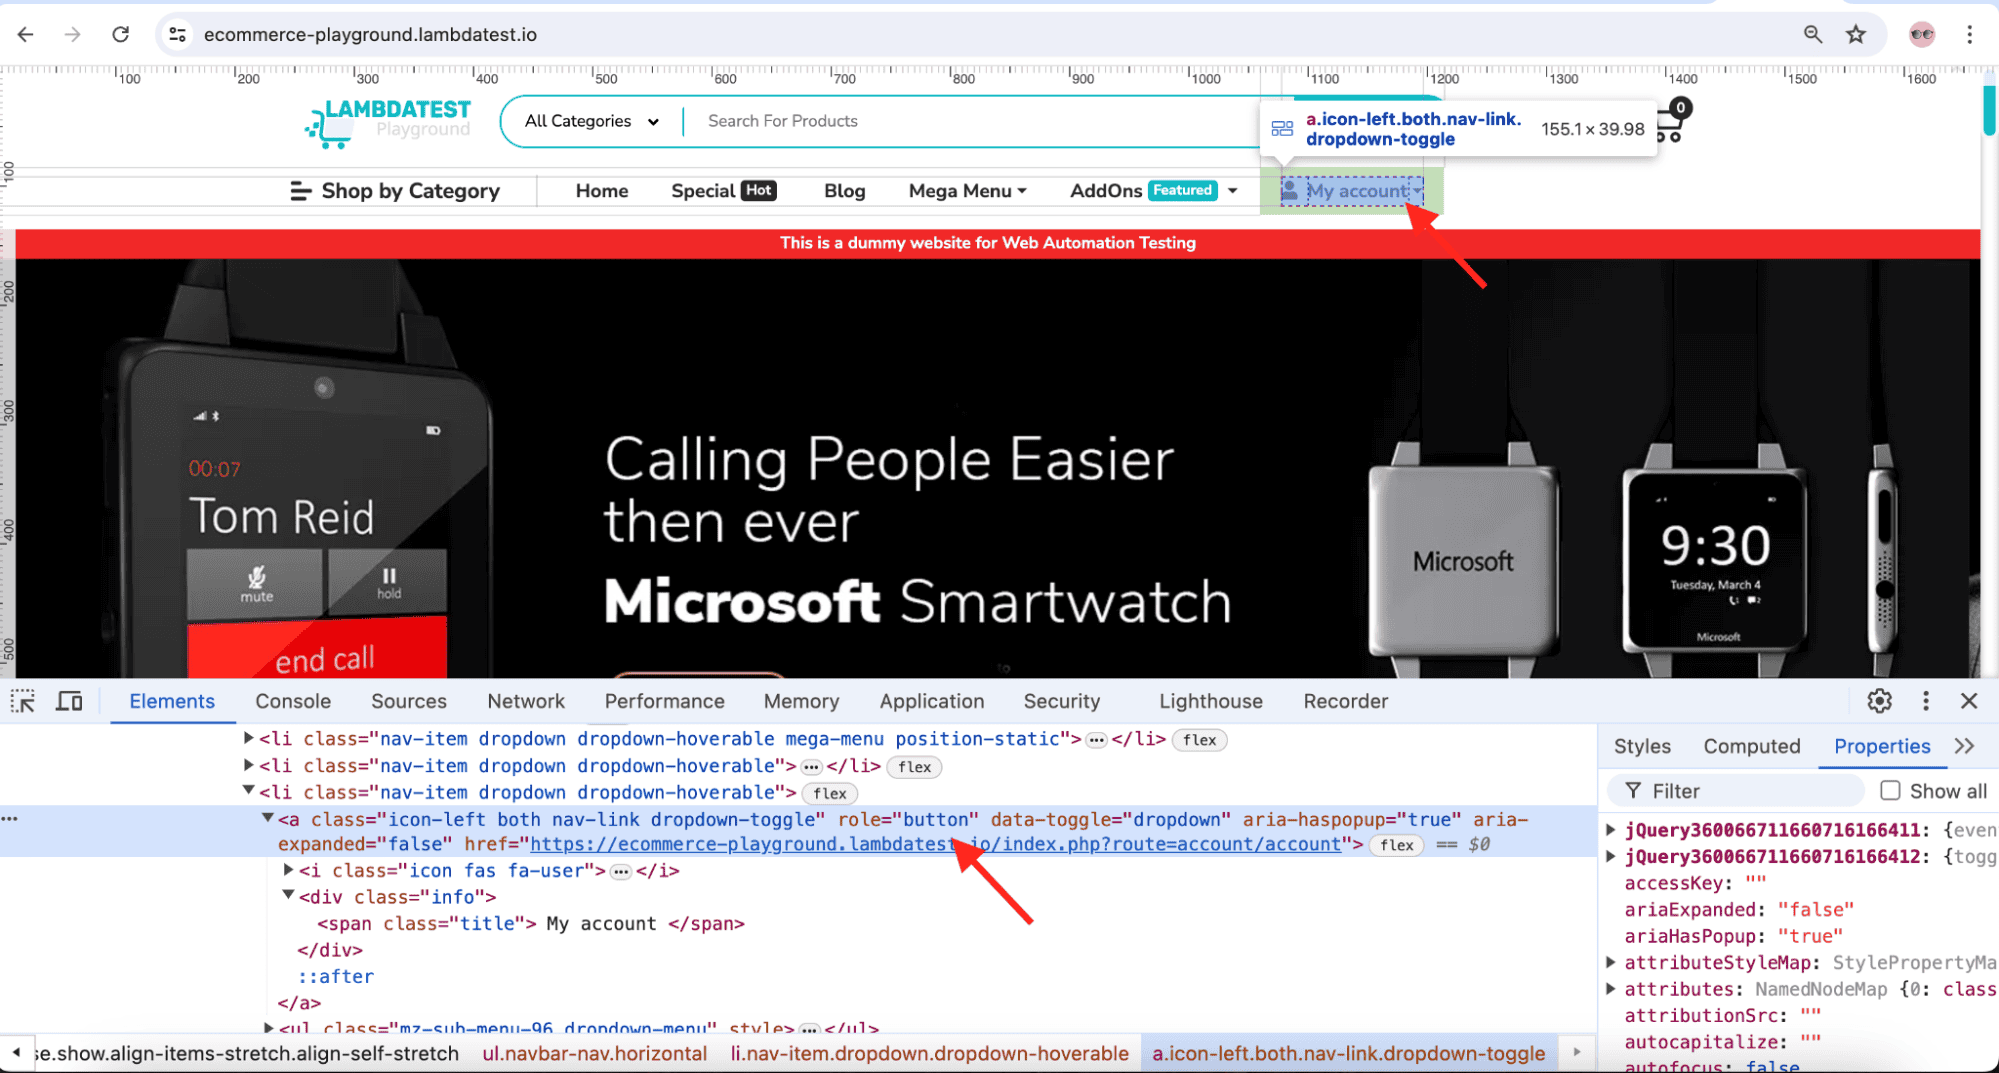
- 定位按钮元素(角色为 button):
this.myAccountLink = page.getByRole("button", { name: " My account" }); - 悬停操作实现:
async hoverMyAccountLink(): Promise<void> { await this.myAccountLink.hover({ force: true }); } - 点击注册链接(角色为 link):
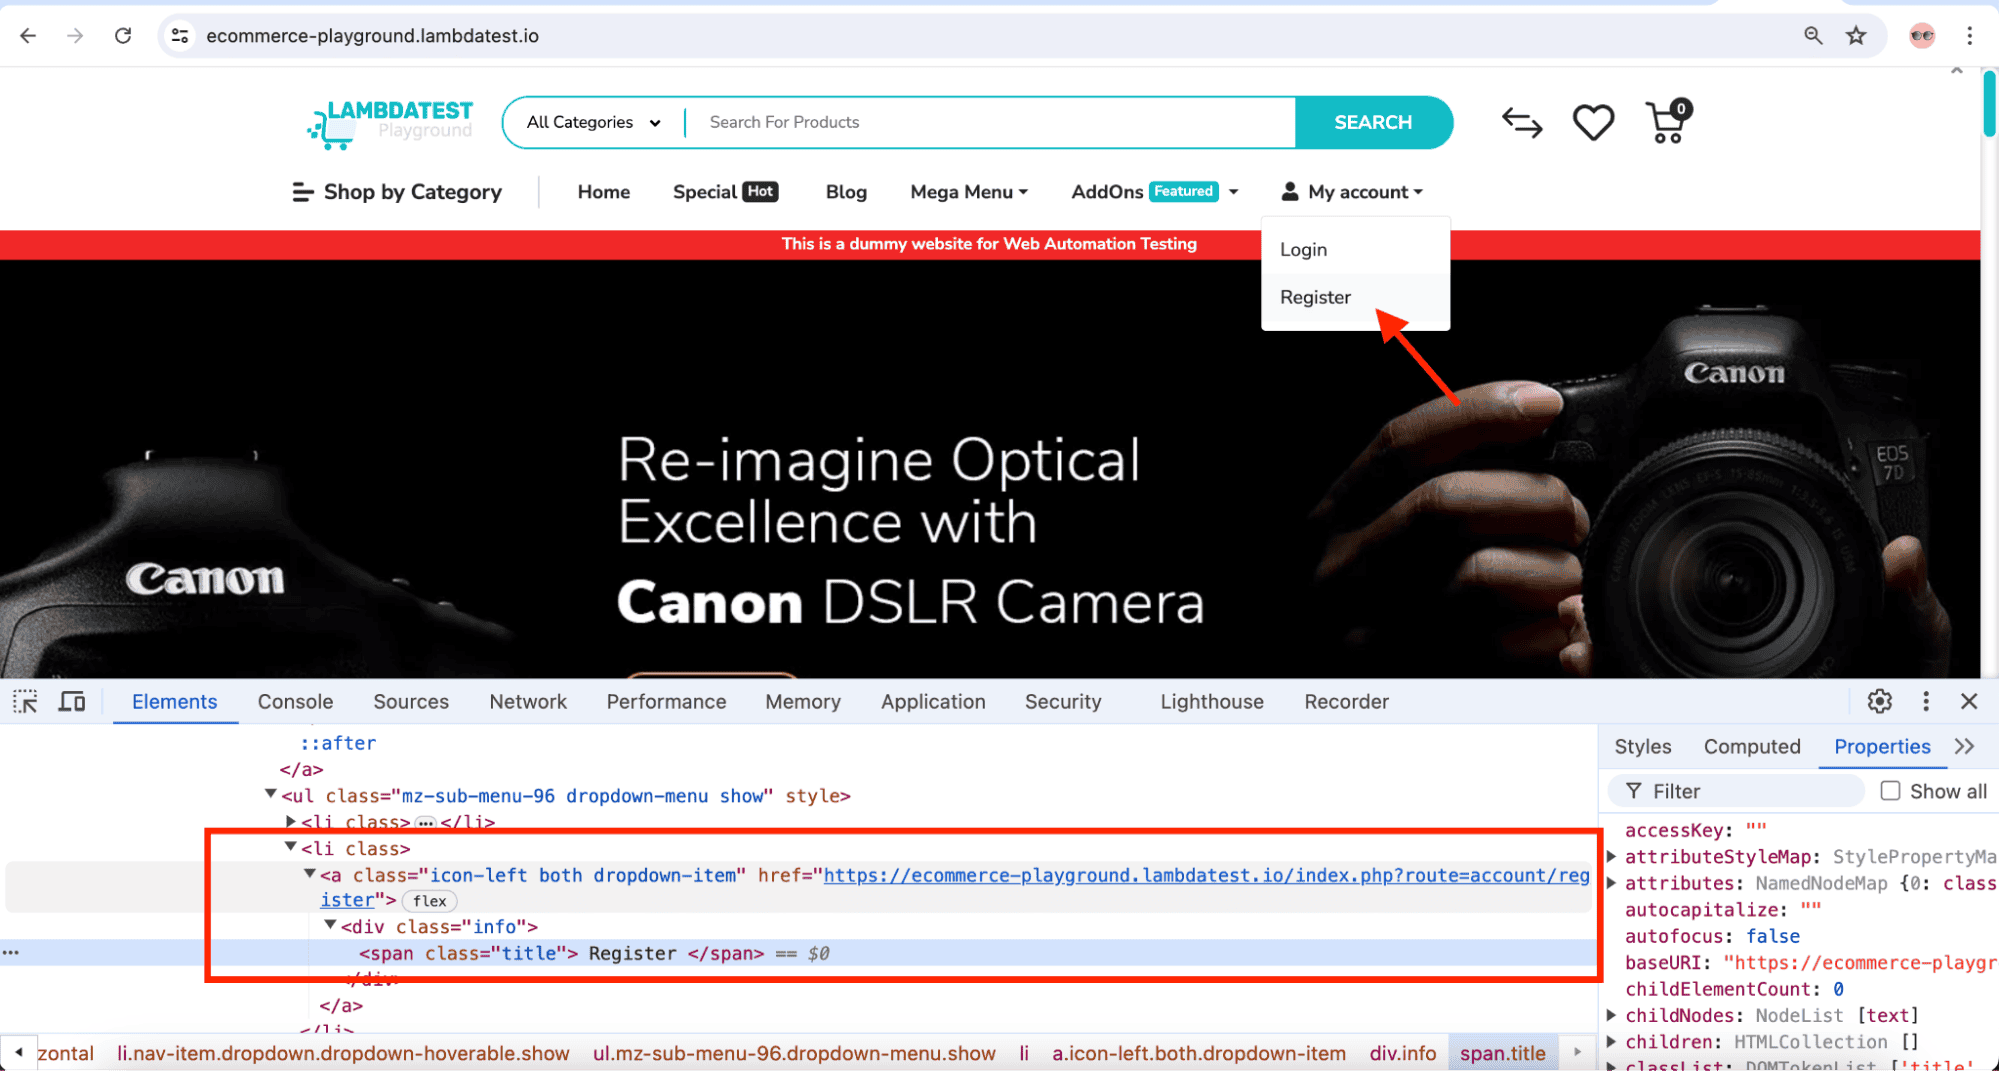
async navigateToRegistrationPage(): Promise<void> {
    await this.hoverMyAccountLink();
    await this.registerLink.click();
}
创建注册页类实现注册功能:
async registerUser(
    firstName: string,
    lastName: string,
    email: string,
    telephoneNumber: string,
    password: string
): Promise<MyAccountPage> {
    await this.firstNameField.fill(firstName);
    await this.lastNameField.fill(lastName);
    await this.emailField.fill(email);
    await this.telephoneField.fill(telephoneNumber);
    await this.passwordField.fill(password);
    await this.confirmPassword.fill(password);
    await this.agreePolicy.click();
    await this.continueBtn.click();

    return new MyAccountPage(this.page);
}
使用 getByLabel() 定位字段,创建 registerUser() 函数完成注册。
创建 my-account-page.ts 用于断言,更新配置文件:
- 调用 navigateToRegistrationPage() 进入注册页
- 断言 "Register Account" 标题
- 使用 register-user-data.json 数据调用 registerUser()
- 注册后断言 "Your Account Has Been Created!" 标题可见
4.5. 实现:测试场景 2
验证购物车功能:
- 断言用户已登录(悬停 "My account" 检查 "Logout" 链接可见)
- 搜索商品(以 iPhone 为例):
const searchResultPage = await homePage.searchForProduct("iPhone"); await searchResultPage.addProductToCart(); - 搜索结果页操作:
- 悬停首个商品
- 点击 "Add to Cart" 按钮
- 断言成功提示:
await expect(searchResultPage.successMessage).toContainText( "Success: You have added iPhone to your shopping cart!" ); const shoppingCart = await searchResultPage.viewCart(); - 最终断言购物车商品名称:
await expect(shoppingCart.productName).toContainText("iPhone");
4.6. 测试执行
本地执行命令(Chrome 浏览器):
$ npx playwright test --project=\"Google Chrome\"
LambdaTest 云端执行命令(macOS Sonoma + 最新 Chrome):
$ npx playwright test --project=\"chrome:latest:macOS Sonoma@lambdatest\"
更新 package.json 的 scripts 块:
"scripts": {
    "test_local": "npx playwright test --project=\"Google Chrome\"",
    "test_cloud": "npx playwright test --project=\"chrome:latest:macOS Sonoma@lambdatest\""
}
执行方式:
- 本地测试:
npm run test_local - 云端测试:
npm run test_cloud
测试完成后可在 LambdaTest 控制台查看结果:
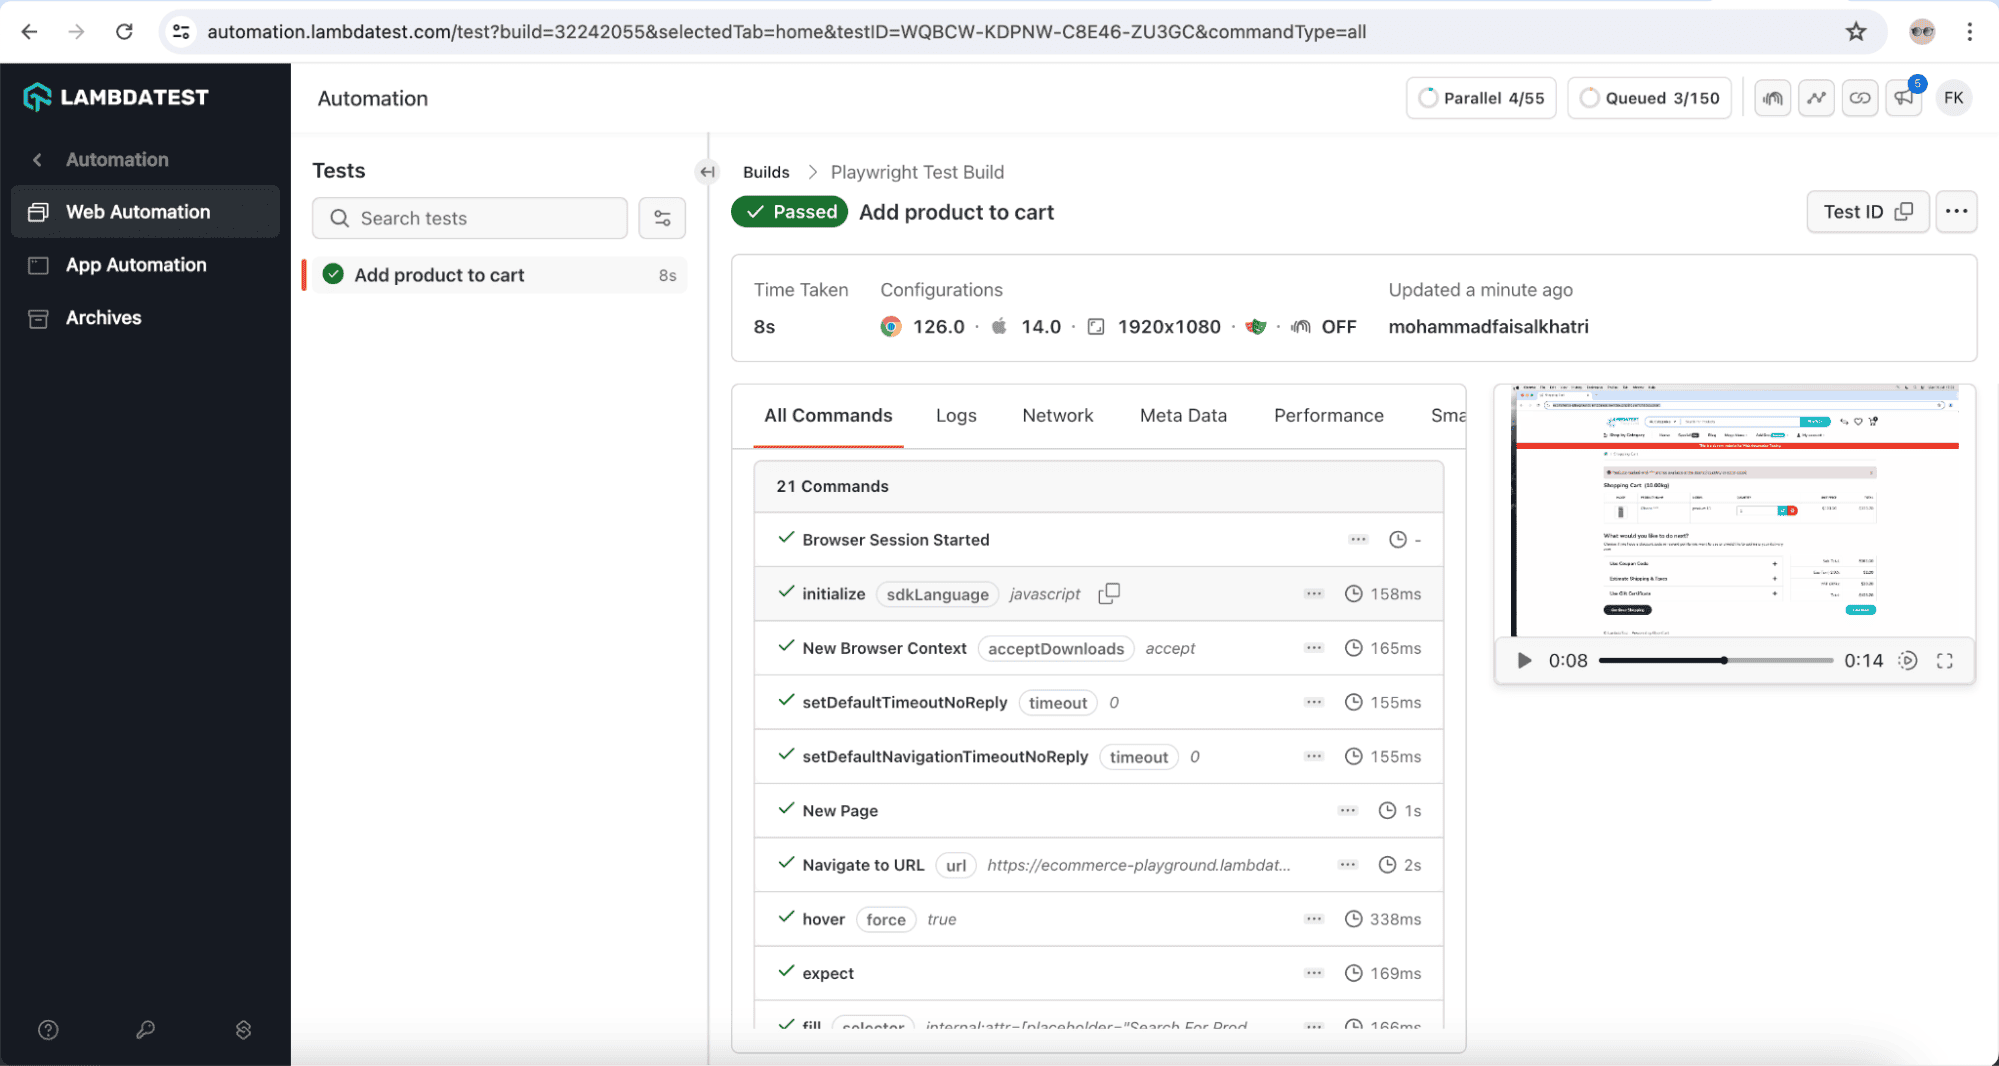
构建详情页包含:
- 平台/浏览器版本信息
- 测试视频和日志
- 执行命令列表
- 耗时统计
5. 总结
Playwright 是轻量级且易用的测试自动化框架,支持多语言配置。
使用 TypeScript + Playwright 的优势:
✅ 配置简单,减少模板代码
✅ 安装后即可快速编写测试
✅ 支持主流浏览器和云端执行
本文源代码可在 GitHub 获取。