1. Introduction
In this tutorial, we’ll discuss the use of Proof Key for Code Exchange (PKCE) for OAuth 2.0 public clients.
2. Background
OAuth 2.0 public clients such as Single Page Applications (SPA) or mobile applications utilizing Authorization Code Grant are prone to authorization code interception attacks. A malicious attacker may intercept the authorization code from the authorization endpoint if the client-server communication happens over an insecure network.
If an attacker can access the authorization code, it can then use it to obtain an access token. Once the attacker owns the access token, it can access the protected application resources similar to a legitimate application user, thus, severely compromising the application. For instance, if the access token is associated with a financial application, the attacker may gain access to sensitive application information.
2.1. OAuth Code Interception Attack
In this section, let us discuss how an Oauth authorization code interception attack can occur: 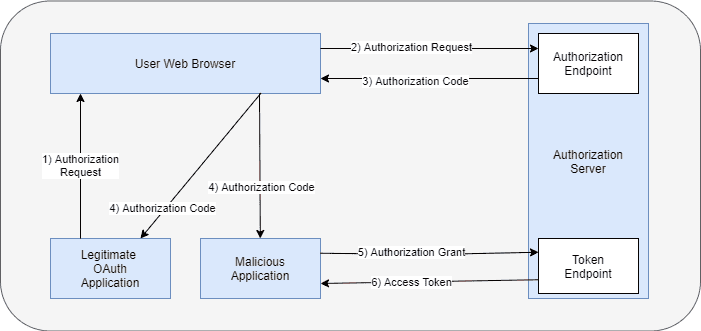 The above diagram demonstrates the flow of how a malicious attacker can misuse the authorization grant code to obtain the access token:
- A legitimate OAuth application initiates the OAuth authorization request flow using its web browser with all required details
- The web browser sends the request to the Authorization server
- The authorization server returns the authorization code to the web browser
- At this stage, the malicious user may access the authorization code if the communication happens over an insecure channel
- The malicious user exchanges the authorization code grant to obtain an access token from the authorization server
- Since the authorization grant is valid, the authorization server issues an access token to the malicious application. The malicious application can misuse the access token to act on behalf of the legitimate application and access protected resources
The Proof Key for Code Exchange is an extension of the OAuth framework intended to mitigate this attack.
3. PKCE with OAuth
The PKCE extension includes the following additional steps with the OAuth Authorization Code Grant flow:
- The client application sends two additional parameters code_challenge and code_challenge_method with the initial authorization request
- The client also sends a code_verifier in the next step while it exchanges the authorization code to obtain an access token
First, a PKCE-enabled client application selects a dynamically created cryptographically random key called code_verifier. This code_verifier is unique for every authorization request. According to the PKCE specification, the length of the code_verifier value must be between 43 and 128 octets.
Besides, the code_verifier can contain only alphanumeric ASCII characters and a few allowed symbols. Second, the code_verifier is transformed into a code_challenge using a supported code_challenge_method. Currently, the supported transformation methods are plain and S256. The plain is a no-operation transformation and keeps the code_challange value the same as of code_verifier. The S256 method first generates a SHA-256 hash of the code_verifier and then performs a Base64 encoding of the hash value.
3.1. Preventing OAuth Code Interception Attack
The following diagram demonstrates how PKCE extension prevents the access token theft: 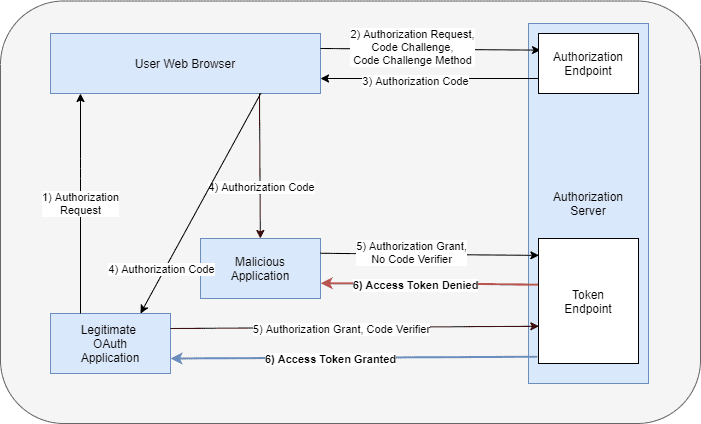
- A legitimate OAuth application initiates the OAuth authorization request flow using its web browser with all required details, and additionally the code_challenge and the code_challenge_method parameters.
- The web browser sends the request to the authorization server and stores the code_challenge and the code_challenge_method for the client application
- The authorization server returns the authorization code to the web browser
- At this stage, the malicious user may access the authorization code if the communication happens over an insecure channel
- The malicious user attempts to exchange the authorization code grant to obtain an access token from the authorization server. However, the malicious user is unaware of the code_verifier that needs to be sent along with the request. The authorization server denies the access token request to the malicious application
- The legitimate application supplies the code_verifier along with the authorization grant to obtain an access token. The authorization server calculates the code_challenge from the supplied code_verifier and the code_challenge_method it stored earlier from the authorization code grant request. It matches the calculated code_challange with the previously stored code_challenge. These values always match and the client is issued an access token
- The client can use this access token to access application resources
4. PKCE With Spring Security
As of version 6.3, Spring Security supports PKCE for both servlet and reactive web applications. However, it is not enabled by default as not all identity providers support the PKCE extension yet. PKCE is automatically used for public clients when the client is running in an untrusted environment such as a native application or web browser-based application and the client_secret is empty or not provided and the client-authentication-method is set to none.
4.1. Maven Configuration
Spring Authorization server supports the PKCE extension. Thus, the simple way to include PKCE support for a Spring authorization server application is to include the spring-boot-starter-oauth2-authorization-server dependency:
<dependency>
    <groupId>org.springframework.boot</groupId>
    <artifactId>spring-boot-starter-oauth2-authorization-server</artifactId>
    <version>3.3.0</version>
</dependency>
4.2. Register Public Client
Next, let us register a public Single Page Application client by configuring the following properties in the application.yml file:
spring:
  security:
    oauth2:
      authorizationserver:
        client:
          public-client:
            registration:
              client-id: "public-client"
              client-authentication-methods:
                - "none"
              authorization-grant-types:
                - "authorization_code"
              redirect-uris:
                - "http://127.0.0.1:3000/callback"
              scopes:
                - "openid"
                - "profile"
                - "email"
            require-authorization-consent: true
            require-proof-key: true
In the above code snippet, we register a client with client_id as public-client and client-authentication-methods as none. The require-authorization-consent requires the end-user to provide additional consent to access the profile and email scopes after the successful authentication. The require-proof-key configuration prevents the PKCE Downgrade Attack.
With require-proof-key configuration enabled, the authorization server does not allow any malicious attempt to bypass the PKCE flow without the code_challenge. The remaining configurations are standard configurations to register the client with the authorization server.
4.3. Spring Security Configuration
Next, let us define the SecurityFileChain configuration for the authorization server:
@Bean
@Order(1)
SecurityFilterChain authorizationServerSecurityFilterChain(HttpSecurity http) throws Exception {
    OAuth2AuthorizationServerConfiguration.applyDefaultSecurity(http);
    http.getConfigurer(OAuth2AuthorizationServerConfigurer.class)
      .oidc(Customizer.withDefaults());
    http.exceptionHandling((exceptions) -> exceptions.defaultAuthenticationEntryPointFor(new LoginUrlAuthenticationEntryPoint("/login"), new MediaTypeRequestMatcher(MediaType.TEXT_HTML)))
      .oauth2ResourceServer((oauth2) -> oauth2.jwt(Customizer.withDefaults()));
    return http.cors(Customizer.withDefaults())
      .build();
}
In the above configuration, we first apply the authorization server’s default security settings. We then apply the Spring security default settings for OIDC, CORS, and Oauth2 resource servers. Let us now define another SecurityFilterChain configuration that will be applied to other HTTP requests, such as the login page:
@Bean
@Order(2)
SecurityFilterChain defaultSecurityFilterChain(HttpSecurity http) throws Exception {
    http.authorizeHttpRequests((authorize) -> authorize.anyRequest()
      .authenticated())
      .formLogin(Customizer.withDefaults());
    return http.cors(Customizer.withDefaults())
      .build();
}
In this example, we use a very simple React application as our public client. This application runs on http://127.0.0.1:3000. The authorization server runs on a different port, 9000. Since these two applications are running on different domains, we will need to supply additional CORS settings so that the authorization server allows the React application to access it:
@Bean
CorsConfigurationSource corsConfigurationSource() {
    UrlBasedCorsConfigurationSource source = new UrlBasedCorsConfigurationSource();
    CorsConfiguration config = new CorsConfiguration();
    config.addAllowedHeader("*");
    config.addAllowedMethod("*");
    config.addAllowedOrigin("http://127.0.0.1:3000");
    config.setAllowCredentials(true);
    source.registerCorsConfiguration("/**", config);
    return source;
}
We are defining a CorsConfigurationSource instance with the allowed origin, headers, methods, and other configurations. Note that in the above configuration, we are using the IP address 127.0.0.1 instead of localhost as the latter is not allowed. Lastly, let us define a UserDetailsService instance to define a user in the authorization server.
@Bean
UserDetailsService userDetailsService() {
    PasswordEncoder passwordEncoder = PasswordEncoderFactories.createDelegatingPasswordEncoder();
    UserDetails userDetails = User.builder()
      .username("john")
      .password("password")
      .passwordEncoder(passwordEncoder::encode)
      .roles("USER")
      .build();

    return new InMemoryUserDetailsManager(userDetails);
}
With the above configurations, we will be able to use the username john and password as the password to authenticate to the authorization server.
4.4. Public Client Application
Let us now talk about the public client. For demonstration purposes, we are using a simple React application as the Single Page Application. This application uses the oidc-client-ts library for client-side OIDC and OAuth2 support. The SPA application is configured with the following configurations:
const pkceAuthConfig = {
  authority: 'http://127.0.0.1:9000/',
  client_id: 'public-client',
  redirect_uri: 'http://127.0.0.1:3000/callback',
  response_type: 'code',
  scope: 'openid profile email',
  post_logout_redirect_uri: 'http://127.0.0.1:3000/',
  userinfo_endpoint: 'http://127.0.0.1:9000/userinfo',
  response_mode: 'query',
  code_challenge_method: 'S256',
};

export default pkceAuthConfig;
The authority is configured with the address of the Spring Authorization server, which is http://127.0.0.1:9000. The code challenge method parameter is configured as S256. These configurations are used to prepare the UserManager instance, which we use later to invoke the authorization server. This application has two endpoints – the “/” to access the landing page of the application and the “callback” endpoint that handles the callback request from the Authorization server:
import React, { useState, useEffect } from 'react';
import { BrowserRouter, Routes, Route } from 'react-router-dom';
import Login from './components/LoginHandler';
import CallbackHandler from './components/CallbackHandler';
import pkceAuthConfig from './pkceAuthConfig';
import { UserManager, WebStorageStateStore } from 'oidc-client-ts';

function App() {
    const [authenticated, setAuthenticated] = useState(null);
    const [userInfo, setUserInfo] = useState(null);

    const userManager = new UserManager({
        userStore: new WebStorageStateStore({ store: window.localStorage }),
        ...pkceAuthConfig,
    });

    function doAuthorize() {
        userManager.signinRedirect({state: '6c2a55953db34a86b876e9e40ac2a202',});
    }

    useEffect(() => {
        userManager.getUser().then((user) => {
            if (user) {
                setAuthenticated(true);
            }
            else {
                setAuthenticated(false);
            }
      });
    }, [userManager]);

    return (
      <BrowserRouter>
          <Routes>
              <Route path="/" element={<Login authentication={authenticated} handleLoginRequest={doAuthorize}/>}/>
              <Route path="/callback"
                  element={<CallbackHandler
                      authenticated={authenticated}
                      setAuth={setAuthenticated}
                      userManager={userManager}
                      userInfo={userInfo}
                      setUserInfo={setUserInfo}/>}/>
          </Routes>
      </BrowserRouter>
    );
}

export default App;
5. Testing
We’ll use a React application with OIDC client support enabled to test the flow. To install the required dependencies, we need to run the npm install command from the application’s root directory. Then, we will start the application using the npm start command.
5.1. Accessing Application for Authorization Code Grant
This client application performs the following two activities: First, accessing the home page at http://127.0.0.1:3000 renders a sign-in page. This is the login page of our SPA application: Next, once we proceed with sign in, the SPA application invokes the Spring Authorization server with the code_challenge and the code_challenge_method:  We can notice the request made to the Spring Authorization server at http://127.0.0.1:9000 with the following parameters:
http://127.0.0.1:9000/oauth2/authorize?
client_id=public-client&
redirect_uri=http%3A%2F%2F127.0.0.1%3A3000%2Fcallback&
response_type=code&
scope=openid+profile+email&
state=301b4ce8bdaf439990efd840bce1449b&
code_challenge=kjOAp0NLycB6pMChdB7nbL0oGG0IQ4664OwQYUegzF0&
code_challenge_method=S256&
response_mode=query
The authorization server redirects the request to the Spring Security login page: 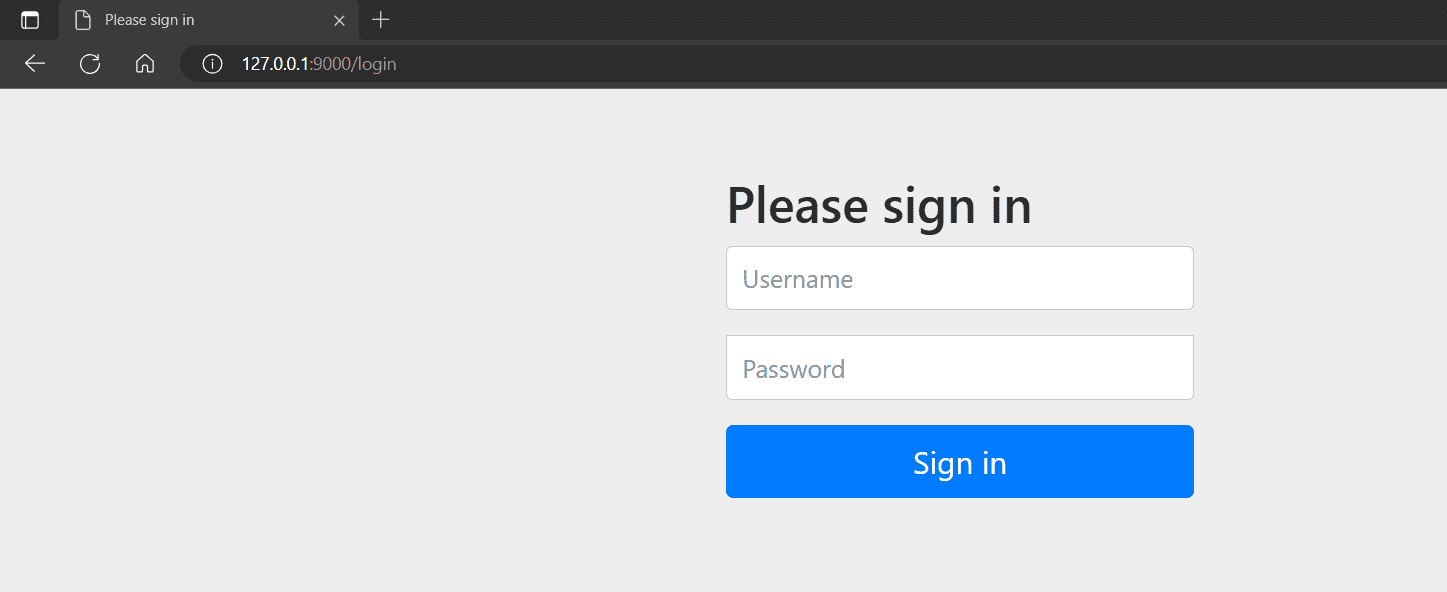 Once we provide the login credentials, the authorization requests consent for the additional Oauth scope profile and email. This is due to the configuration require-authorization-consent to true in the authorization server:
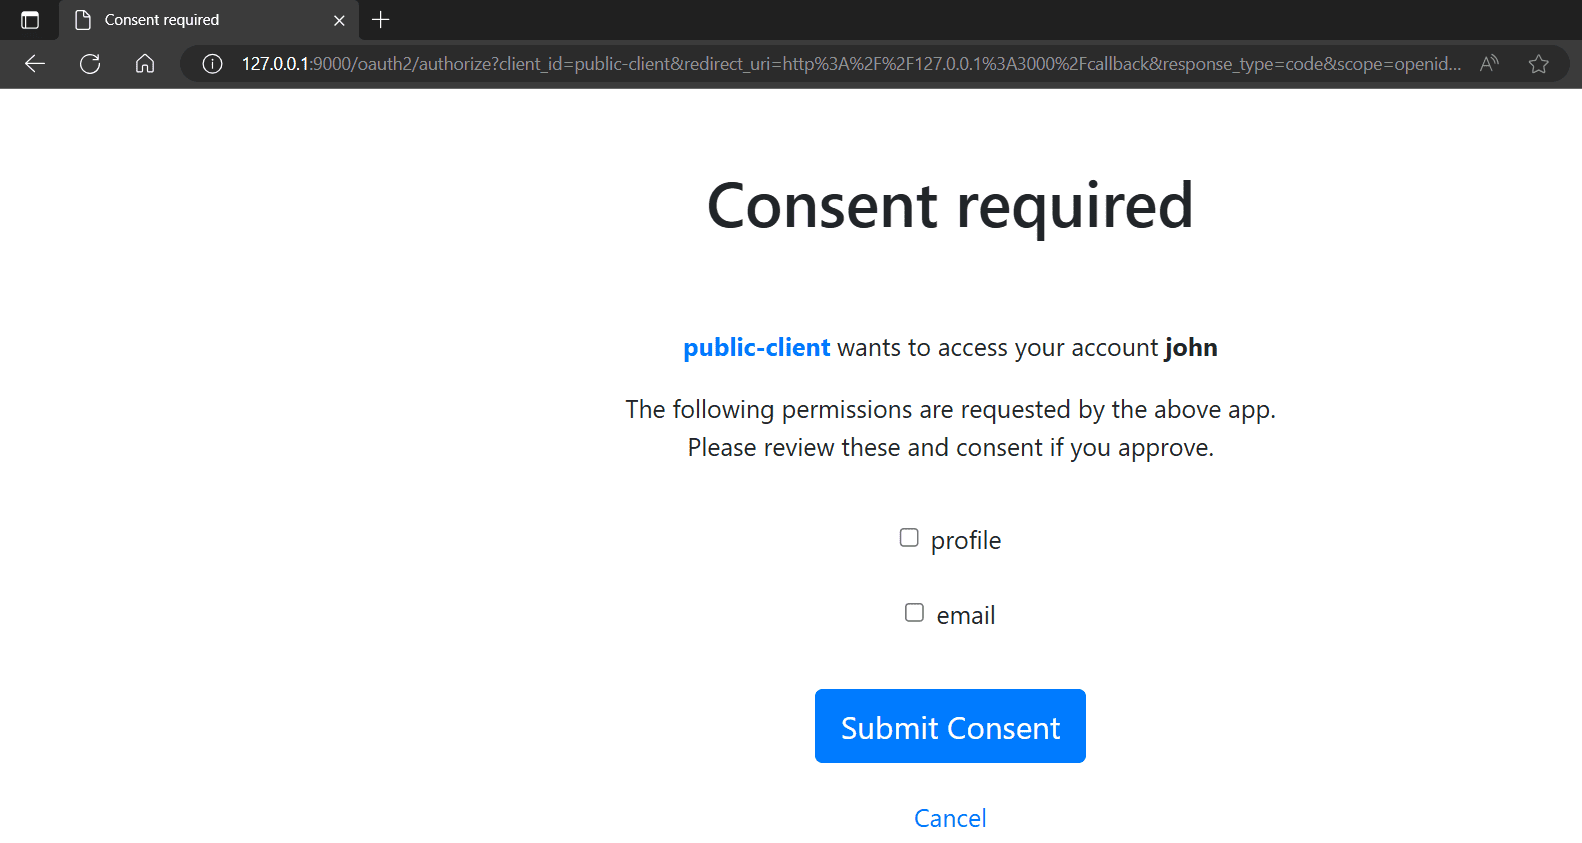
5.2. Exchange Authorization Code for Access Token
If we complete the login, the authorization server returns the authorization code. Subsequently, the SPA requests another HTTP to the authorization server to obtain the access token. The SPA supplies the authorization code obtained in the previous request along with the code_challenge to obtain the access_token:  For the above request, the Spring authorization server responds with the access token:
  Next, we access the userinfo endpoint in the authorization server to access the user details. We supply the access_token with the Authorization HTTP header as the Bearer token to access this endpoint. This user information is printed from the userinfo details:
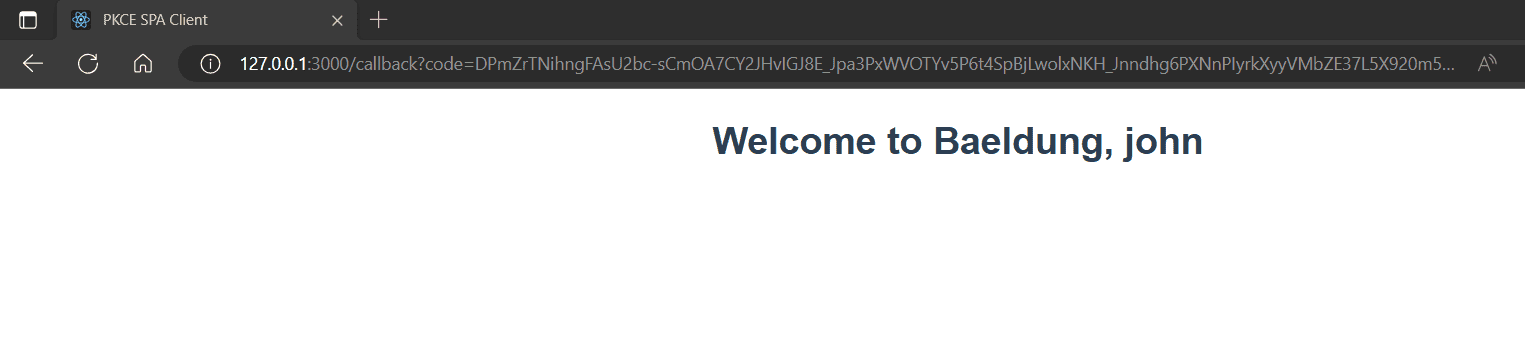
6. Conclusion
In this article, we’ve demonstrated how to use the OAuth 2.0 PKCE extension in a single-page application with a Spring Authorization Server. We started the discussion with the need for the PKCE for public clients and explored the configurations in the Spring Authorization server to use PKCE flow. Lastly, we leveraged a React application to demonstrate the flow. All the source code is available over on GitHub.