1. 概述
本教程将指导如何在 Spring Boot 中集成 SAML2。SAML 是实现安全应用的成熟技术,但配置过程涉及多个参与方,相对复杂。我们需要在服务提供商(SP)和身份提供商(IdP)之间反复调整配置,因此需要耐心按步骤操作。下面我们将逐步创建一个可运行的 SAML2 应用。
2. 配置服务提供商(SP)
我们的 Spring Boot 应用将作为服务提供商。首先创建包含 Spring Security、Spring MVC 和 OpenSAML 依赖的 Spring Boot 应用。核心依赖是 Spring Security SAML2,Spring Security 框架通过以下单一依赖提供 SAML2 支持:
<dependency>
    <groupId>org.springframework.security</groupId>
    <artifactId>spring-security-saml2-service-provider</artifactId>
</dependency>
2.1. SAML 基础配置
在 application.yml 中添加 SAML2 必要配置。最关键的是身份提供商的元数据。虽然我们已添加 metadata-uri 配置,但此时元数据文件尚未生成:
spring:
  security:
    saml2:
      relyingparty:
        registration:
          okta:
            signing:
              credentials:
                - private-key-location: classpath:local.key
                  certificate-location: classpath:local.crt
            singlelogout:
              binding: POST
              response-url: "{baseUrl}/logout/saml2/slo"
            assertingparty:
              metadata-uri: "classpath:metadata/metadata-idp.xml"
singlelogout 配置定义了身份提供商在登出成功后的重定向接口。signing.credentials 配置指定了应用用于向身份提供商签名登出请求的密钥和证书。使用 OpenSSL 工具生成 local.key 和 local.crt 文件:
openssl req -newkey rsa:2048 -nodes -keyout local.key -x509 -days 365 -out local.crt
2.2. 代码级安全配置
添加安全过滤器到过滤器链,该过滤器将身份提供商元数据注入安全上下文。同时在 http 对象上调用 saml2Login() 和 saml2Logout() 启用登录/登出功能:
Saml2MetadataFilter filter = new Saml2MetadataFilter(relyingPartyRegistrationResolver, new OpenSamlMetadataResolver());

http.csrf(AbstractHttpConfigurer::disable).authorizeHttpRequests(authorize -> authorize.anyRequest()
  .authenticated())
  .saml2Login(withDefaults())
  .saml2Logout(withDefaults())
  .addFilterBefore(filter, Saml2WebSsoAuthenticationFilter.class);

return http.build();
使用 withDefaults() 方法配置默认行为,这正是 Spring Boot 平台的强大之处——仅需几行代码即可完成整个 SAML2 应用配置。接下来我们将配置 Okta 作为身份提供商。
3. 配置身份提供商(IdP)
本步骤将 Okta 设置为身份提供商。身份提供商负责用户认证并生成 SAML 断言,该断言将返回给用户代理(浏览器)。用户代理将断言提交给服务提供商进行验证,验证通过后即可访问资源。
注册 Okta 开发者账户 并登录后,在左侧导航栏进入 Applications 页面开始 SAML 应用集成:

3.1. 创建应用集成
点击 "Create App Integration" 打开创建向导,选择 SAML 2.0:
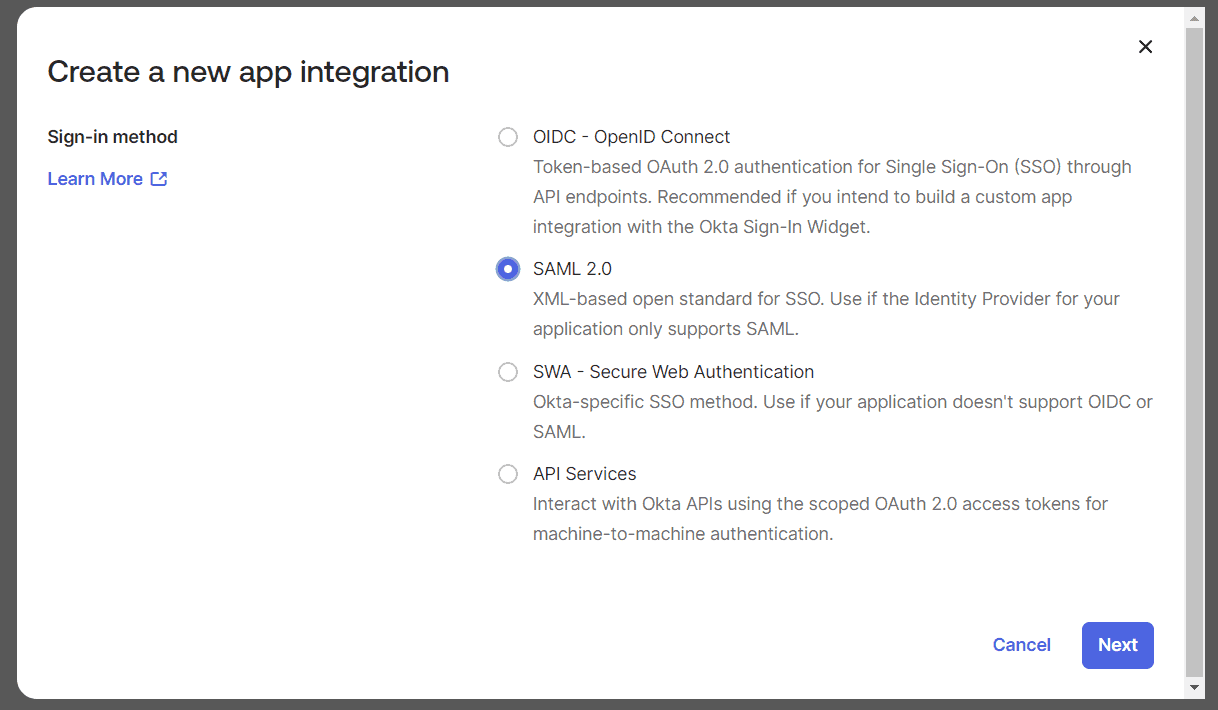
点击 "Next" 进入三步式 SAML 集成向导。
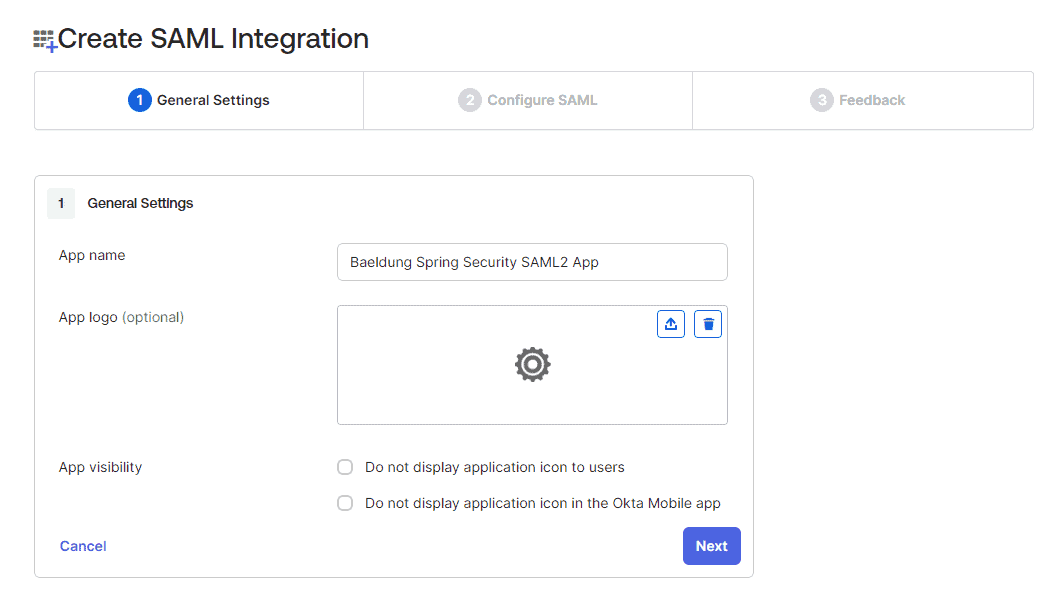
3.2. 通用设置
填写应用名称为 "Baeldung Spring Security SAML2 App":
3.3. SAML 核心配置
配置 SAML 应用的关键参数:
- 单点登录(SSO)URL:身份提供商接收 SSO 请求的地址
- 受众 URI(Audience URI):SAML 断言接收方的标识符
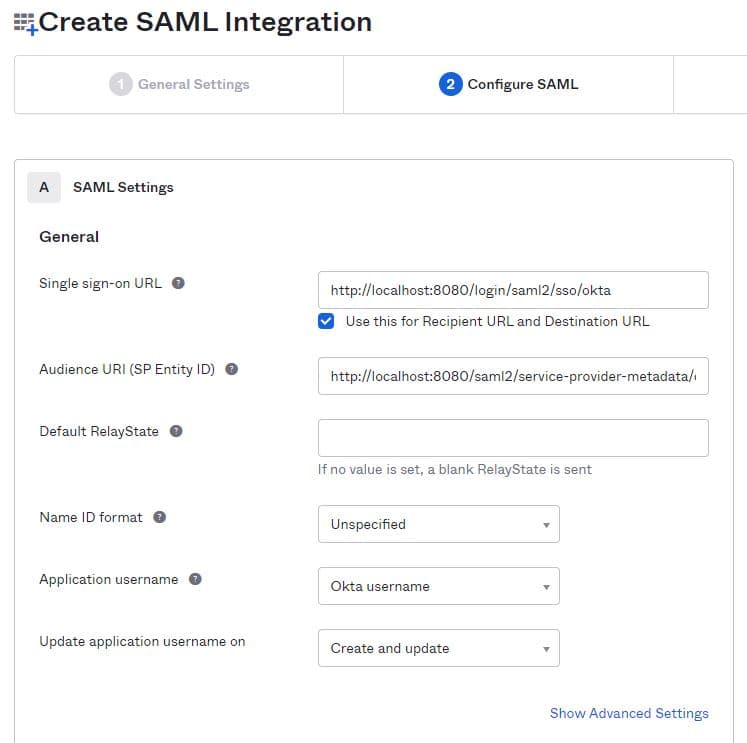
示例配置:
- 受众 URI:
http://localhost:8080/saml2/service-provider-metadata/okta - 单点登录 URL:
http://localhost:8080/login/saml2/sso/okta
3.4. 高级设置与用户属性
展开 "Show Advanced Settings" 部分:
- 启用单点登出:上传
local.crt证书(与服务提供商配置中的证书相同) - 配置单点登出 URL:
http://localhost:8080/logout/saml2/slo
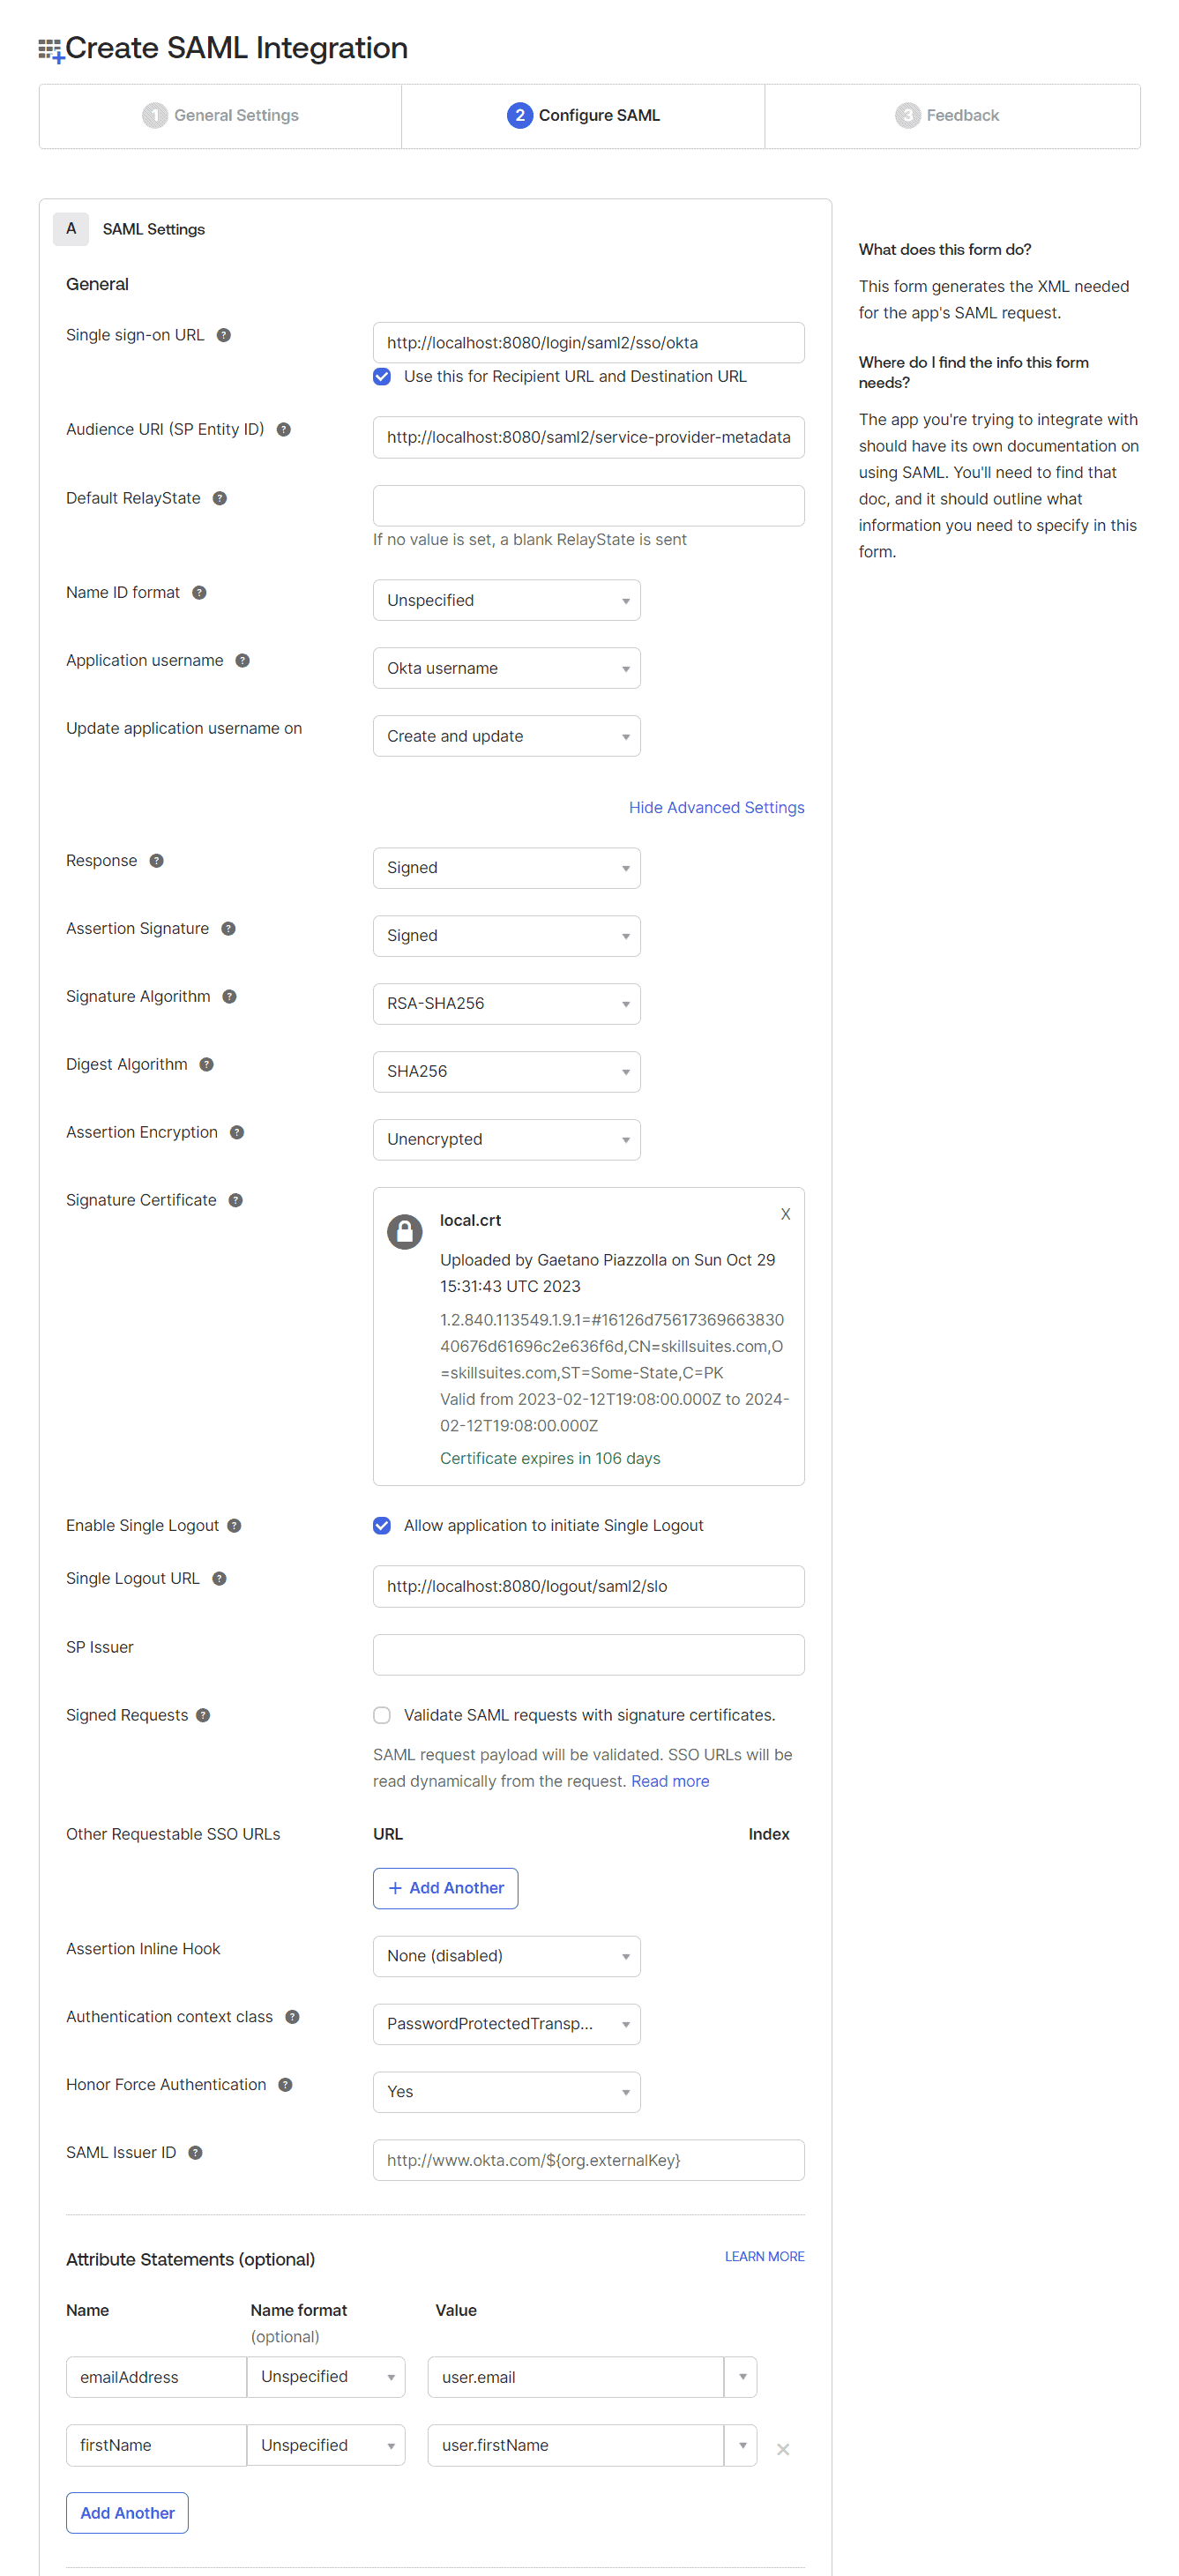
添加用户属性映射:
emailAddress -> Unspecified -> user.email
firstName -> Unspecified -> user.firstName
通过 "Preview the SAML Assertion" 预览生成的断言:

3.5. 反馈信息
选择 "I'm an Okta customer adding an internal app":

3.6. 获取 SAML 配置信息
完成向导后进入应用的 "Sign On" 标签页,点击右侧 "View SAML setup instructions":

在配置页面底部找到 IdP 元数据:

复制元数据并保存为 metadata-idp-okta.xml,放置于服务提供商的 resources/metadata 目录下,满足 application.yml 中 metadata_uri 的要求:

至此,服务提供商和身份提供商配置完成。接下来在 Okta 中创建用户并分配应用权限。
4. 创建用户主体
登录 Okta 开发者账户,在左侧 "Directory" 下进入 "People" 页面。填写表单创建新用户(可能需要刷新页面才能看到新用户):
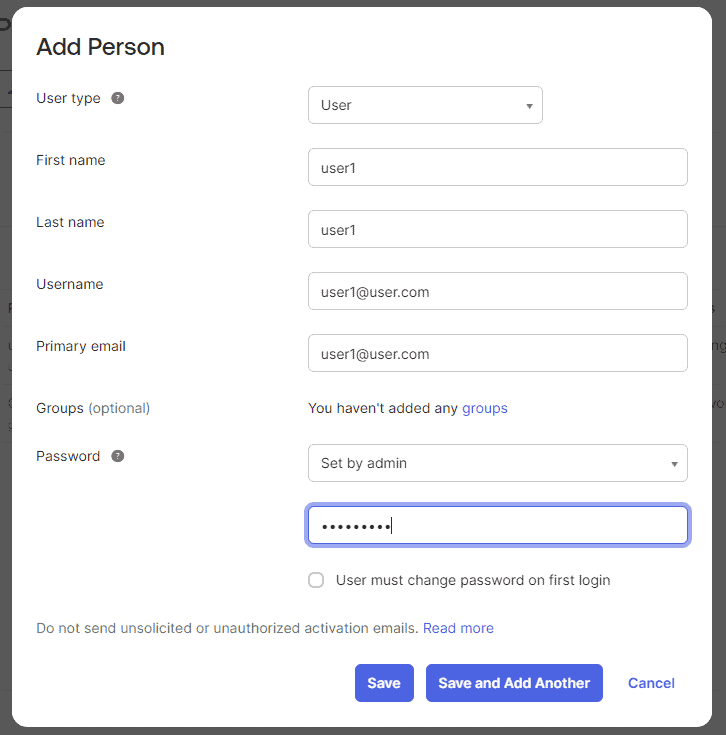
⚠️ 生产环境建议发送激活邮件或要求首次登录修改密码,此处我们直接激活用户。
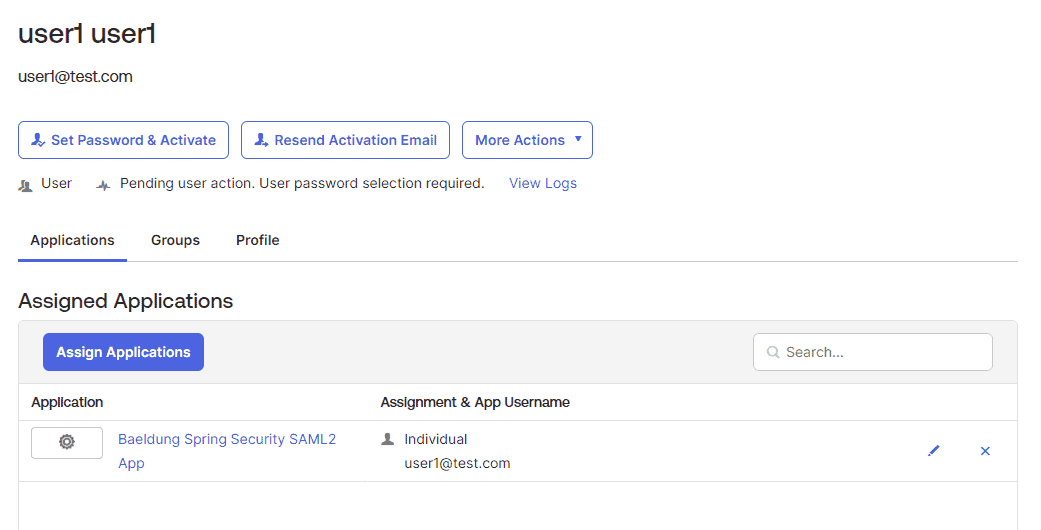
点击 "Assign" 按钮将用户分配到 SAML 应用:
5. 测试应用
启动 Spring Boot 应用,访问 http://localhost:8080 将跳转到登录页面:

登录成功后显示用户信息(包括 emailAddress 和 firstName):

最后测试登出功能。首先在 application.yml 中配置 <OKTA-ID>(从 URL 中获取):
spring:
  security:
    saml2:
      relyingparty:
        registration:
          okta:
            ...
            singlelogout:
              url: https://dev-<OKTA-ID>.okta.com/app/dev-56617222_springbootsaml_1/exk8b5jr6vYQqVXp45d7/slo/saml
              binding: POST
              response-url: "{baseUrl}/logout/saml2/slo"
点击登出按钮将清除所有 SAML 会话:

6. 总结
本文介绍了 Spring Boot Security SAML2 的集成方案。尽管 SAML2 配置复杂,但它是大型企业的首选方案。掌握 SAML2 后,可以充分利用其强大的安全特性,不仅保障应用安全,还能实现单点登录(SSO),避免用户记忆多套账号密码。
✅ 关键要点总结:
- 服务提供商需配置元数据、证书和安全过滤器
- 身份提供商需配置 SAML 断言参数和用户属性
- 单点登出需同步配置证书和重定向 URL
- 测试时需验证登录、用户属性展示和登出流程
完整示例代码请查看 GitHub 仓库。