1. Overview
In this tutorial, we’ll discuss an interesting computer graphics topic: projection. Further, we’ll briefly explore the technique and its real-time advantages.
2. Projection
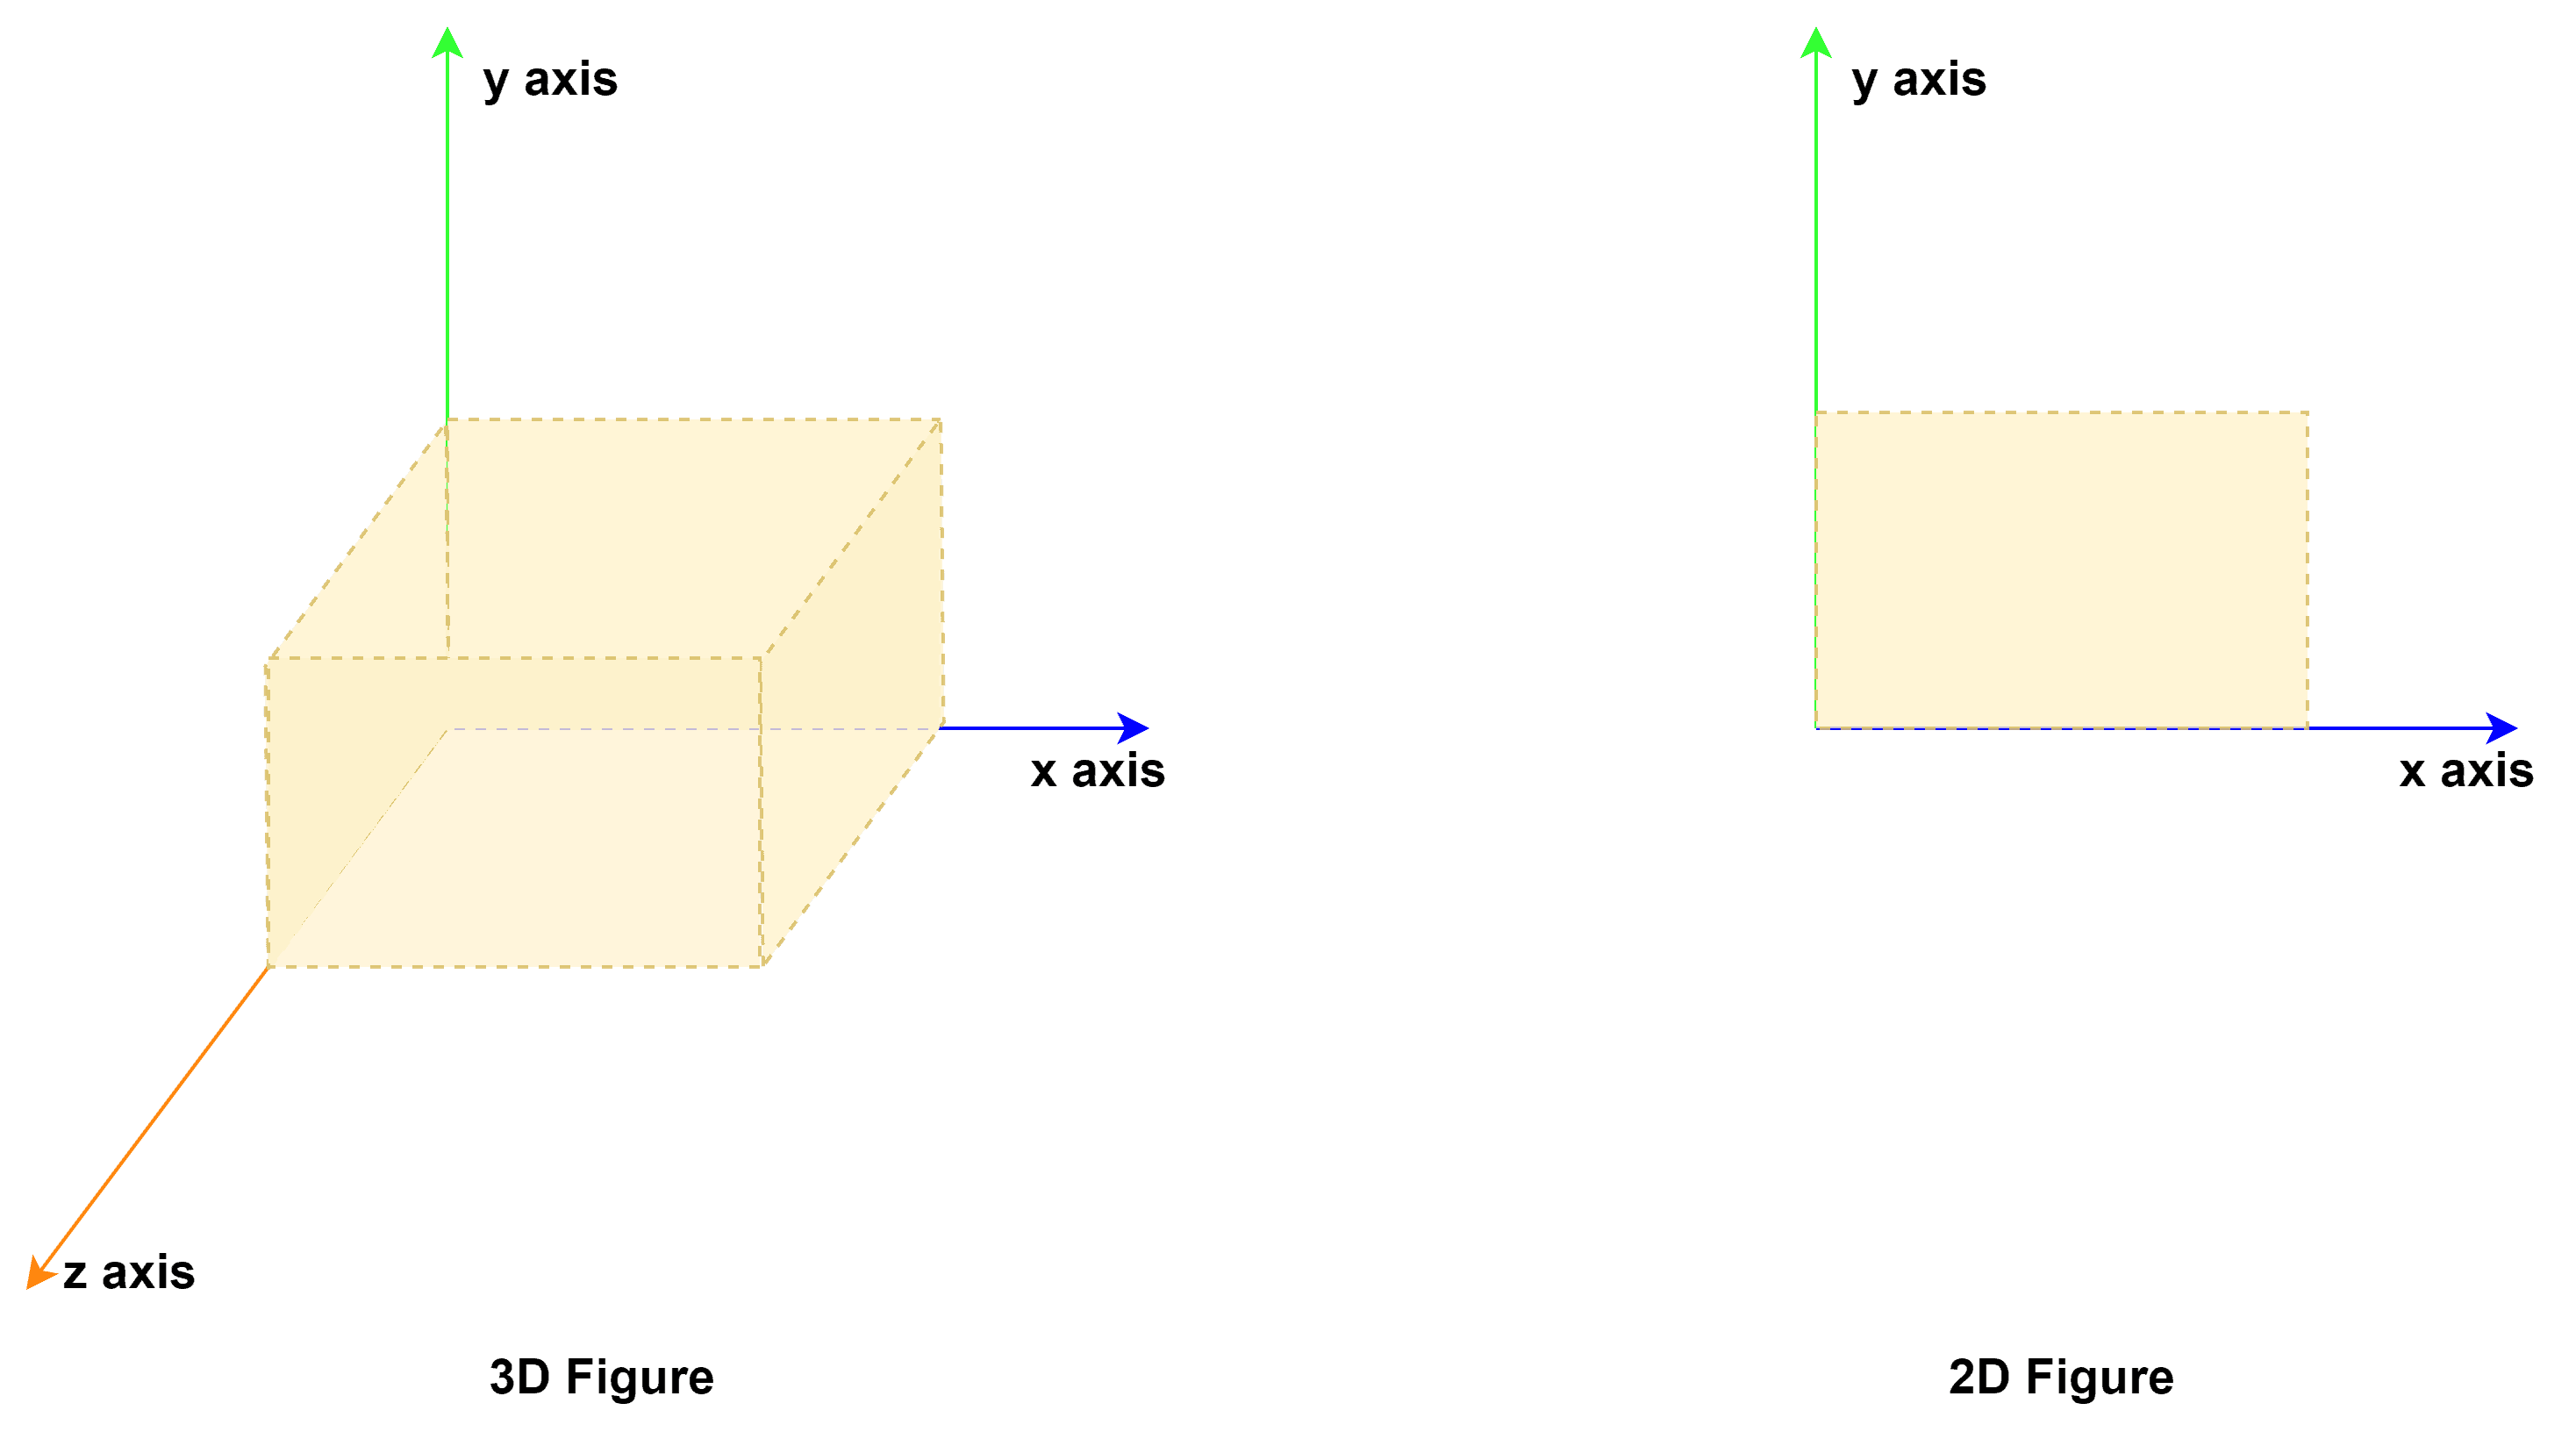
We consider an object in the real world to possess 3D visual attributes such as length, breadth, and height. Further, we can present a 3D figure via paper or digital in 2D form. We can represent an object in 2D space using any 2 attributes. Notably, this conversion is possible with the help of projection.
Interestingly, we refer to 2D space as the projection or view plane. Additionally, we consider the viewing medium like the camera or eye as the viewpoint.
In the coordinate system, we can represent a 3D figure using the coordinates and 2D figure using the
coordinates:
A simple example of projection is drawing a person on paper.
3. Types
The surface of the object from the viewpoint is projected onto a view plane. Furthermore, we can achieve projection by various methods. However, we can divide projection into two categories: parallel and perspective.
3.1. Parallel Projection
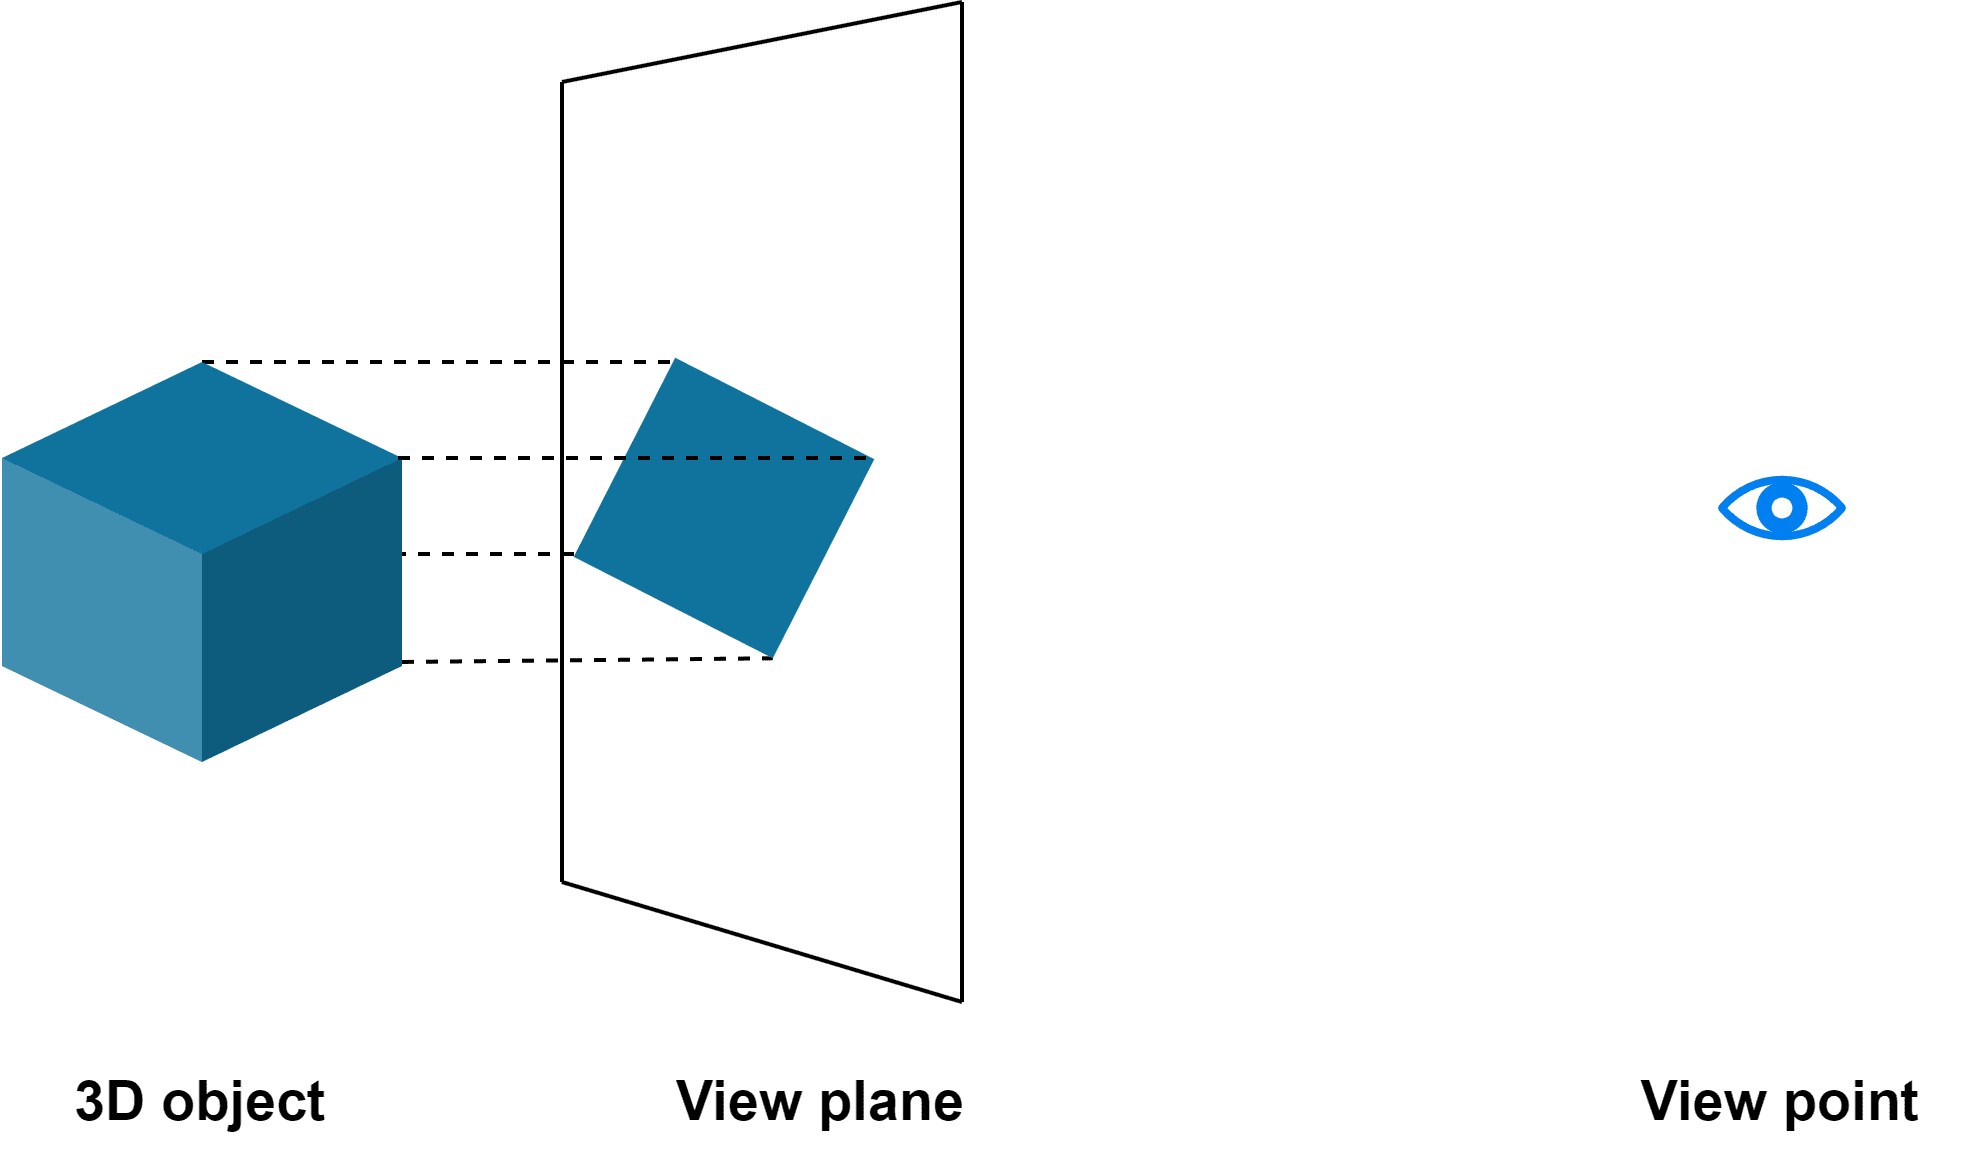
In this type of projection, the object in the real world is projected onto a plane exactly parallel to the 3D object. Additionally, here the lines of projection remain a straight line.
Further, we can visualize parallel projection using an example:
 The parallel projection may be further classified as orthographic or oblique. The orthographic projection indicates that the line of projection is perpendicular to the view plane*.* Likewise, oblique projection corresponds to slanting lines of projection. In both cases, the size of the 3D and 2D figures remains the same.
3.2. Perspective Projection
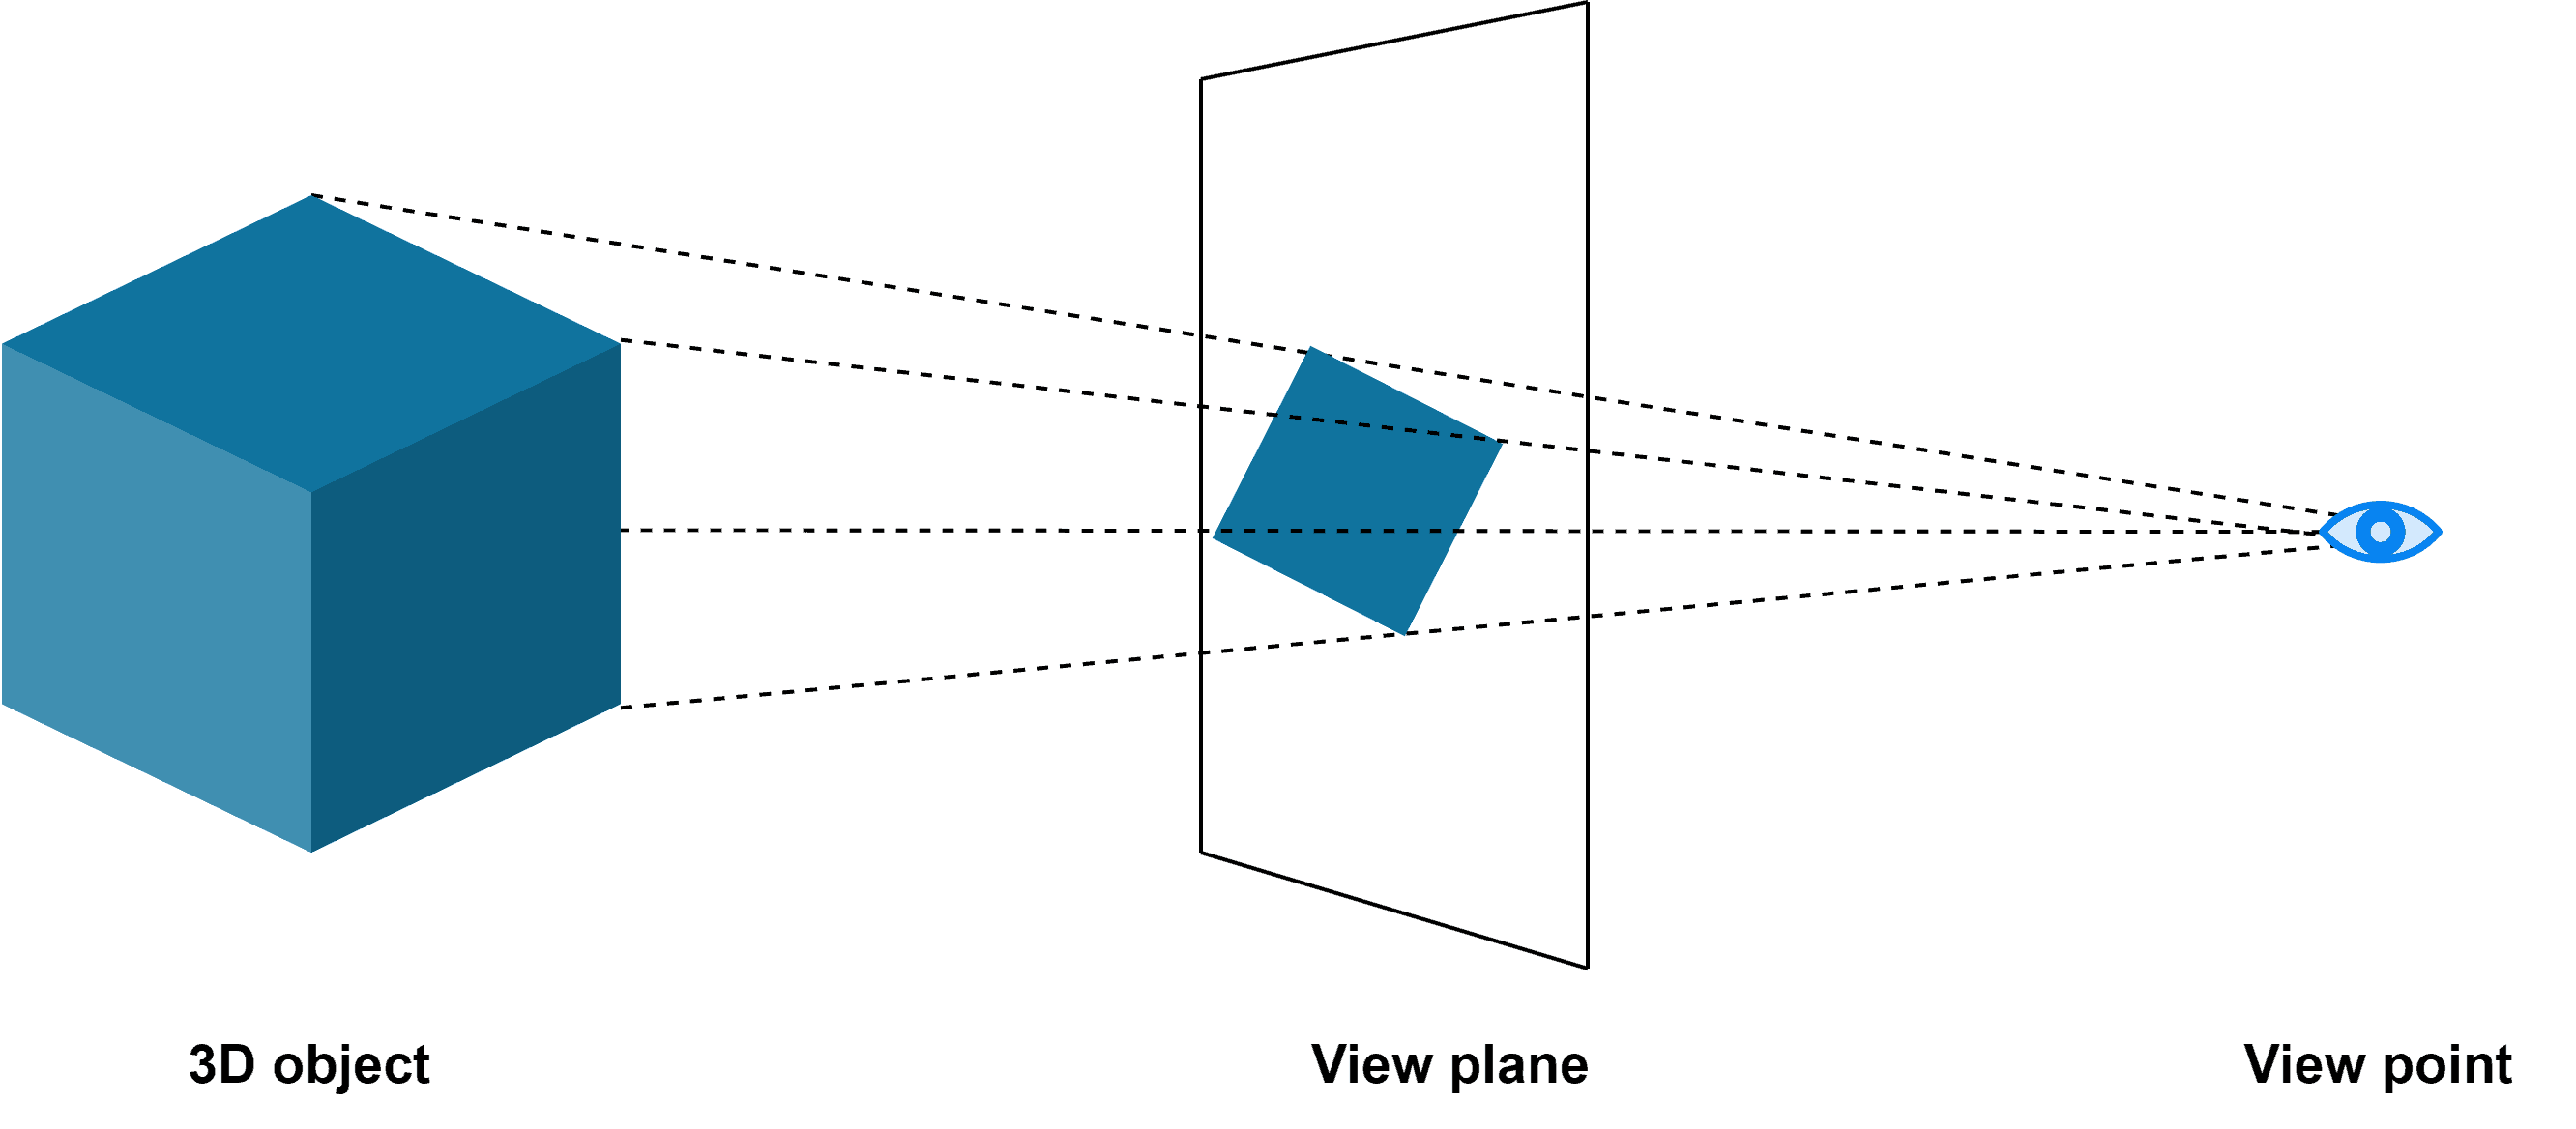
Perspective projection works by projecting the 3D object to a reduced size on the view plane. Besides, the lines of projection converge to the view plane based on the viewpoint. Additionally, we can also refer to the viewpoint as the center of projection.
Let’s understand the perspective projection using an example:
 Moreover, perspective projection can be further classified as one-point, two-point, and three-point. This is based on the number of vanishing points possible on the view plane.
Notably, the vanishing point is the extended point where the parallel lines of the object are assumed to intersect. For example, we consider the railway tracks that are parallel lines. However, they’re assumed to converge based on the perspective in an image.
3.3. Comparison
Comparatively, let’s understand some of the key differences between parallel and perspective projection:
Parallel Projection
Perspective Projection
Size of 3D figure and 2D figure remains same
Size of 3D figure is larger than 2D figure
Shape of 3D figure and 2D figure remains same
Shape of 3D figure and 2D figure differs based on the viewpoint location as well as angle
Lines of projection are straight
Lines of projection converges to a viewpoint
The distance between view plane and viewpoint is infinite
Distance between view plane and viewpoint is finite since it converges into the view point
Actual size of the 3D object is known
Actual size of the 3D object is unknown
An example is X-ray of teeth
An example is a picture of mountain taken using camera
4. Advantages
Projection allows visual representation of any object in the real world. Storing data in 2D reduces the memory space needed to save the information.
Importantly, 2D printing is much cheaper than 3D printing on paper. It’s used for drawing in the field of design, engineering, and architecture.
In the medical field, we can easily diagnose disease with the help of projection. Additionally, one such obvious example of projection for diagnosis is X-rays. Furthermore, projection has given rise to many imaging devices.
5. Conclusion
In this tutorial, we discussed an interesting representation of 3D objects in 2D mediums using projection. Additionally, we explored the basic categorization as well as the advantages of projection.
