1. Overview
In this article, we’ll learn how to list all supported glyphs for a given font in Linux. First, we’ll learn about glyphs and how they relate to fonts. Then, we’ll briefly explore how glyphs and fonts work in Linux.
Afterward, we’ll use several open-source utilities to list the glyphs in some fonts.
2. Fonts and Glyphs
Fonts are files that are used for rendering text in applications. These files include information about the characters, style, and their geometry. Generally, fonts are either bitmap or outline. In bitmap fonts, each character is a bitmap image. In contrast, outline fonts contain mathematical descriptions of the shape of the characters.
A glyph is the specific visual representation of a character in a font. A font can contain multiple glyphs for the same character. For instance, a font may contain three glyphs for a character regular, bold, and italic.
In addition to glyphs, a font may also contain ligatures. A ligature is a single glyph that combines multiple characters. For instance, we type ellipses using a single “…” character instead of three period characters “…”.
In Linux, we can use both bitmap and outline fonts. However, we specifically deal with outline fonts in this tutorial because they’re the most widely used.
3. Printing Font Glyphs
There is no dedicated utility that can print all the font glyphs in a single command. However, there are some tools that we can use together for the task.
For instance, we can make use of fontconfig and printf. fontconfig is a useful tool for managing fonts. With fontconfig, we can configure fonts, list fonts, and query fonts for information.
On the other hand, printf is a comprehensive utility for printing text data to output streams. It’s already included in the standard GNU coreutils.
We can install fontconfig from the official package repositories:
# Debian and derivatives
$ sudo apt install -y fontconfig

# Fedora and derivatives
$ sudo dnf install -y fontconfig

# openSUSE and derivatives
$ sudo zypper install --non-interactive fontconfig

# Arch Linux and derivatives
$ sudo pacman -Sy --noconfirm fontconfig
Once installed, let’s verify its existence:
$ fc-query --version
fontconfig version 2.15.0
3.1. Listing Fonts
We can list all the fonts by simply using the fc-list command:
$ fc-list | head -n5
/usr/share/fonts/truetype/dejavu/DejaVuSerif-Bold.ttf: DejaVu Serif:style=Bold
/usr/share/fonts/truetype/noto/NotoSansThai-Regular.ttf: Noto Sans Thai:style=Regular
/usr/share/fonts/truetype/noto/NotoSansModi-Regular.ttf: Noto Sans Modi:style=Regular
/usr/share/fonts/opentype/urw-base35/URWBookman-LightItalic.otf: URW Bookman:style=Light Italic
/usr/share/fonts/truetype/noto/NotoSansPahawhHmong-Regular.ttf: Noto Sans Pahawh Hmong:style=Regular
Similarly, if we want to search the fonts that contain a specific glyph:
$ fc-list :charset=03F9
/usr/share/fonts/truetype/dejavu/DejaVuSerif-Bold.ttf: DejaVu Serif:style=Bold
/usr/share/fonts/truetype/dejavu/DejaVuSansMono.ttf: DejaVu Sans Mono:style=Book
/usr/share/fonts/truetype/noto/NotoSansMono-Regular.ttf: Noto Sans Mono:style=Regular
/usr/share/fonts/truetype/dejavu/DejaVuSans.ttf: DejaVu Sans:style=Book
/usr/share/fonts/truetype/liberation/LiberationSans-Regular.ttf: Liberation Sans:style=Regular
...
As we can see, it lists the fonts that contain the Sigma letter, which is represented by the unicode code point 03F9.
3.2. Querying Fonts
We can also query fonts for character information using fc-query. For instance, we can print the Unicode character ranges for all supported glyphs in Liberation Sans:
$ fc-query --format='%{charset}\n' /usr/share/fonts/truetype/liberation/LiberationSans-Regular.ttf
20-7e a0-36f 374-375 37a-37e 384-38a 38c 38e-3a1 3a3-3ce 3d0-513 51a-51d 591-5c7 5d0-5ea 5f0-5f41d00-1dca 1dfe-1e9b 1e9e 1ea0-1ef9 1f00-1f15 1f18-1f1d 1f20-1f45 1f48-1f4d 1f50-1f57 1f59 1f5b1f5d 1f5f-1f7d 1f80-1fb4 1fb6-1fc4 1fc6-1fd3 1fd6-1fdb 1fdd-1fef 1ff2-1ff4 1ff6-1ffe 2000-20102012-2022 2026 202a-2030 2032-2034 2039-203a 203c 203e 2044 205e 206a-206f 2074-2079 207f-20892090-2094 20a0-20b5 20bf 20f0 2105 2113 2116-2117 2122 2126 212e 214d-214e 2153-2154 215b-215e2184 2190-2195 21a8 21d4 2202 2206 220f 2211-2212 2215 2219-221a 221e-221f 2229 222b 2248 2260-22622264-2265 2302 2310 2320-2321 2500 2502 250c 2510 2514 2518 251c 2524 252c 2534 253c 2550-256c 25802584 2588 258c 2590-2593 25a0-25a1 25aa-25ac 25b2 25ba 25bc 25c4 25ca-25cc 25cf-25d9 25e6 263a-263c263f-2647 2660 2663 2665-2666 2669-266c 266f 2c60-2c6d 2c71-2c77 2e17 a717-a721 a788-a78c fb01-fb02fb1d-fb36 fb38-fb3c fb3e fb40-fb41 fb43-fb44 fb46-fb4f fe20-fe23 fffc
3.3. Printing Unicode Characters
Now, the question is how do we print the visual representation of these Unicode characters? The answer is printf. printf can take a decimal representation of the Unicode code point and print out the actual character.
For instance, let’s print the visual representation of the Euler Constant using printf:
$ printf -v char '\\U%x' $((16#2107))
Upon running, it prints nothing because the command converts the hexadecimal Unicode code point to a decimal representation. Then, instead of printing the character, it stores it in a variable char. Now, we can simply print the content of the char:
$ printf '%b' '$char'
ℇ
3.4. Putting It All Together
Now, we have enough knowledge to implement a script that will automate printing all the glyphs for a given font file:
#!/bin/bash -

printhelp() { echo "$0 FontFile"; exit 1; }
printerror() { local error=$1; shift; echo "$0: $@"; exit "$error"; }

[ "$#" -ne 1 ] && printhelp

width=70
fontfile="$1"

[ -f "$fontfile" ] || printerror 4 'File not found'

list=$(fc-query --format='%{charset}\n' "$fontfile")

for range in $list
do IFS=- read start end <<<"$range"
    if [ "$end" ]
    then
        start=$((16#$start))
        end=$((16#$end))
        for((i=start;i<=end;i++)); do
            printf -v char '\\U%x' "$i"
            printf '%b' "$char"
        done
    else
        printf '%b' "\\U$start"
    fi
done | grep -oP '.{'"$width"'}'
At the top, we have two helper functions that are executed only when the script encounters an error. Next, we check if there is an additional argument, which is a path to the font file. Then, we define the length of the line by setting the width to 70. We can adjust this value accordingly.
Similarly, we assign the font file path to the fontfile variable.
Then, we query the font file for the character set using the –format option. The resulting list of characters is stored in the list variable.
Finally, we iterate over that list to print the character by giving its unicode value to printf.
Let’s take it for a test run to print all the glyphs for Liberation Sans:
$ ./print_glyphs.sh /usr/share/fonts/truetype/liberation/LiberationSans-Regular.ttf
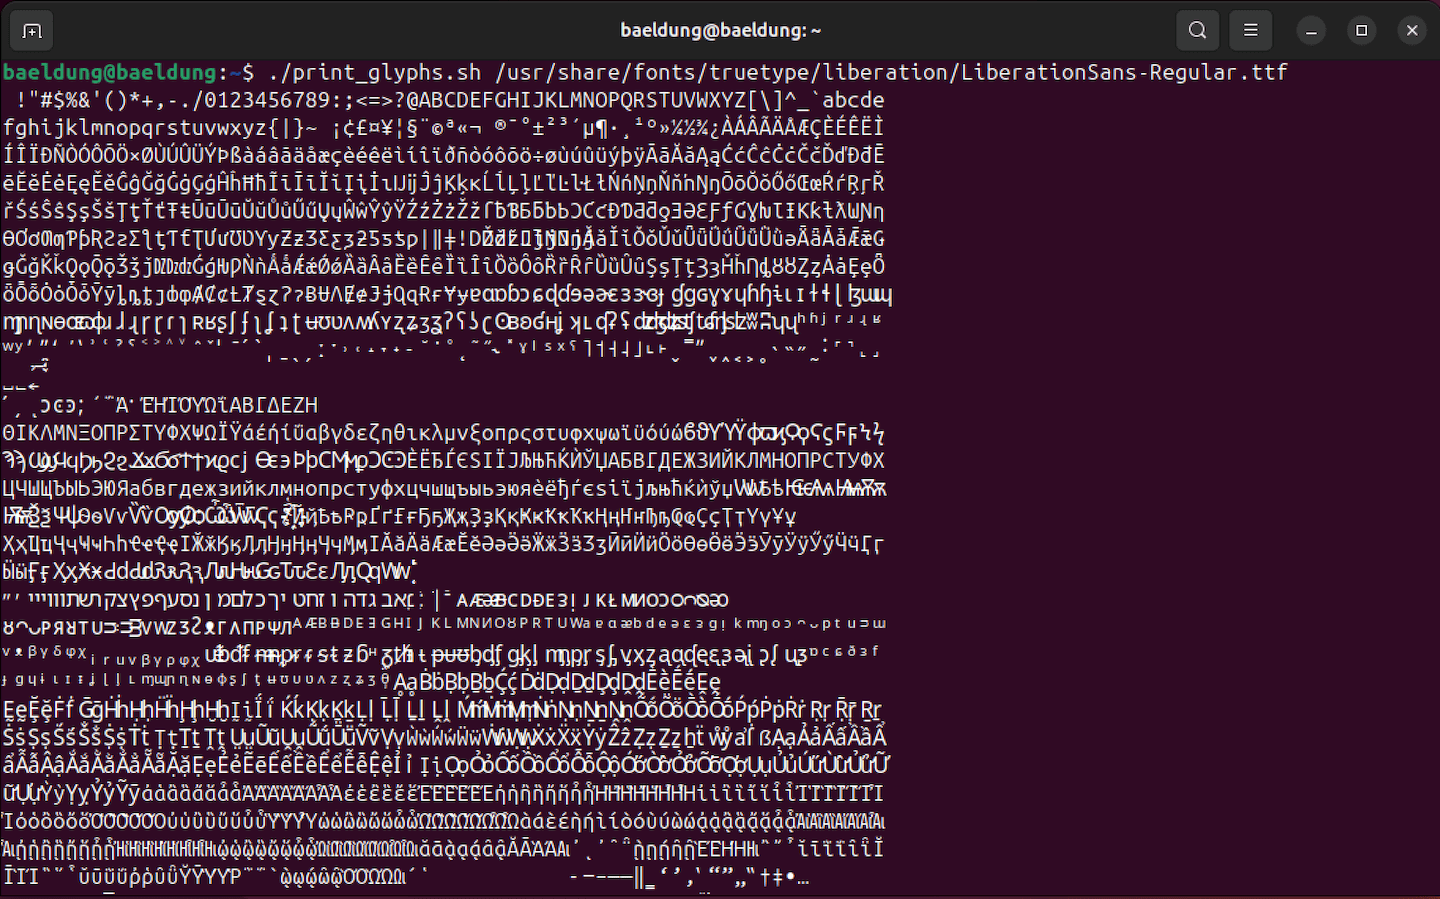
Notably, it prints a long text of glyphs. However, we should know that the Unicode characters will not be printed correctly if our terminal doesn’t support Unicode.
4. Conclusion
In this article, we covered what are fonts and glyphs. Then, we took a deep dive into printing all the glyphs for a given font in Linux.
Finally, we used a simple Bash script that makes use of fc-query and printf to automate the process of printing glyphs for a specific font.