1. Overview
STL files are widely utilized in 3D printing and CAD. These files include 3D model data and are commonly used to manufacture actual products using additive processes. For opening STL files, there are various tools available on Linux systems for viewing and manipulating these files.
In this tutorial, we’ll look at how to open STL files in Linux.
2. Using Blender
Blender is a proficient, open-source, 3D creative suite that accepts a variety of 3D file formats, including STL. It features complete modeling, sculpting, and rendering capabilities:
To install Blender, we can either download it from the official website or use the package management command:
$ sudo apt install blender
This command will install Blender on our computer. We can start Blender from the program menu or by entering blender into the terminal:
$ blender
Once Blender is open, we can then import an STL file. To import, we can go to File > Import > STL, then we’ll browse to the STL file, select it, and click Import STL. Additionally, we can examine, handle, and edit the 3D model using Blender’s rich toolset:
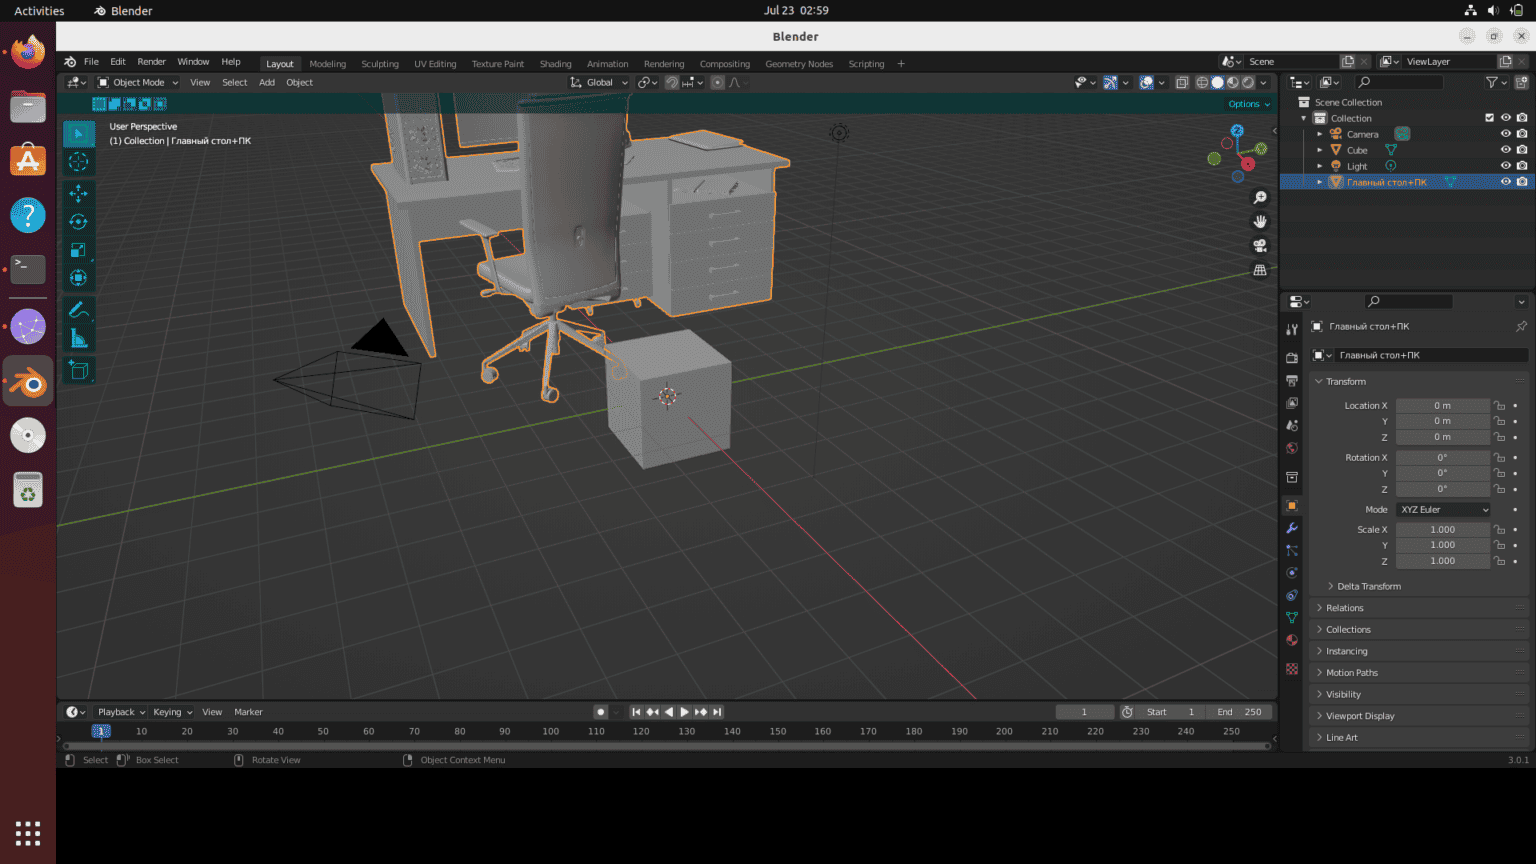
In conclusion, Blender’s comprehensive set of features includes modeling, sculpting, and rendering capabilities which allow for detailed adjustments and modifications to STL files.
3. Using FreeCAD
FreeCAD is a proficient open-source parametric 3D CAD modeler that is suitable for creating realistic objects of any size. It’s perfect for engineers, architects, and product designers.
We install FreeCAD using the apt package manager command:
$ sudo apt install freecad
After the installation, we can then open FreeCAD from the application menu or by entering freecad into the terminal:
$ freecad
To import an STL file, choose File > Open, and then navigate to the STL file location, select it, and click Open:
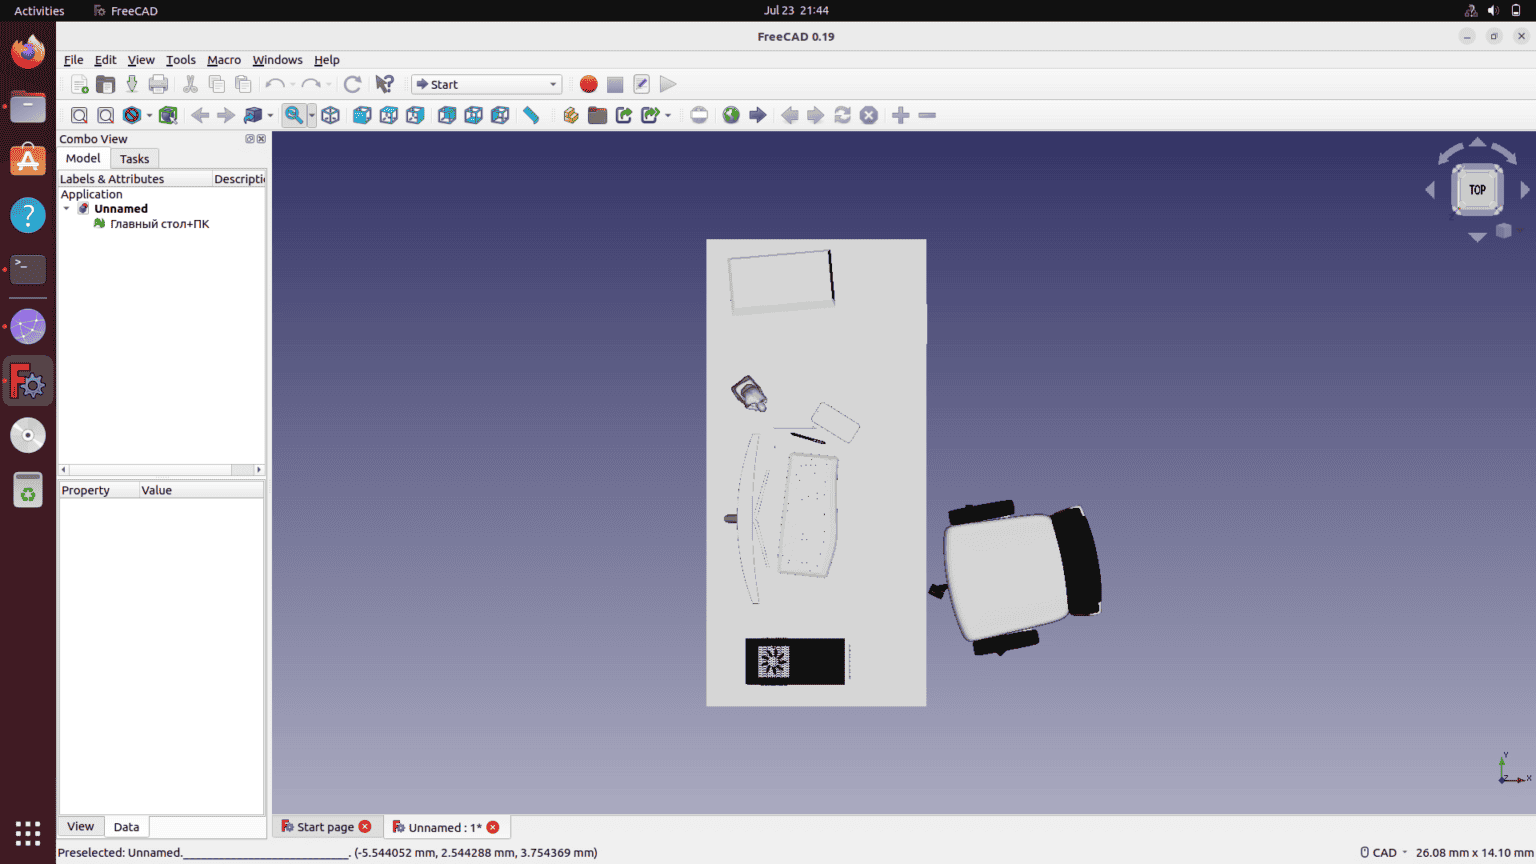
In this example, we use FreeCAD to open a specific STL file. Once the file is open, we can convert the mesh to a solid and modify it with FreeCAD’s customizable tools.
FreeCAD’s customizable nature makes it great for creating and modifying models since it allows for comprehensive adjustments and fine control over the model’s features.
4. Using MeshLab
MeshLab is an open-source tool for analyzing and manipulating 3D triangular models. It’s ideal for examining, cleaning, healing, and converting meshes, making it a vital instrument for 3D printing and model preparation:
We can use the apt package manager command to install meshlab:
$ sudo apt install meshlab
After installation, we can set up meshlab from the program menu or by typing meshlab in the terminal:
$ meshlab
Furthermore, to import an STL file, select File > Import Mesh. A file dialog box will pop up. Then we can then browse to the STL file, select it, and click open:
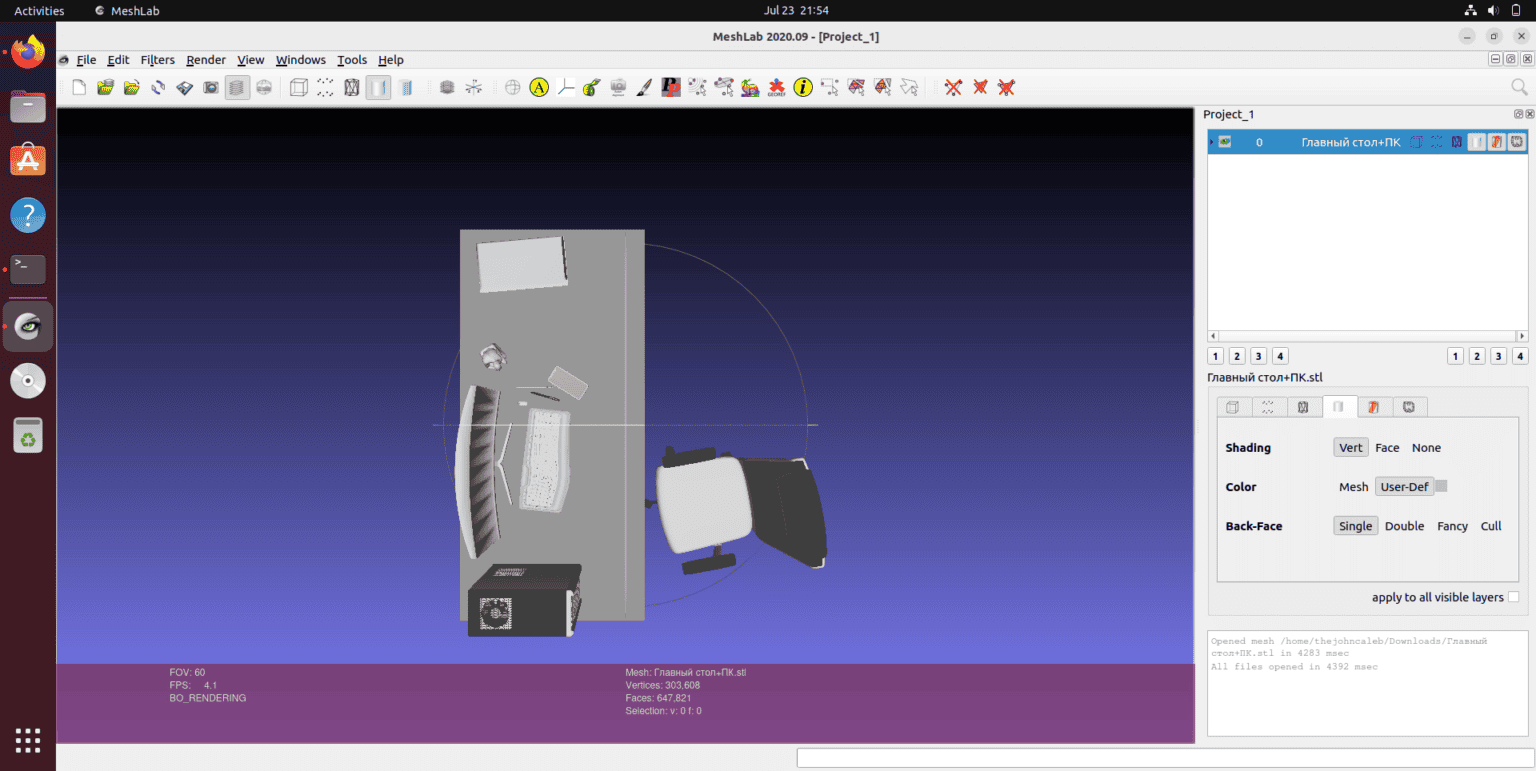
In this example, we use MeshLab to open the provided STL file. Once the file is opened, we can inspect and edit the 3D model using MeshLab’s rich toolset.
MeshLab provides tools for inspecting and editing meshes, such as cleaning to remove duplicate vertices, unreferenced vertices, and non-manifold edges. Repairing to fix holes and errors in the mesh, converting to reduce the number of faces in the mesh while preserving the overall shape, and transforming to rotate, scale, and translate the mesh. These tools enable us to prepare STL files for 3D printing and further editing.
5. Using Slic3r
Slic3r is a 3D slicing program that turns 3D models into 3D printing instructions. It’s an essential tool for 3D printing, with capabilities such as print preview, support generation, and multi-extruder support.
To install Slic3r, we can either download it from the official website or use the package management command:
$ sudo apt install slic3r
After the installation, we can access Slic3r from the program menu or by typing slic3r in the terminal:
$ slic3r
To import an STL file, we can click on Add, then navigate to the STL file, select it, and click Open:
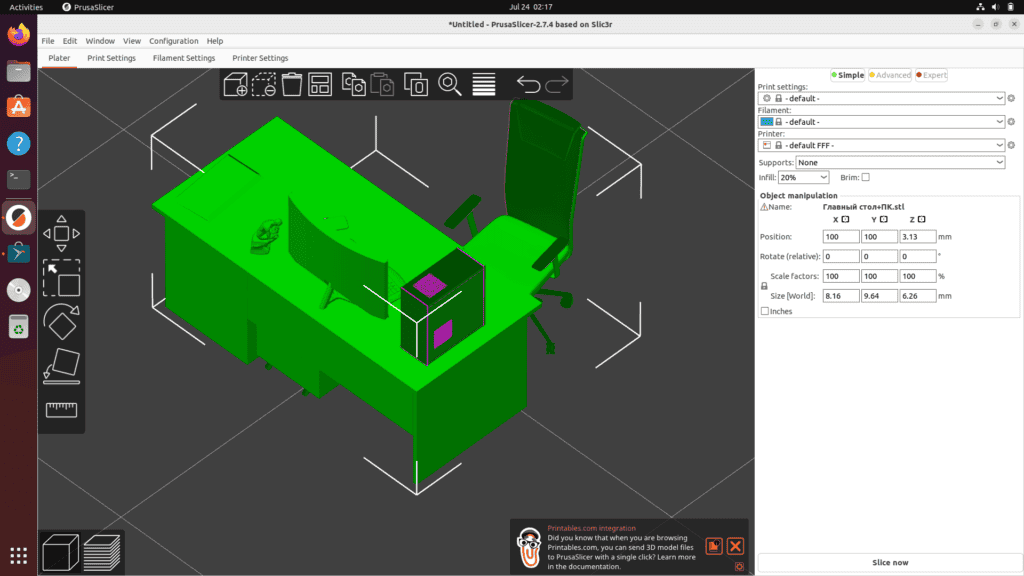
Additionally, Slic3r includes a print preview feature that allows us to see the layers and paths the printer will take, support generation, which creates support structures for overhangs automatically, multi-extruder support, which allows us to use multiple extruders for multi-material or multi-color prints, and G-code generation, which converts the 3D model into G-code instructions for the printer.
6. Using Viewstl
If we don’t want to install any software on our Linux machine, various online sites such as Viewstl enable us to examine STL files directly in our browser. These online viewers provide a handy and rapid way to evaluate our 3D models without the need for local installations.
To get started, let’s open a web browser and navigate to Viewstl’s website. Then, we’ll click the Choose File icon and choose the STL file from our local storage. Once uploaded, the 3D model will be displayed in the browser. We can then rotate, zoom, and pan the view to examine the model from various perspectives:
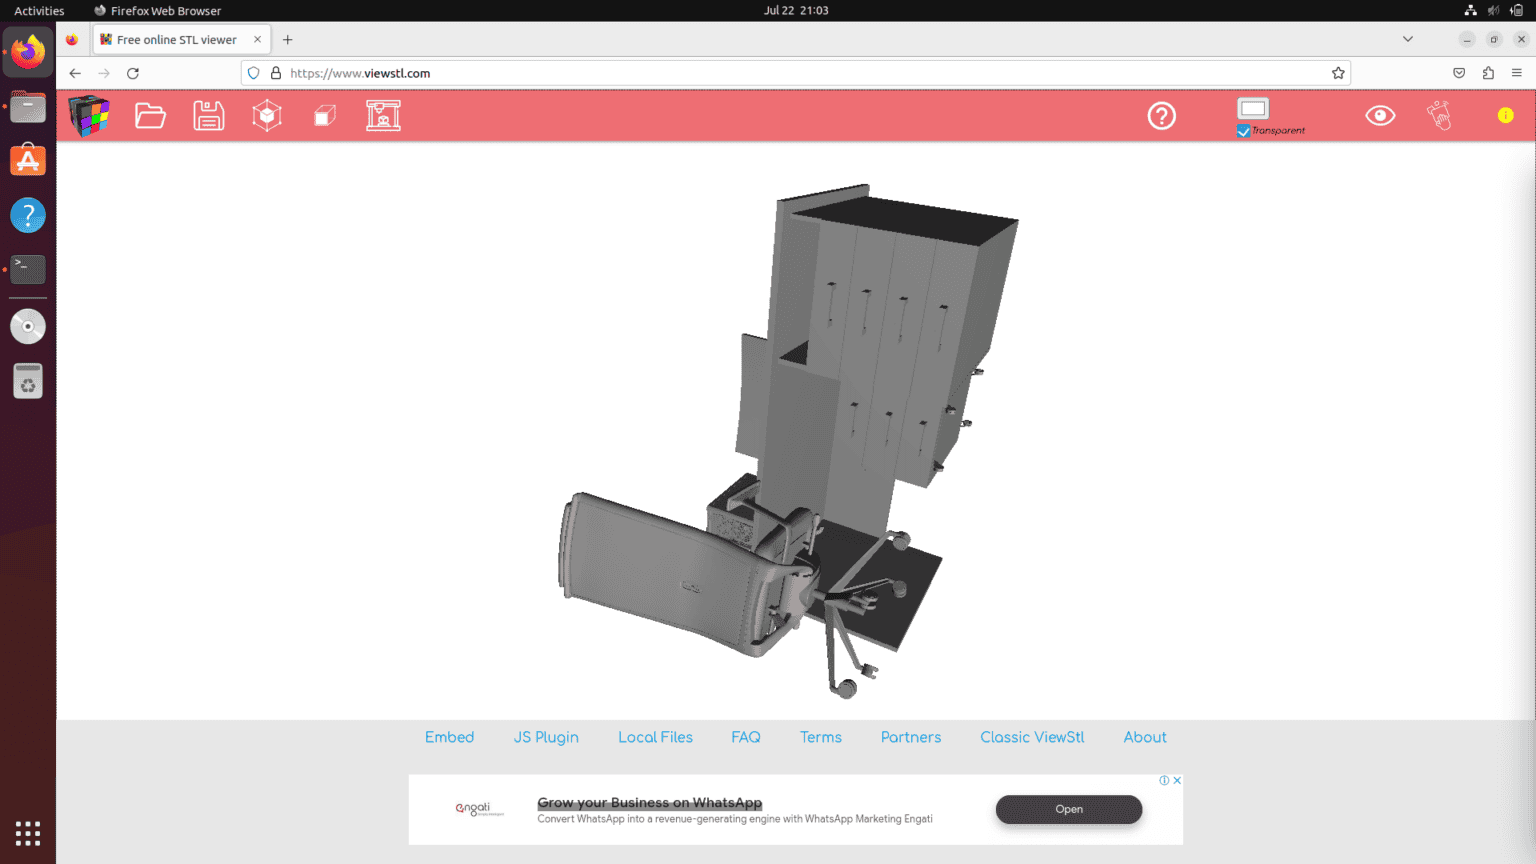
Additionally, Viewstl is quick and straightforward, with no need for any local setup. And because Viewstl runs in the browser, it’s fully compatible with Linux systems.
7. Conclusion
Understanding how to read and view STL files on Linux is simple if we use the appropriate tools.
In this article, we looked at many ways to open STL files on a Linux machine. Whether we choose Blender for its extensive feature set, FreeCAD for precise CAD modeling, MeshLab for mesh processing, Slic3r for 3D printing, or online viewers for quick and easy inspections, each tool has cool features that focus on certain parts of 3D modeling and printing.
These methods offer a solution for efficiently managing STL files. We can select the finest choice for our needs and begin working with our STL files right away.