1. Overview
Vim is a versatile text editor that allows us to manage files without leaving the editor. The integrated approach is convenient and helps maintain focus by addressing the ad hoc need to manage files without interrupting our workflow.
In this tutorial, we’ll learn multiple approaches to deleting a file using Vim efficiently.
2. Using External Shell Commands
In this section, we’ll learn how to use an external shell command such as rm within Vim to delete files directly from the editor.
Let’s use touch to create the sample1.txt file on the file system and open the file in Vim:
$ touch sample1.txt
$ vim sample1.txt
We’ll reuse these steps in all other approaches as well.
Now, we can enter into the command mode and use the :! command to delete the current file with the rm command:
:!rm <Ctrl-r>%
We must note that we used the
Unfortunately, we’ll notice that after deleting the file, Vim shows the E211 error because we’ve deleted the current file that was in the list of active open buffers:
E211: File "sample1.txt" no longer available

Press ENTER or type command to continue
Further, we can verify the list of active buffers by executing :ls in the command mode:
:ls
  1 %a   "sample1.txt"                  line 1
Press ENTER or type command to continue
Moving on, we need to execute :bdelete in Vim’s command mode to unload the currently active buffer from the memory:
:bdelete
Lastly, it’s a good idea to verify that the sample1.txt file is no longer in the list of active buffers:
:ls
  2 %a   "[No Name]"                    line 1
As expected, we’ve got a clean slate now.
3. Using the terminal Command
With recent versions of Vim, we can use the terminal command to solve our use case of deleting the current file.
3.1. Single Command Execution
We can specify one of the shell commands for file removal as an argument to the terminal command to execute it as a quick one-off command.
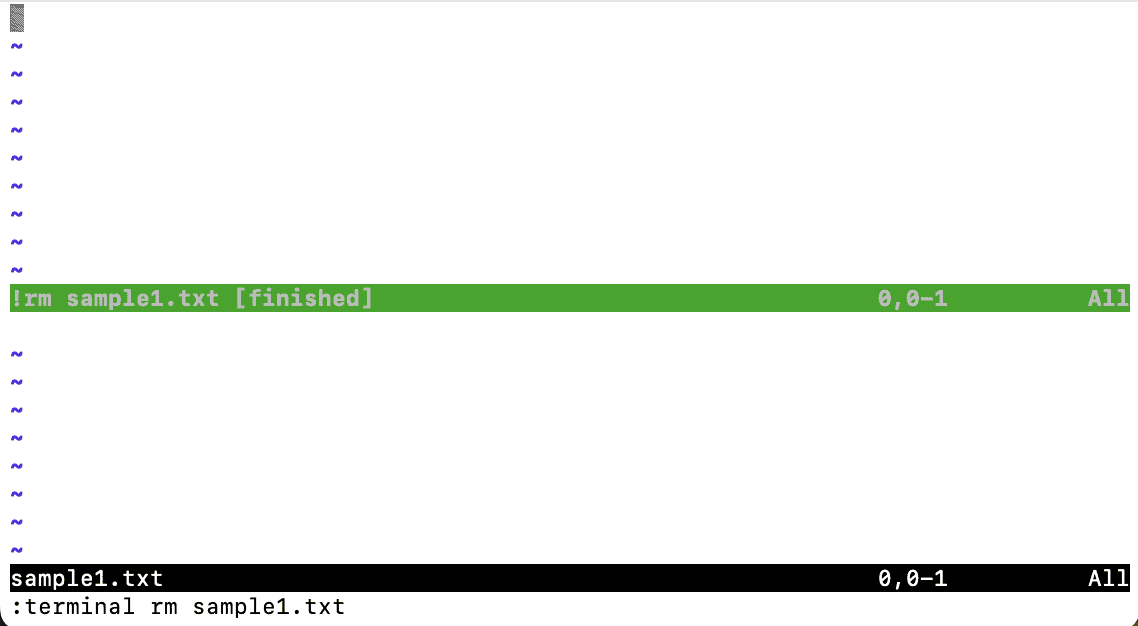
Let’s execute the rm command using terminal to remove the current file:
:terminal rm <Ctrl-r>%
We’ve successfully deleted the file from the disk.
Further, we’ll notice that there is an additional terminal buffer after the execution of the terminal command:
Now, we have two unnecessary active buffers that we must delete. So, we can use | (pipe) to chain the bdelete commands to remove both of them in a single go:
:bdelete! | bdelete
Since the terminal buffer that opens in this approach is a read-only buffer, we appended the ! modifier to force the deletion.
3.2. Interactive Terminal Session
Alternatively, we can start an interactive terminal session with the terminal command:
:terminal
Next, we can use any of the file removal shell commands to delete the current file and exit the terminal window:
$ rm sample1.txt
$ exit
We specified the filename explicitly because we’re executing the command in a terminal session.
Lastly, we need to delete the active buffer corresponding to the active file:
:bdelete
Note that we don’t have an open terminal buffer in this approach, as we already used the exit command to exit the terminal.
4. Using the execute Command
The approaches we’ve covered so far required us to execute the file removal and buffer deletion steps separately, which is slightly inconvenient for our use case.
To make it convenient, we can use the execute command to create dynamic commands from strings and execute them in a single step:
:execute <expression>
Now, let’s revisit our approach to file removal using the rm command:
:execute 'silent !rm ' . expand('%') | bdelete
We used the concatenation operator (.) to create the command from multiple strings. Additionally, we used the silent command modifier to suppress any prompt or errors shown after the rm command.
Further, let’s write an expression for the execute command that chains the terminal command with the two bdelete commands:
:execute 'terminal rm ' . expand('%') . ' && exit' | bdelete! | bdelete
Excellent! It looks like we’ve nailed this one.
5. Using File Explorer
In this section, we’ll learn how to delete a file using Vim’s built-in Netrw file explorer.
First, we need to run the Explore command in the command mode:
:Explore
Next, we can navigate the listing using the motion keys such as j and k. Further, we’ll use the mf key combination to mark multiple files:
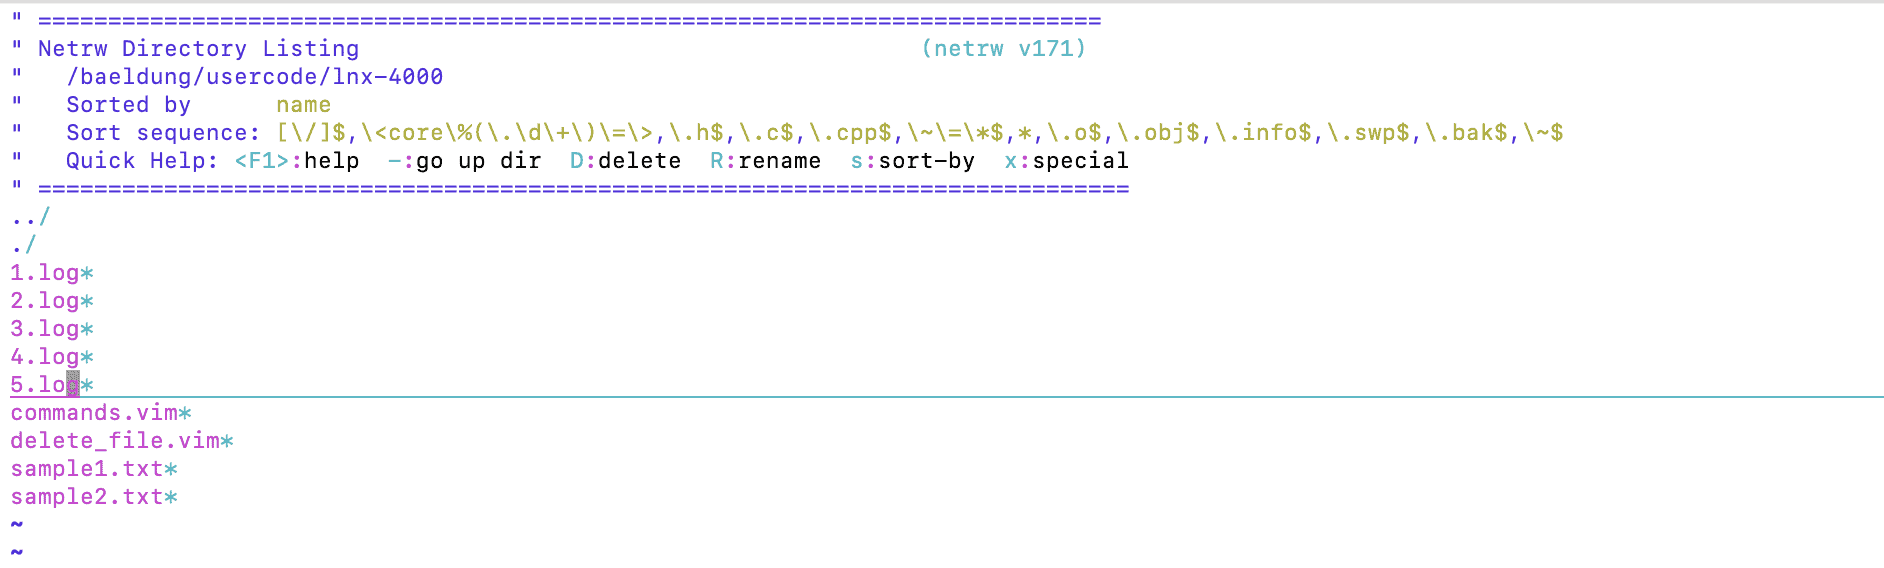
Lastly, we press D to delete the selected files and press y or a to confirm the deletion:
Confirm deletion of file<...> [{y(es)},n(o),a(ll),q(uit)]
All the selected files have been deleted from the disk. Further, we can use :q to exit the explorer.
6. Using a Vim Function
In this section, we’ll learn how to delete a file using the built-in and user-defined Vim functions.
6.1. With the delete() Function
Let’s use the built-in delete() function to delete the current file:
:call delete(expand('%')) | bdelete
Here, we used the :call command to execute the function. Additionally, we used the expand function to expand % to the current filename.
6.2. With the system() Function
We can also use the system() built-in function to execute an external command for file removal. Let’s see this in action with the rm command:
:call system('rm ' . expand('%')) | bdelete
Fantastic! It worked as expected.
7. Using a Custom Command
We can define a custom command to delete the current file. Let’s define the DelCurrentFile command within the commands.vim script:
$ cat commands.vim
command DelCurrentFile call delete(expand('%')) | bdelete
We can use any of the earlier implementations for this definition.
Now, to use DelCurrentFile, we must source the commands.vim script within Vim:
:source commands.vim
Lastly, we can execute the DelCurrentFile command to delete the current file:
:DelCurrentFile
Perfect! It’s super convenient to delete the current file with this approach.
8. Conclusion
In this article, we learned multiple approaches to deleting a file in Vim. Further, we explored different commands, such as :!, terminal, call, execute, Explore, terminal, and bdelete, to solve our use case.
Lastly, we created super convenient solutions using Vim functions and custom commands.