1. 概述
本教程介绍如何使用Spring Boot和Keycloak配置OAuth2后端。
我们将Keycloak作为OpenID Provider(OIDP)。可以把它看作一个负责认证和用户数据(角色、档案、联系信息等)的用户服务。它是目前最完整的OpenID Connect (OIDC)实现之一,具备以下特性:
- 单点登录(SSO)和单点登出(后端通道登出)
- 身份代理、社交登录和用户联邦
- 服务器管理和用户账户管理的UI界面
- 可编程控制一切的REST管理API
在回顾Spring Security的OAuth2配置选项后,我们将配置两个不同的Spring Boot应用:
- 使用oauth2Login的有状态客户端
- 无状态的oauth2ResourceServer
2. 使用Docker快速启动Keycloak
本节介绍如何使用预配置的领域(realm)启动Keycloak服务器。我们将在第6节介绍如何创建这样的领域。
2.1. Docker Compose文件
在开发者桌面沙盒化授权服务器的最简单方式是拉取Keycloak Docker镜像。我们使用Docker compose文件配置它:
services:
  keycloak:
    container_name: baeldung-keycloak.openid-provider
    image: quay.io/keycloak/keycloak:25.0.1
    command:
    - start-dev
    - --import-realm
    ports:
    - 8080:8080
    volumes:
    - ./keycloak/:/opt/keycloak/data/import/
    environment:
      KEYCLOAK_ADMIN: admin
      KEYCLOAK_ADMIN_PASSWORD: ${KEYCLOAK_ADMIN_PASSWORD}
      KC_HTTP_PORT: 8080
      KC_HOSTNAME_URL: http://localhost:8080
      KC_HOSTNAME_ADMIN_URL: http://localhost:8080
      KC_HOSTNAME_STRICT_BACKCHANNEL: true
      KC_HTTP_RELATIVE_PATH: /
      KC_HTTP_ENABLED: true
      KC_HEALTH_ENABLED: true
      KC_METRICS_ENABLED: true
    extra_hosts:
    - "host.docker.internal:host-gateway"
    healthcheck:
      test: ['CMD-SHELL', '[ -f /tmp/HealthCheck.java ] || echo "public class HealthCheck { public static void main(String[] args) throws java.lang.Throwable { System.exit(java.net.HttpURLConnection.HTTP_OK == ((java.net.HttpURLConnection)new java.net.URL(args[0]).openConnection()).getResponseCode() ? 0 : 1); } }" > /tmp/HealthCheck.java && java /tmp/HealthCheck.java http://localhost:8080/auth/health/live']
      interval: 5s
      timeout: 5s
      retries: 20
2.2. 使用配套项目的领域
配套项目包含一个JSON文件,定义了我们需要的Keycloak对象:
- 一个baeldung-keycloak领域
- 一个baeldung-keycloak-confidential客户端,密钥为secret
- 一个映射器,用于将领域角色添加到颁发给baeldung-keycloak-confidential客户端的访问令牌和ID令牌中(默认只有访问令牌包含领域角色)
- 一个在领域级别定义的NICE角色(Keycloak也支持在客户端级别定义角色)
- 两个用户:brice(拥有NICE角色)和igor(没有NICE角色)。两者密码均为secret
compose文件中的*--import-realm参数指示Keycloak从其data/import/*文件夹中的JSON文件加载对象。
根据compose文件中定义的卷,我们应该将配套项目中的keycloak/baeldung-keycloak-realm.json文件复制到相对于compose文件的*./keycloak/*文件夹中。
2.3. 启动Docker容器
为简化初始配置,上面的Docker compose文件使用了KEYCLOAK_ADMIN_PASSWORD环境变量,我们应在启动容器前设置它:
export KEYCLOAK_ADMIN_PASSWORD=admin
docker compose up -d
运行这些命令后,Keycloak启动。当看到包含Keycloak 25.0.1 [...] started的日志行时,表示启动完成。
现在我们可以通过访问*http://localhost:8080使用Keycloak管理控制台,凭据为admin/admin*。
3. Spring Security的OAuth2配置
OAuth2和Spring Security提供的不同应用配置选项通常会引起很多混淆。
3.1. OAuth2参与者
我们先了解OAuth2的三个关键参与者:
授权服务器负责资源所有者的认证并向客户端颁发令牌 – 本教程中我们使用Keycloak担任此角色
客户端驱动流程从授权服务器获取令牌,存储令牌,并使用有效令牌授权向资源服务器的请求。当资源所有者是用户时,客户端使用授权码流程(或当用户设备输入能力有限时使用设备流程)针对授权服务器进行登录,获取令牌以代表用户向资源服务器发送请求。
本教程中,我们的客户端是使用oauth2Login的Spring应用和Postman。
资源服务器提供对REST资源的安全访问。它们检查令牌的有效性(颁发者、过期时间、受众等)并控制客户端访问(客户端范围、资源所有者角色、资源所有者与被访问资源的关系等)。我们将把REST API配置为资源服务器。
从上述内容可以看出,选择从授权服务器获取令牌的流程是OAuth2客户端的责任。因此,用户登录和登出从来不是资源服务器的关注点。
3.2. oauth2Login
Spring Security的*oauth2Login配置了*授权码和刷新令牌流程**。它还配置了一个授权客户端存储库(默认存储在会话中)和一个授权客户端管理器供我们访问——在返回令牌前根据需要刷新令牌。
对带有oauth2Login的Spring客户端的请求使用会话cookie授权。这就是为什么在带有oauth2Login的Security(Web)FilterChain bean中应始终启用CSRF防护。
请求成功授权后安全上下文中的Authentication类型是OAuth2AuthenticationToken。
如果使用OpenID自动配置提供者,OAuth2AuthenticationToken的主体(principal)是从ID令牌构建的OidcUser,否则需要额外调用userinfo接口来设置OAuth2User作为主体。
Spring Security权限通过GrantedAuthoritiesMapper或自定义OAuth2UserService映射。
3.3. oauth2ResourceServer
Spring Security的*oauth2ResourceServer配置了*Bearer令牌安全*。它提供自省(即不透明令牌*)和JWT解码两种选择。
对于资源服务器,用户状态由令牌声明持有,可以禁用会话。这带来两大好处:
- 可以禁用CSRF防护——CSRF攻击涉及会话,而这里不使用会话
- 资源服务器易于扩展——无论请求路由到哪个实例,客户端和资源所有者的状态都随声明一起携带
请求成功授权后安全上下文中的Authentication类型可以通过认证转换器自定义。但默认认证类型、它如何从令牌转换以及其中包含的权限如何解析的细节取决于资源服务器类型:
- 使用JWT解码器时,默认认证类型是JwtAuthenticationToken,权限通过JWT认证转换器使用访问令牌声明映射
- 使用访问令牌自省时,默认认证类型是BearerTokenAuthentication,权限通过自定义内省器使用自省端点响应解析
3.4. 选择oauth2Login还是oauth2ResourceServer
从上述内容可以推断,*oauth2Login和*oauth2ResourceServer服务于不同目的。Spring Security为每个提供了不同的Spring Boot启动器,因为两者不应共存于同一个Security(Web)FilterChain bean中**:
- oauth2Login授权基于会话,而oauth2ResourceServer基于Bearer令牌
- 由于基于会话,oauth2Login需要CSRF防护。但由于无状态特性,资源服务器不需要它
- 权限映射和安全上下文中的Authentication类型在oauth2Login、带JWT解码器的oauth2ResourceServer和带自省的oauth2ResourceServer中各不相同
由于无状态应用的可扩展性,我们通常优先使用oauth2ResourceServer配置REST端点。但这要求向REST API发送(或路由)请求的组件能够从授权服务器获取令牌,将其存储在某种状态(会话或其他)中,过期时刷新令牌,并使用访问令牌授权请求。
许多REST客户端可以做到这一点(编程式客户端如Spring的RestClient和WebClient,或带UI的客户端如Postman),但浏览器在没有Angular、React或Vue等框架的帮助下无法做到(并且现在出于安全原因不推荐这样做)。
oauth2Login的主要用例是服务器端渲染的UI,以及用作OAuth2后端前端(BFF)的Spring Cloud Gateway。但由于其有状态特性,在水平扩展以实现高可用性或负载均衡时,我们需要使用Spring Session或智能代理。
3.5. 组合异构请求授权机制
为了授权来自不同异构消费者的请求,我们可能需要使用多个oauth2Login、oauth2ResourceServer、x509、formLogin、Basic认证等配置应用。例如,在OAuth2 BFF中,前端请求使用oauth2Login授权,而执行器端点使用oauth2ResourceServer或Basic授权。
在这种情况下,应为每个请求授权机制使用不同的Security(Web)FilterChain bean,所有bean都使用不同的*@Order装饰,除最后一个外都带有securityMatcher定义其适用的请求。没有securityMatcher*的过滤器链将作为所有未匹配请求的默认链。
4. 使用Thymeleaf实现登录
我们使用Spring Boot和Keycloak实现OAuth2的第一个用例是一个Thymeleaf应用,它使用OpenID Provider认证用户。这个示例简单,但展示了在有状态应用中使用Keycloak实现基于角色的访问控制(RBAC)。
值得注意的是:
- **在单页应用或移动应用系统中,我们会使用带有类似OAuth2客户端配置的OAuth2 BFF**。
- 我们的Thymeleaf应用是OAuth2客户端,因为它使用oauth2Login和ID令牌构建用户认证,但它不使用访问令牌(不向资源服务器发送请求)。如前所述,浏览器和Spring后端之间的请求使用会话cookie授权。
- 要水平扩展,我们需要跨实例共享会话(Spring Session)或使用智能代理将来自同一用户代理的所有请求路由到同一实例。
4.1. 依赖项
*启用OAuth2用户登录的最重要依赖是spring-boot-starter-oauth2-client***。当然,由于我们创建的是渲染Thymeleaf模板的servlet应用,还需要spring-boot-starter-web和spring-boot-starter-thymeleaf。
将它们添加到pom.xml:
<dependency>
  <groupId>org.springframework.boot</groupId>
  <artifactId>spring-boot-starter-oauth2-client</artifactId>
</dependency>
<dependency>
  <groupId>org.springframework.boot</groupId>
  <artifactId>spring-boot-starter-thymeleaf</artifactId>
</dependency>
<dependency>
  <groupId>org.springframework.boot</groupId>
  <artifactId>spring-boot-starter-web</artifactId>
</dependency>
这些依赖足以运行,但如果想在测试Spring OAuth 2应用中的访问控制时模拟认证,还需要在test范围内添加*spring-security-test*。
4.2. Provider和Registration配置
由于Keycloak在*${issuer-uri}/.well-known/openid-configuration*暴露其OpenID配置,且Spring Security可以从OpenID配置自动配置提供者,只需定义其issuer-uri:
spring.security.oauth2.client.provider.baeldung-keycloak.issuer-uri=http://localhost:8080/realms/baeldung-keycloak
现在使用上述provider配置客户端registration:
spring.security.oauth2.client.registration.keycloak.provider=baeldung-keycloak
spring.security.oauth2.client.registration.keycloak.authorization-grant-type=authorization_code
spring.security.oauth2.client.registration.keycloak.client-id=baeldung-keycloak-confidential
spring.security.oauth2.client.registration.keycloak.client-secret=secret
spring.security.oauth2.client.registration.keycloak.scope=openid
我们在client-id中指定的值与Keycloak管理控制台中声明的机密客户端匹配。
可以从Credentials选项卡获取client-secret的值。使用导入的领域时,密钥是secret。
4.3. 将Keycloak领域角色映射到Spring Security权限
有几种方法可以在带有oauth2Login的过滤器链中映射权限,但最简单的可能是暴露一个GrantedAuthoritiesMapper bean,这也是我们要做的。
首先定义一个负责从Keycloak声明集(可能是ID或访问令牌负载,以及userinfo或自省响应体)提取权限的bean:
interface AuthoritiesConverter extends Converter<Map<String, Object>, Collection<GrantedAuthority>> {}

@Bean
AuthoritiesConverter realmRolesAuthoritiesConverter() {
  return claims -> {
    var realmAccess = Optional.ofNullable((Map<String, Object>) claims.get("realm_access"));
    var roles = realmAccess.flatMap(map -> Optional.ofNullable((List<String>) map.get("roles")));
    return roles.map(List::stream)
      .orElse(Stream.empty())
      .map(SimpleGrantedAuthority::new)
      .map(GrantedAuthority.class::cast)
      .toList();
  };
}
由于JVM中的泛型类型擦除以及应用上下文中可能存在多个不同输入输出的Converter bean,这个AuthoritiesConverter接口在bean工厂搜索Converter<Map<String, Object>, Collection
由于我们使用issuer-uri自动配置了OIDC提供者,在GrantedAuthoritiesMapper中作为输入获得的是OidcUserAuthority实例:
@Bean
GrantedAuthoritiesMapper authenticationConverter(
  Converter<Map<String, Object>, Collection<GrantedAuthority>> authoritiesConverter) {
    return (authorities) -> authorities.stream()
      .filter(authority -> authority instanceof OidcUserAuthority)
      .map(OidcUserAuthority.class::cast)
      .map(OidcUserAuthority::getIdToken)
      .map(OidcIdToken::getClaims)
      .map(authoritiesConverter::convert)
      .flatMap(roles -> roles.stream())
      .collect(Collectors.toSet());
}
注意我们如何注入并使用了上面定义的权限转换器bean。
4.4. 组装SecurityFilterChain Bean
以下是我们将使用的完整SecurityFilterChain:
@Bean
SecurityFilterChain clientSecurityFilterChain(
      HttpSecurity http,
      ClientRegistrationRepository clientRegistrationRepository) throws Exception {
  http.oauth2Login(Customizer.withDefaults());
  http.logout((logout) -> {
    var logoutSuccessHandler =
        new OidcClientInitiatedLogoutSuccessHandler(clientRegistrationRepository);
    logoutSuccessHandler.setPostLogoutRedirectUri("{baseUrl}/");
    logout.logoutSuccessHandler(logoutSuccessHandler);
  });

  http.authorizeHttpRequests(requests -> {
    requests.requestMatchers("/", "/favicon.ico").permitAll();
    requests.requestMatchers("/nice").hasAuthority("NICE");
    requests.anyRequest().denyAll();
  });

  return http.build();
}
让我们分解理解关键部分。
***oauth2Login()*方法将OAuth2LoginAuthenticationFilter添加到过滤器链**。该过滤器拦截请求并应用处理授权码和刷新令牌流程所需的逻辑。它还会将令牌存储在会话中。
要理解OAuth2登出如何工作,应记住用户至少有两个独立的会话:一个在授权服务器(本例中是Keycloak),另一个在每个带有oauth2Login的客户端上。要完全登出,必须终止所有会话。
OpenID标准定义了多种实现方式,但我们将重点关注*RP-Initiated Logout,我们使用OidcClientInitiatedLogoutSuccessHandler*配置它。
在此流程中,用户代理(用户的浏览器)首先从依赖方(我们带有oauth2Login的Spring应用)登出以关闭其会话。RP响应重定向到OpenID提供者(OP),包含要关闭会话关联的ID令牌和登出后URL(本例中是Thymeleaf首页)。然后OP关闭其会话并将用户代理重定向到提供的URL。
最后,我们定义访问控制规则:
- 为使用户能从首页登录,首页必须允许匿名访问。
- /nice路径仅限拥有NICE权限的认证用户访问。
4.5. Thymeleaf网页
我们使用Thymeleaf创建两个网页:
- index.html根据用户状态显示登录或登出按钮。还包含一个导航到*/nice的按钮,为获得良好的用户体验,我们仅向拥有NICE*权限的认证用户显示此按钮。
- nice.html仅包含静态内容。
我们的index.html具有条件逻辑,能够使用用户会话中的值:
<div class="container">
<h1 class="form-signin-heading">Baeldung: Keycloak & Spring Boot</h1>
<p>Welcome to a Thymeleaf UI served by Spring Boot and secured using Keycloak!</p>
<div th:if="${!isAuthenticated}">
<a href="/oauth2/authorization/keycloak"><button type="button"
class="btn btn-lg btn-primary btn-block">Login</button></a>
</div>
<div th:if="${isAuthenticated}">
<p>Hi <span th:utext="${name}">..!..</span>!</p>
<a href="/logout"><button type="button" class="btn btn-lg btn-primary">Logout</button></a>
<a th:if="${isNice}" href="/nice">
<button type="button" class="btn btn-lg btn-primary">Browse to NICE users page</button></a>
</div>
</div>
4.6. 控制器
UiController构建首页模型(用户name,以及isAuthenticated和isNice标志),并解析Thymeleaf模板:
@Controller
public class UiController {
  @GetMapping("/")
  public String getIndex(Model model, Authentication auth) {
    model.addAttribute("name",
        auth instanceof OAuth2AuthenticationToken oauth && oauth.getPrincipal() instanceof OidcUser oidc
        ? oidc.getPreferredUsername()
        : "");
    model.addAttribute("isAuthenticated",
        auth != null && auth.isAuthenticated());
    model.addAttribute("isNice",
        auth != null && auth.getAuthorities().stream().anyMatch(authority -> {
          return Objects.equals("NICE", authority.getAuthority());
        }));
    return "index.html";
  }

  @GetMapping("/nice")
  public String getNice(Model model, Authentication auth) {
    return "nice.html";
  }
}
4.7. 测试带oauth2Login的Thymeleaf应用
现在我们可以使用喜欢的IDE启动应用。或者,从maven父目录运行:
sh ./mvnw -pl spring-boot-mvc-client spring-boot:run
通过浏览器访问http://localhost:8081/,应看到一个带登录按钮的页面。
导航到NICE用户专属页面的按钮仅在以brice身份登录时可见(以igor身份登录时不可见)。
在RP-Initiated Logout后的下次登录尝试时,应需要输入凭据。
如果从Java配置中移除logout部分,从Spring应用登出时Keycloak会话不会结束,新的登录尝试将静默完成。Keycloak不会显示登录表单,因为从其角度看,我们仍处于登录状态。
5. 使用JWT解码器的REST API
现在继续介绍使用Spring Boot和Keycloak实现OAuth2,这次是一个无状态REST API,期望接收JWT格式的Bearer访问令牌。
5.1. 依赖项
这次,**最重要的依赖是spring-boot-starter-oauth2-resource-server**。由于创建的是servlet应用,还需要spring-boot-starter-web:
<dependency>
  <groupId>org.springframework.boot</groupId>
  <artifactId>spring-boot-starter-oauth2-resource-server</artifactId>
</dependency>
<dependency>
  <groupId>org.springframework.boot</groupId>
  <artifactId>spring-boot-starter-web</artifactId>
</dependency>
这些依赖足以运行,但如果想在测试期间模拟认证,还需要在test范围内添加*spring-security-test*。
5.2. 配置JWT解码器
在资源服务器上验证访问令牌时,可以选择JWT解码器或自省。前者要求授权服务器颁发JWT格式的访问令牌。但它效率高得多,因为自省要求资源服务器对每个请求都调用授权服务器,这会引入延迟并可能使授权服务器过载。
Keycloak访问令牌是JWT,在Spring Boot中,单个属性就足以配置带有JWT解码器的资源服务器:
spring.security.oauth2.resourceserver.jwt.issuer-uri=http://localhost:8080/realms/baeldung-keycloak
5.3. 将Keycloak领域角色映射到Spring Security权限
对于带有JWT解码器的资源服务器,我们应该配置认证转换器。
我们可以在这里重用之前的权限转换器bean实现:
@Bean
JwtAuthenticationConverter authenticationConverter(
      Converter<Map<String, Object>, Collection<GrantedAuthority>> authoritiesConverter) {
  var authenticationConverter = new JwtAuthenticationConverter();
  authenticationConverter.setJwtGrantedAuthoritiesConverter(jwt -> {
    return authoritiesConverter.convert(jwt.getClaims());
  });
  return authenticationConverter;
}
注意这次我们传递的是访问令牌声明而非ID令牌声明。
5.4. 组装SecurityFilterChain Bean
现在准备定义资源服务器安全过滤器链:
@Bean
SecurityFilterChain resourceServerSecurityFilterChain(
      HttpSecurity http,
      Converter<Jwt, AbstractAuthenticationToken> authenticationConverter) throws Exception {
  http.oauth2ResourceServer(resourceServer -> {
    resourceServer.jwt(jwtDecoder -> {
      jwtDecoder.jwtAuthenticationConverter(authenticationConverter);
    });
  });

  http.sessionManagement(sessions -> {
    sessions.sessionCreationPolicy(SessionCreationPolicy.STATELESS);
  }).csrf(csrf -> {
    csrf.disable();
  });

  http.authorizeHttpRequests(requests -> {
    requests.requestMatchers("/me").authenticated();
    requests.anyRequest().denyAll();
  });

  return http.build();
}
在这段代码中:
- 第一块启用资源服务器配置,使用JWT解码器和自定义认证转换器将Keycloak角色转换为Spring Security权限。
- 然后完全禁用会话和CSRF防护。
- 最后定义一些访问控制:只有携带有效Bearer令牌的请求才能访问*/me*端点,禁止访问任何其他资源,无论请求授权如何。
5.5. REST控制器
为演示资源服务器中的Keycloak角色映射,我们暴露一个端点,反映安全上下文中JwtAuthenticationToken的一些信息:
@RestController
public class MeController {
  @GetMapping("/me")
  public UserInfoDto getGretting(JwtAuthenticationToken auth) {
    return new UserInfoDto(
      auth.getToken().getClaimAsString(StandardClaimNames.PREFERRED_USERNAME),
      auth.getAuthorities().stream().map(GrantedAuthority::getAuthority).toList());
  }

  public static record UserInfoDto(String name, List roles) {}
}
将auth转换为JwtAuthenticationToken是安全的,因为访问限制为isAuthenticated(),并且我们的认证转换器返回的就是JwtAuthenticationToken。如果路由是permitAll(),我们还应处理AnonymousAuthenticationToken以应对未经授权的请求(没有Bearer令牌的请求)。
5.6. 测试REST API
现在准备实时测试我们的REST API。像Thymeleaf应用一样,可以使用喜欢的IDE运行,或从maven父目录执行:
sh ./mvnw -pl spring-boot-resource-server spring-boot:run
然后,使用Postman从Keycloak获取访问令牌,应打开集合或请求的Authorization选项卡,选择OAuth2,并使用已在Keycloak中设置的值(重定向URI)和Spring属性,或从OpenID配置获取的值填写表单:
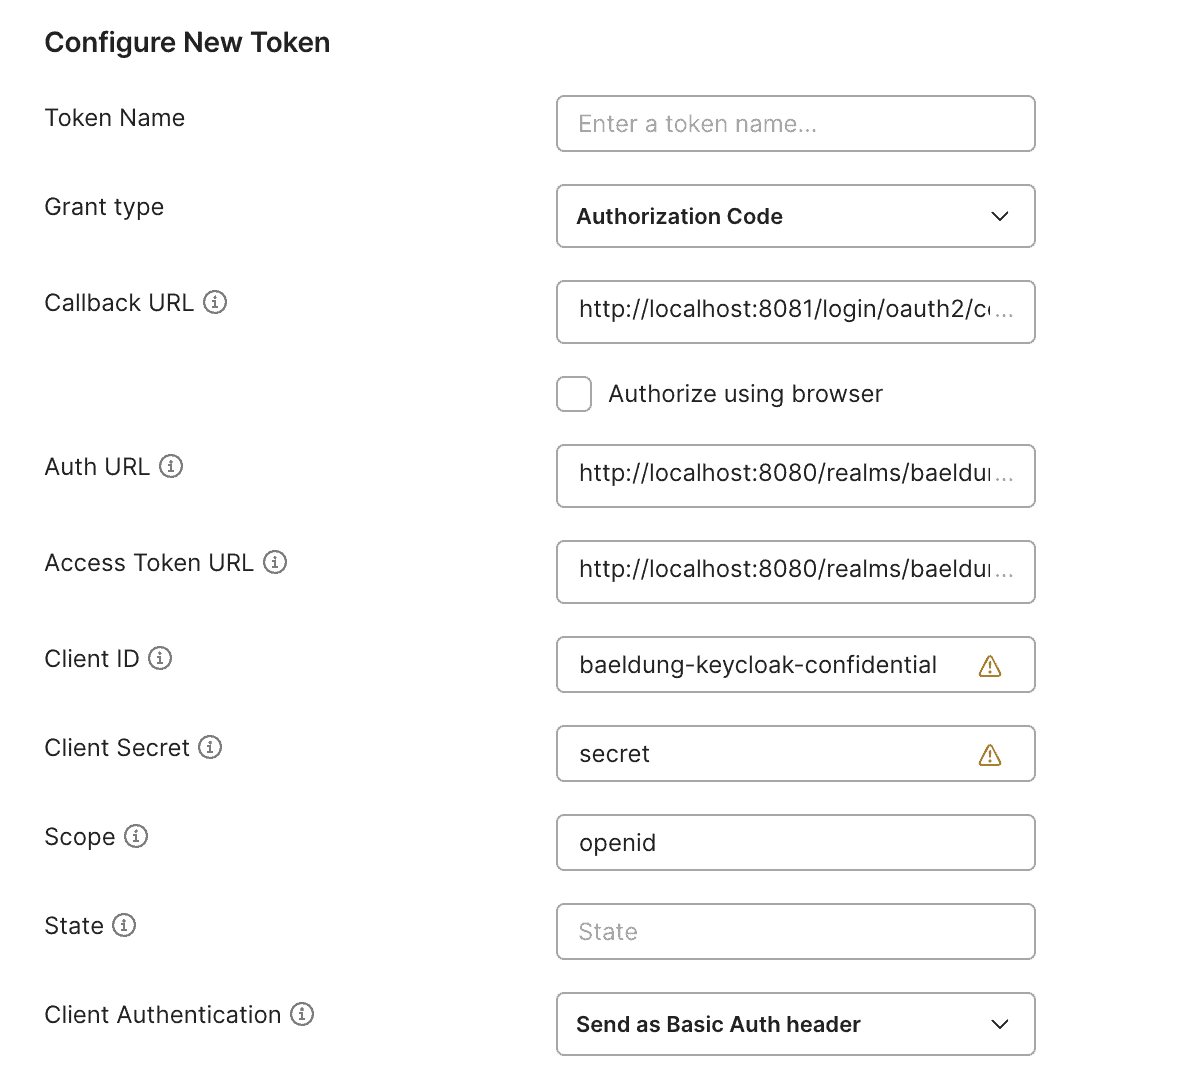
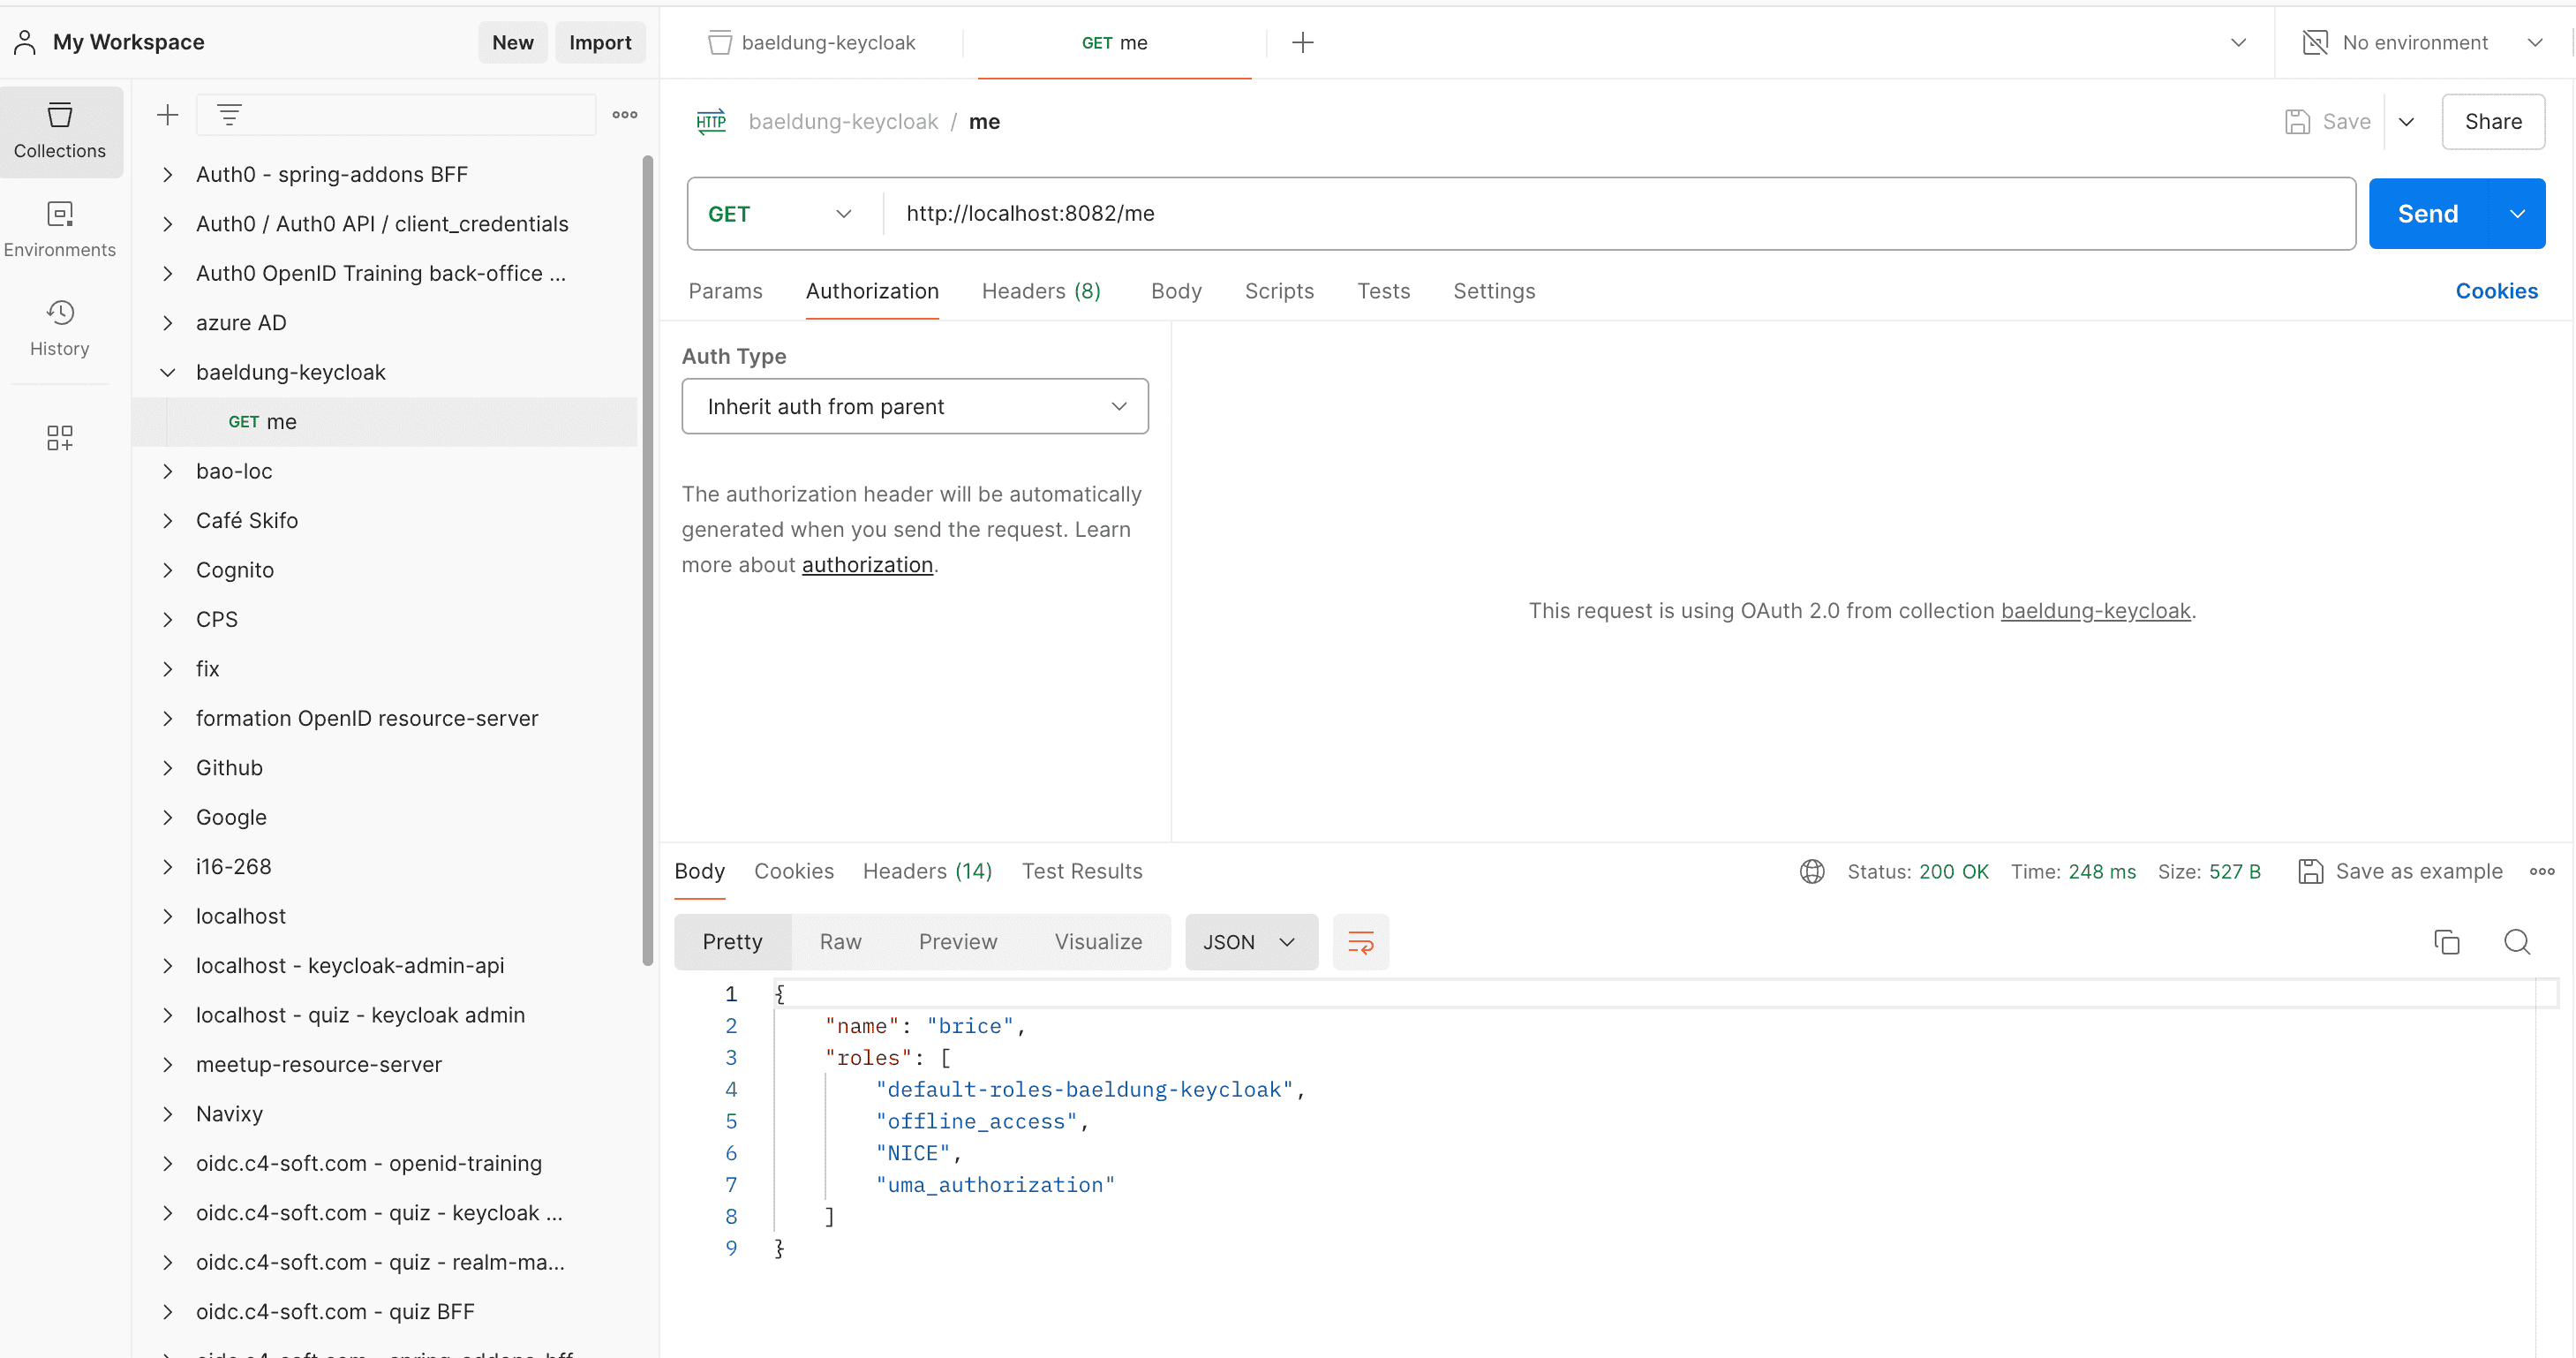
最后,向http://localhost:8082/me发送GET请求。响应应是一个包含Keycloak登录名和领域角色的JSON负载:
6. 创建Keycloak领域
本教程中,我们将Keycloak对象沙盒化在创建Docker容器时导入的自定义领域中。这在团队中引入新开发人员或试验替代配置时非常有用。
让我们详细说明这些对象最初是如何创建的。
6.1. 领域
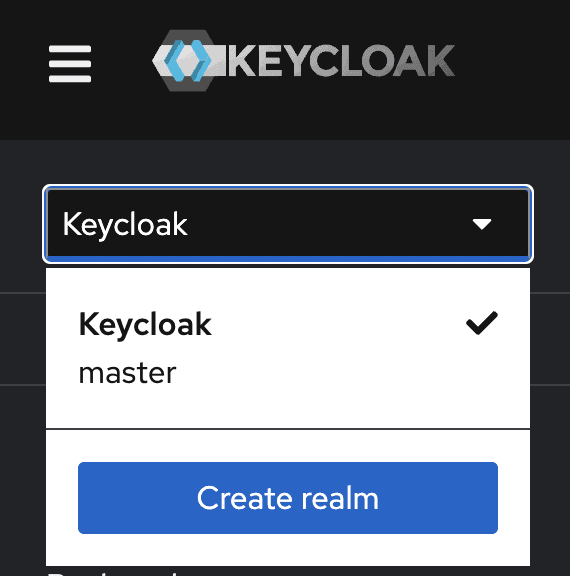
导航到左上角点击Create Realm按钮:
在下一屏,将领域命名为baeldung-keycloak:
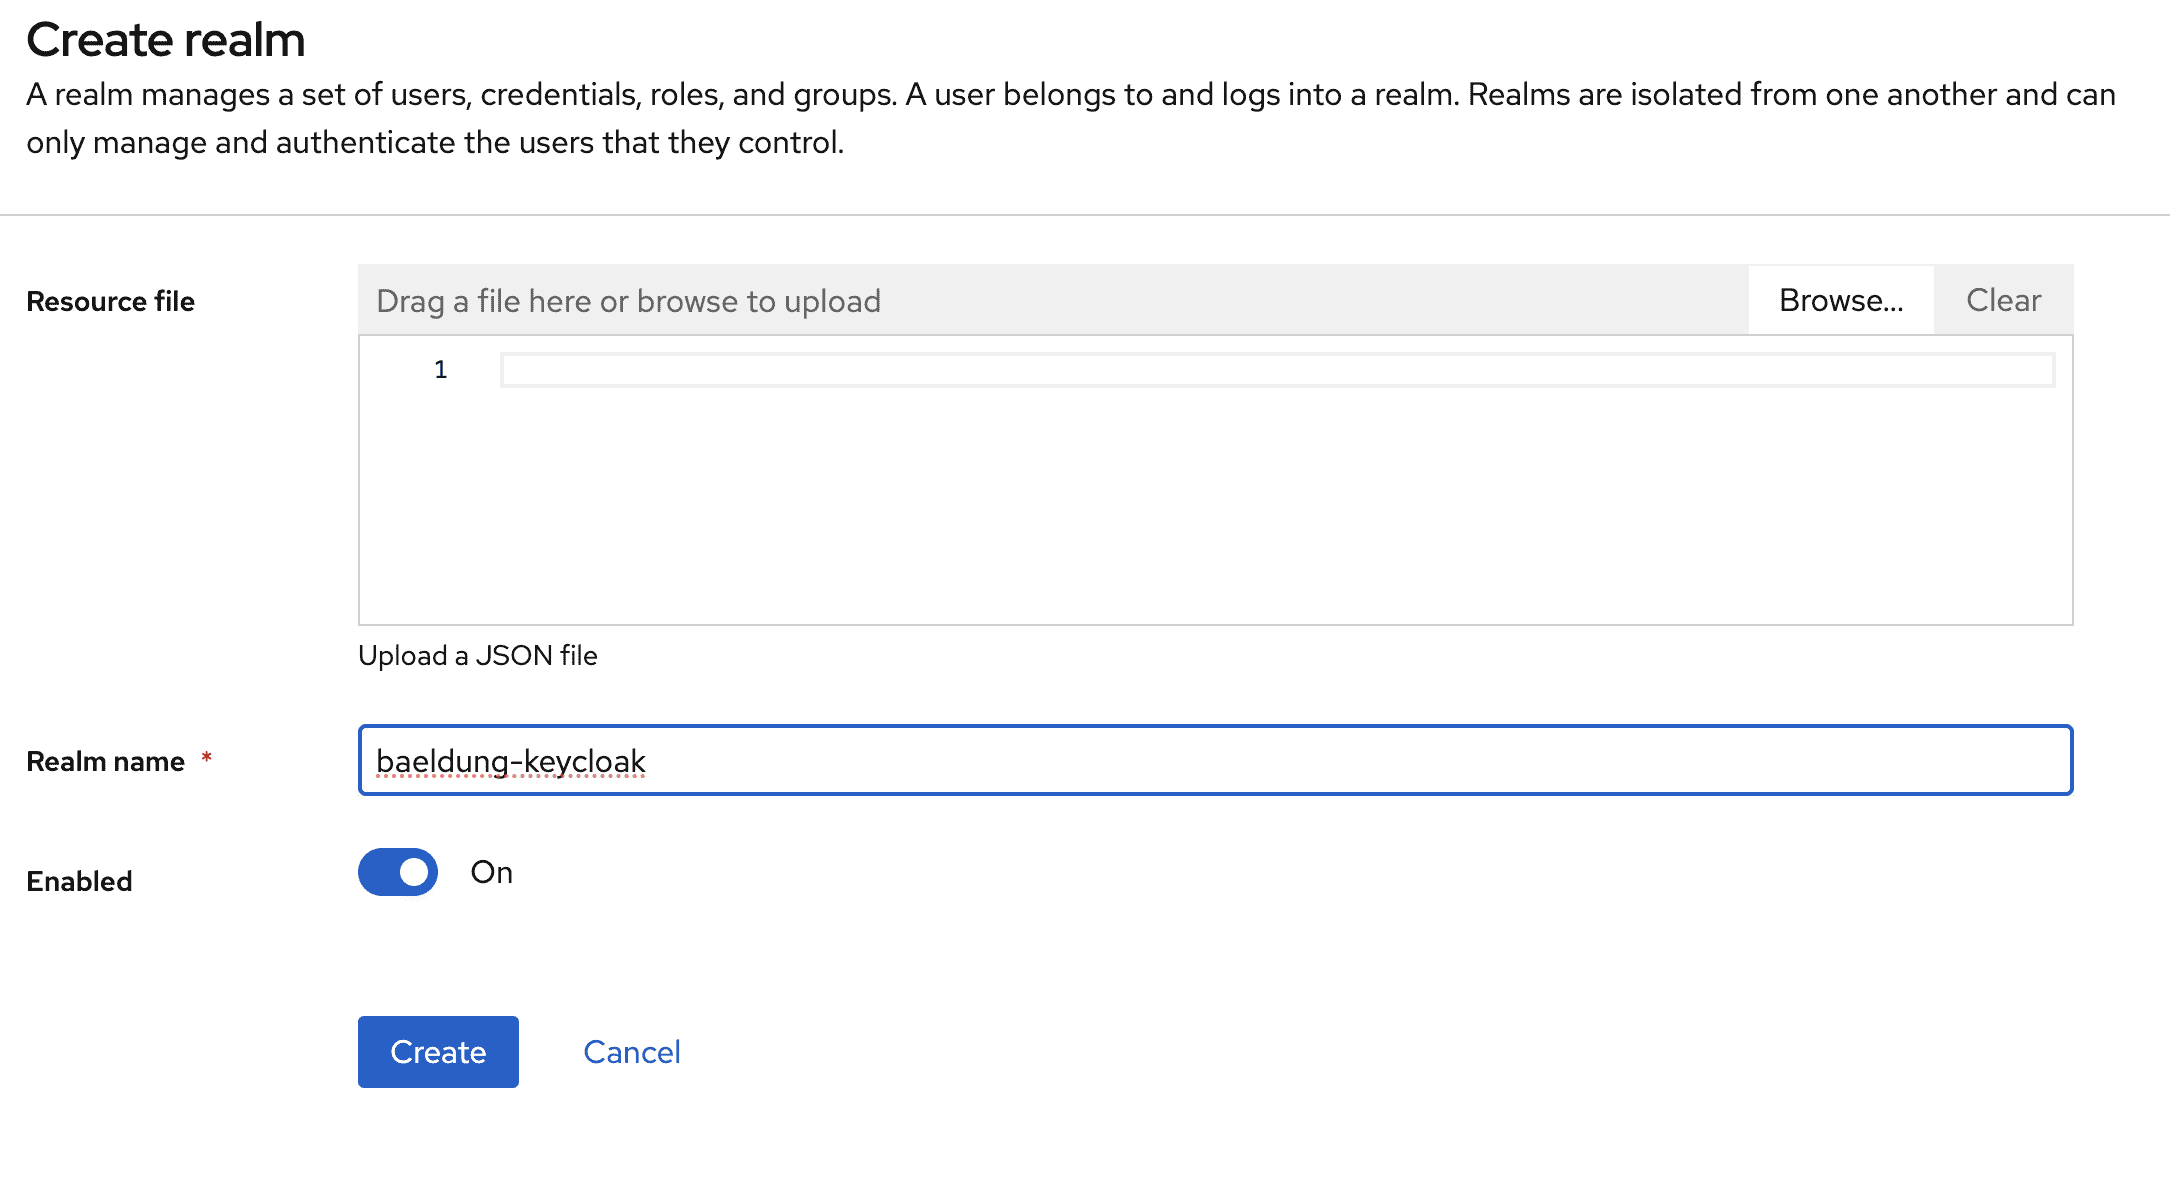
点击Create按钮后,我们被重定向到其详情页。
下一节中的所有操作都将在此baeldung-keycloak领域内进行。
6.2. 用于认证用户的机密客户端
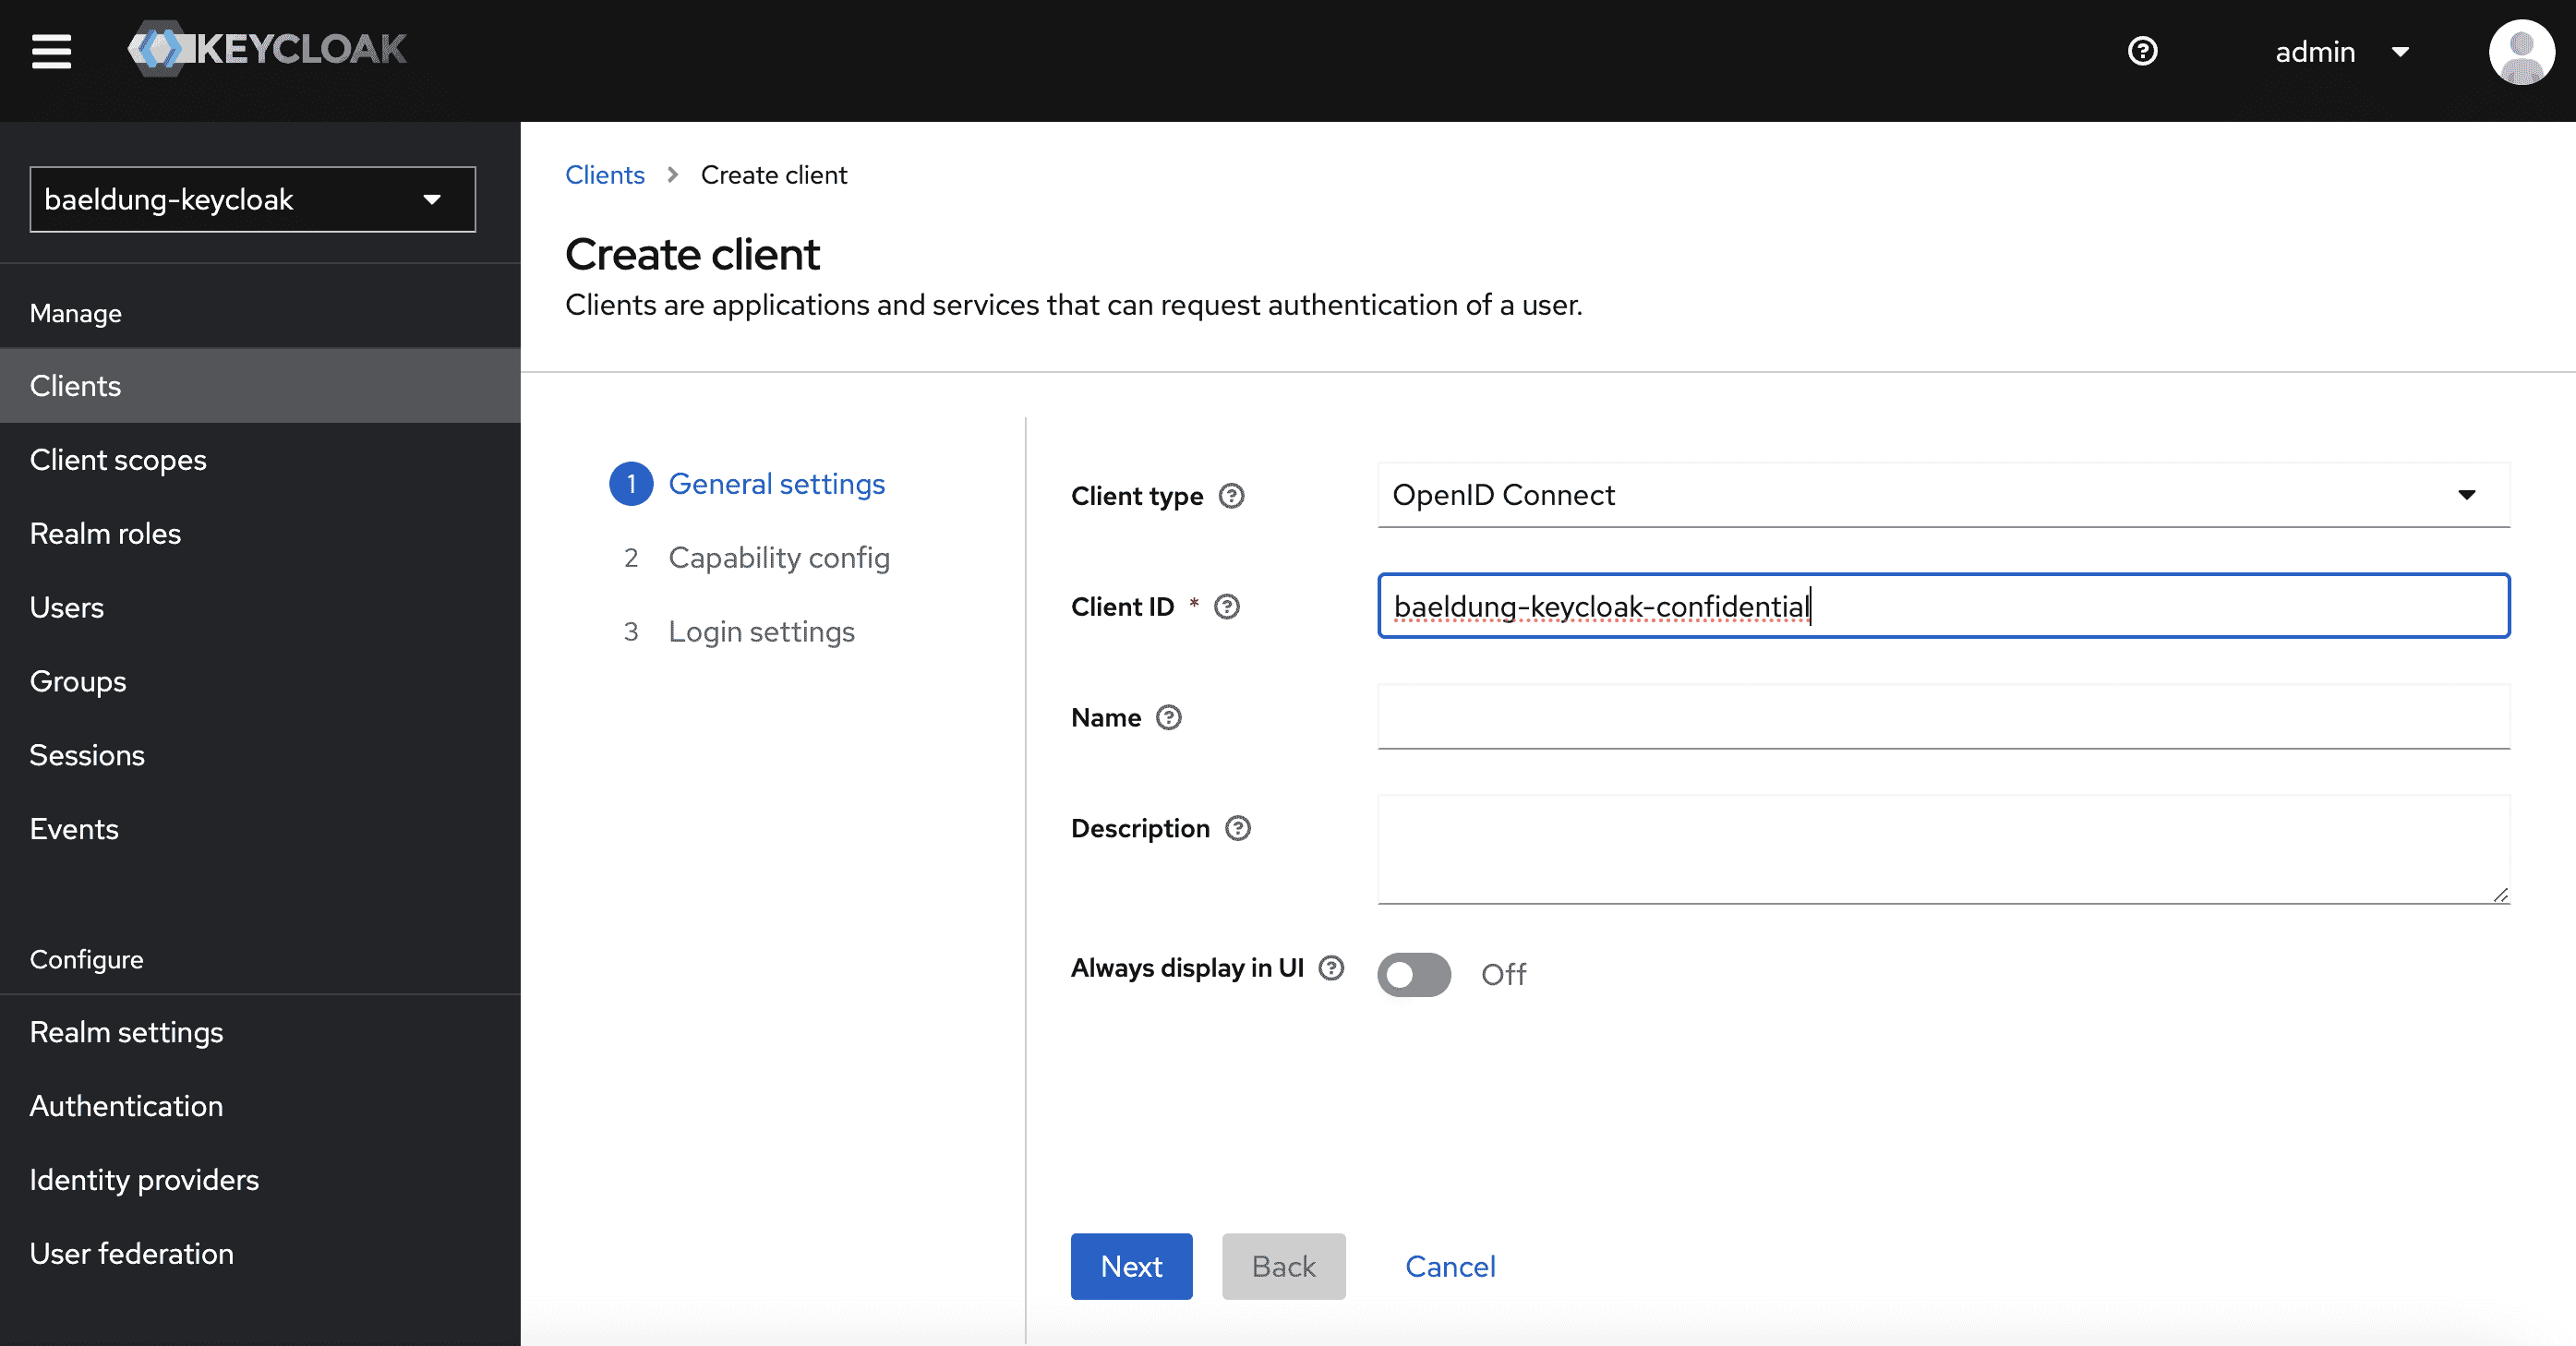
现在导航到Clients页面,创建一个名为baeldung-keycloak-confidential的新客户端:
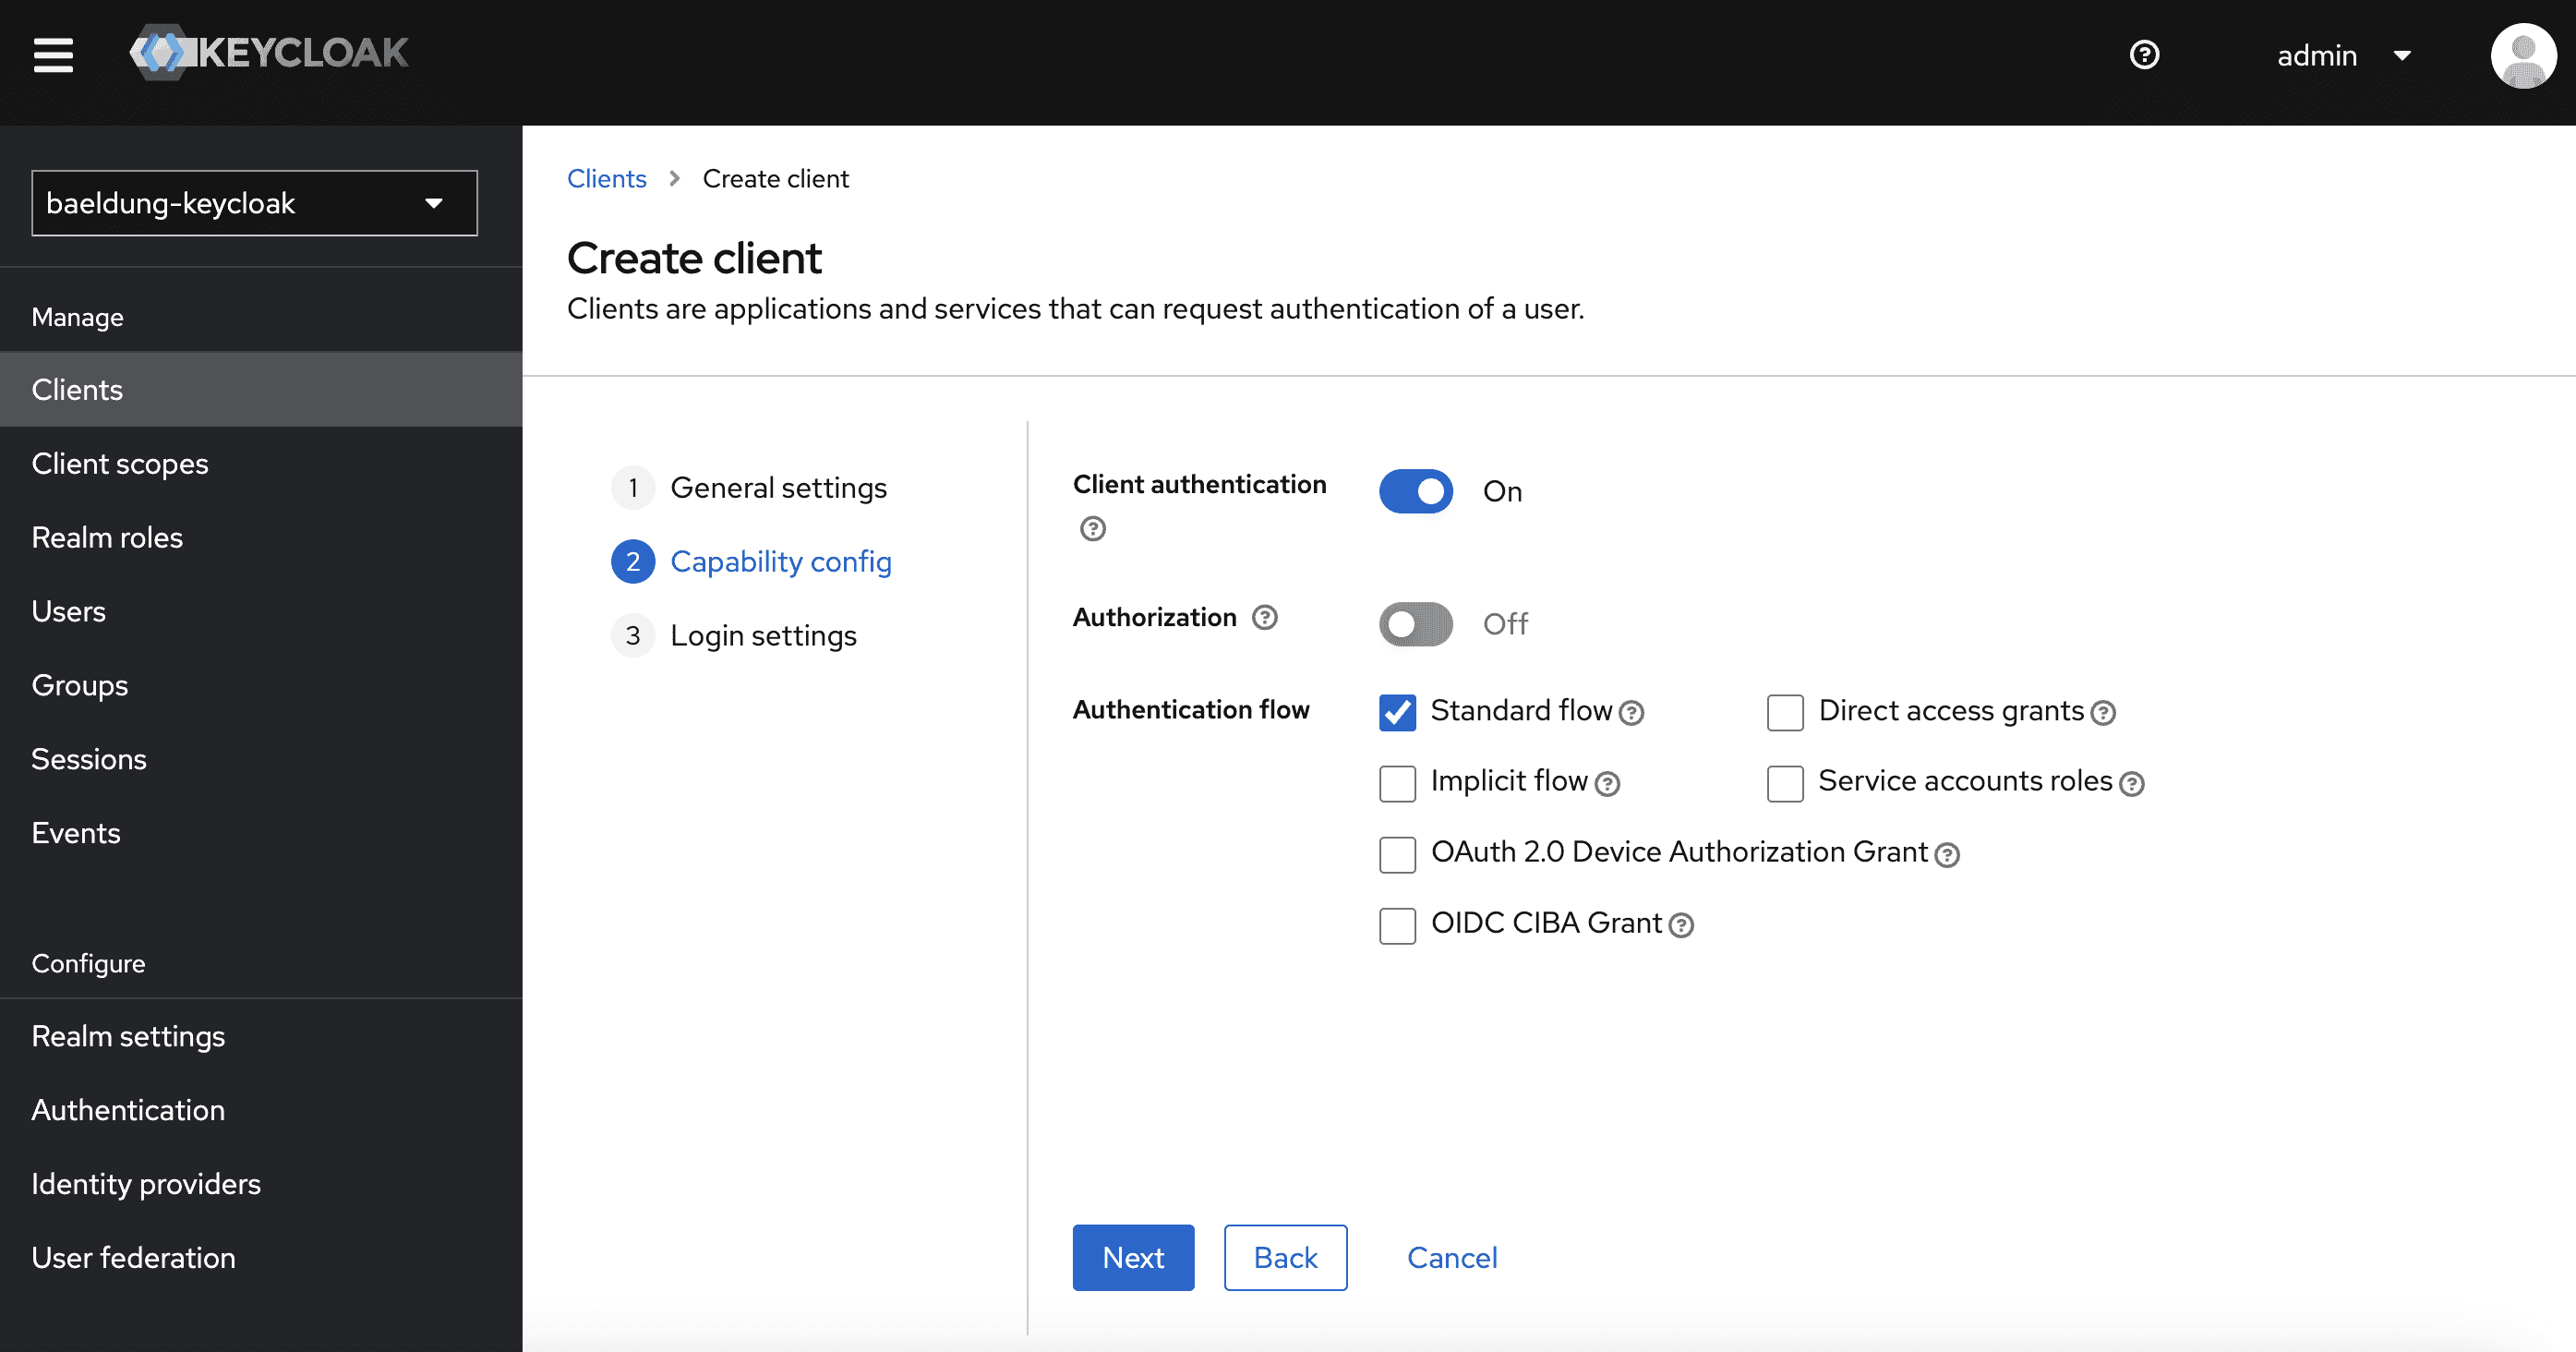
在下一屏,确保Client authentication已启用(这使客户端成为"机密"客户端),并且仅勾选Standard flow(这会激活授权码和刷新令牌流程):
最后,需要为客户端允许重定向URI和来源:
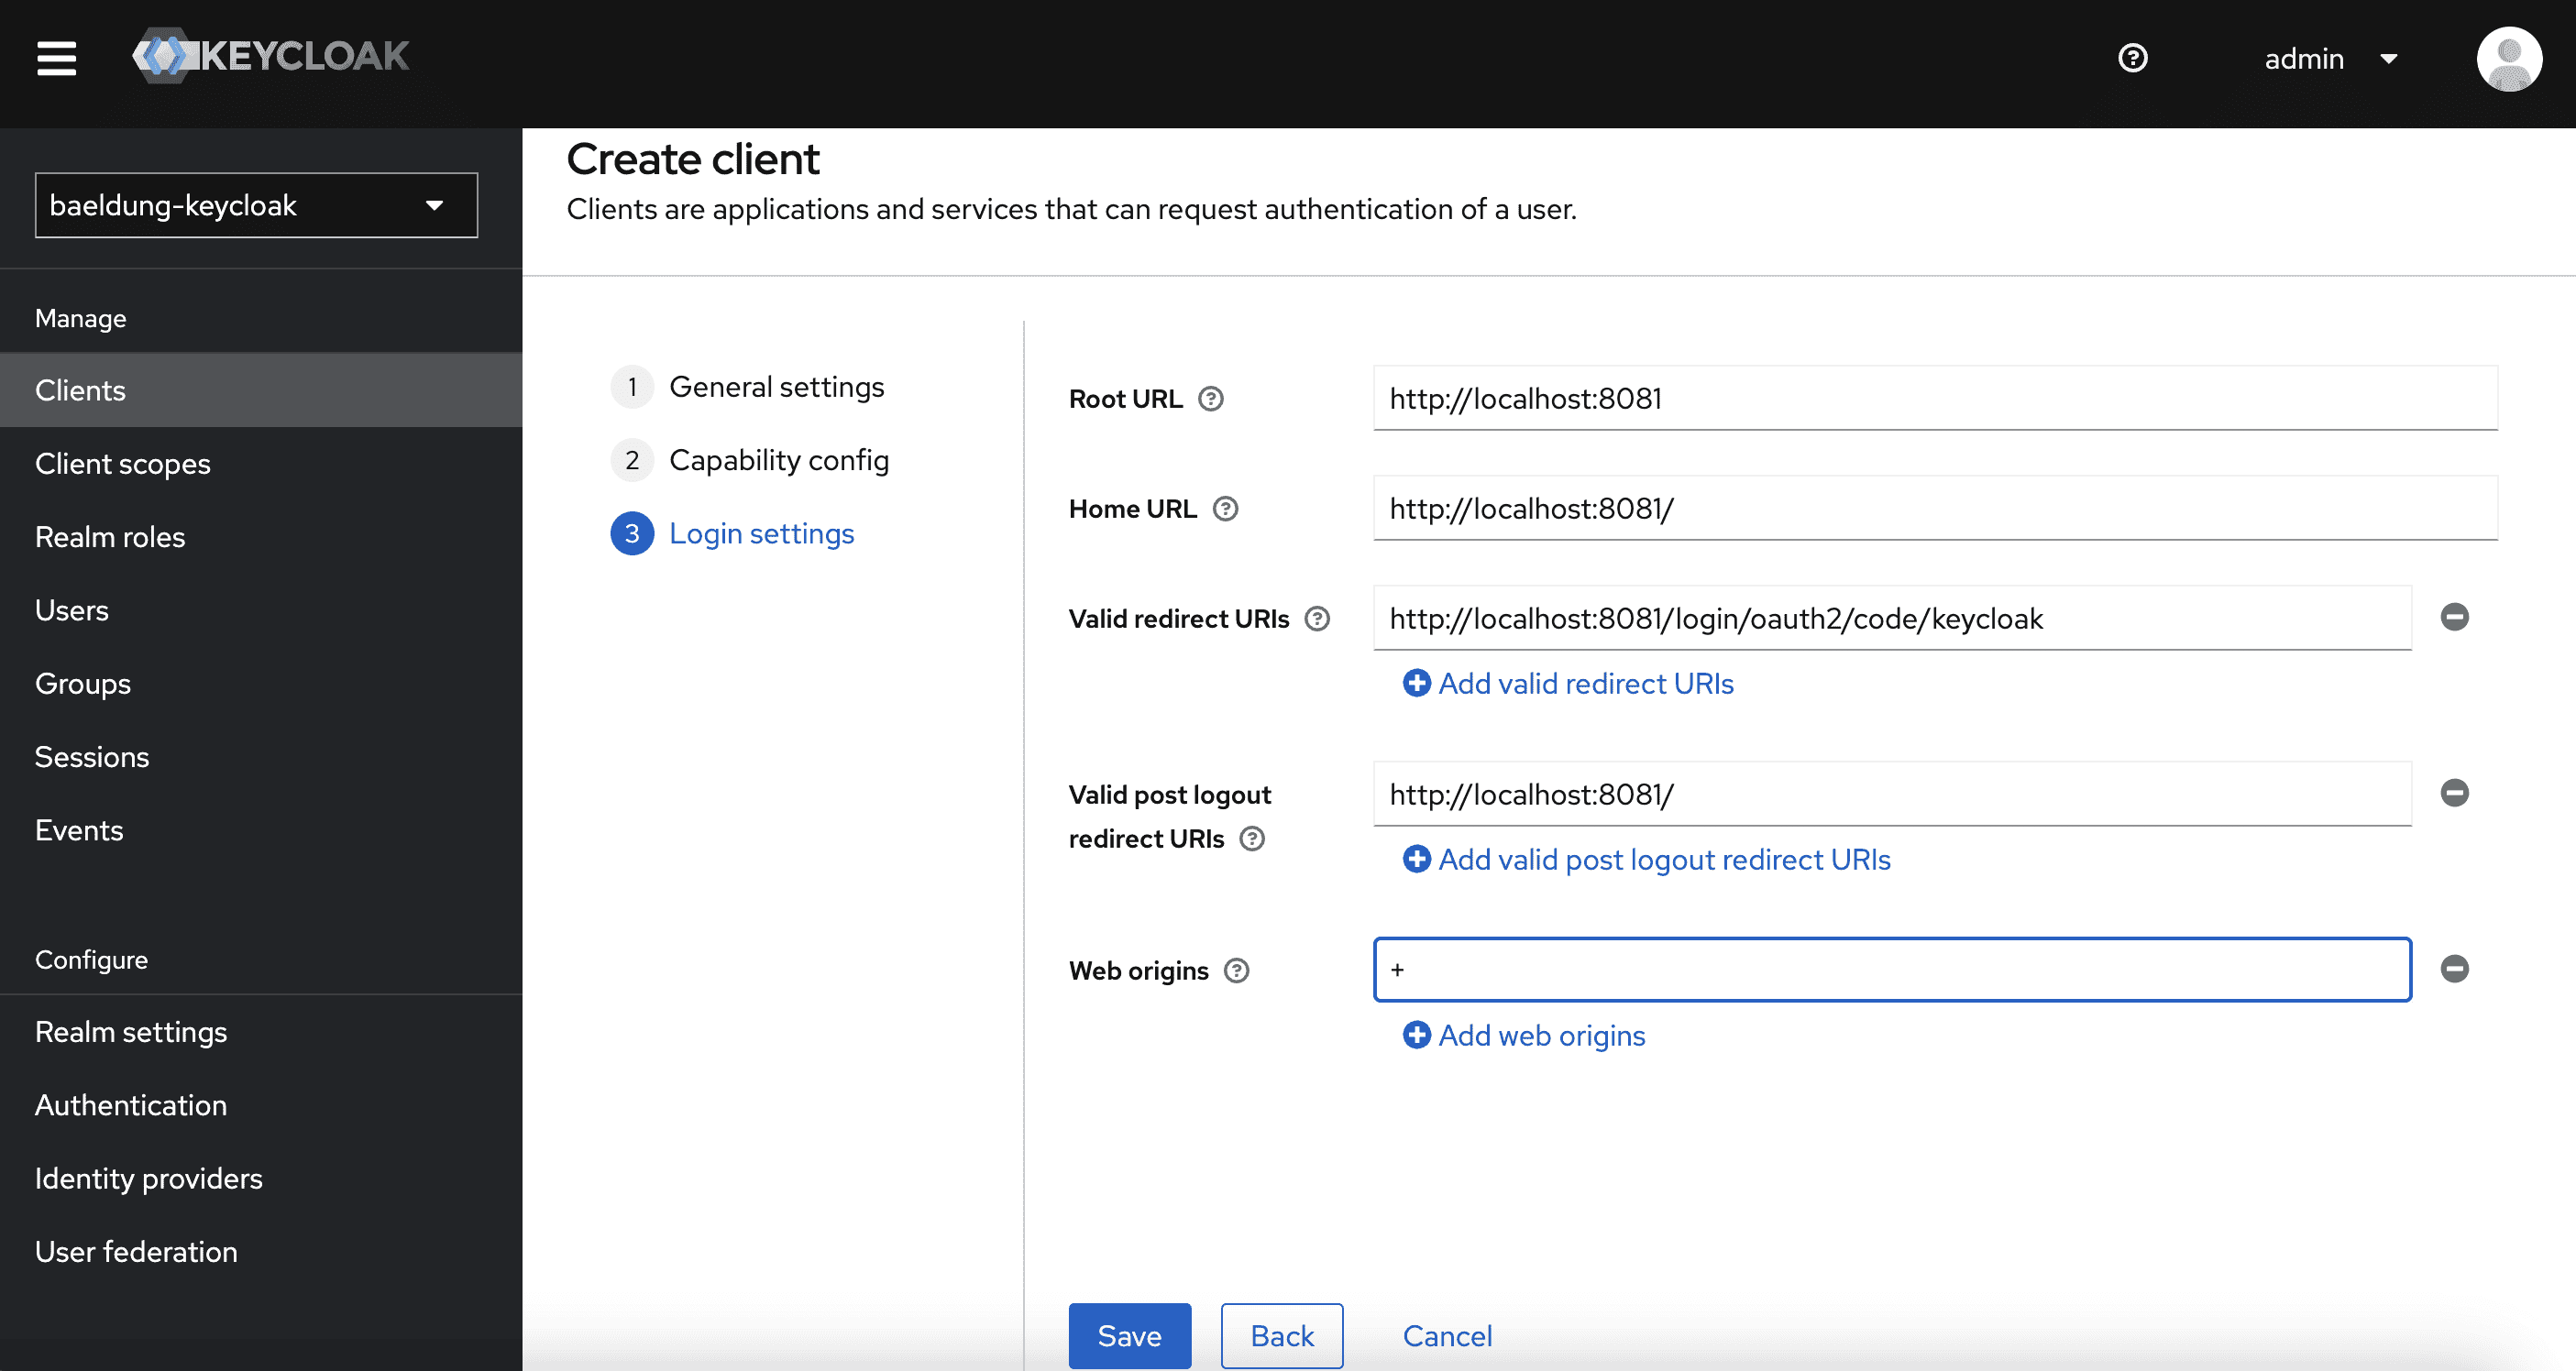
由于我们的Spring Boot客户端应用(带oauth2Login)配置在端口8081上运行,且注册ID为keycloak,我们设置:
- http://localhost:8081/login/oauth2/code/keycloak作为Valid redirect URIs
- *http://localhost:8081/*作为Valid post-logout URIs(Thymeleaf首页)
- *+*作为Web origins以允许Valid redirect URIs中的所有来源
6.3. 配置哪些JSON负载包含领域角色
为确保Keycloak角色添加到我们在Spring应用中使用的各种负载中,我们:
导航到客户端详情中的Client scopes选项卡:
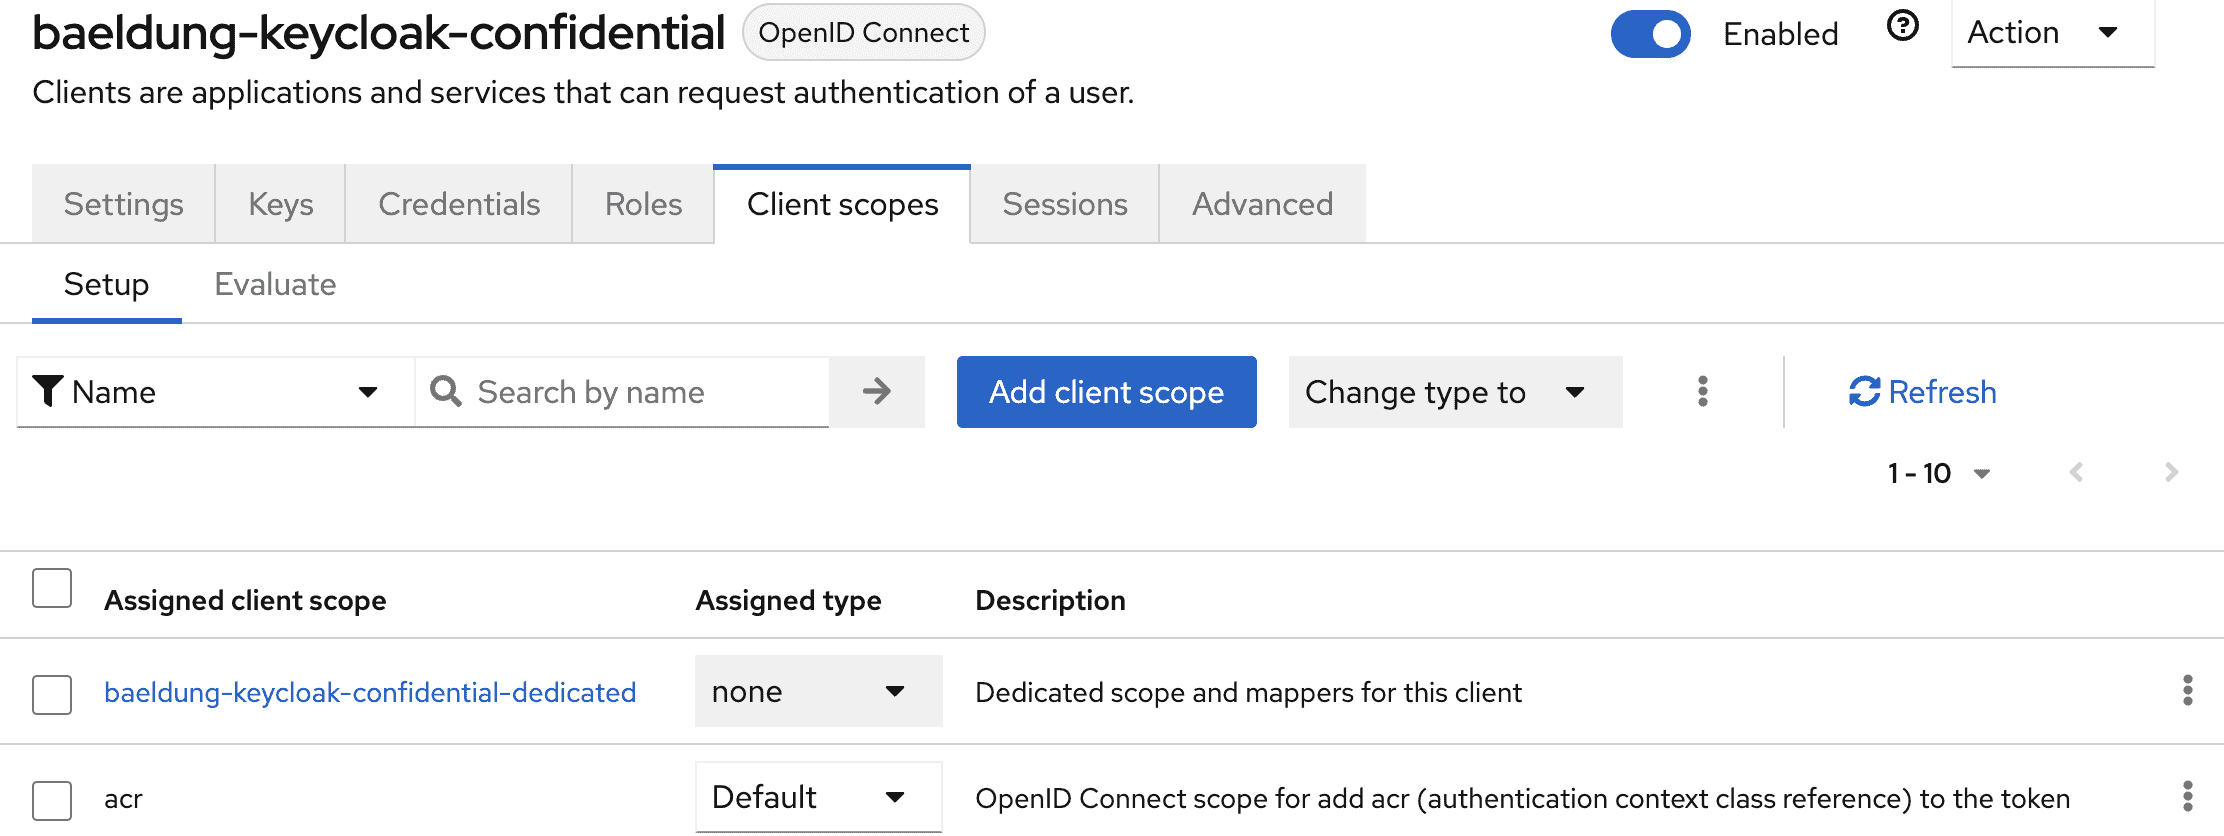
点击baeldung-keycloak-confidential-dedicated作用域访问其配置详情:
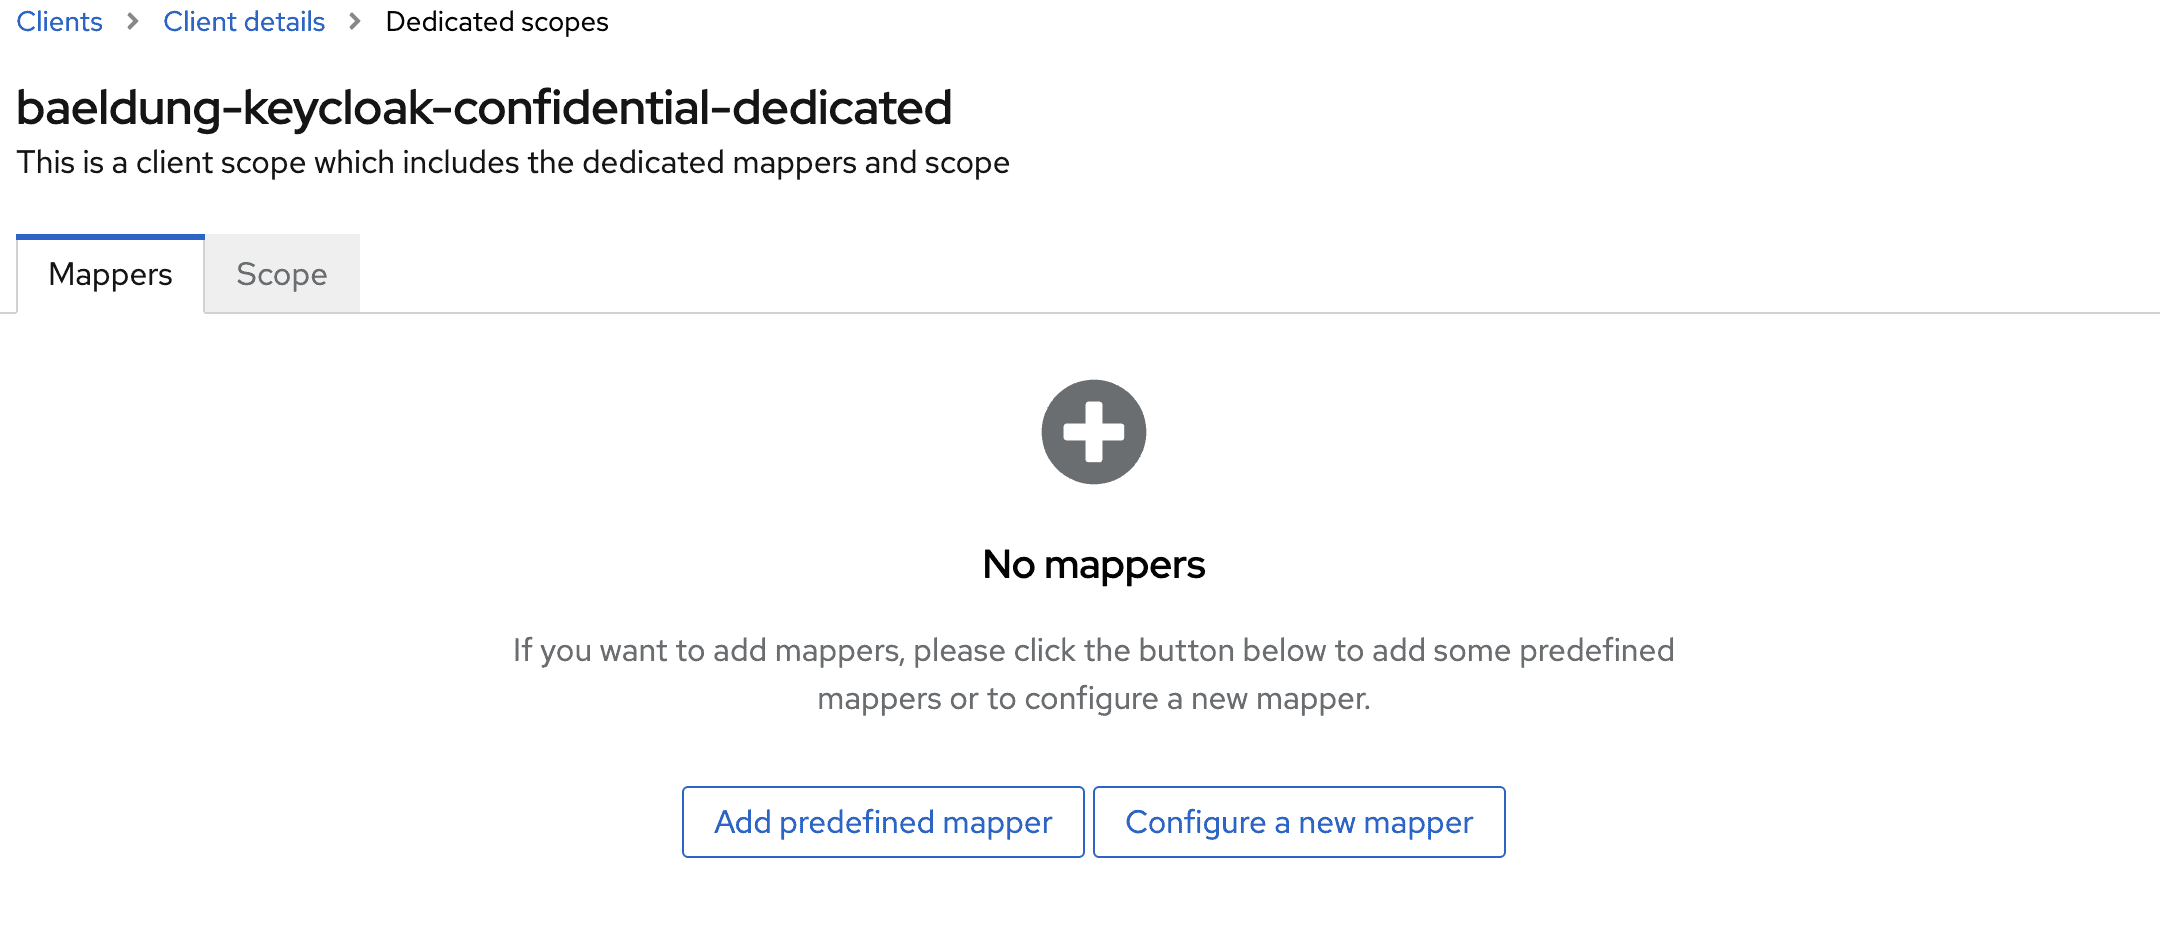
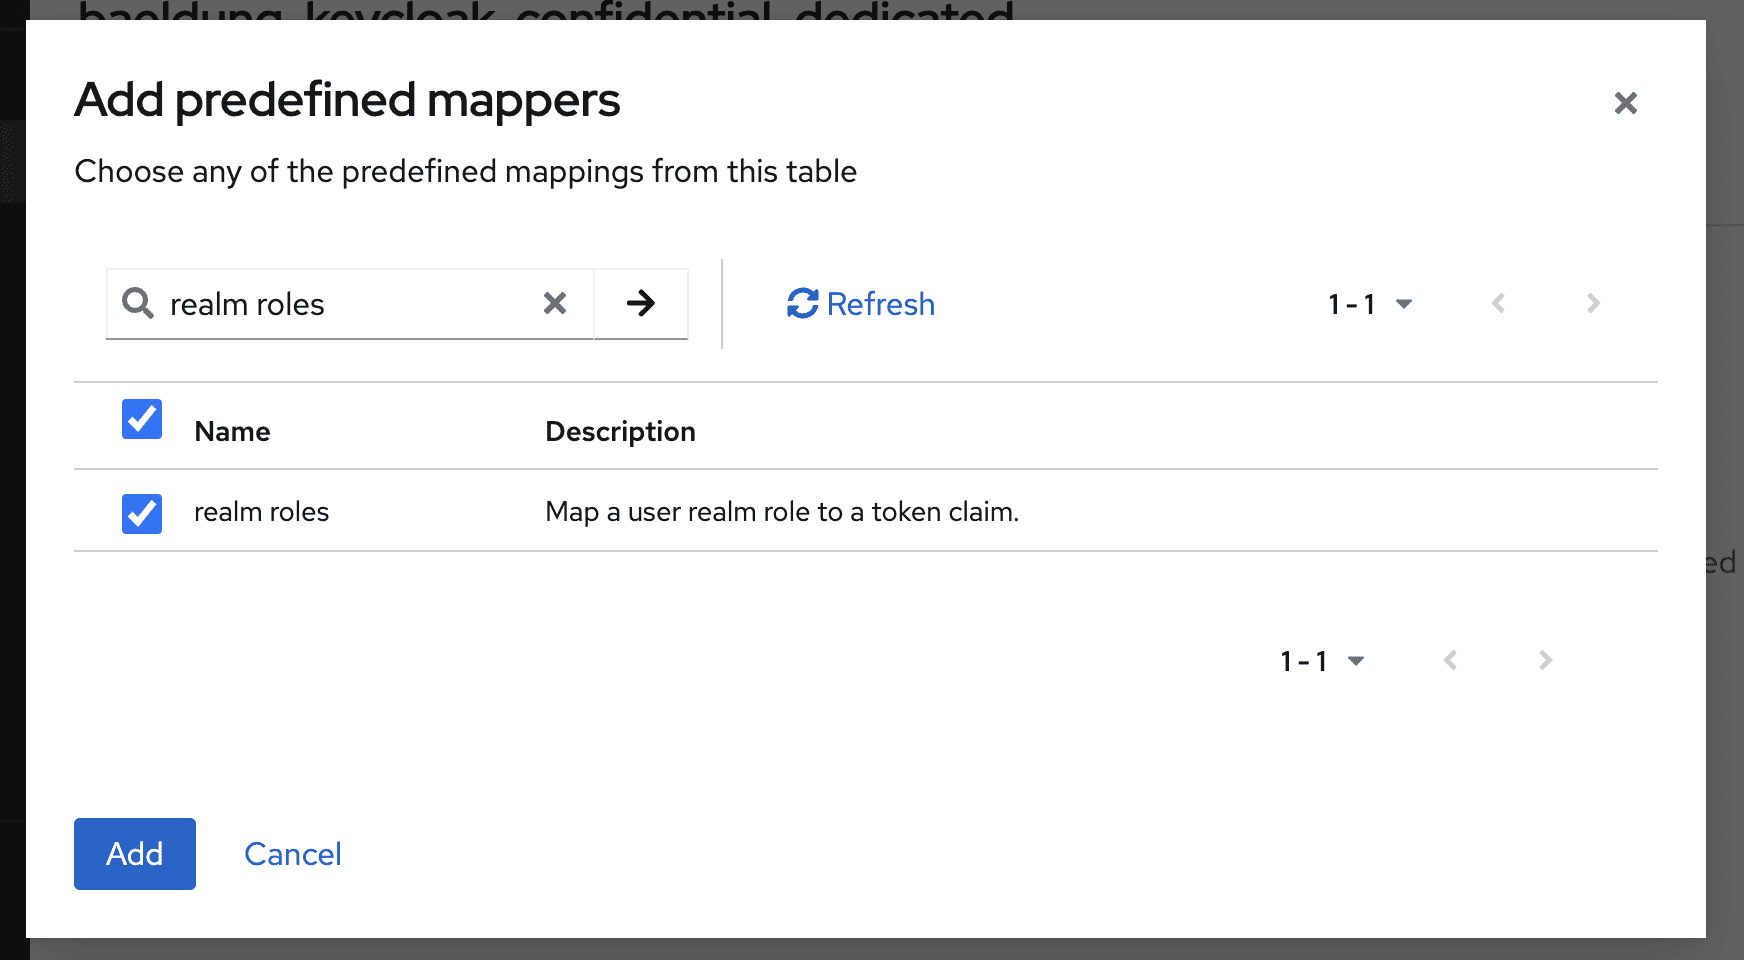
点击Add predefined mapper按钮,选择realm roles映射器:
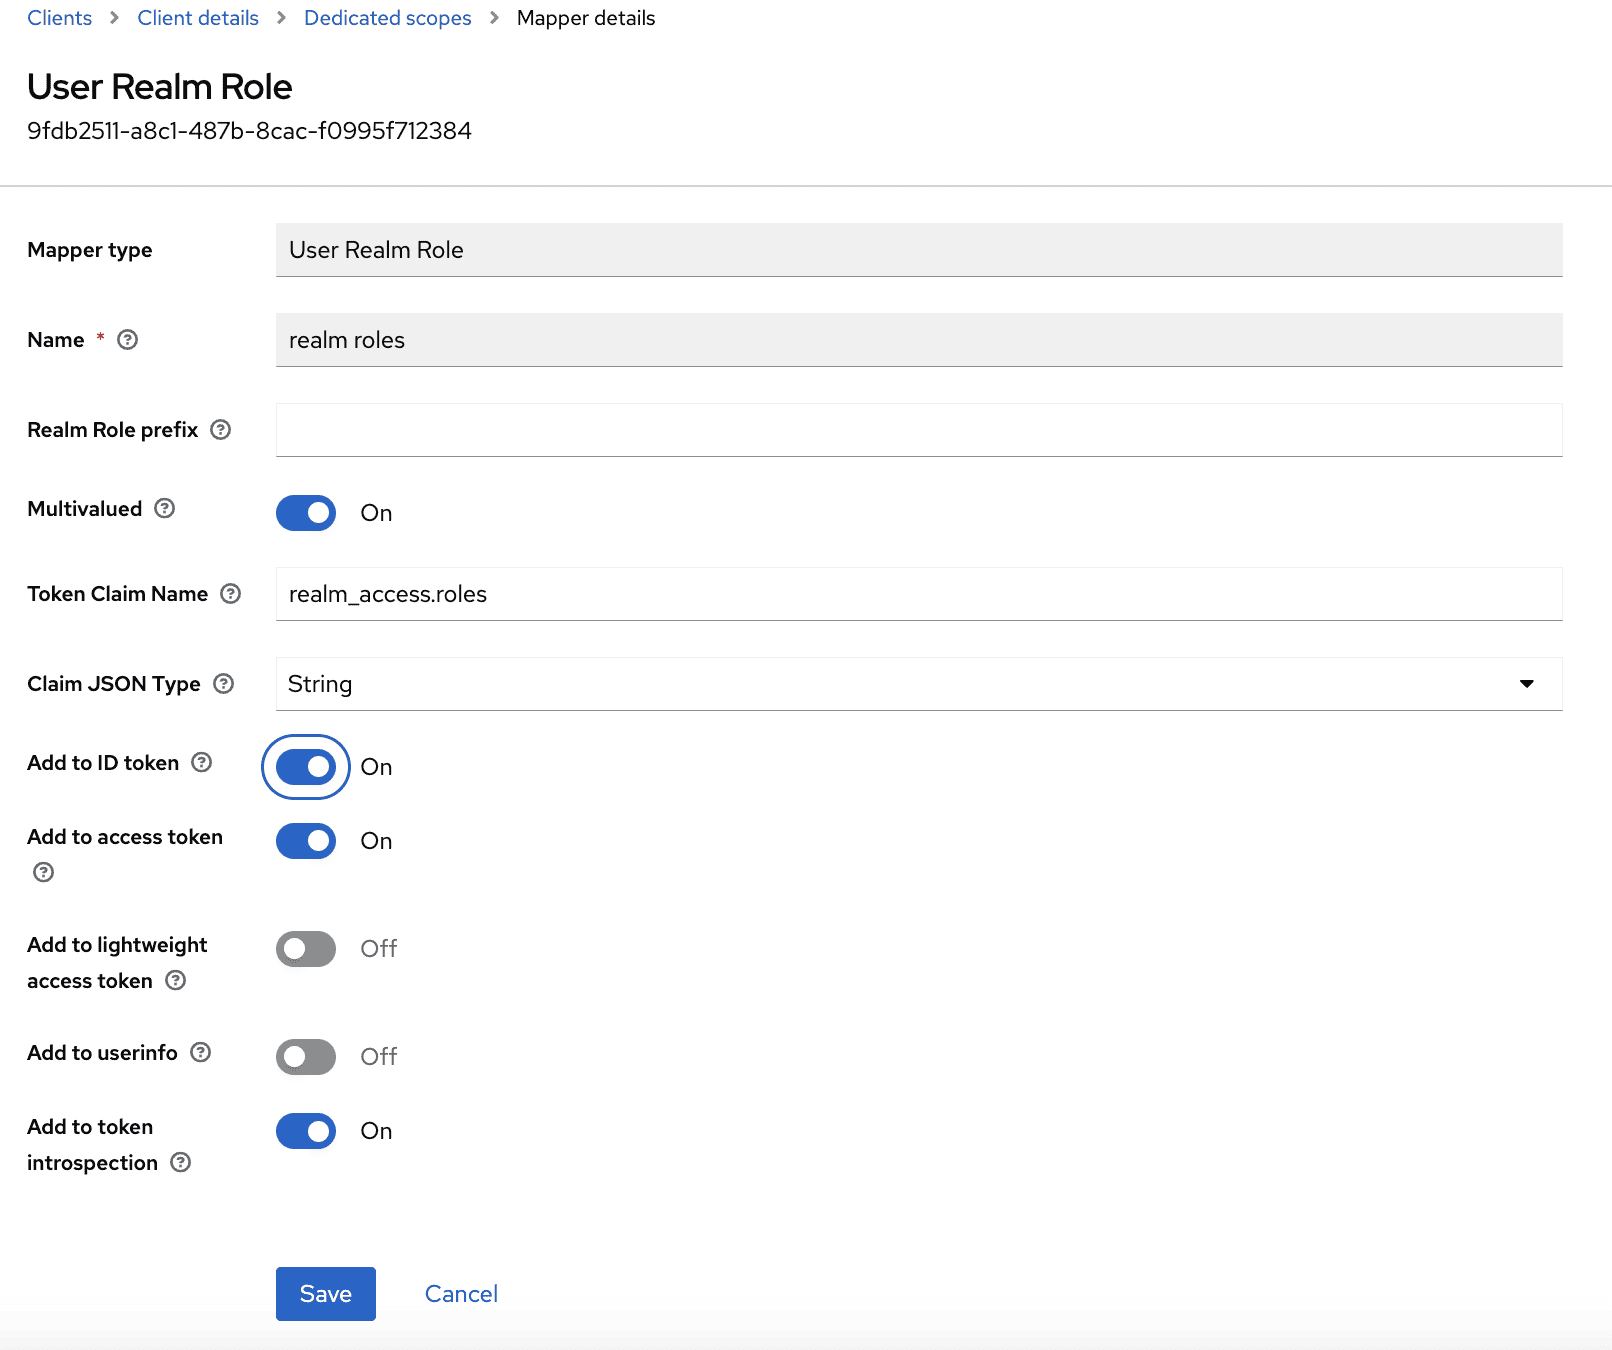
编辑时,可以选择哪些JSON负载包含领域角色:
- access tokens:用于带JWT解码器的资源服务器
- introspection:用于带令牌自省的资源服务器(Spring Security术语中的不透明令牌)
- ID tokens:用于带oauth2Login和OpenID的客户端(使用issuer-uri自动配置提供者)
- userinfo:用于带oauth2Login但没有OpenID的客户端(issuer-uri留空,在Spring配置中设置其他提供者属性)
由于我们在带oauth2Login的OpenID客户端(Thymeleaf应用)和带JWT解码器的资源服务器中都实现了基于角色的访问控制(RBAC),应确保领域角色添加到访问令牌和ID令牌中。
6.4. 领域角色
在Keycloak中,我们可以为整个领域或按客户端定义角色并分配给用户。本教程我们专注于领域角色。
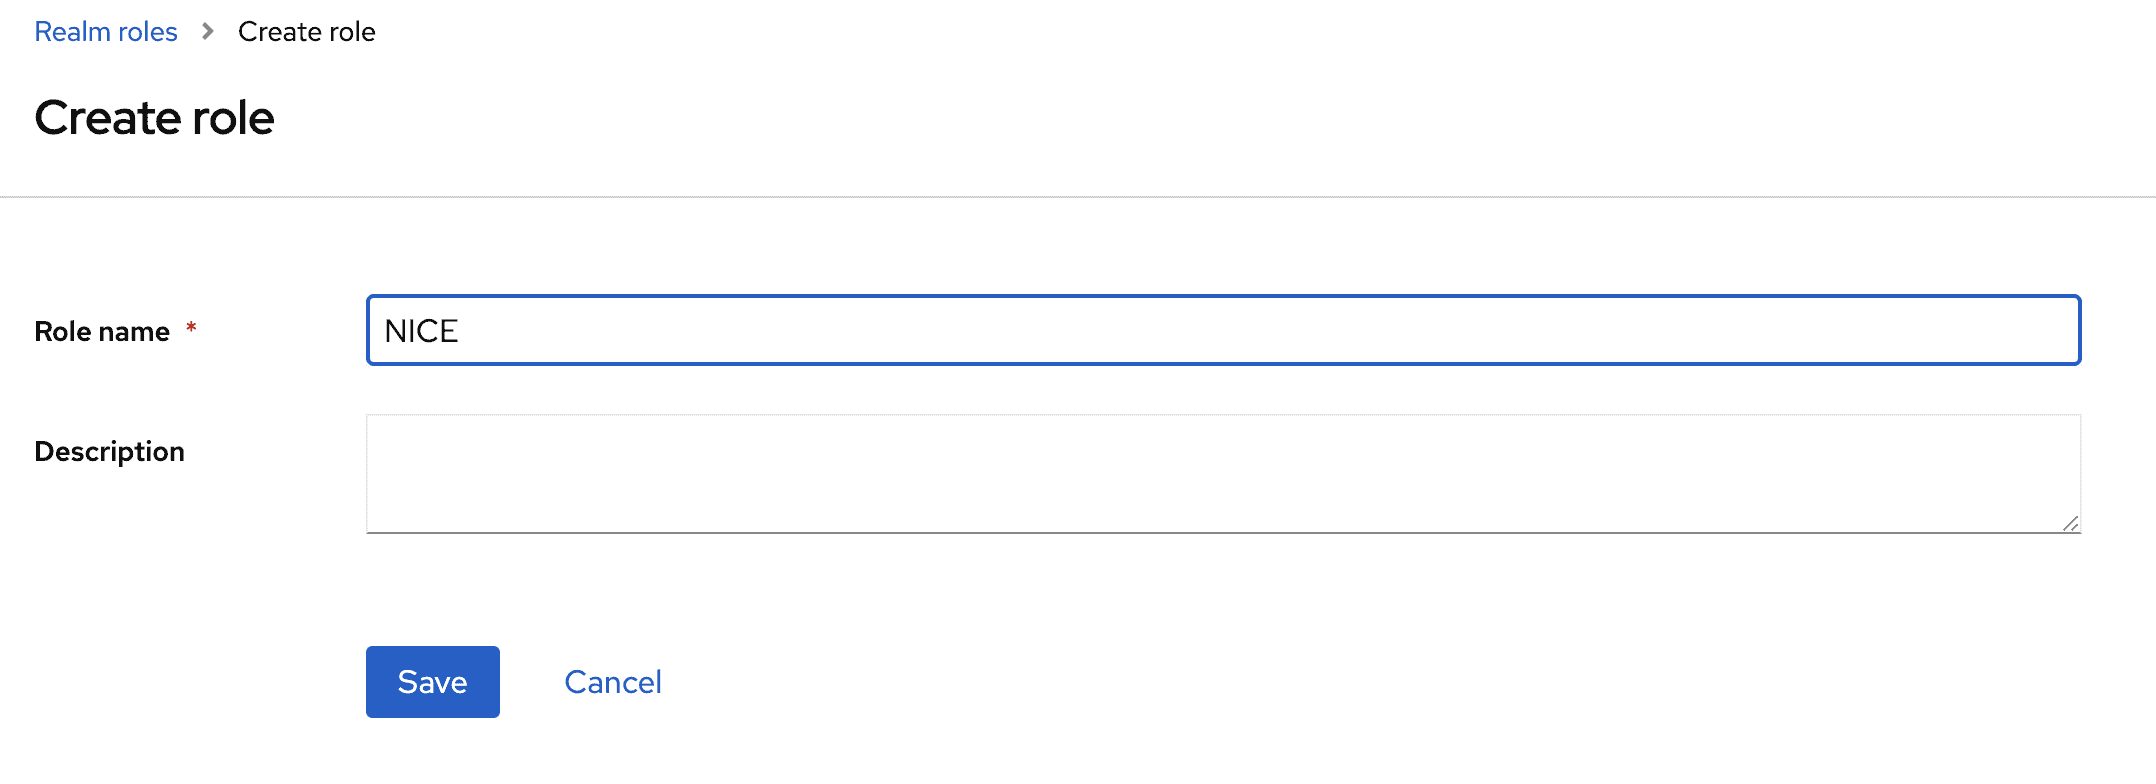
导航到Realm roles页面:
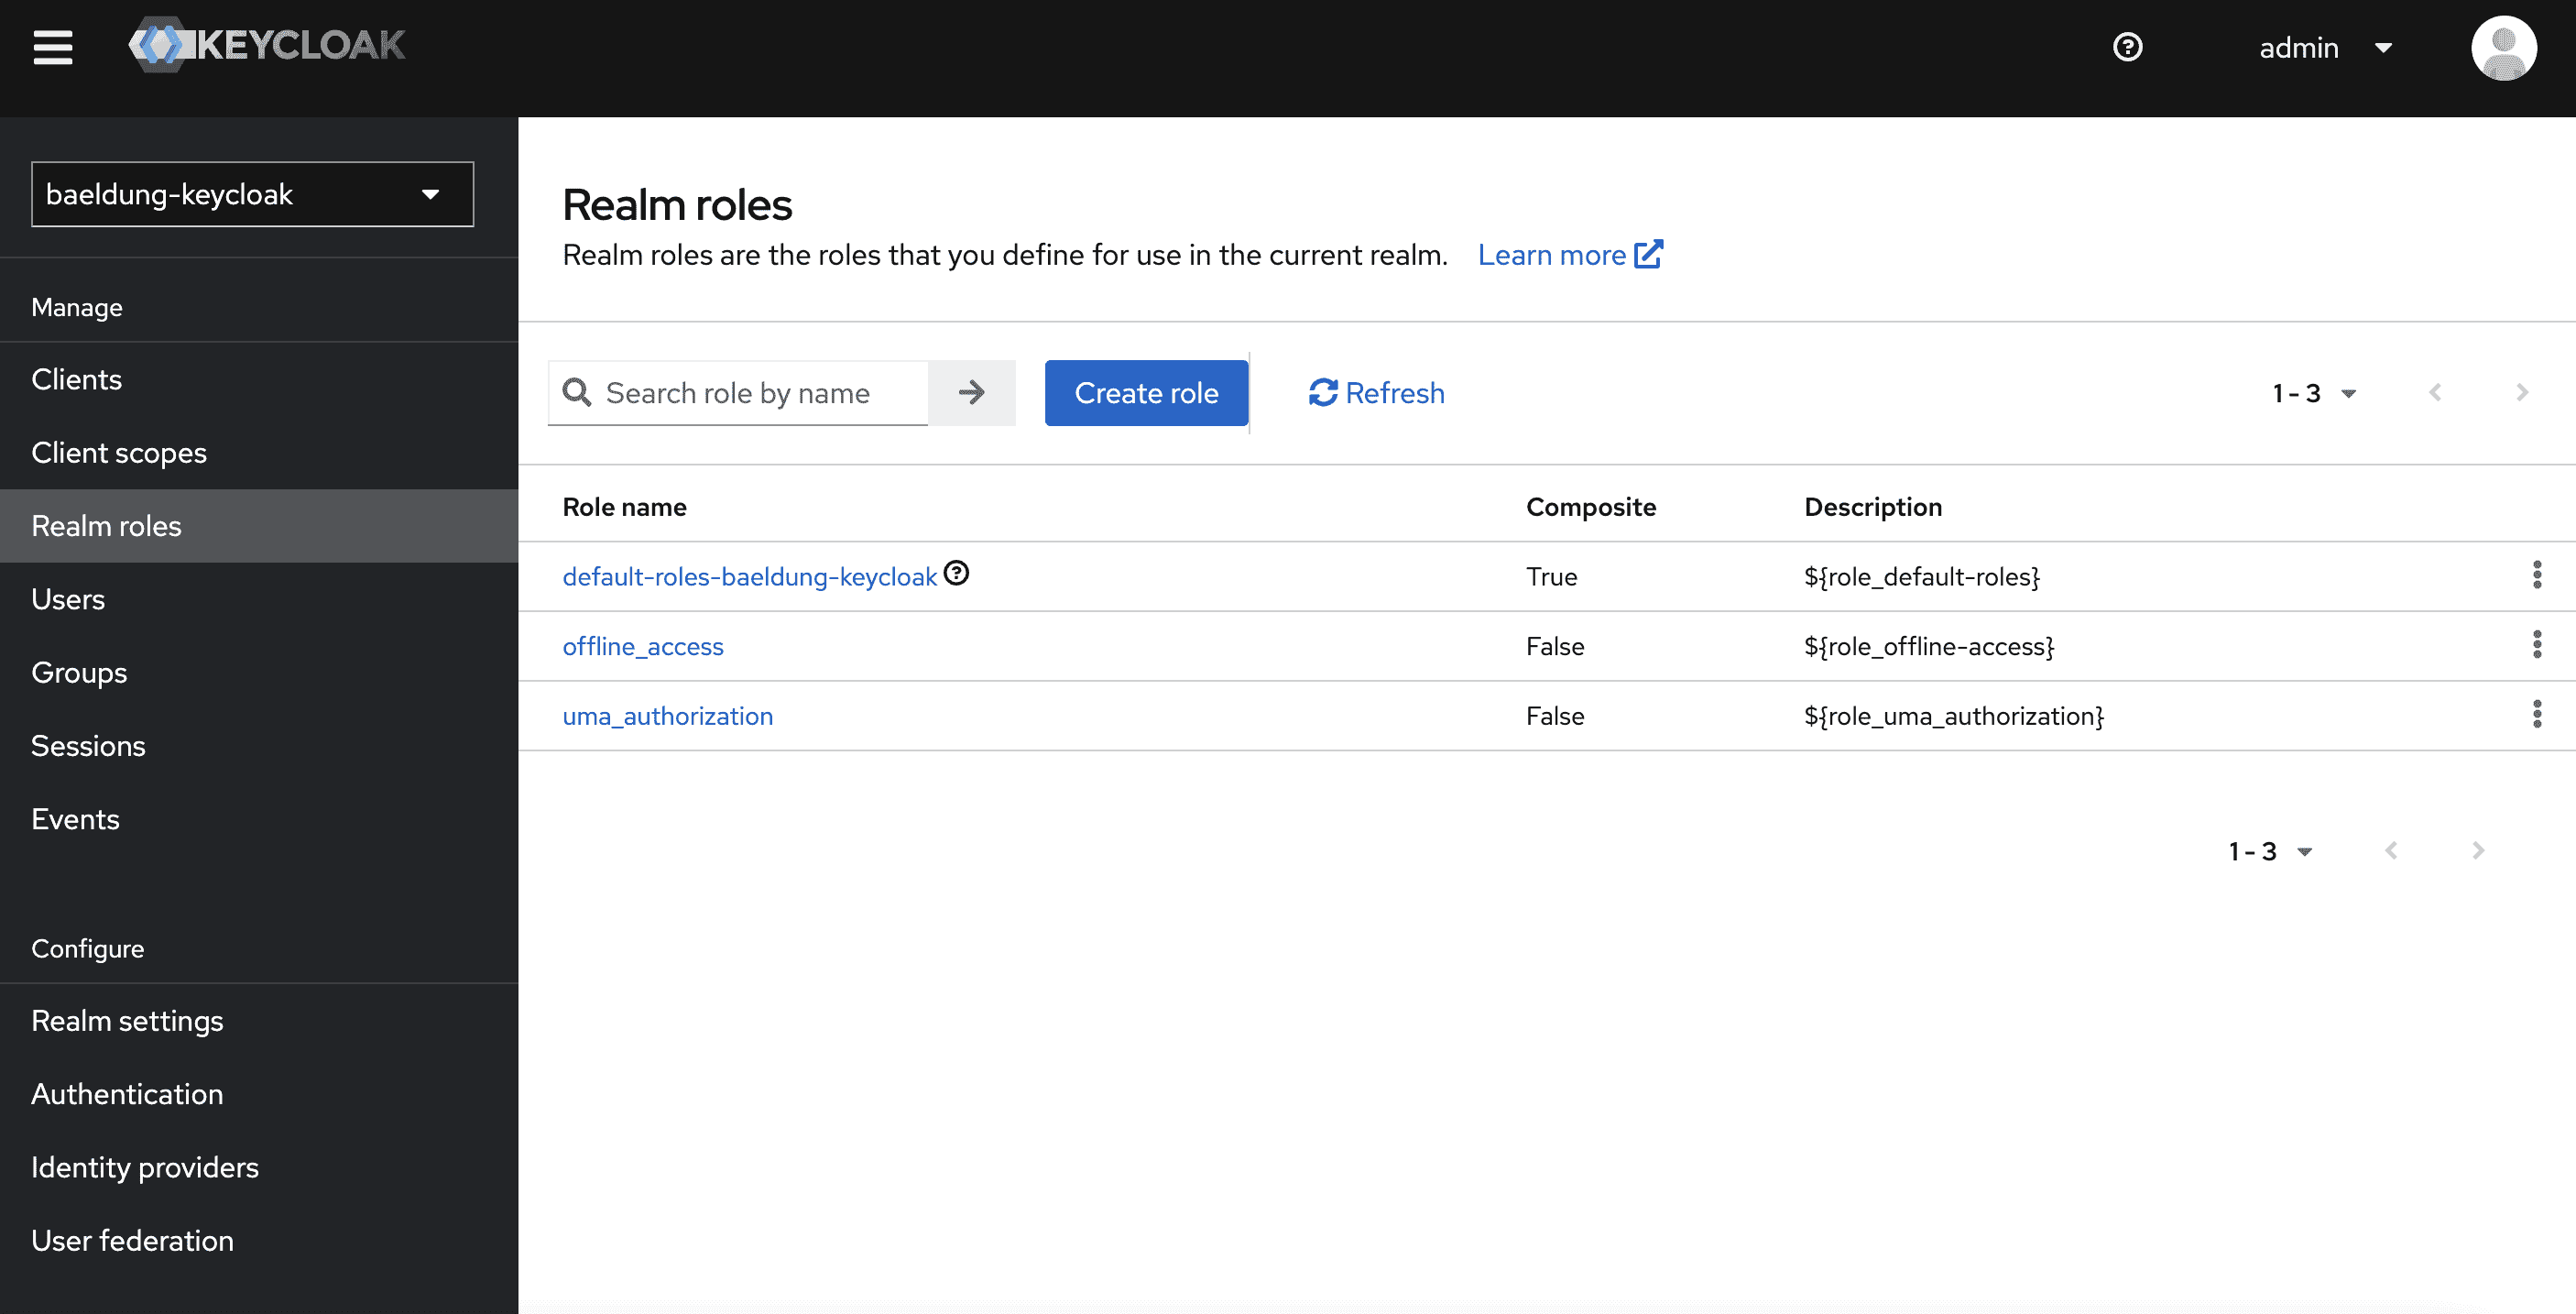
在那里创建NICE角色:
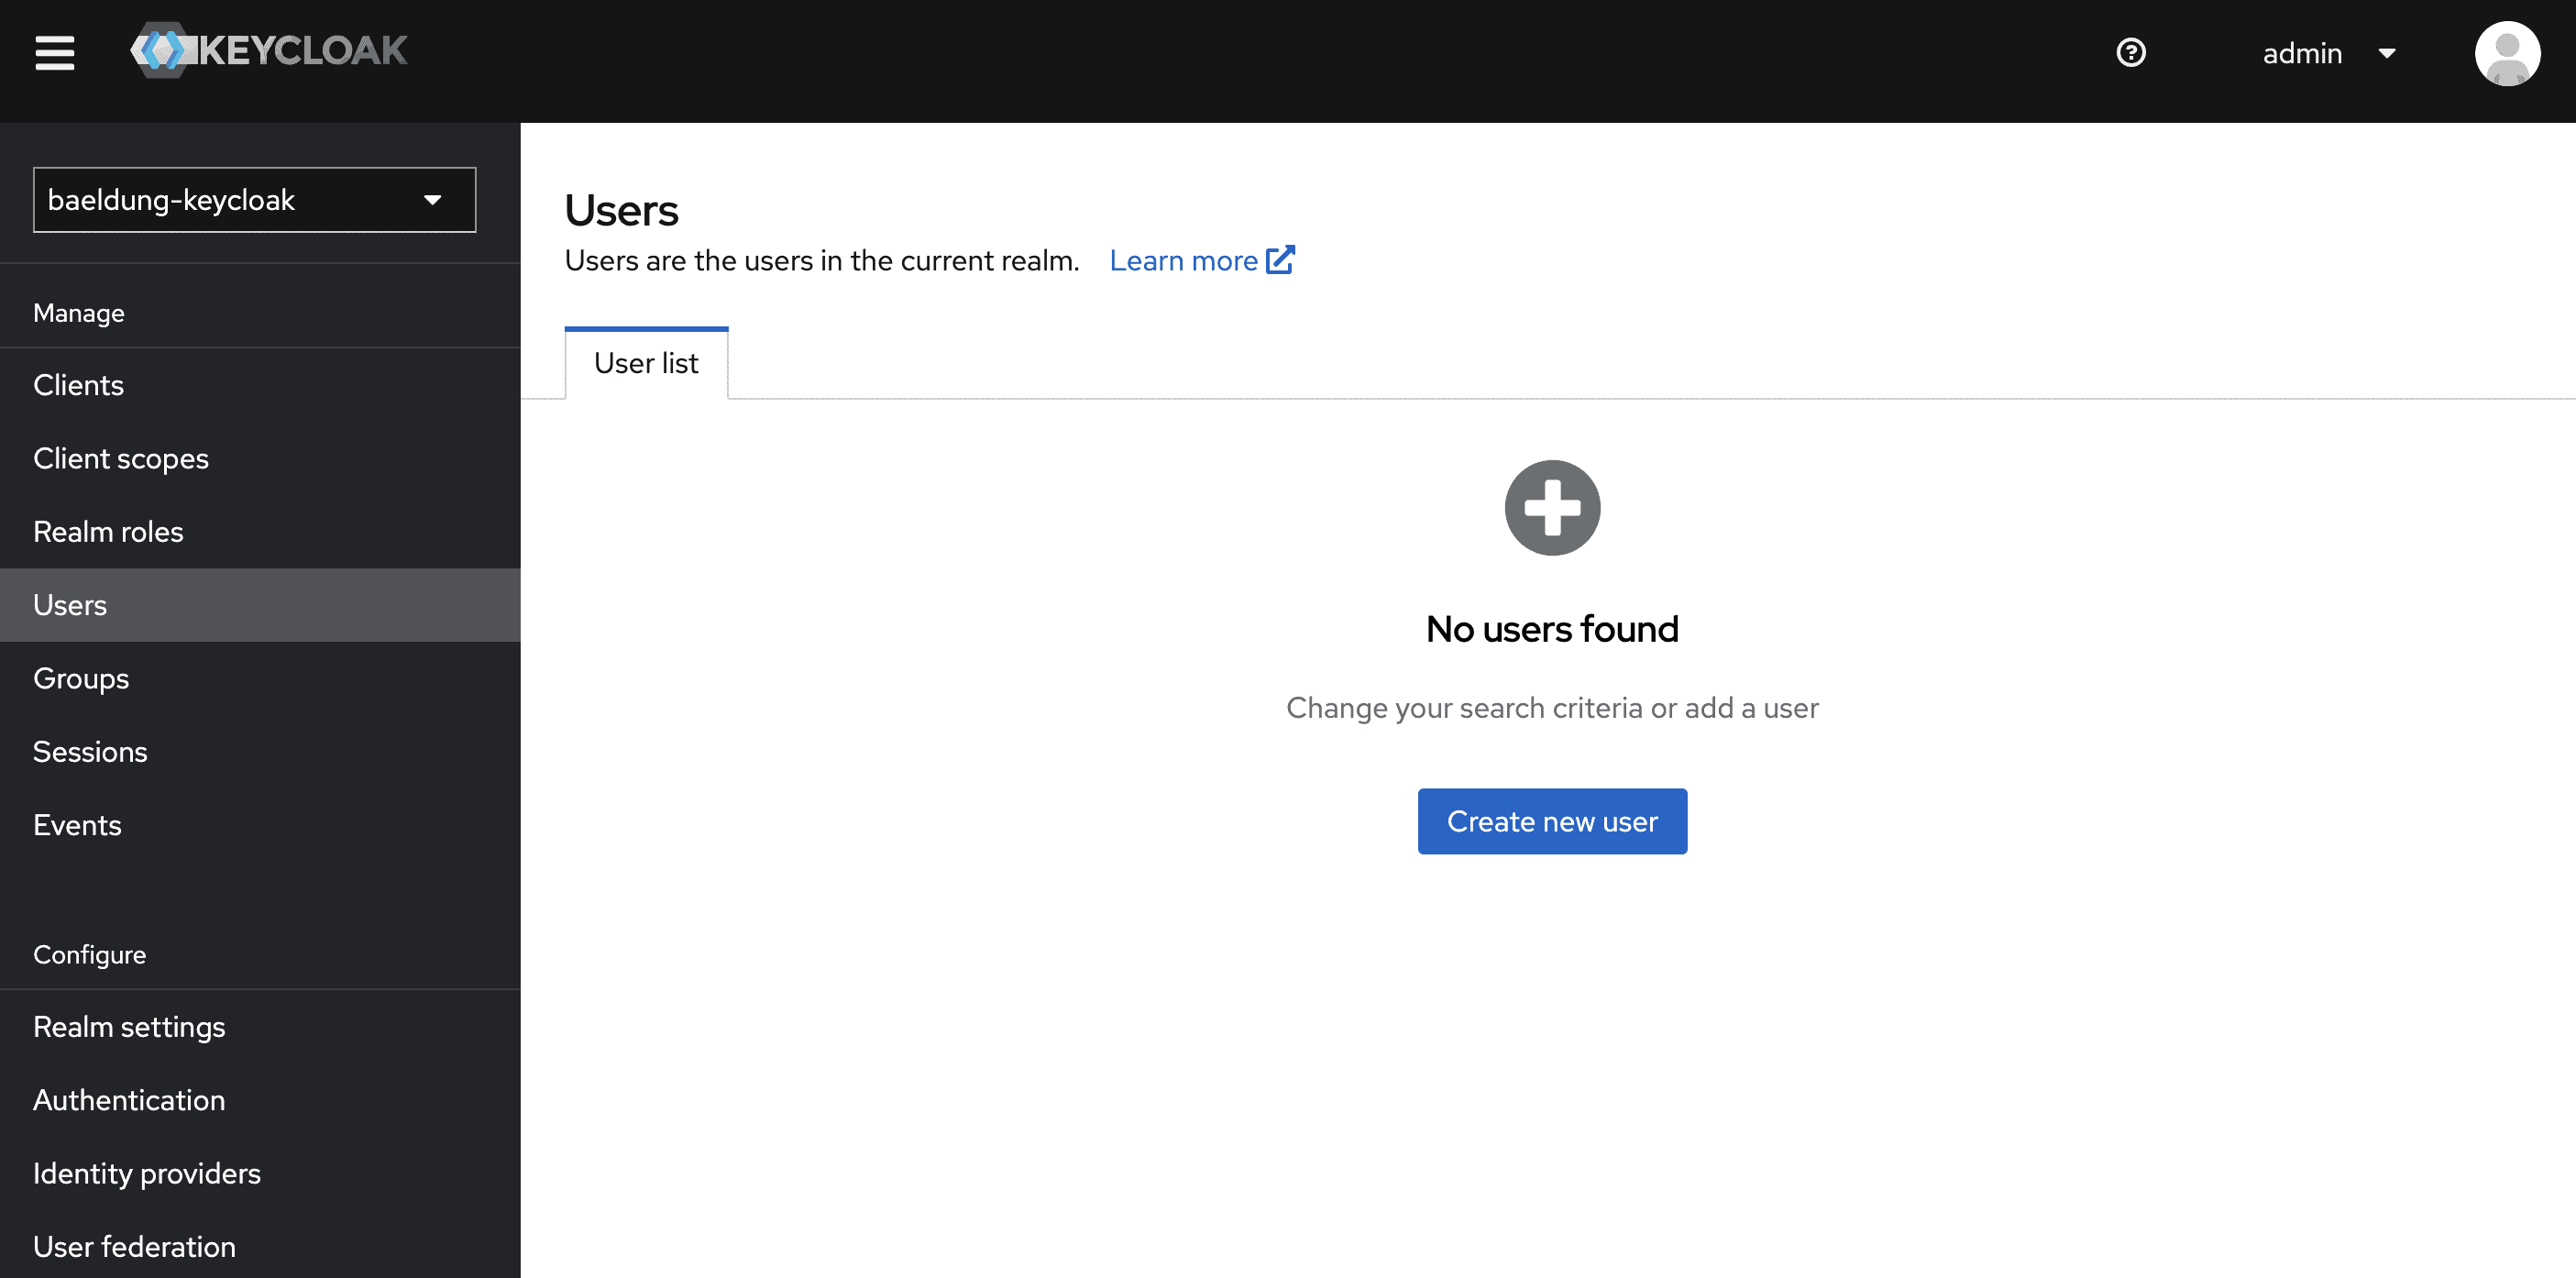
6.5. 用户和领域角色分配
转到Users页面添加两个用户(一个名为brice并授予NICE角色,另一个名为igor且不授予领域角色):
首先创建一个名为brice的新用户:
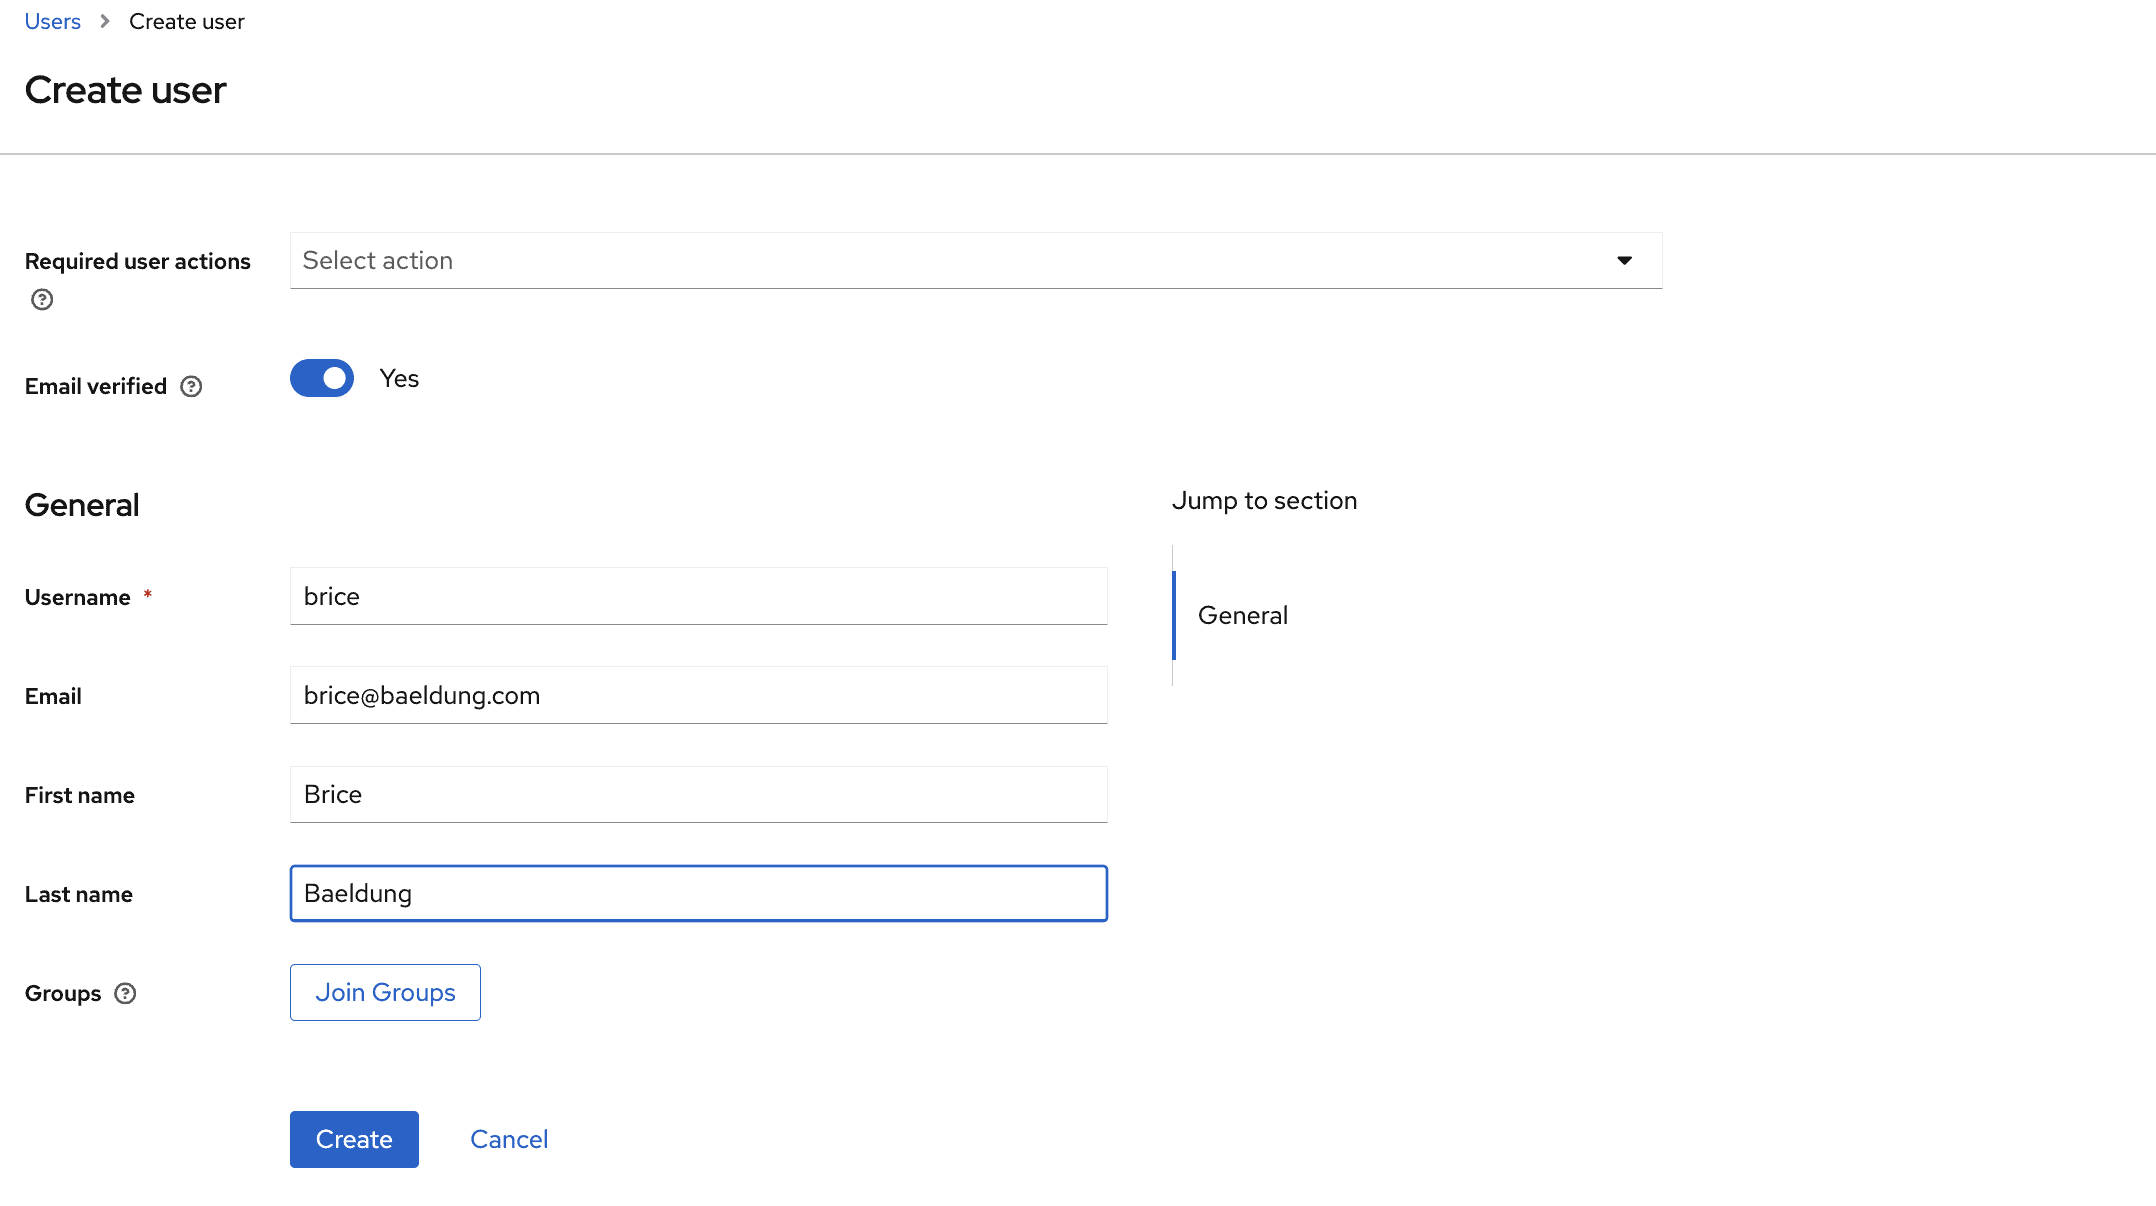
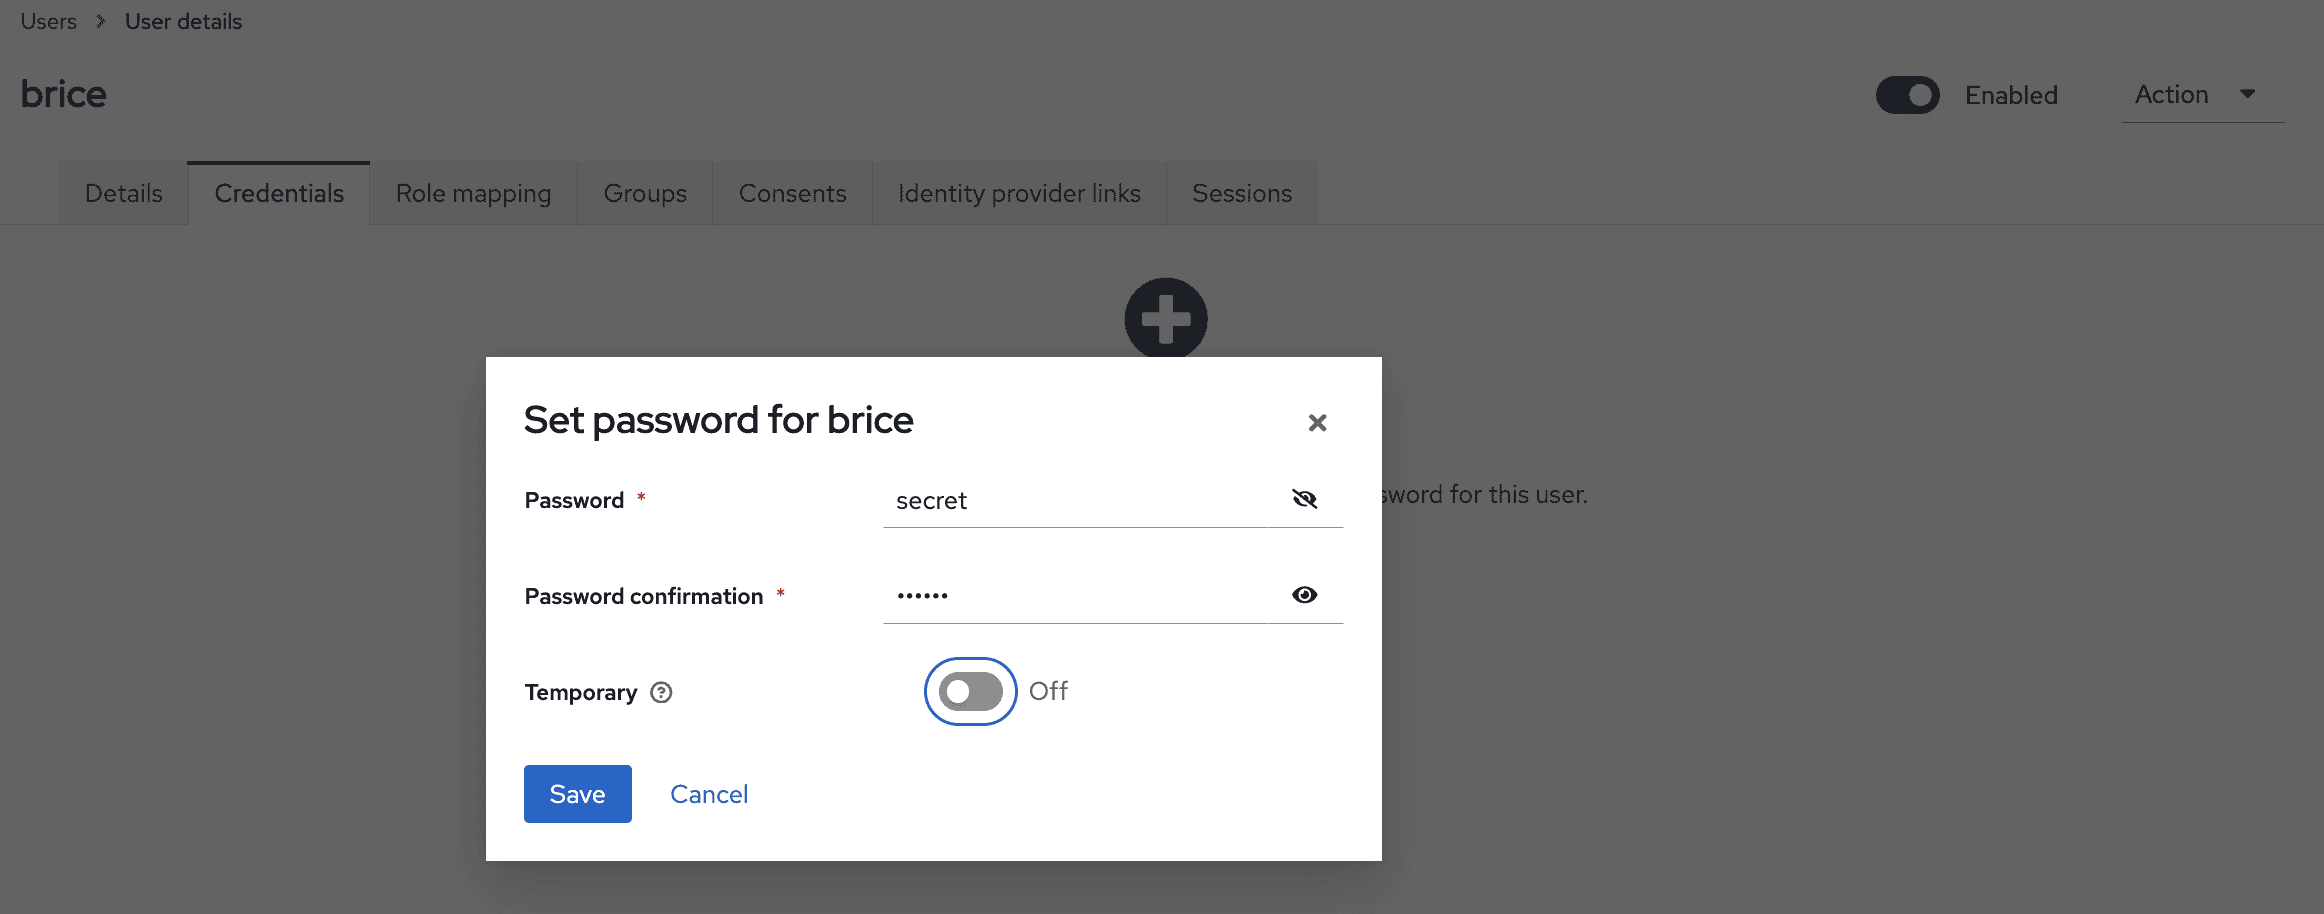
点击Create按钮后,可以看到用户详情。应浏览到credential选项卡设置其密码:
最后,导航到Role Mappings选项卡分配NICE角色(注意Filter by realm roles下拉菜单):
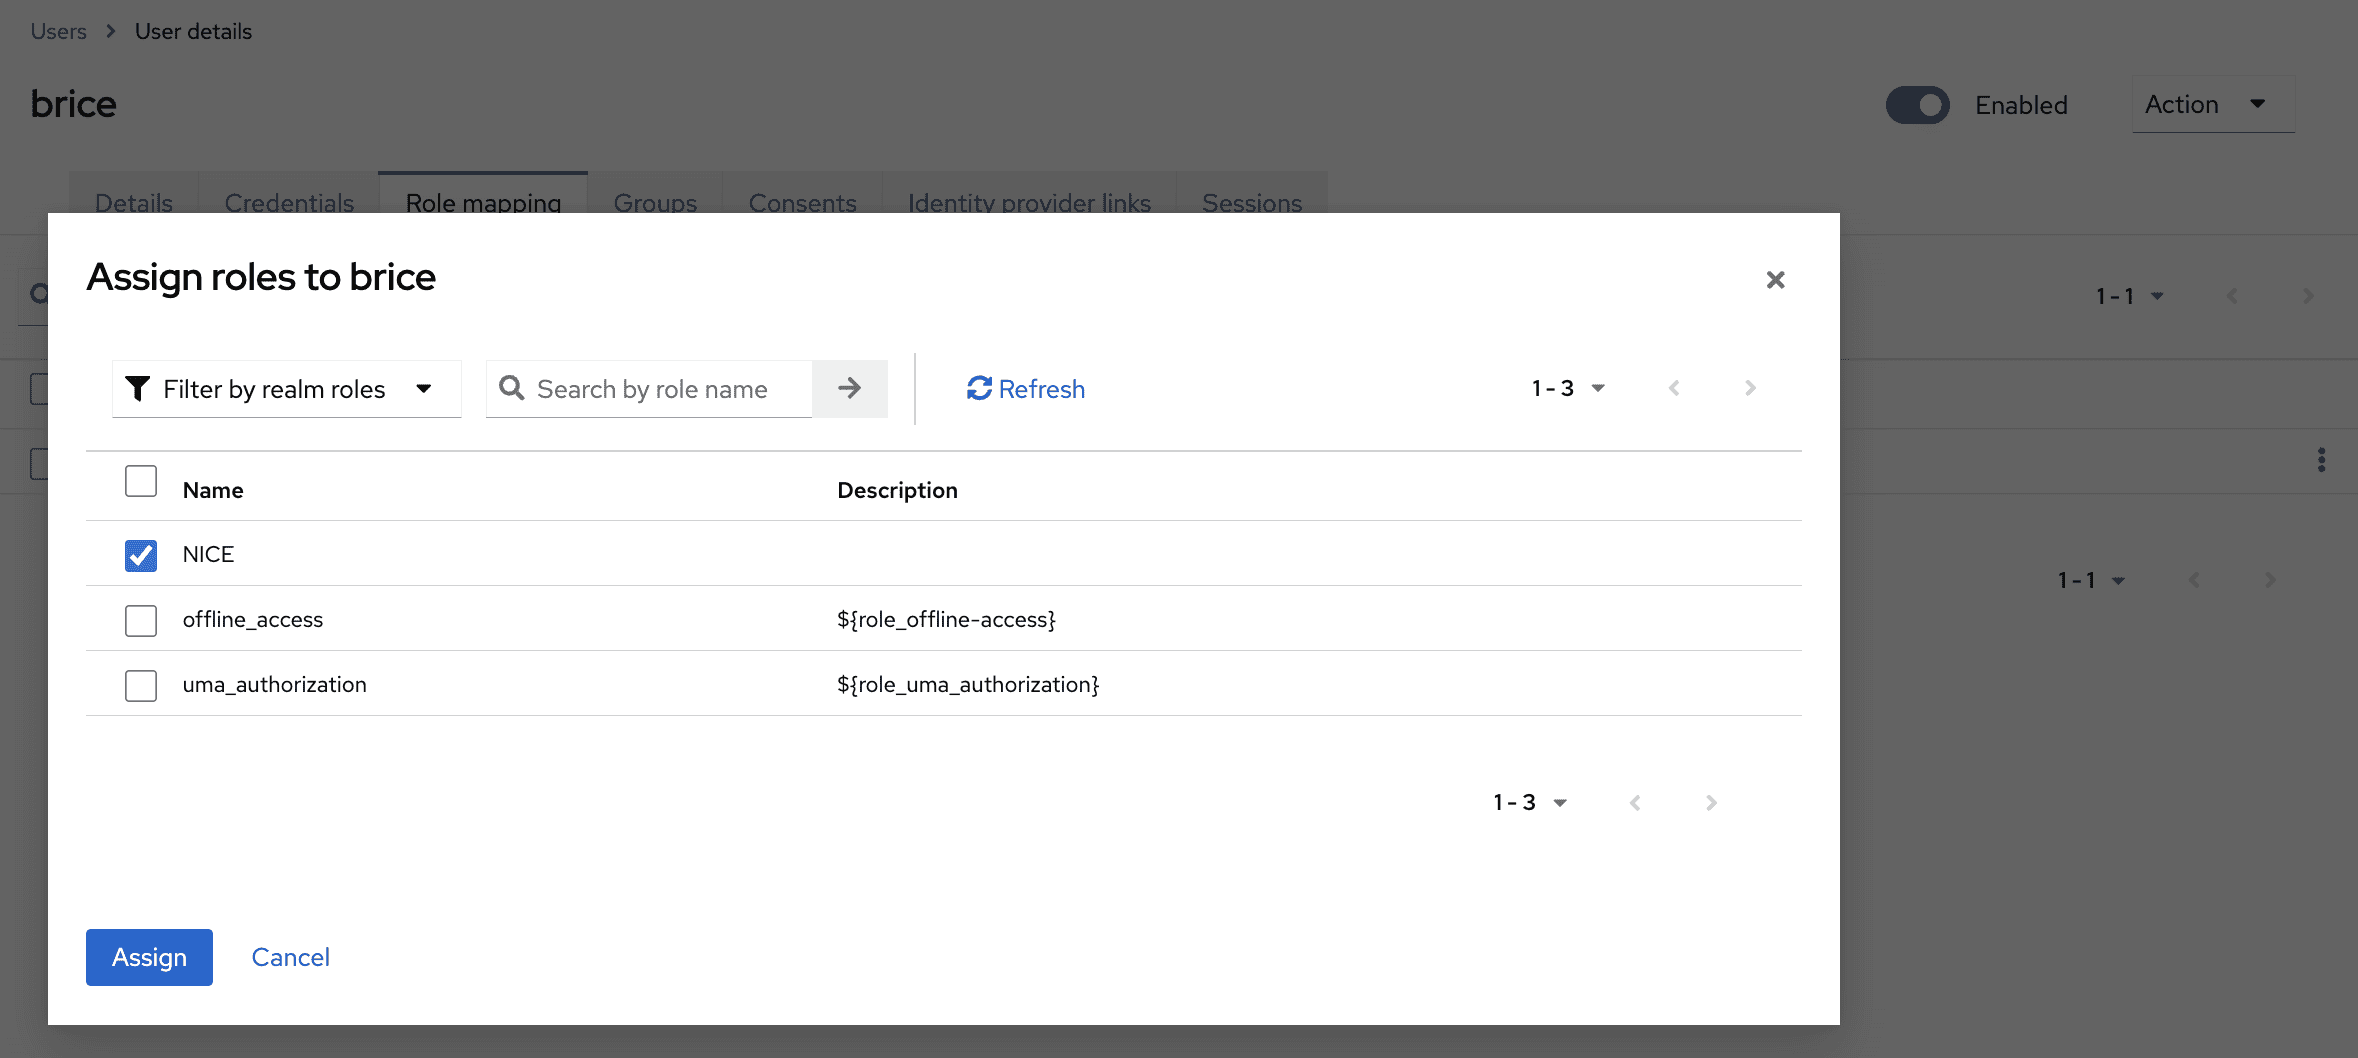
我们可以为igor重复本节指令,跳过角色分配部分。
6.6. 导出领域
完成领域配置后,可以使用以下命令导出(在Docker Desktop中,对运行容器使用Exec选项卡):
cd /opt/keycloak/bin/
sh ./kc.sh export --dir /tmp/keycloak/ --users realm_file
然后可以从Files选项卡收集每个领域的JSON文件。
7. 结论
本文介绍了如何使用Spring Boot和Keycloak配置OAuth2后端。
除了使用Docker进行最小化Keycloak设置外,我们还了解了如何导入和导出领域。
此外,在回顾Spring应用中OAuth2的不同配置选项后,我们将Spring应用配置为带oauth2Login的有状态OAuth2客户端或无状态OAuth2资源服务器。
与往常一样,本文的源代码可在GitHub上获取。