1. Introduction
Clipping in computer graphics refers to removing objects or parts of objects outside of the visible area of a computer screen or viewport.
In this tutorial, we’ll delve into various types of clipping techniques and their wide-ranging applications in computer graphics.
2. Why Do We Need Clipping?
The viewing window (or viewport) often has a limited display area. Moreover, when rendering complex scenes, it’s essential to optimize performance by discarding objects or parts of objects that viewers can’t see.
Clipping helps eliminate unnecessary calculations and improves the efficiency of rendering algorithms. Furthermore, it guarantees the display of only the visible portions of objects, resulting in faster rendering times and a more realistic representation of a scene.
2.1. Settings
When we want to display a scene with only those objects within a particular rectangular window, we should first specify the window’s coordinates (,
,
,
):
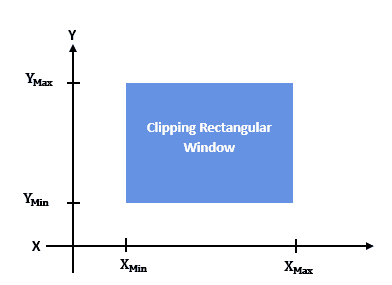
Then. we clip the objects to show only their parts in the specified window:
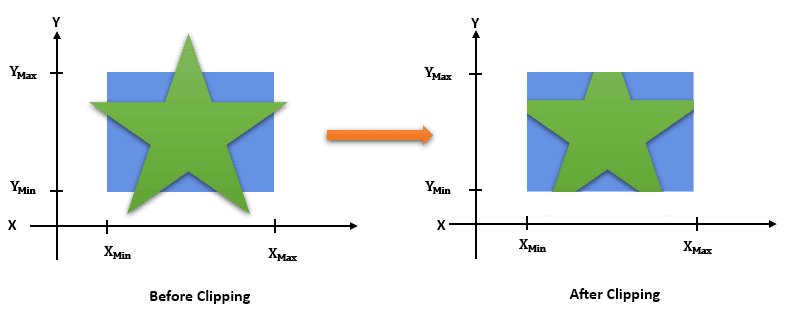
We’ll cover clipping in two-dimensional spaces.
3. Clipping
There are several clipping techniques we can use.
3.1. The Cohen-Sutherland Algorithm for Line Clipping
The Cohen-Sutherland algorithm uses a region code to clip a portion of a line not present in the visible region. It divides a region into 9 cells based on , and
:
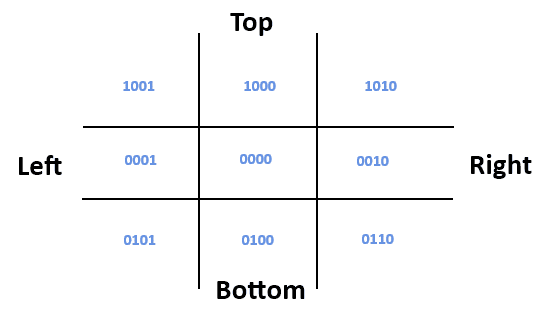
Each cell has a code that determines its position:
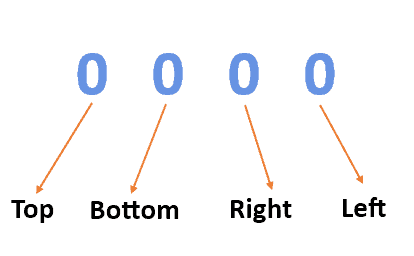
The central part is the viewing window, and all lines which lie within this region are completely visible.
A region code is always assigned to the endpoints of the line based on the cells they’re in. That’s how we determine their rendering. A line segment is:
- visible if both endpoints have the 0000 code
- invisible if no endpoint has the 0000 code
- to be clipped if one endpoint has the 0000 code and the other doesn’t
For example:
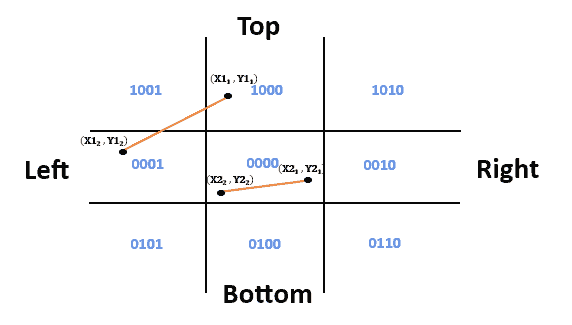
The segment has the 1000 and 0001 codes. So, it’s invisible. In contrast, both endpoints of
have the 0000 code, so the segment is entirely visible.
3.2. Point Clipping
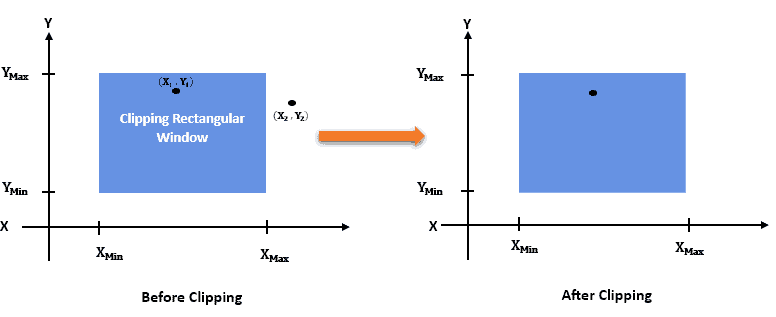
This type involves determining whether a point \boldsymbol{(X, Y)} is inside or outside a specific region:
If any of these inequalities is false, it means that the point lies outside the window, and therefore, it won’t be visible:
However, this technique isn’t commonly used.
3.3. Polygon Clipping
We can use polygon clipping to determine which portions of the polygon are visible to the viewer and to discard any parts of the polygon that are outside of the viewing area:
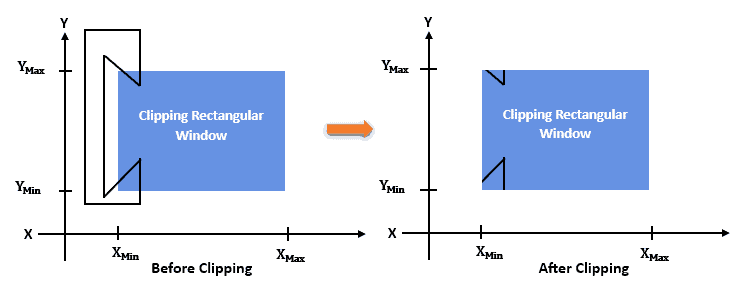
To do so, we can apply line clipping to the polygon’s edges.
3.4. Curve, Exterior, and Text Clipping
In addition to the previously illustrated techniques, there are additional clipping techniques that allow us to control and confine visual elements within defined regions.
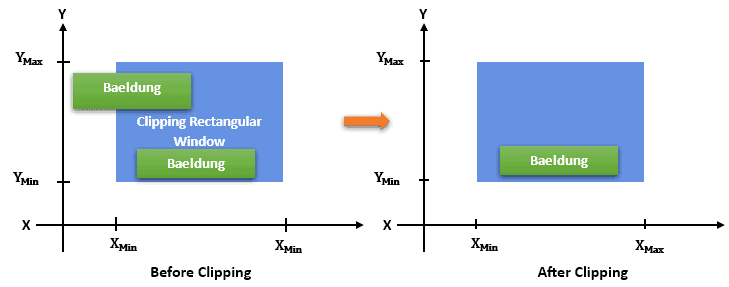
Among these techniques is text clipping. We use it to ensure that text is displayed only within a defined region. Additionally, it is commonly used in graphic design software, web design tools, and document processing software:
We can use the exterior clipping to show only the elements outside of the clipping window:
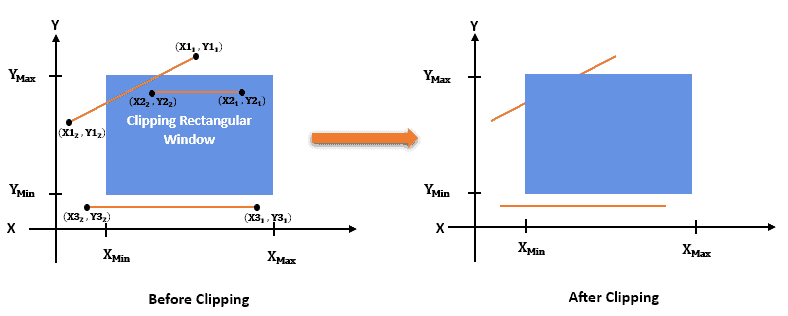
Finally, curve clipping involves determining which parts of a curve lie within the viewing window. It involves non-linear calculations:
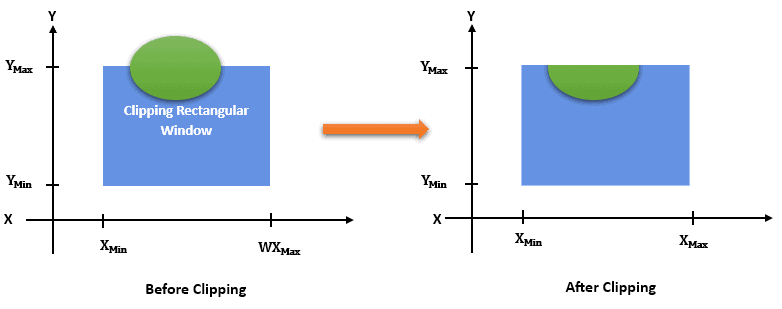
4. Applications
Clipping in computer graphics finds applications in various contexts:
- Real-time rendering in video games: Clipping can optimize the performance by rendering only the visible portions of game objects, improving frame rates and overall gameplay experience
- CAD and architectural design: Clipping can also assist in displaying complex 3D models accurately, allowing designers to focus on the visible components during the design process
- Virtual reality (VR) and augmented reality (AR): Another application of clipping in ensuring that virtual or augmented objects are rendered realistically within the user’s field of view, enhancing the immersive experience
5. Conclusion
In this article, we talked about clipping in computer graphics.
By removing or hiding portions of an object that aren’t visible, clipping improves rendering performance.