1. 简介
在 Kubernetes 中,ConfigMap 是用于管理配置数据的核心资源之一。在日常运维和应用升级中,能够方便、高效地更新配置,是确保系统稳定性和可维护性的关键。
本文将介绍几种使用 kubectl 命令行工具编辑 ConfigMap 的常用方法,并结合实际场景说明其适用性。
2. 场景准备
ConfigMap 的更新方式与其创建方式密切相关。为了更好地演示,我们先创建两个不同方式生成的 ConfigMap。
2.1. 从环境变量文件创建 ConfigMap
假设我们有两个配置文件 config1.env 和 config2.env,内容如下:
$ cat config1.env
env1_var1=e1v1
env1_var2=e1v2

$ cat config2.env
env2_var1=e2v1
env2_var2=e2v2
使用 kubectl create 创建 ConfigMap:
$ kubectl create configmap test-configmap1 --from-env-file=config1.env,config2.env --save-config
configmap/test-configmap1 created
验证内容:
$ kubectl get configmap test-configmap1 -o json | jq '.data'
{
  "env1_var1": "e1v1",
  "env1_var2": "e1v2",
  "env2_var1": "e2v1",
  "env2_var2": "e2v2"
}
⚠️ 注意:
--from-env-file可同时指定多个文件,但每个文件中的键值对会被合并。
2.2. 从文件和字面量创建 ConfigMap
除了环境变量文件,ConfigMap 也可以从普通文件和字面量创建。
创建两个配置文件:
$ cat config3.properties
env3_var1=e3v1
env3_var2=e3v2

$ cat config4.properties
env4_var1=e4v1
env4_var2=e4v2
创建 ConfigMap:
$ kubectl create configmap test-configmap2 \
  --from-file=cf3_props=config3.properties \
  --from-file=config4.properties \
  --from-literal=var1=v1 \
  --from-literal=var2=v2 \
  --save-config
configmap/test-configmap2 created
验证内容:
$ kubectl get configmap test-configmap2 -o json | jq '.data'
{
  "cf3_props": "env3_var1=e3v1\nenv3_var2=e3v2\n",
  "config4.properties": "env4_var1=e4v1\nenv4_var2=e4v2\n",
  "var1": "v1",
  "var2": "v2"
}
✅ 技巧:使用
--from-file时,若未指定 key,则使用文件名作为 key;整个文件内容作为一个 value。
3. 使用 kubectl delete + kubectl create
最直接的方式是删除 ConfigMap 后重新创建。适用于:
- 配置文件已更新,且希望完全替换旧内容
- 不关心服务短暂停机时间
操作示例:
$ kubectl delete configmap test-configmap1 test-configmap2
configmap "test-configmap1" deleted
configmap "test-configmap2" deleted

$ kubectl create configmap test-configmap1 --from-env-file=config1.env,config2.env --save-config
configmap/test-configmap1 created

$ kubectl create configmap test-configmap2 \
  --from-file=cf3_props=config3.properties \
  --from-file=config4.properties \
  --from-literal=var1=v1 \
  --from-literal=var2=v2 \
  --save-config
configmap/test-configmap2 created
验证:
$ kubectl get configmap test-configmap1 -o json test-configmap2 -o json | jq '.items[].data'
⚠️ 缺点:此方式会中断依赖该 ConfigMap 的 Pod,可能导致服务不可用。
4. 使用 kubectl edit
适合手动修改,尤其在配置文件不在本地、或需临时调整时非常方便。
执行命令:
$ kubectl edit configmap test-configmap1 test-configmap2
系统将使用默认编辑器(如 Vim)打开 ConfigMap 内容,可直接修改:
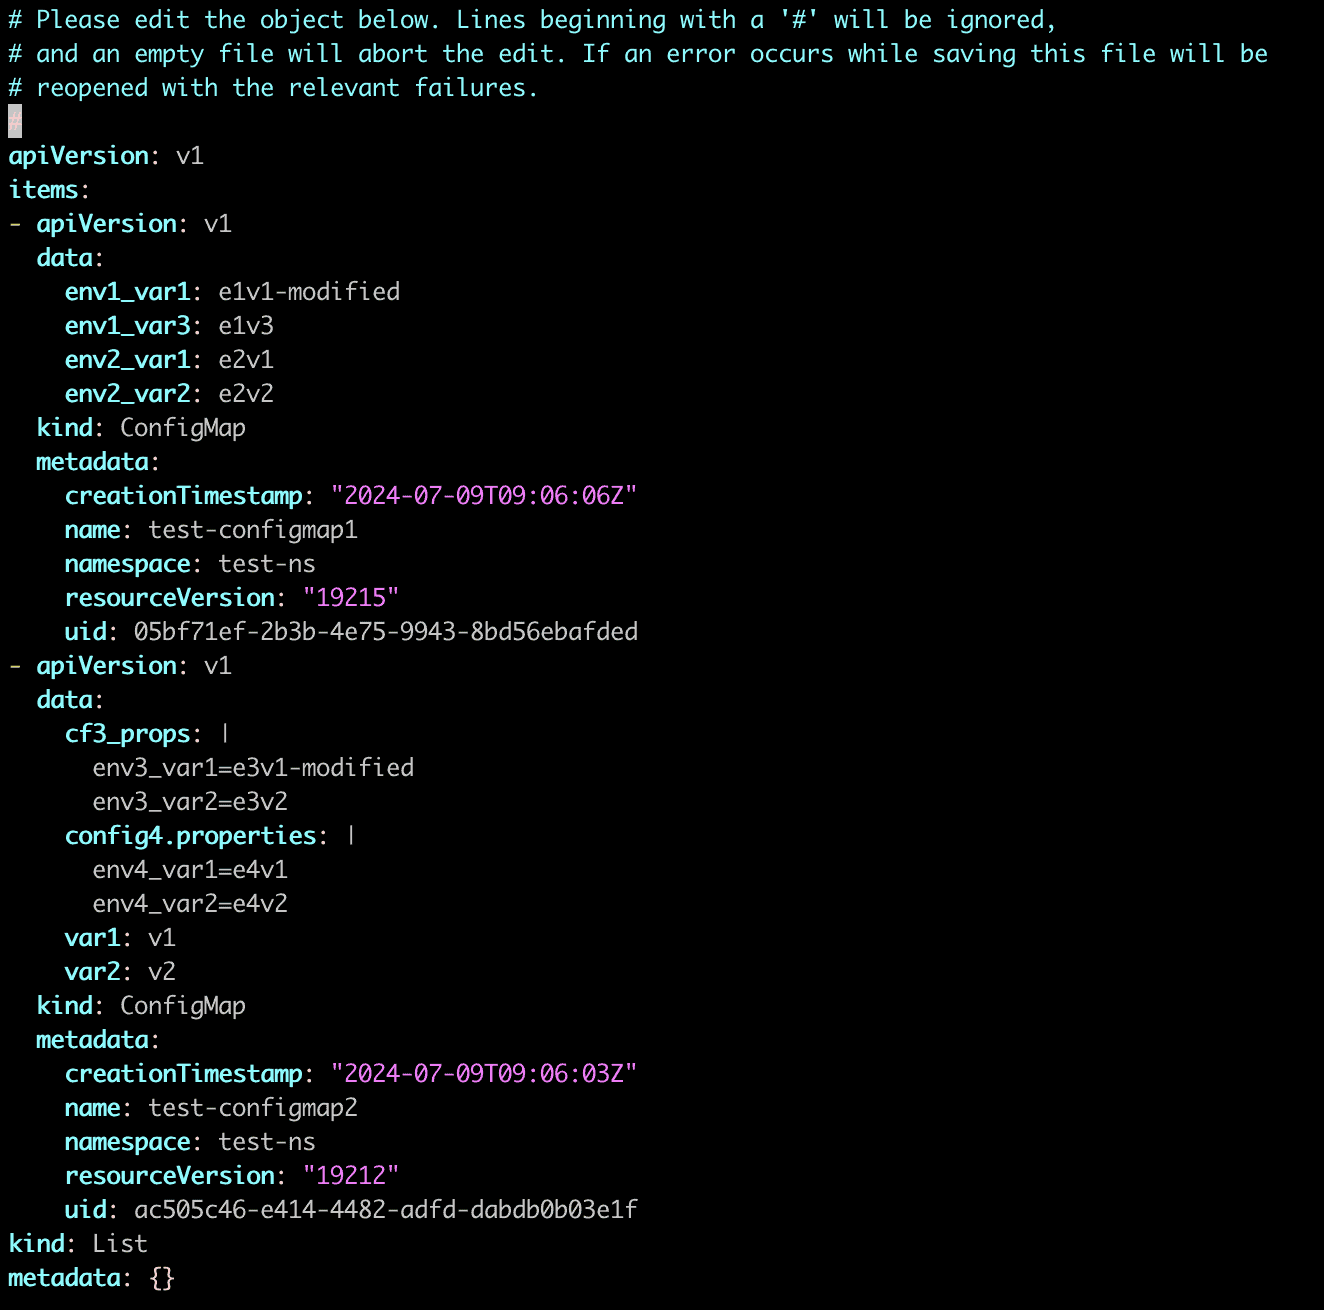
保存后验证:
$ kubectl get configmap test-configmap1 -o json test-configmap2 -o json | jq '.items[].data'
✅ 优点:无需本地文件,直接编辑集群资源 ⚠️ 缺点:不适用于自动化流程或多人协作场景
5. 使用 kubectl apply
适合在 CI/CD 流程中更新 ConfigMap,支持增量更新,且不会中断服务。
5.1. 结合 --dry-run 与本地文件
$ kubectl create configmap test-configmap1 --from-env-file=config1.env,config2.env --dry-run=client -o yaml | kubectl apply -f -
configmap/test-configmap1 configured

$ kubectl create configmap test-configmap2 \
  --from-file=cf3_props=config3.properties \
  --from-file=config4.properties \
  --from-literal=var1=v1 \
  --from-literal=var2=v2 \
  --dry-run=client -o yaml | kubectl apply -f -
configmap/test-configmap2 configured
✅ 优点:无需删除资源,适用于生产环境
5.2. 使用资源文件定义
若本地无原始配置文件,可先导出 ConfigMap:
$ kubectl get configmap test-configmap1 -o json test-configmap2 -o json > configmaps.json
修改 configmaps.json 文件内容后,再应用:
$ kubectl apply -f configmaps.json
configmap/test-configmap1 configured
configmap/test-configmap2 configured
✅ 优点:适用于已有 ConfigMap 的增量更新
6. 使用 kubectl replace
适用于完全替换整个 ConfigMap 内容的场景。
前提:已有修改后的 ConfigMap 定义文件(如 configmaps.json)
执行命令:
$ kubectl replace -f configmaps.json
configmap/test-configmap1 replaced
configmap/test-configmap2 replaced
验证:
$ kubectl get configmap test-configmap1 -o json test-configmap2 -o json | jq '.items[].data'
⚠️ 注意:此操作会覆盖整个 ConfigMap,不建议用于部分更新
7. 使用 kubectl patch
适用于只更新 ConfigMap 中的某些字段,而不是整个资源。
创建 patch 文件:
$ cat config1.env-patch
{"data":{"env1_var1":"e1v1-modified", "env1_var3":"e1v3"}}
应用 patch:
$ kubectl patch configmap test-configmap1 --patch-file=config1.env-patch
configmap/test-configmap1 patched
同样地,更新 test-configmap2:
$ cat config3.properties-patch
{"data":{"cf3_props": "env3_var1=e3v1-modified\nenv3_var2=e3v2\n"}}

$ kubectl patch configmap test-configmap2 --patch-file=config3.properties-patch
configmap/test-configmap2 patched
验证:
$ kubectl get configmap test-configmap1 -o json test-configmap2 -o json | jq '.items[].data'
✅ 优点:精准更新,避免影响其他字段 ⚠️ 注意:必须完整提供字段值,否则会被覆盖
8. 总结
| 方法 | 适用场景 | 优点 | 缺点 |
|---|---|---|---|
kubectl delete + create |
本地配置文件已更新 | 简单直接 | 可能导致服务中断 |
kubectl edit |
手动修改、无本地文件 | 快速修改 | 不适合自动化 |
kubectl apply |
CI/CD、增量更新 | 安全、可重复 | 需要配置文件 |
kubectl replace |
替换整个 ConfigMap | 彻底更新 | 覆盖所有字段 |
kubectl patch |
更新特定字段 | 精准控制 | 需构造 patch 文件 |
✅ 建议:
- 生产环境推荐使用
kubectl apply或kubectl patch - 调试或测试环境可用
kubectl edit - 避免频繁使用
delete + create,除非确认无服务依赖
合理选择更新方式,能有效降低运维风险,提升系统稳定性。